Thingiverse
Rigidbot SLS (Sugar LASER sinterer) MOD by keuranos
by Thingiverse
Last crawled date: 2 years, 11 months ago
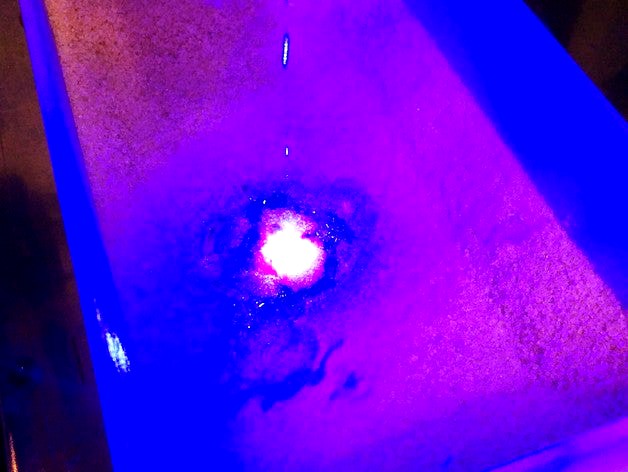
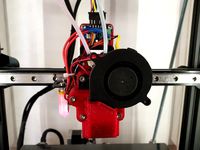
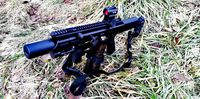
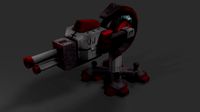
In the last couple days, I have experimented how to transform Rigidbot FDM 3D-printer (and others too) + $200 L-Cheapo v2 laser cutter/engraver module to crude SLS (Selective Laser Sintering) printer for powdered build materials.
With this setup my goal is to have with minimum modifications:
Standard FDM-type 3D-printer
Laser cutter / engraver
SLS-printer
Currently the setup is not very fast and it takes about 10 minutes to make one layer, but hopefully process can & will be optimized with better slicer & gcode settings.
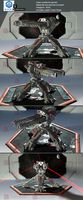
I have experimented mainly with cane sugar, because I had it and scrap prints are delicious. Aroma of burning sugar is also much nicer than burning plastics. If you plan to use some other material, like powdered ABS, you will want to adjust your printing speed and other settings accordingly.
The plow setup is very simple, but also a little too violent, so you will need to adjust the printing starting height so that the first layer of material bonds to build box bottom for support. If the print does not stick, lower the print starting height.
I also recommend to check your laser lens assembly and tighten the spring inside it.
WARNING: This is highly experimental and if you do not know what you are doing and won't choose to wear approratiave protection, you will go blind and burn your house down, so don't do it.
But if you do it, do not ever leave your printer unattended or look at the laser light without suitable protection gear. Even with protection goggles it is unwise to look at the beam and it is unfortunate for our eyes that the only way to focus L-Cheapo properly is to stare at the laser focus point and adjust the lens assembly. B)
You'll need:
Fine cane sugar. More darker the sugar, less build time. Cannot be sticky sort, even the lumps. Cane dust sugar might give better results but it is harder to spread evenly.
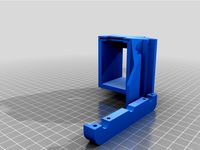
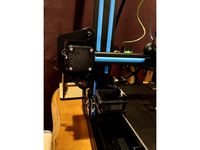
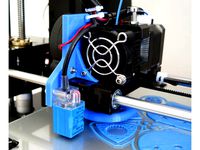
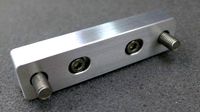
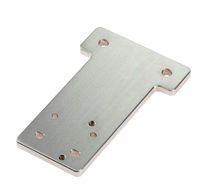
The plow (aura.stl) is actually the only Rigidbot 3D printer spesific part, so if some other printer is used you need to remodel it to fit your own extruder assembly. I printed it with PLA and 0,15mm layer height.
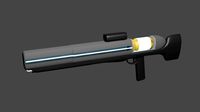
L-Cheapo v2 laser module (if your laser begins to flicker, put an larger cap to the output). I used this marvelous design by xzivr: http://www.thingiverse.com/thing:593054
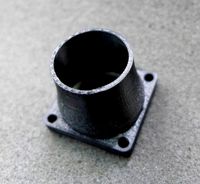
Build box (loota.stl) printed with PLA, I used mild under extrusion at the build box floor, so that there is more of an adhesive surface to sugar stick to.
The code assumes that you drive your Z-axis to 80mm and also move your Z-axis limit switch so that it does not crash with the build plate / box.
If you have Simplify3D, you can just import all my setting from the provided laser80.fff or you can adjust my G-Code for your setup parameters.
Extrusion width: 0,05mm
Layer height: 0,1mm (this depends what material you are using)
Top solid layers: 0
Bottom solid layers:
Outline/perimeter: 1 shell
Fill patterm: concentric (seems to work better than rectilinear
Infill: 10%
OBS! Simplify3D and the G-Code both assume that you drive your printer manually at 80mm before executing.
Layer change G-Code (remove the comments before using):
M400 ; Wait for previous command to finish
M104 S0 ; Laser OFF
G92 Z80 ; Set Z-level to 80mm
G0 Y190 X47.5 F3000 ; Go to the back and center of the build box
G91 ; Set relative movement on
G0 Z-75 F3000 ; Move Z to 5mm @ 3000mm/m
G90 ; Set absolute movement on
G0 Y40 F1000 ; Drive to 40mm from the front of the build box
G91 ; Set relative movements on
G0 Z30 Y-30 F1000 ; Move Z to 35mm and 10mm foward to the front of the build box
G0 Z-33.9 ; F1000 ; Lower the Z-axis height to 1,1mm sweeping height (this parameter shoulg be adjusted to suit your build material)
G90 ; Absolute movement on
G0 Y160 F1000 ; Sweep back to 30mm from the back of the build box
G0 Z+80 ; Rise Z to 80mm
G92 Z0 ; Set Z to 0
M400 ; Wait for previous commands to be executed
M104 S100 ; Laser ON
You need also this start.gcode, these are slightly modified from the original from robotseverywhere:
M104 S0 ; Laser OFF
G21
G28 X0 Y0 ; Do not check the Z-level to prevent crash to build box
G92 Z80 ; Set Z level to 80mm, which has to be set manually before print
G1 Z+80 ; Drive to Z to 80mm, actually it is already there!
G90
G92 X0 Y0 Z0 E0 ; Set current position to ZEROES
M400 ; Wait
M104 S100 ; Laser ON
And end.gcode
G91 ; Set relative movements on, why?
M400 ; Wait
M104 S0 ; Laser OFF
G28 X0 Y0 ; Park
M84
With this setup my goal is to have with minimum modifications:
Standard FDM-type 3D-printer
Laser cutter / engraver
SLS-printer
Currently the setup is not very fast and it takes about 10 minutes to make one layer, but hopefully process can & will be optimized with better slicer & gcode settings.
I have experimented mainly with cane sugar, because I had it and scrap prints are delicious. Aroma of burning sugar is also much nicer than burning plastics. If you plan to use some other material, like powdered ABS, you will want to adjust your printing speed and other settings accordingly.
The plow setup is very simple, but also a little too violent, so you will need to adjust the printing starting height so that the first layer of material bonds to build box bottom for support. If the print does not stick, lower the print starting height.
I also recommend to check your laser lens assembly and tighten the spring inside it.
WARNING: This is highly experimental and if you do not know what you are doing and won't choose to wear approratiave protection, you will go blind and burn your house down, so don't do it.
But if you do it, do not ever leave your printer unattended or look at the laser light without suitable protection gear. Even with protection goggles it is unwise to look at the beam and it is unfortunate for our eyes that the only way to focus L-Cheapo properly is to stare at the laser focus point and adjust the lens assembly. B)
You'll need:
Fine cane sugar. More darker the sugar, less build time. Cannot be sticky sort, even the lumps. Cane dust sugar might give better results but it is harder to spread evenly.
The plow (aura.stl) is actually the only Rigidbot 3D printer spesific part, so if some other printer is used you need to remodel it to fit your own extruder assembly. I printed it with PLA and 0,15mm layer height.
L-Cheapo v2 laser module (if your laser begins to flicker, put an larger cap to the output). I used this marvelous design by xzivr: http://www.thingiverse.com/thing:593054
Build box (loota.stl) printed with PLA, I used mild under extrusion at the build box floor, so that there is more of an adhesive surface to sugar stick to.
The code assumes that you drive your Z-axis to 80mm and also move your Z-axis limit switch so that it does not crash with the build plate / box.
If you have Simplify3D, you can just import all my setting from the provided laser80.fff or you can adjust my G-Code for your setup parameters.
Extrusion width: 0,05mm
Layer height: 0,1mm (this depends what material you are using)
Top solid layers: 0
Bottom solid layers:
Outline/perimeter: 1 shell
Fill patterm: concentric (seems to work better than rectilinear
Infill: 10%
OBS! Simplify3D and the G-Code both assume that you drive your printer manually at 80mm before executing.
Layer change G-Code (remove the comments before using):
M400 ; Wait for previous command to finish
M104 S0 ; Laser OFF
G92 Z80 ; Set Z-level to 80mm
G0 Y190 X47.5 F3000 ; Go to the back and center of the build box
G91 ; Set relative movement on
G0 Z-75 F3000 ; Move Z to 5mm @ 3000mm/m
G90 ; Set absolute movement on
G0 Y40 F1000 ; Drive to 40mm from the front of the build box
G91 ; Set relative movements on
G0 Z30 Y-30 F1000 ; Move Z to 35mm and 10mm foward to the front of the build box
G0 Z-33.9 ; F1000 ; Lower the Z-axis height to 1,1mm sweeping height (this parameter shoulg be adjusted to suit your build material)
G90 ; Absolute movement on
G0 Y160 F1000 ; Sweep back to 30mm from the back of the build box
G0 Z+80 ; Rise Z to 80mm
G92 Z0 ; Set Z to 0
M400 ; Wait for previous commands to be executed
M104 S100 ; Laser ON
You need also this start.gcode, these are slightly modified from the original from robotseverywhere:
M104 S0 ; Laser OFF
G21
G28 X0 Y0 ; Do not check the Z-level to prevent crash to build box
G92 Z80 ; Set Z level to 80mm, which has to be set manually before print
G1 Z+80 ; Drive to Z to 80mm, actually it is already there!
G90
G92 X0 Y0 Z0 E0 ; Set current position to ZEROES
M400 ; Wait
M104 S100 ; Laser ON
And end.gcode
G91 ; Set relative movements on, why?
M400 ; Wait
M104 S0 ; Laser OFF
G28 X0 Y0 ; Park
M84
Similar models
thingiverse
free
SVO2 Purge Bucket and GCODE by RedSquirrelHobbies
... positioning on
g1 z-1 f1000 ; lower nozzle by 1mm
g90 ; absolute positioning on
m400 ; wait for finish
thingiverse
free
Geeetech A10t Purge Bucket with removable bucket by 123TaDa
...ipe
g0 x0 f2000 ; return
m211 s1 ; turn on soft stops once more
g1 e-0.5 ; try to prevent pips
g92 e0
; start extruder script end
thingiverse
free

Dual material Y joiner remix by hackwell
...ustom gcode
g92 e0 t1
g91
g1 t1 e-140 f3500; unload filament
g90
g92 e0 t1
g0 x{prime_tower_position_x} y{prime_tower_position_y}
thingiverse
free

anycubic i3 auto turn off switch (pericles) by ikaros1978
...dont want to drill the printer then pass the wire outside the printer around it and you can just use a power strip to turn it off
thingiverse
free
ANET A6 UPGRADE to SKYNET 2.3.2 AUTO for CURA 2.6.2 by Sirassassin
...140 e-3 x+1 y+200 f9000 ;move z up a bit and retract filament even more
m84 ;steppers off
g90 ;absolute positioning
red no coping
thingiverse
free

HDMI VIKI 108SP Box by thanhglobal
...
m140 s0 ; disable heated bed
m84 ; turn steppers off
if you have any question, please email to me at thanh_hcm@yahoo.com
thanks.
thingiverse
free
A20M A10M BigMac MKII 5015 Blower
...
g1 e70 f3000
g92 e0
g1 e30 f200
g92 e0
g4 s3
g0 f10000
; end extruder 2
g92 e0
g1 e-5 f6000
g1 x-10.5 f8000
g1 e-70 f3000
g92 e0
thingiverse
free

Anet A8 auto off by JUHHisi
... the top
g1 x198 f3600 ; move 198mm to the right
g1 x-10 f3600 ; move 8mm to the left
m84 ;steppers off
g90 ;absolute positioning
thingiverse
free

Spool Coil Holder 1.5 by Fantasmino
... ; lower the nozzle 10 mm
g90 ; sets the coordinates in absolute
important! disable supports!
thingiverse
free

Spool Coil Holder 1.0 by Fantasmino
... ; lower the nozzle 10 mm
g90 ; sets the coordinates in absolute
important! disable supports!
Keuranos
thingiverse
free
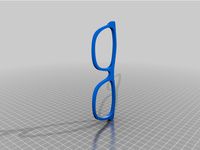
3D printed eyeglasses by keuranos
...f my eyeglasses, so i took the lenses and designed new frames with fusion 360. posted here as requested by 3d printing community.
thingiverse
free

Kinect vertical holder by keuranos
...to be placed in to my kreylos ar sandbox.
i couldn't find suitable model for my purposes, so i quickly drew one with sketcup.
thingiverse
free

Ski for Daewoo/Daetech 6hp 66cm snow plow by keuranos
...bottom to improve the steering. stay tuned!
update - suksi3v2.stl is the latest iteration with improved steering and clearance.
Rigidbot
thingiverse
free

z_bracket rigidbot
...z_bracket rigidbot
thingiverse
z_bracket for 4 screws
thingiverse
free

Rigidbot Side Brackets by MKAY666
...rigidbot side brackets by mkay666
thingiverse
rigidbot side and z brackets
thingiverse
free

RigidBot Caliber Holder by dafes
...rigidbot caliber holder by dafes
thingiverse
caliber holder for the rigidbot frame
thingiverse
free

Rigidbot printerbed by nickbernstein
... printerbed by nickbernstein
thingiverse
build plate for rigidbot 3d printer. intended to be be c&c fabricated from aluminum
thingiverse
free

Filament Guide for Rigidbot by omegdadi
...filament guide that clips onto the frame of a rigidbot 3d printer. inspired by the rigidbot side cutter tool holder by steve0605.
thingiverse
free

Rigidbot End Cap by pdidonna
...rigidbot end cap by pdidonna
thingiverse
end cap to plug up the ends of the rigidbot frame
thingiverse
free

RigidBot monitor by EremaStar
...rigidbot monitor by eremastar
thingiverse
lcd
thingiverse
free

RigidBot Z-Axis Support by dafes
...rigidbot z-axis support by dafes
thingiverse
support structure for the z-axis upgraded rigidbot.
thingiverse
free

RigidBot Bar End Cap by tchotchke
...rigidbot bar end cap by tchotchke
thingiverse
push in end cap for covering the ends of the rigidbot bars.
thingiverse
free

Rigidbot Hex Key Holder by Steve0605
...rigidbot hex key holder by steve0605
thingiverse
a place to keep your hex keys handy for the rigidbot printer.
Sinterer
3d_export
$2000
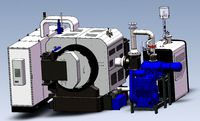
pressure sintering furnace for cemented carbide
... protective atmosphere. it is designed for the industrial production of cemented carbide, dysprosium metal and ceramic materials.
3d_export
$26
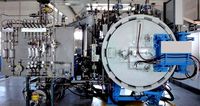
vacuum sintering furnace
...he device. close the doors and windows, turn off the lights and fans, etc. close the windows and lock the door of the laboratory.
3d_export
$13
stribog nose aseutra silencer
...r
3dexport
stribog nose for aseutra sl4i-smg 9x19 m15x1 silencer. best quality on hp jet fusion 3d or selective laser sintering.
3d_export
$21

stock adapter grand power stribog
... 0,10 - 0,15, infill 100%, supports everywhere, brim. recommended: best quality on hp jet fusion 3d or selective laser sintering.
thingiverse
free

Mount for Sinter Bearings 8x10x10 by dvoelkel
...or sinter bearings 8x10x10 by dvoelkel
thingiverse
i did a remix of that to carry my sinter bearings.
thanks for the original :)
thingiverse
free

Selective Laser Sintering: Alpha 1 by peter_
...is a follow up to the selective laser sintering powder test rig that i recently posted ( http://www.thingiverse.com/thing:3389 ).
thingiverse
free

Bronze sintered bushing adapter for LM8UU replacement by misan
... all. if you want to replace your lm8uu for bronze sintered bushings, this part may help, provided you bushings are similar size.
thingiverse
free

Open Source Laser sintering 3D printer by lukask
...you-sls-the-first-desktop-open-source-lasersinter/x/10003734
check out the video at:https://www.youtube.com/watch?v=txitbq2ykp8
thingiverse
free

Selective Laser Sintering: Powder test rig by peter_
...purposes -- i've been actively developing a more capable system, which was largely based on lessons learned from this one. :)
thingiverse
free

Sintered Bronze Bushing Holder by AlucardWulf
...r. the bores are the same as for a sc8uu as last time.
as always if there are any questions feel free to ask in german or english
Sugar
archibase_planet
free

Sugar bowl
...sugar bowl
archibase planet
sugar bowl sugar-basin sugar-bowl
sugar bowl - 3d model (*.gsm+*.3ds) for interior 3d visualization.
archibase_planet
free
Sugar-bowl
...rchibase planet
sugar-bowl sugar bowl sugar-basin kitchen ware
sugar-bowl - 3d model (*.gsm+*.3ds) for interior 3d visualization.
archibase_planet
free

Sugar-bowl
... planet
sugar bowl sugar-basin sugar-bowl kitchen ware
sugar-bowl n160911 - 3d model (*.gsm+*.3ds) for interior 3d visualization.
archibase_planet
free

Sugar bowl
...sugar bowl
archibase planet
sugar bowl sugar-basin
sugar bowl - 3d model (*.gsm+*.3ds) for interior 3d visualization.
archibase_planet
free

Sugar bowl
...sugar bowl
archibase planet
sugar bowl sugar-basin kitchen ware
sugar bowl - 3d model (*.3ds) for interior 3d visualization.
archibase_planet
free

Sugar bowl
...ugar bowl
archibase planet
sugar bowl sugar-basin kitchen ware
sugar bowl - 3d model (*.gsm+*.3ds) for interior 3d visualization.
archibase_planet
free

Sugar bowl
...ugar bowl
archibase planet
sugar bowl sugar-basin kitchen ware
sugar bowl - 3d model (*.gsm+*.3ds) for interior 3d visualization.
archibase_planet
free

Sugar bowl
...anet
sugar bowl sugar-basin kitchen ware
sugar bowl screaming fox n150113 - 3d model (*.gsm+*.3ds) for interior 3d visualization.
archibase_planet
free
Sugar-bowl
...e planet
vase sugar-bowl bowl sugar-basin kitchen ware
sugar-bowl n100313 - 3d model (*.gsm+*.3ds) for interior 3d visualization.
archibase_planet
free

Sugar bowl
...sugar bowl
archibase planet
sugar bowl kitchen ware sugar-basin
vase 3 - 3d model (*.gsm+*.3ds) for interior 3d visualization.
Sls
turbosquid
$50

sl
... available on turbo squid, the world's leading provider of digital 3d models for visualization, films, television, and games.
turbosquid
$45

Sl Bed
...oyalty free 3d model sl bed for download as max, max, and fbx on turbosquid: 3d models for games, architecture, videos. (1625378)
3ddd
$1

CILEK SL ACTIVE
...cilek sl active
3ddd
cilek
шкаф фирмы cilek из коллекции sl active white
3ddd
$1

CILEK SL ACTIVE
...cilek sl active
3ddd
cilek
cilek active (sl active white) sla-1304 кровать «selen»
3ddd
$1
Cilek SL ACTIVE
...k sl active
3ddd
cilek , стеллаж
cilek active (sl active white) 1501-sla стеллаж «hayal»
3d_export
$20

mercedes benz sl 1963
...mercedes benz sl 1963
3dexport
mercedes benz sl 1963
3ddd
$1
Орбитрек SL 116
...116
3ddd
детская площадка
уличный орбитрек sl 116 производства inter atleticahttp://diso.interatletika.com/product259/
3ddd
free

Брусья SL 105
... детская площадка
уличные брусья sl 105 ,производства inter atleticahttp://diso.interatletika.com/product247/
3ddd
free
Турник SL 117
... турник
уличный турник sl 117 производства inter atletica.http://diso.interatletika.com/product258/
3ddd
$1

Kettle scarlett sl 1501
...kettle scarlett sl 1501
3ddd
kettle , чайник
kettle scarlett sl 1501
Mod
design_connected
$13

MOD. 4233 - MOD. 4234 Table Lamp
...mod. 4233 - mod. 4234 table lamp
designconnected
arcahorn mod. 4233 - mod. 4234 table lamp computer generated 3d model.
design_connected
$11

MOD.1095
...mod.1095
designconnected
mod.1095 computer generated 3d model. designed by sarfatti, gino.
3ddd
$1

fireplaces mod Spec
...fireplaces mod spec
3ddd
камин
fireplaces mod spec 180x90x125h
3ddd
free

Flos Mod. 2129
... mod
фабрика: flos
модель: mod. 2129
описание: подвесной светильник, металл, белый, черный.
сайт: www.flos.com
turbosquid
$32

MOD A 001
... available on turbo squid, the world's leading provider of digital 3d models for visualization, films, television, and games.
turbosquid
$15

Mod 70..
... available on turbo squid, the world's leading provider of digital 3d models for visualization, films, television, and games.
turbosquid
$10

MOD Sofa
... available on turbo squid, the world's leading provider of digital 3d models for visualization, films, television, and games.
turbosquid
$1

Mod-Lite
... available on turbo squid, the world's leading provider of digital 3d models for visualization, films, television, and games.
turbosquid
$1
pc mod
... available on turbo squid, the world's leading provider of digital 3d models for visualization, films, television, and games.
turbosquid
free
Robot Mod
... available on turbo squid, the world's leading provider of digital 3d models for visualization, films, television, and games.
Laser
3d_export
$5
laser
...laser
3dexport
a 3d laser
3d_export
free
cnc 3dp laser nozzle for 2w laser opt lasers
...logy that gave birth to cutting and engraving laser heads this laser nozzle was designed for, read the article in the link below:
3d_export
free
cnc laser mount opt lasers
...eive the engraving and cutting laser heads this cnc machine laser mount was designed for, read the article on the following page:
turbosquid
$20

Laser
... available on turbo squid, the world's leading provider of digital 3d models for visualization, films, television, and games.
turbosquid
$15
Laser
... available on turbo squid, the world's leading provider of digital 3d models for visualization, films, television, and games.
turbosquid
$3
Laser
... available on turbo squid, the world's leading provider of digital 3d models for visualization, films, television, and games.
3d_export
$5

laser sword
...laser sword
3dexport
it is a blue laser sword with a metal frame
3d_ocean
$19
Laser Turret
...be used in any sf type of game, especially in tower defense games. - laser turret: 3025 polygons - props: 270 polygons - textu...
3d_export
free
workbee cnc laser mount for opt lasers
...the specifications of engraving and cutting laser heads this mount was designed for, please take a look at the following website:
3d_export
free

shapeoko cnc laser mount for opt lasers
...ind out the opportunities that adding a cutting and engraving laser head to your cnc can bring, take a look at the website below: