Thingiverse
RepRap TinkerBot I1 - 3d printer by RepRapOsterlen
by Thingiverse
Last crawled date: 3 years ago
SORRY for the lack of updates lately but my temp work sucks me dry of energy currently and I will upload more build guides as soon as I am back on track.
Thanks for your patience :)
[--Who is this weird dude?--------------------------------------------------]
Hi my name is Cliff mellangård.
I live in a small town in Sweden called simrishamn.
You can find my youtube channel here where some of my tinkerings can be found.https://www.youtube.com/user/GamersHeaven74
[--Introduction------------------------------------------------------------------]
I do not have any fancy education or anything but are a simple tinkerhead that do it for fun in my apartement ;)
And why do I put this here?
I got bitten by the 3d printer bug a year ago :)
And here is my first design that I wanted to share!
If you wonder about the name so is it completely designed in tinkercad that I love for its simplicity.
[--Main---------------------------------------------------------------------]
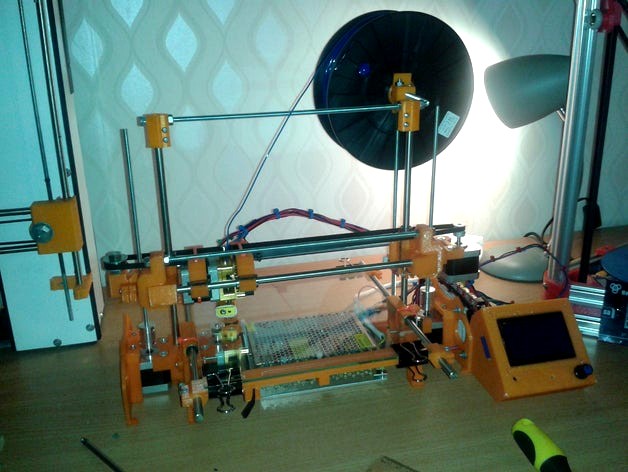
This is a small 3d printer that where designed to be cheap and easy to build with completely printed parts as main source.
It is a mashup of ideas I got from Huxley,printrbot,wallace,minion and smartrap.
The design is done so you can mirror and mix all setups to fit your neads and is intended to be a kind of hackabot where the user adjust it to there neads.
The print size is simply the length of the rods and size of glas plate.
Iam working on the bom and build instructions so please be patient!
This is a first release where some parts will be changed as soon as I see soft spots in the design.
Its not intended to be the best but cheap and as easy as possible to assemble for newcomers.
My main goal whas also to cut down on parts for all you reprap sellers out there that want to sell it as a kit get as low as possible shipping.
[--Info-----------------------------------------------------------------------]
Stay tuned for updates and as soon as I figure it out to add it to the reprap community so will it be on there wiki and forum also ;)
The updates can be a bit slow as iam unemployed and get temp work here and there that may inflict on my time I can put on my designs.
[--Updates------------------------------------------------------------------]
2014-08-23 changes.
Now added the main part file as two separate objects so its even easier to print on smaller printers that might not have as extended cooling fans.
Added part one of build instructions.
I also wanted to tell that I printed this with 3 perimeters on a 0.4 nozzle so let me know if there is any issues?
[--2014-08-23 --------------------------------------------------]
added part 2-4 of the build instructions.
[--2014-08-28 --------------------------------------------------]
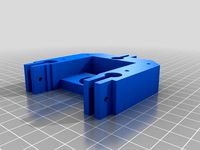
My fellow repraper Wayne Friedt have allowed me to include his case for the reprap full graphics controller.
The cool thing with this case is that it also hides most of the cables and makes it look cleaner.
Simply measure the height on the of the frame side the ramps is mounted on and drill a hole to attach it to the printer.
The frame is constructed to be able to mount various attachements on.https://www.facebook.com/my3dph?ref=bookmarks
[--2014-08-28 --------------------------------------------------]
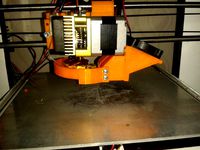
Added my latest changes that will improve print height and extremely simple with little parts and better placement for the fillament roll.
The top threaded rod is simply longer and you bend it after 320-330 mm in a 90 degree angle and use a support leg for the weight of the roll.
Looks a bit cooler :)
Will start on the build guide again now.
[--2014-09-02 --------------------------------------------------]
Added part 5-6 to the build guide.
[--2014-09-08 --------------------------------------------------]
Added part 7 to the build guide.
Thanks for your patience :)
[--Who is this weird dude?--------------------------------------------------]
Hi my name is Cliff mellangård.
I live in a small town in Sweden called simrishamn.
You can find my youtube channel here where some of my tinkerings can be found.https://www.youtube.com/user/GamersHeaven74
[--Introduction------------------------------------------------------------------]
I do not have any fancy education or anything but are a simple tinkerhead that do it for fun in my apartement ;)
And why do I put this here?
I got bitten by the 3d printer bug a year ago :)
And here is my first design that I wanted to share!
If you wonder about the name so is it completely designed in tinkercad that I love for its simplicity.
[--Main---------------------------------------------------------------------]
This is a small 3d printer that where designed to be cheap and easy to build with completely printed parts as main source.
It is a mashup of ideas I got from Huxley,printrbot,wallace,minion and smartrap.
The design is done so you can mirror and mix all setups to fit your neads and is intended to be a kind of hackabot where the user adjust it to there neads.
The print size is simply the length of the rods and size of glas plate.
Iam working on the bom and build instructions so please be patient!
This is a first release where some parts will be changed as soon as I see soft spots in the design.
Its not intended to be the best but cheap and as easy as possible to assemble for newcomers.
My main goal whas also to cut down on parts for all you reprap sellers out there that want to sell it as a kit get as low as possible shipping.
[--Info-----------------------------------------------------------------------]
Stay tuned for updates and as soon as I figure it out to add it to the reprap community so will it be on there wiki and forum also ;)
The updates can be a bit slow as iam unemployed and get temp work here and there that may inflict on my time I can put on my designs.
[--Updates------------------------------------------------------------------]
2014-08-23 changes.
Now added the main part file as two separate objects so its even easier to print on smaller printers that might not have as extended cooling fans.
Added part one of build instructions.
I also wanted to tell that I printed this with 3 perimeters on a 0.4 nozzle so let me know if there is any issues?
[--2014-08-23 --------------------------------------------------]
added part 2-4 of the build instructions.
[--2014-08-28 --------------------------------------------------]
My fellow repraper Wayne Friedt have allowed me to include his case for the reprap full graphics controller.
The cool thing with this case is that it also hides most of the cables and makes it look cleaner.
Simply measure the height on the of the frame side the ramps is mounted on and drill a hole to attach it to the printer.
The frame is constructed to be able to mount various attachements on.https://www.facebook.com/my3dph?ref=bookmarks
[--2014-08-28 --------------------------------------------------]
Added my latest changes that will improve print height and extremely simple with little parts and better placement for the fillament roll.
The top threaded rod is simply longer and you bend it after 320-330 mm in a 90 degree angle and use a support leg for the weight of the roll.
Looks a bit cooler :)
Will start on the build guide again now.
[--2014-09-02 --------------------------------------------------]
Added part 5-6 to the build guide.
[--2014-09-08 --------------------------------------------------]
Added part 7 to the build guide.
Similar models
thingiverse
free
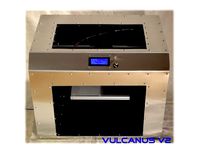
Vulcanus V2 RepRap 3D Printer by Vulcaman
...urce 3d-printer. you can see the full instruction/printed parts at http://www.instructables.com/id/vulcanus-v2-reprap-3d-printer/
thingiverse
free

Vulcanus V1 Reprap 3D Printer 300€ by Vulcaman
...ou enjoy it :-)
update 08.01.2016: added sketchup zip files
instruction:http://www.instructables.com/id/vulcanus-v1-3d-printer/
thingiverse
free

Filament Guide for Tumaker Voladora V2 by malopezn
... item to guide the filament inside the printer.
update: you can find a new design here: http://www.thingiverse.com/thing:361116
thingiverse
free

Reprap - AtomX Micro Bot by RepRapOsterlen
....https://youtu.be/iiad7d7niw4
bom will be added during a longer time :)
this is a early beta access.
http://reprap.org/wiki/atomx
thingiverse
free

Reprap - Funbot i1 by RepRapOsterlen
...ki page.http://reprap.org/wiki/funbot_i1
013-12-14
uploaded the print cooler and large ramps cover.
latest upgrades are uploaded.
thingiverse
free

LayerFused C201 3D Printer
...follow the series and make the printer or a similar build with these videos. these are only some of...
thingiverse
free

Balcony hooks by MrPringles
... and x-maslights.
also added a double design so you can print two at the same time if you have a small printer like me; a mod-t.
thingiverse
free

3D uBox 2.0 by Jfv
...ts from my printrbot simple. i just wanted to have a more stable printer.
update - need extra 30cm rod + gt2 cable and gt2 pulley
thingiverse
free

Sparkmaker - Cover Clips by m4RT1n
...printer & supplies
sparkmaker power switch option
have fun...
if you like it please follow me or/and give it a like :) , thx
thingiverse
free

OmniSphere for smaller Printers by Geoffro
...e printed on a smaller printer like a kossel mini.
the mesh has not been edited at all, simply sliced to make it easier to print.
Tinkerbot
thingiverse
free

Tinkerbot by Kush
...e support between the legs, and you have to remove it (sorry i know its annoying)
this was one of my earlier designs on tinkercad
thingiverse
free

Flat Ghost Meeple from Ghostel by Tinkerbot Games by GinoBrancazio
...s.
for more information about the game go to tinkerbotgames.com/ghostel
3d version here: http://www.thingiverse.com/thing:1095254
thingiverse
free

3D Ghost Meeple from Ghostel by Tinkerbot Games by GinoBrancazio
....thingiverse.com/thing:1095304
update: i have added the stl file for the 3d ghostly barrier token, and the 10mm player score cube
thingiverse
free
Reprap - Funbot i1 by RepRapOsterlen
...4. http://youtu.be/vi6veqji7e8 this is going to replace my old tinkerbot design. keep in mind that the y base is...
Repraposterlen
thingiverse
free

Replicator and duplicator y axis pillows for 625zz bearings by RepRapOsterlen
...l after i where told this :)
front..https://www.youtube.com/watch?v=ogegxd7cy1m
rear..https://www.youtube.com/watch?v=qstyjz7dukg
thingiverse
free

Creatbot DX2 replacement hotend base. by RepRapOsterlen
...adjustment.
only replace the original if you know wath you are doing or actually have a broken part.
https://youtu.be/zlmgwn9jmw0
thingiverse
free

Playpi a Raspberry pi 2 case for retropie by RepRapOsterlen
...for retro pie builds but its up to you.
its done in tinkercad the free cad prg.
video.https://www.youtube.com/watch?v=hkyouk_mzqq
thingiverse
free
Reprap - AtomX Micro Bot by RepRapOsterlen
....https://youtu.be/iiad7d7niw4
bom will be added during a longer time :)
this is a early beta access.
http://reprap.org/wiki/atomx
thingiverse
free
Reprap - Funbot i1 by RepRapOsterlen
...ki page.http://reprap.org/wiki/funbot_i1
013-12-14
uploaded the print cooler and large ramps cover.
latest upgrades are uploaded.
thingiverse
free

Reprep Atomx mods by Al_Ross
...for the reprap atomx. kudos to the original designer: repraposterlen www.thingiverse.com/thing:1444061 these were mainly made so i that i...
thingiverse
free
Direct drive mk8 print cooler that works with most types. by RepRapOsterlen
...h together.
use a glue gun to get it tight in the seams.
i made it for personal use but uploaded it here if anyone else neads it.
thingiverse
free
Funbot i1 Remake by moebius_2033
...me here. thanks again!!! update i've received word from repraposterlen he said i can work on his wiki page,...
I1
3d_ocean
$30
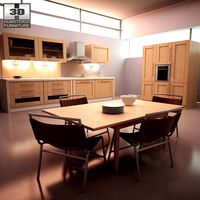
Kitchen set i1
...ven plates shelves sink table ware
kitchen set i1 include 3d models: sink, cupboards, table, chair, plates, oven, hob, extractor.
humster3d
$40

3D model of Kitchen Set I1
...uy a detailed 3d model of kitchen set i1 in various file formats. all our 3d models were created maximally close to the original.
3d_export
$50

Kitchen set i1 3D Model
...ances kitchen utensils cups sink cupboards table chair plates oven hob extractor
kitchen set i1 3d model humster3d 33973 3dexport
cg_studio
$50

Kitchen set i13d model
...el
cgstudio
.3ds .lwo .max .obj .pz3 - kitchen set i1 3d model, royalty free license available, instant download after purchase.
3d_ocean
$5

Curtain - With Window (Vray-C4D)
...home interior files: .c4d 3ds obj for outside image. http://i1trekearth.com/photos/14190/kouri_trees_11.jpg ...
cg_studio
$49

Sony Xperia Z1 White3d model
...cell phone mobile cellular tft lcd touchscreen touch screen i1 honami z1s c6916 c6903 c6906 c6943 white .max .obj...
cg_studio
$49

Sony Xperia Z1 Purple3d model
...cell phone mobile cellular tft lcd touchscreen touch screen i1 honami z1s c6916 c6903 c6906 c6943 purple .max .obj...
thingiverse
free

Funbot i1 - bowden hotend holder by Georg_cz
...er i have modify a little hotend holder. i would like to use bowden hotend because of weight of extruder instead original holder.
thingiverse
free
Bernis extruder holder for Funbot i1 by Georg_cz
...ed use bowden and bernis extruder. so here is my holder for it. is working well as is and z axis can go to the end of posibility.
thingiverse
free

Carabiner S i1 by JcDenton
...-type first interation
part1 - 0.3lh_75%infill/2perimeters
part2 - 0.2lh_100%infill/2perimeters
pins should be semi-loose fitting
Reprap
turbosquid
$1

Go Pro Balance Hand Wand Reprap
... available on turbo squid, the world's leading provider of digital 3d models for visualization, films, television, and games.
thingiverse
free
Reprap keychain by AndreasD
...reprap keychain by andreasd
thingiverse
a simple reprap logo keychain for the reprap lovers like me!
thingiverse
free

REPRAP CHASSIS by leonk
...reprap chassis by leonk
thingiverse
reprap chassis
thingiverse
free

COUPLER RepRap by leonk
...coupler reprap by leonk
thingiverse
coupler reprap
thingiverse
free

RepRap Switch by n3opl4n
...reprap switch by n3opl4n
thingiverse
switch for reprap prusa i2.
p-space hackerspace logo.
thingiverse
free

Reprap pendulum by mr_seeker
...ap pendulum by mr_seeker
thingiverse
its a pendulum in the shape of the reprap logo. it has a 1mm hole for putting a wire in it.
thingiverse
free

RepRap Ornament by redskinsjbs
...reprap ornament by redskinsjbs
thingiverse
i tried to make a teardrop shape ornament for the holiday season in honor of reprap
thingiverse
free
Spool holder reprap by mdnm
...spool holder reprap by mdnm
thingiverse
this is spool holder for reprap.
thingiverse
free

RepRap logo keyring by mrjohnc
...reprap logo keyring by mrjohnc
thingiverse
reprap logo keyring
thingiverse
free

REPRAP LEON K by leonk
...reprap leon k by leonk
thingiverse
reprap leon k
Printer
archibase_planet
free

Printer
...inter
archibase planet
printer laser printer pc equipment
printer n120614 - 3d model (*.gsm+*.3ds) for interior 3d visualization.
archibase_planet
free

Printer
...rchibase planet
laser printer office equipment computer equipment
printer - 3d model (*.gsm+*.3ds) for interior 3d visualization.
turbosquid
$100

Printer
...er
turbosquid
royalty free 3d model printer for download as on turbosquid: 3d models for games, architecture, videos. (1487819)
turbosquid
$3

Printer
...turbosquid
royalty free 3d model printer for download as max on turbosquid: 3d models for games, architecture, videos. (1670230)
turbosquid
$1

printer
...turbosquid
royalty free 3d model printer for download as max on turbosquid: 3d models for games, architecture, videos. (1595546)
turbosquid
$1

printer
...turbosquid
royalty free 3d model printer for download as max on turbosquid: 3d models for games, architecture, videos. (1595105)
turbosquid
$10

Printer
...id
royalty free 3d model printer for download as max and 3dm on turbosquid: 3d models for games, architecture, videos. (1607146)
turbosquid
$7

Printer
...royalty free 3d model printer for download as ma, ma, and obj on turbosquid: 3d models for games, architecture, videos. (1644580)
turbosquid
$30

Printer
... available on turbo squid, the world's leading provider of digital 3d models for visualization, films, television, and games.
turbosquid
$20

Printer
... available on turbo squid, the world's leading provider of digital 3d models for visualization, films, television, and games.