Thingiverse
Rep 2x E3D upgrade by Felixre7
by Thingiverse
Last crawled date: 3 years ago
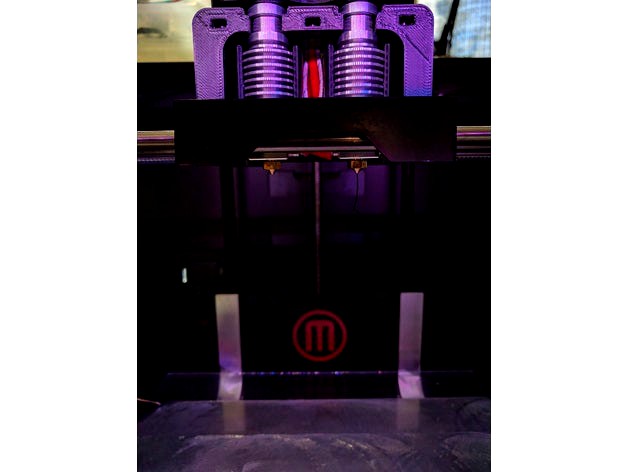
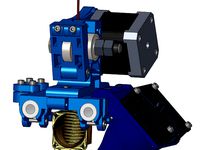
I loved the 2x e3d upgrade but was worried the fan ducts were going to break with all the shaking and didn't think they snapped on very tightly. Went ahead and upgraded and redesigned.
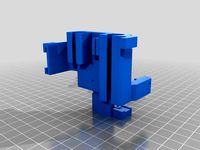
And then i just kept going, this is a full redesign of cadsys' e3d upgrade for the 2x:
hardware:
2 x M3x18 or longer - carriage to hotend assembly
3 x M3x12 or longer - top cap to hotend assembly
2 x M3 washer - optional for the top cap
1 x good ol popscicle stick - X axis endstop
5 x M3 nuts
k type thermocouple for e3d:https://www.matterhackers.com/store/printer-accessories/e3d-type-k-thermocouple-cartridge
software:
Just need to reverse the direction on the two extruders when using cadsys's upside down rear mount extruder mounts.
directions:
assemble E3D extruders, use the kType thermocouples instead of what came with them.
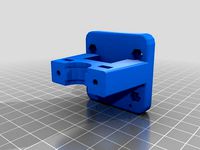
push the 5 3mm nuts into their holes and line them up with the bolt holes, should be snug and they shouldn't fall out easily.
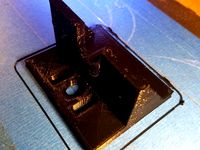
Cut off about 1.375" of a popsicle stick and glue into the matching cutout on the hot end mount.
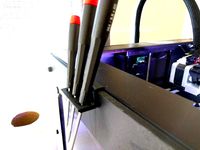
Secure the clamp to the top of the hot ends with the 12mm bolts. Cinch down each of the bolts before tightening anything! Check to make sure the clamp is level and then start tightening each of the 3 screws about a quarter to half turn at a time, don't over tighten the clamp to the point you are bending it too much.
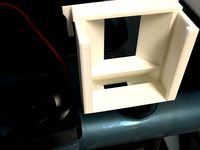
Screw the fans onto the fan ducts, make absolutely positive they are blowing DOWN. Ideally the wires are pointing in or forward.
Snap the fan ducts onto the hot end, they should feel very secure. with no play but they will still rotate easily.
Use the two 18mm screw to attach the assembly into your X carriage.
Wire it all up and you're good to go!
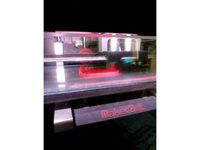
connect thermocouples as shown in the picture, if yours come with different colored terminals or wires use a DMM with the ability to read a thermocouple to make sure you don't get the wires backwards, this can cause a pretty large error in temp reading at extrusion temps.
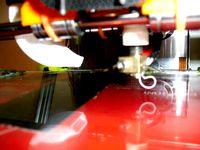
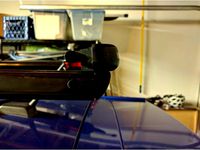
getting the two nozzles level is pretty difficult but spending time getting the hot ends to the exact same height helps then from there shim the side of the hot end holder with paper as shown in the last picture, it took a single piece for me to get them level enough that they dont interfere with each other but still stick to the build plate well.
Slicer Settings:
Simplify gave much better results even with the same settings, but the stock maker bot desktop still works! Just turn up the retract distance a little thanks to the bowden.
these are some sample settings that worked for ABS and nylon through this printer, it is fairly robust and works with most settings unless you're going for the perfect print in which case tweak away!
3-4.75mm retract
2500-5000mm/min retract speed
4800-5100mm/min print speed (helps a lot)
And then i just kept going, this is a full redesign of cadsys' e3d upgrade for the 2x:
hardware:
2 x M3x18 or longer - carriage to hotend assembly
3 x M3x12 or longer - top cap to hotend assembly
2 x M3 washer - optional for the top cap
1 x good ol popscicle stick - X axis endstop
5 x M3 nuts
k type thermocouple for e3d:https://www.matterhackers.com/store/printer-accessories/e3d-type-k-thermocouple-cartridge
software:
Just need to reverse the direction on the two extruders when using cadsys's upside down rear mount extruder mounts.
directions:
assemble E3D extruders, use the kType thermocouples instead of what came with them.
push the 5 3mm nuts into their holes and line them up with the bolt holes, should be snug and they shouldn't fall out easily.
Cut off about 1.375" of a popsicle stick and glue into the matching cutout on the hot end mount.
Secure the clamp to the top of the hot ends with the 12mm bolts. Cinch down each of the bolts before tightening anything! Check to make sure the clamp is level and then start tightening each of the 3 screws about a quarter to half turn at a time, don't over tighten the clamp to the point you are bending it too much.
Screw the fans onto the fan ducts, make absolutely positive they are blowing DOWN. Ideally the wires are pointing in or forward.
Snap the fan ducts onto the hot end, they should feel very secure. with no play but they will still rotate easily.
Use the two 18mm screw to attach the assembly into your X carriage.
Wire it all up and you're good to go!
connect thermocouples as shown in the picture, if yours come with different colored terminals or wires use a DMM with the ability to read a thermocouple to make sure you don't get the wires backwards, this can cause a pretty large error in temp reading at extrusion temps.
getting the two nozzles level is pretty difficult but spending time getting the hot ends to the exact same height helps then from there shim the side of the hot end holder with paper as shown in the last picture, it took a single piece for me to get them level enough that they dont interfere with each other but still stick to the build plate well.
Slicer Settings:
Simplify gave much better results even with the same settings, but the stock maker bot desktop still works! Just turn up the retract distance a little thanks to the bowden.
these are some sample settings that worked for ABS and nylon through this printer, it is fairly robust and works with most settings unless you're going for the perfect print in which case tweak away!
3-4.75mm retract
2500-5000mm/min retract speed
4800-5100mm/min print speed (helps a lot)
Similar models
thingiverse
free
Printrbot Plus E3D Extruder mount by tdeagan
...o that the extruder sits at a level appropriate for the e3d, but still allows mounting to the printrbot plus x-carriage assembly.
thingiverse
free

Solidoodle Underside Fan Duct by lawsy
...ont mount fan duct. due to the added length, however, room is available under the the extruder carriage to mount a 30 x 5 mm fan.
thingiverse
free

Fan Duct for 30mm fan by stanrob
...or 30mm fan by stanrob
thingiverse
i design this fan duct to cool down the plastic down the hot end (e3d). this is for 30mm fan.
thingiverse
free

40mm Fan Duct - Chinese E3D v6 Hot end by xvsideswipe
...40mm fan duct - chinese e3d v6 hot end by xvsideswipe
thingiverse
40mm fan duct for the chinese e3d v6 hot end
thingiverse
free
Solidoodle Pico Hot-End Cooling Fan Duct (with mk5 mount) by eckerj
...onnectors, etc) but the 40mm fan that comes with the pico fits in nicely, and the duct mounts nicely to lawsy's mk5 extruder.
thingiverse
free
UP Mini parts for entire extruder replacement with an extruder from China (MK8) by jeeplvr
... a bit. there is a set screw under the insulation surrounding the hot end just for the up mini thermocouple. do not over tighten.
thingiverse
free
new x-carriage for prusa i2 with fan duct for hot-end E3D_V6 by autorobotics
...nd e3d_v6 by autorobotics
thingiverse
new x-carriage for prusa i2 with fan duct for hot-end e3d_v6,
fan 50x50 + upgrade to 40x40
thingiverse
free
Lulzbot TAZ Extended / Adjustable Nozzle Fan Duct for e3D / hexagon hot ends by SuperSolid_3D
...re you can slide it up and down for adjustment, and doesn't require heat-set insert nuts for mounting the fan with m3 screws.
thingiverse
free
cooling duct for extruder by stanrob
...ling duct for extruder by stanrob
thingiverse
this is a cooling duct for the plastic down the hot end.
i draw it for exhaust fan
thingiverse
free
E3D v6 Fan Duct by Tavy
... holes dimensions 26mm. i have currently used the hot end clamp without the nuts. i have just screw them all the way on the base.
Felixre7
thingiverse
free
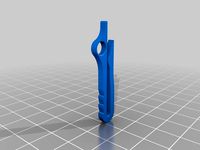
Key Chain hook hanger by Felixre7
...er by felixre7
thingiverse
just another keyhanger, design to be waterjet cut but still works printed. just print lots of spares!
thingiverse
free
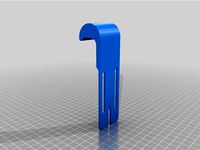
Solo Controller phone/tablet extensions by Felixre7
...xtensions by felixre7
thingiverse
slightly longer extension for the solo, remixed for more strength and no supports for printing
thingiverse
free
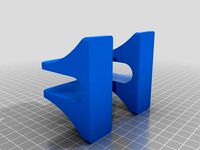
Vertical Cutting Board Stand by Felixre7
...by felixre7
thingiverse
simple cutting board holder for small ish wood boards, works best on rounded end boards ~.75" thick
thingiverse
free
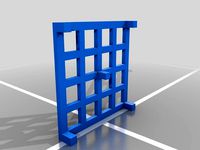
4x4 key switch tester plate by Felixre7
...ch tester plate by felixre7
thingiverse
simple 4x4 mechanical key switch tester for cherry mx compatible keys at a 1.5 deg angle
thingiverse
free

Replicator 2X plastic rivet replacement by Felixre7
...stic rivets that hold the two side windows in on a replicator 2x, not sure if the replicator 2 has the holes to fit these or not.
thingiverse
free
Kitchen Brush Hanger by Felixre7
...up so no need for supports and .3" in diameter, small enough to fit most brushes large enough that they are nice and strong.
thingiverse
free
Replicator 2X tool caddy by Felixre7
... into. you can use as many as tools you have that commonly get used. holes are spaced for a typical hex driver/small screwdriver.
thingiverse
free
Yakima High Roller Rear Cap by Felixre7
...lears my car's hatch back when open. you can also just use it to replace yours if you have lost it or the original one broke.
Rep
turbosquid
$1

coat of arms 2 rep
...oyalty free 3d model coat of arms 2 rep for download as blend on turbosquid: 3d models for games, architecture, videos. (1612589)
turbosquid
$35
Star Trek The Original Series Early Hypospray Rep
...rly hypospray rep for download as max, dwg, fbx, obj, and stl on turbosquid: 3d models for games, architecture, videos. (1618046)
3d_ocean
$3
Low Poly Green Mushroom Hand Painted
...games or simple animations. it is not meant to rep.. ...
3d_ocean
$12
Ashley Jaidyn Dresser & Mirror
...the proportions and sizes of real furniture. with the rep.. ...
thingiverse
free

Rep Rap coin by AJ_IBBO
...rep rap coin by aj_ibbo
thingiverse
this is a small coin with the rep rap logo on it, designed to be a test pice.
thingiverse
free

Fan for ESS Turbofan Rep by tesla_c0il
...fan for ess turbofan rep by tesla_c0il
thingiverse
fan for ess turbofan rep
thingiverse
free

Sphinx rep-tile by kitwallace
...the sphinx is the best-known pentagonal rep-tile.
the scale, width of the outline, the extruded height and form are customisable
thingiverse
free
REP RAP PERSO CF
...rep rap perso cf
thingiverse
cf
thingiverse
free

rep rap PCB Mount by AJ_IBBO
...ep rap pcb mount by aj_ibbo
thingiverse
this mount is designed to hold the mdf board with the pcb, on to the rep rap 3d printer.
thingiverse
free

Makerbot Rep 2 Spool Holder by funmun
...makerbot rep 2 spool holder by funmun
thingiverse
the is a spool holder for the makerbot rep 2.
E3D
turbosquid
$23

E3D - Google Home
... 3d model e3d - google home for download as max, obj, and c4d on turbosquid: 3d models for games, architecture, videos. (1192509)
cg_studio
free

e3d model
...e3d model
cgstudio
- e 3d model, royalty free license available, instant download after purchase.
turbosquid
$2

Syringe C4D (E3D Ready)
...lty free 3d model syringe c4d (e3d ready) for download as c4d on turbosquid: 3d models for games, architecture, videos. (1336720)
turbosquid
$12

Microphone USB E3D and C4D
...ree 3d model microphone usb e3d & c4d for download as c4d on turbosquid: 3d models for games, architecture, videos. (1568216)
turbosquid
$29

E3D - OnePlus 6 Black
...model e3d - oneplus 6 black for download as max, obj, and c4d on turbosquid: 3d models for games, architecture, videos. (1358534)
turbosquid
$29

E3D - Motorola One 2018
...del e3d - motorola one 2018 for download as max, obj, and c4d on turbosquid: 3d models for games, architecture, videos. (1358533)
turbosquid
$29

E3D - Disney MagicBands 2
...l e3d - disney magicbands 2 for download as max, obj, and c4d on turbosquid: 3d models for games, architecture, videos. (1355515)
turbosquid
$29

E3D - Samsung Z4 Smartphone
...e3d - samsung z4 smartphone for download as max, obj, and c4d on turbosquid: 3d models for games, architecture, videos. (1182179)
turbosquid
$23

E3D - Razer Phone model
...del e3d - razer phone model for download as max, obj, and c4d on turbosquid: 3d models for games, architecture, videos. (1231207)
turbosquid
$23

E3D - Alcatel Idol 5
... model e3d - alcatel idol 5 for download as max, obj, and c4d on turbosquid: 3d models for games, architecture, videos. (1212799)
2X
3ddd
$1
modular u shape 2x
...modular u shape 2x
3ddd
modular
точечный светильник modular u shape 2x
turbosquid
$20

Modern Sofa 2x
... available on turbo squid, the world's leading provider of digital 3d models for visualization, films, television, and games.
turbosquid
$7

Spartan Helmets 2x
... available on turbo squid, the world's leading provider of digital 3d models for visualization, films, television, and games.
turbosquid
$4

Grenade Pack 2x
... available on turbo squid, the world's leading provider of digital 3d models for visualization, films, television, and games.
3d_ocean
$17
Modern Sofa 2x
...only tri and quad polygons) • real-world sizes and proportions • the model is grouped for easy selection and placing in your s...
archive3d
free
Sofa 2x 3D Model
...sofa 2x 3d model
archive3d
sofa divan
archive3d
free

Bed 2x 3D Model
...bed 2x 3d model
archive3d
bed beds
archive3d
free

Sofa 2x 3D Model
...sofa 2x 3d model
archive3d
sofa silik
archive3d
free

Case 2x 3D Model
...case 2x 3d model
archive3d
wardrobe case
3ddd
$1

Butterfly Sofa 2x
...butterfly sofa 2x
3ddd
butterfly
полезный диванчик для гостиной. в двух цветовых решениях
Upgrade
turbosquid
$15

Upgraded Glock
...e 3d model upgraded glock for download as obj, fbx, and blend on turbosquid: 3d models for games, architecture, videos. (1185950)
3ddd
$1

Calligaris / UPGRADE
...calligaris / upgrade
3ddd
calligaris
c материалом
3d_export
free

cz upgrade
...cz upgrade
3dexport
https://www.buymeacoffee.com/mestrezen3d https://linktr.ee/mestrezen3
turbosquid
$80

Custer Tank upgrade
... available on turbo squid, the world's leading provider of digital 3d models for visualization, films, television, and games.
turbosquid
$39

Domestos 1 upgrade
... available on turbo squid, the world's leading provider of digital 3d models for visualization, films, television, and games.
3d_export
$10

Upgraded tea cup
...upgraded tea cup
3dexport
a cup with an unusual design and a unique shape for a more enjoyable tea experience
3d_export
$8

dixy outlander classic style upgraded poplar wood lounge chair
...utlander classic style upgraded poplar wood lounge chair
3dexport
dixy outlander classic style upgraded poplar wood lounge chair
turbosquid
free

AK-12 + Upgrades low-poly 3D model
...ow-poly 3d model for download as fbx, blend, and unitypackage on turbosquid: 3d models for games, architecture, videos. (1501145)
evermotion
$700

Upgrade from V-ray 1.5 to 3.5 for 3ds max
...here is no need to purchase a new dongle - your current dongles will be reprogrammed to carry v-ray 3. evermotion 3d models shop.
evermotion
$300

Upgrade from V-Ray 2.0 to V-ray 3.5 for 3ds Max
... interface (gui) for editing settings on one machine and one render node for rendering on one machine. evermotion 3d models shop.