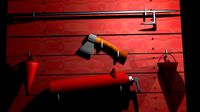
Thingiverse
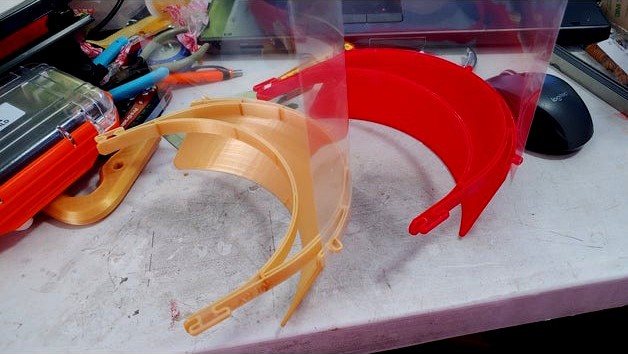
REMIX of DtM v3.0 NIH approved face shield for Vase Spiralize printing by Nerys
by Thingiverse
Last crawled date: 4 years, 1 month ago
BEFORE PRINTING THIS IN BULK FOR LOCAL MEDICAL FACILITIES PRINT ONE AND LET THEM APPROVE IT FIRST!!!
I have also included the factory file if you are using simplify 3d. if you DO NOT need the "visor" portion just print process 1 alone and its a 33 minute print !!!!
I have added a Euro 4 hole punch version and Gcode the gcode has NO heat bed so manually turn on your heat bed first it will turn it off when done.
Print both processes for all of it.
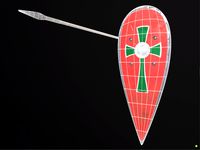
I remixed the DtM v3.0 (https://3dprint.nih.gov/discover/3dpx-013238) shield by tprestero. I did not change any dimensions or fitment. I just remixed it for "vase mode" spiralize printing. this permits it to be printed in at least 1/3 the time (40 to 65 minutes per) and use less material. almost half the material at 27g
It is more flexible where it needs to be (head band) for comfort and is now an "open structure" which will improve sanitation. (IPA can now get inside. there are no closed cavities to retain anything)
I am including Gcode that should be compatible with any printer with a 200x200 or larger build volume. on some less capable machine you might need to slow down a little (try 75%) on better capable machines you might be able to go faster (diminishing returns its so fast now) The tricky parts are first layer. it needs to go down well and the "head visor" portion (over 12mm in Z) you might need to slow down for this or lower layer height for this if it gives you troubles.
if you slice and its NOT doing vase mode that is a "thin wall behavior" issues. in S3D goto advanced and set for thin wall and thin fill with 100% overlap in cura I think you need to turn off thin wall detection and set overlap. then it will print in vase mode.
I have printed it on 5 different machines from different manufacturers and no problems so far.
if you want to slice yourself. use NO top or bottom layers and 1 perimeter in vase mode or spiralize outer contour mode.
MAKE SURE your "start point" if somewhere along the visor arc (0,0 is usually good) as the transition at 12mm can cause "oddities" in vase mode if you don't make the start point in the "arc" of the visor.
if you get retractions and vase mode breaks enable thin wall compensation with 100% allowed overlap and the problems will go away. some parts of the model nearly intersect. this is to allow the reinforcement ribs that are vase compatible to "connect" the different perimeters for more stiffness and strength.
the THICK version STL is for LARGE nozzles. use regular vase mode for a 1.2mm nozzle for 1.0mm nozzles use an extrusion multiplier (EM) or Flow Rate of 1.25 for 0.8 mm nozzles use 1.5 You can use 0.6mm layer height for the first 12mm but NOT for the visor. 0.3mm max recommended (the layers will fail at higher than 0.4mm too much horizontal deviation per layer.
with the thick model this can be printed in under 40 minutes!! it will however be a little heavier 50g but also super strong and rigid.
I have also included the factory file if you are using simplify 3d. if you DO NOT need the "visor" portion just print process 1 alone and its a 33 minute print !!!!
I have added a Euro 4 hole punch version and Gcode the gcode has NO heat bed so manually turn on your heat bed first it will turn it off when done.
Print both processes for all of it.
I remixed the DtM v3.0 (https://3dprint.nih.gov/discover/3dpx-013238) shield by tprestero. I did not change any dimensions or fitment. I just remixed it for "vase mode" spiralize printing. this permits it to be printed in at least 1/3 the time (40 to 65 minutes per) and use less material. almost half the material at 27g
It is more flexible where it needs to be (head band) for comfort and is now an "open structure" which will improve sanitation. (IPA can now get inside. there are no closed cavities to retain anything)
I am including Gcode that should be compatible with any printer with a 200x200 or larger build volume. on some less capable machine you might need to slow down a little (try 75%) on better capable machines you might be able to go faster (diminishing returns its so fast now) The tricky parts are first layer. it needs to go down well and the "head visor" portion (over 12mm in Z) you might need to slow down for this or lower layer height for this if it gives you troubles.
if you slice and its NOT doing vase mode that is a "thin wall behavior" issues. in S3D goto advanced and set for thin wall and thin fill with 100% overlap in cura I think you need to turn off thin wall detection and set overlap. then it will print in vase mode.
I have printed it on 5 different machines from different manufacturers and no problems so far.
if you want to slice yourself. use NO top or bottom layers and 1 perimeter in vase mode or spiralize outer contour mode.
MAKE SURE your "start point" if somewhere along the visor arc (0,0 is usually good) as the transition at 12mm can cause "oddities" in vase mode if you don't make the start point in the "arc" of the visor.
if you get retractions and vase mode breaks enable thin wall compensation with 100% allowed overlap and the problems will go away. some parts of the model nearly intersect. this is to allow the reinforcement ribs that are vase compatible to "connect" the different perimeters for more stiffness and strength.
the THICK version STL is for LARGE nozzles. use regular vase mode for a 1.2mm nozzle for 1.0mm nozzles use an extrusion multiplier (EM) or Flow Rate of 1.25 for 0.8 mm nozzles use 1.5 You can use 0.6mm layer height for the first 12mm but NOT for the visor. 0.3mm max recommended (the layers will fail at higher than 0.4mm too much horizontal deviation per layer.
with the thick model this can be printed in under 40 minutes!! it will however be a little heavier 50g but also super strong and rigid.
Similar models
thingiverse
free

Stackable Box (spiral vase mode) by T_Uehara
...
210mm172mm85mm stackable box
please print by a spiral vase mode. i printed by layer 0.55mm and outer wall 0.9mm by 0.8mm nozzle.
thingiverse
free
sphere by wacomg
...re by wacomg
thingiverse
simple sphere
thin wall
spiral mode print
just test
0.3mm nozzle
0.2mm first layer
0.15mm other layers
thingiverse
free

Nerys Vase by Nerys
...first go at doing this. this vase is scary similar to zyyx's vase. it is not a copy and...
thingiverse
free

Spiral vase
.../vase mode in slicers, because walls are really thin and it could be not waterproof.
whole thing was created using mattercontrol.
thingiverse
free

Spiral vase style phone stand by wadded
...ese phone stands out with a 1mm e3d volcano nozzle on spiral vase mode, 0.5mm layer height. typically takes 12 minutes per stand.
thingiverse
free
Red Empire Card Wrapper
...hick as your nozzle.
print this in vase mode (cura calls it "spiralize outer contour option under "special modes")
thingiverse
free
Pencil Box / Пенал by Ares566
...ox.stl 1mm layer 0.3mm. print it in spiral vase mode.
other stl you may to print with 0.6mm nozzle and 0.2mm layer in normal mode
thingiverse
free

Simple Vase by vikram31
...nozzle and set the layer height to 0.6 mm and line width to 1.0 mm)
for solid mode:
top layer - 0
infill - 0%
wall line count - 3
thingiverse
free

Simple Vase by vikram31
...nozzle and set the layer height to 0.6 mm and line width to 1.0 mm)
for solid mode:
top layer - 0
infill - 0%
wall line count - 3
thingiverse
free

VMT - High Tech Base - Bunker
...e needs!
suggested printing with a 1mm nozzle.
pre-made gcode created for an ender 3/5 with 0.12mm layer height and a 1mm nozzle.
Nih
3d_export
$5

war face shield
...model<br>shield 3d<br>shield low poly 3d model<br>face shield 3d print nih ...
thingiverse
free

NIH Face shield 3 pk by Hfamilyfun
...nih face shield 3 pk by hfamilyfun
thingiverse
3 mask version for 220x220 beds
thingiverse
free

NIH face shield DtM-v3 by Hfamilyfun
...ih.gov/discover/3dpx-013359
your slicer must have concentric support generation for good results. currently, settings are for pla
thingiverse
free

NIH Face shield 4Pack by Hfamilyfun
...e as the first 2 piece stack except we found that a 250 x 200 bed will hold four
print settings are the same as the 2 piece stack
thingiverse
free

NIH Approved face shield design by Mortimer452
...et of clear transparency film, available at most office or school supply stores. holes can be made with a standard 3-hole punch.
3d_sky
free

Fence
...fence 3dsky fencing for stairs or lestni?nih ...
thingiverse
free

Tension release by amanmo77
...by amanmo77 thingiverse this the tension release from the nih 3d printing...
thingiverse
free

Surgical Mask Strap N95 REMIX by ColoGeo
...surgical mask strap n95 remix by cologeo thingiverse nih mask strap variant for n95...
thingiverse
free

NIH's DtM-v3.0 Face Shield PPE, 3D printable headband, COVID-19 / Coronavirus PPE by scottconnerly
...s gone through some fda work. medical professionals are likely to accept these donations.
included:
4-model layout
2-model layout
thingiverse
free

Face Shield Vizor by Kevin005
...approved for clinical use by the national institute of health(nih ...
Dtm
turbosquid
$189
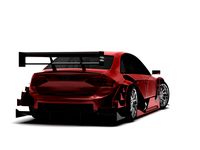
Audi DTM
... available on turbo squid, the world's leading provider of digital 3d models for visualization, films, television, and games.
turbosquid
$298

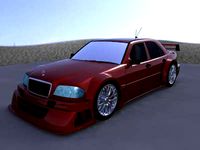
Mercedes AMG C63 DTM
...ree 3d model mercedes amg c63 dtm for download as obj and fbx on turbosquid: 3d models for games, architecture, videos. (1182909)
turbosquid
$60
MERCEDES C class DTM
... available on turbo squid, the world's leading provider of digital 3d models for visualization, films, television, and games.
3d_export
$20
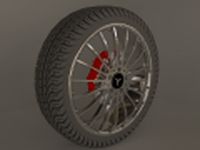
Wheel of a Mercedes Model AMG DTM 3D Model
...dtm 3d model
3dexport
wheel tire llanta rueda mercedes amg dtm
wheel of a mercedes model amg dtm 3d model romerixo 55262 3dexport
3d_export
$99

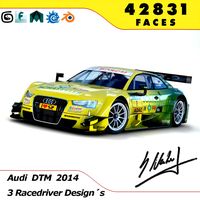
Audi A5 DTM 2014 3D Model
...xport
2012 2013 2014 car sport germany fast racing race audi s5 touring a5 rs5 dtm
audi a5 dtm 2014 3d model squir 79230 3dexport
cg_studio
$129

Audi A5 DTM 20143d model
...5 dtm
.3ds .c4d .fbx .lwo .max .obj - audi a5 dtm 2014 3d model, royalty free license available, instant download after purchase.
3d_export
$60
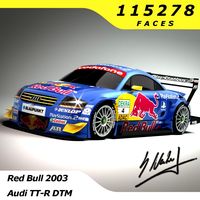
Audi TT-R DTM 2003 3D Model
...odel
3dexport
audi tt-r dtm 2003 red bull ekstr?m eki race racecar germany tt
audi tt-r dtm 2003 3d model neubi3d 101412 3dexport
cg_studio
$111
Audi RS5 DTM 20143d model
...bj .lwo .fbx .dxf .dae .blend .3ds - audi rs5 dtm 2014 3d model, royalty free license available, instant download after purchase.
cg_studio
$99
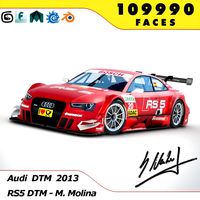
Audi RS5 DTM 2013 - Molina3d model
...obj .lwo .fbx .blend .3ds - audi rs5 dtm 2013 - molina 3d model, royalty free license available, instant download after purchase.
3d_export
$111
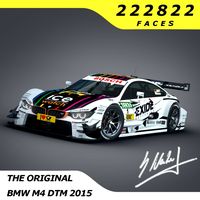
BMW M4 DTM 2014 - 2015 3D Model
...rmany german motorsport europa fia 2014 2015 tourenwagen touring sportcar
bmw m4 dtm 2014 - 2015 3d model neubi3d 100820 3dexport
Nerys
3ddd
free

Neri
... фонарь
уличный фонарь фирмы neri
моделился по спецификации (есть на рендере)
текстуры в ахиве.
25 700 полигонов.
3ddd
free
Technolux Neri
...technolux neri
3ddd
technolux
technolux neri
3ddd
free
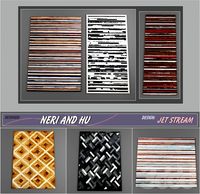
NERI AND HU
...neri and hu
3ddd
ковер
ковры ручной работы дизайнеров neri and hu
серия jet stream
3ddd
$1
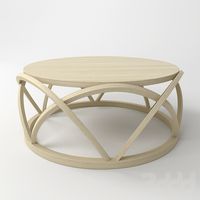
стол neri & ho
...стол neri & ho
3ddd
neri & ho
стол neri & ho
turbosquid
$12

Nerys Sheepskin Footstool
...d model nerys sheepskin footstool for download as max and fbx on turbosquid: 3d models for games, architecture, videos. (1256019)
3ddd
$1
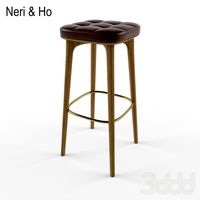
Neri & Ho
...
глубина (см): 36,2
материал каркаса: орех американский
материал обивки: кожа
все материалы и текстуры имею уникальные названия.
3ddd
$1
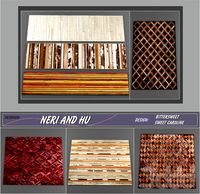
NERI AND HU часть 2
...neri and hu часть 2
3ddd
ковры
ковры ручной работы дизайнеров neri and hu
серия bittersweet и sweet caroline
turbosquid
free

NERY&HU Armchair
... available on turbo squid, the world's leading provider of digital 3d models for visualization, films, television, and games.
3ddd
$1
Neri & Hu Platform Sofa
...кстуры.
вес 236 000 полигонов
сайтhttp://www.thefutureperfect.com/designer/neri-hu/platform-sofa.html
размеры 230х92см
3ddd
$1

Табурет Neri & Ho
... nori & ho
табурет от neri & ho
материал : дерево, кожа
размеры : w 350 x d 350 x h 460 mm
Approved
3d_export
$30

Stamp 3D Model
...stamp invoice wooden handle office supply tool ink stamper approved documents letter form paper stamp 3d model tartino 27989...
cg_studio
$30

Stamp3d model
...rubber stamp invoice wooden handle supply tool ink stamper approved documents letter form paper .3ds .c4d .dxf .obj -...
3d_ocean
$12

Pumpkin Package
... stability and has earned the aethereal studios game ready stamp of approval. the autumn pumpkin package is optimized for both...
3ddd
$1
FREDERICIA FURNITURE 3Seats sofa No.1
...ard fabrics according to current price list. customer specified fabrics (com) upon factory approval.
dimensions in cm
206х86х83
3d_ocean
$9
Catwalk for structures
...for structures, heavy duty, aisc 360 and can/csa 16 approved used in mine plants and construction infrastructure, scale 1:1,...
3ddd
$1
FREDERICIA FURNITURE 2Seats sofa No.1
...rd fabrics according to current price list. customer specified fabrics (com) upon factory approval.
dimensions in cm
143x86x 83
3d_ocean
$8

Adidas Conext15 Official match ball
...adidas conext15 official match ball 3docean adidas approved ball brazuca conext conext15 field fifa football goal match...
3d_ocean
$8

Adidas Finale 2014/2015 Champions League Ball
...adidas finale 2014/2015 champions league ball 3docean adidas approved ball champions fifa finale football goal league net score...
3d_ocean
$8

Adidas Finale Berlin 2015
...adidas finale berlin 2015 3docean adidas approved ball berlin champions fifa final finale football goal league...
3d_ocean
$8
Puma evoPower 1 Statement and Statement 15
...puma evopower 1 statement and statement 15 3docean approved ball evo evopower fifa football goal kick official power...
V3
3d_export
$5

Poison-v3
...poison-v3
3dexport
poison-v3
3ddd
$1

Curtain v3
...curtain v3
3ddd
полупрозрачная штора v3
turbosquid
free
v3
... available on turbo squid, the world's leading provider of digital 3d models for visualization, films, television, and games.
3d_export
$5
potato v3
...potato v3
3dexport
turbosquid
$69

Skeletor v3
...royalty free 3d model skeletor v3 for download as ztl and obj on turbosquid: 3d models for games, architecture, videos. (1712713)
turbosquid
$49
Zombie v3
...
royalty free 3d model zombie v3 for download as obj and ztl on turbosquid: 3d models for games, architecture, videos. (1342458)
turbosquid
$2

Bitcoin v3
...
royalty free 3d model bitcoin v3 for download as c4d and prj on turbosquid: 3d models for games, architecture, videos. (1182845)
turbosquid
$29
Turret V3
...alty free 3d model turret v3 for download as ma, obj, and fbx on turbosquid: 3d models for games, architecture, videos. (1217498)
turbosquid
$20
Radiators v3
... free 3d model radiators v3 for download as max, max, and obj on turbosquid: 3d models for games, architecture, videos. (1607437)
turbosquid
$10
Wheel V3S
...e 3d model wheel v3s for download as 3ds, obj, fbx, and blend on turbosquid: 3d models for games, architecture, videos. (1344250)
Spiralize
3ddd
$1
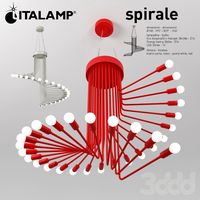
italamp spirale
...italamp spirale
3ddd
italamp , spirale
italamp spirale
3ddd
free
Verpan / Spiral
...verpan / spiral
3ddd
spiral , verpan
verpan люстра spiral
3d_export
free

Spiral staircase
...spiral staircase
3dexport
spiral staircase
turbosquid
$5

Spiral
...quid
royalty free 3d model spiral for download as and sldpr on turbosquid: 3d models for games, architecture, videos. (1214311)
3d_export
$5

Spiral lamp
...spiral lamp
3dexport
spiral lamp in modern style.
turbosquid
$59

Spiralizer
... available on turbo squid, the world's leading provider of digital 3d models for visualization, films, television, and games.
3d_ocean
$4
Spiral stairs
...spiral stairs
3docean
spiral stairs
spiral stairs 270 cm high inner radius 40 cm outer radius 120 cm
3d_export
$5

Spiral stairs
...spiral stairs
3dexport
spiral stairs<br>.blend
3d_export
$9

vdb spiral
...vdb spiral
3dexport
vdb spiral with different resolutions: low, middle and high
3d_ocean
$17
Spiral staircase
...uble handle handrail interior lux luxury metal modern open stairs realistic render spiral stair staircase stairs
spiral staircase
Shield
3d_export
$5
shield
...shield
3dexport
shield
3d_export
$5
Shield
...shield
3dexport
shield and a spear
3d_ocean
$6
Shield
...shield
3docean
game shield low polygon mei evil shild old shield shield
2048 texture obj,fbx,blend game ready.
3d_export
$5

Shield
...shield
3dexport
a shield that hasn't been made of materials will be available to everyone
3d_ocean
$4
Round Shield
...round shield
3docean
ancient battle fantasy knight medieval shield shields warrior
nice model of round shield.
3d_export
free
metal shield
...metal shield
3dexport
russian metal shield - anti-riot shield.
3d_export
$5

shield
...shield
3dexport
old shield, damaged and covered in mold. every file have a zip folder in with textures.
turbosquid
free

Shield
...shield
turbosquid
free 3d model shield for download as c4d on turbosquid: 3d models for games, architecture, videos. (1164800)
3d_export
$5
fire shield
...fire shield
3dexport
fire shield
turbosquid
$10

SHIELD
...
turbosquid
royalty free 3d model shield for download as obj on turbosquid: 3d models for games, architecture, videos. (1273553)
Vase
turbosquid
$9

vases vase
...bosquid
royalty free 3d model vases vase for download as max on turbosquid: 3d models for games, architecture, videos. (1171666)
3d_ocean
$3

Vase
...s ceramic vase editable vase vase
3d model vase that you can modify easily by moving the shapes. created in 3ds max 2014 version.
archibase_planet
free

Vase
... planet
vase vase with flowers flowers roses vase with roses
vase roses n110413 - 3d model (*.3ds) for interior 3d visualization.
3d_export
$5
vase
...vase
3dexport
vase
3d_export
$5
vase
...vase
3dexport
vase
3d_export
$5

vase
...vase
3dexport
vase
3d_export
$5

Vase
...vase
3dexport
vase
3ddd
$1
vase
...vase
3ddd
vase
3ddd
$1
Vase
...vase
3ddd
vase
3ddd
free
Vase
...vase
3ddd
vase
0
turbosquid
$12

Calligraphic Digit 0 Number 0
...hic digit 0 number 0 for download as max, obj, fbx, and blend on turbosquid: 3d models for games, architecture, videos. (1389318)
3d_export
$6

set-0
...set-0
3dexport
turbosquid
$6

hedge 0
...yalty free 3d model hedge 0 for download as max, obj, and fbx on turbosquid: 3d models for games, architecture, videos. (1450353)
turbosquid
$5

Nuber 0
...oyalty free 3d model nuber 0 for download as ma, obj, and fbx on turbosquid: 3d models for games, architecture, videos. (1564674)
turbosquid
$22

0.jpg
... available on turbo squid, the world's leading provider of digital 3d models for visualization, films, television, and games.
turbosquid
free

Steam Locomotive Fowler 4F 0-6-0
... available on turbo squid, the world's leading provider of digital 3d models for visualization, films, television, and games.
turbosquid
$10

Liquid Number 0
... model liquid number 0 for download as c4d, 3ds, fbx, and obj on turbosquid: 3d models for games, architecture, videos. (1689919)
turbosquid
$45

Dragon360_perspShape_tmp.0.jpg
... available on turbo squid, the world's leading provider of digital 3d models for visualization, films, television, and games.
turbosquid
$8

Rocks Debris 0
... available on turbo squid, the world's leading provider of digital 3d models for visualization, films, television, and games.
3d_export
$18

wood-guardrail-fence 0
...wood-guardrail-fence 0
3dexport
wood-guardrail-fence 0<br>3ds max 2015
Remix
turbosquid
$5

MODA Collection Remix Chair
... available on turbo squid, the world's leading provider of digital 3d models for visualization, films, television, and games.
3d_export
$12

remix yamaha rm1x
...remix yamaha rm1x
3dexport
geometry triangles 15.2k vertices 7.6k pbr no textures 1 materials 1 uv layers yes
3d_ocean
$5

Vray fabric Kvadrat remix green - tileable
...th vray and 3dsmax. high-resolution texture images (2000×2000 px) file included: shader vray 2.40 texture image 3ds max 2011 file
turbosquid
$20

Gerrit Rietveld 1938 Zig Zag Chair Remix
... available on turbo squid, the world's leading provider of digital 3d models for visualization, films, television, and games.
3d_export
$10

multicolored remix parametric table furniture
... fbx, obj, mtl, archive with textures. the model has no glitches. render and materials - vray . without using plugins. good use!
3ddd
$1

Barovier&Toso / Manhattan Remix 7192
... 004293-142405
в коллекции есть люстры 7, 9, 12 рожковые. диаметр соответственный 1000, 1250, 1500 мм.
3ddd
$1

Muuto fiber chair
...grey/grey, dusty green/dusty green, nature/oak, natural white/oak upholstery options remix 183/black, remix 133/grey, remix 643/dusty red leather options black...
3ddd
$1

Barovier&Toso 7190-7195
...7190-7195 3ddd barovier&toso потолочнай люстра фабрики barovier&toso;, коллекция manhattan remix артикул 7190-7195. размеры в inches: 39"...
3d_export
$5

3D Locking Handle Weatherproof Storage Box Container
...handle weatherproof storage box container 3dexport new, improved and remixd! no screws required. print-in-place. weatherproof. parametric. 2 parts. easy...
cg_studio
$49

HTC One Mini 2 Amber Gold3d model
...cell phone mobile cellular super lcd touchscreen touch screen remix amber gold .max .obj .mb .lwo .fbx .c4d .3ds...
Face
turbosquid
$100
face a face
... available on turbo squid, the world's leading provider of digital 3d models for visualization, films, television, and games.
turbosquid
$6
Face To Face Swing
... available on turbo squid, the world's leading provider of digital 3d models for visualization, films, television, and games.
3ddd
$1
Almerich Face to Face
... гибкостью материала, прозрачностью и тактом, чтобы создавать игры со светом и тенью.
размеры: 48 x 48 x 155 см
полигоны: 39 376
design_connected
$11
Face
...face
designconnected
montis face chairs computer generated 3d model. designed by gerard van den berg.
turbosquid
$15
Face
...ce
turbosquid
royalty free 3d model face for download as mud on turbosquid: 3d models for games, architecture, videos. (1178369)
turbosquid
$6
Face
...ce
turbosquid
royalty free 3d model face for download as max on turbosquid: 3d models for games, architecture, videos. (1409756)
turbosquid
$1
Face
...uid
royalty free 3d model face for download as obj and blend on turbosquid: 3d models for games, architecture, videos. (1288500)
turbosquid
$150

Face
... available on turbo squid, the world's leading provider of digital 3d models for visualization, films, television, and games.
turbosquid
$50

face
... available on turbo squid, the world's leading provider of digital 3d models for visualization, films, television, and games.
turbosquid
$15

Face
... available on turbo squid, the world's leading provider of digital 3d models for visualization, films, television, and games.
Printing
design_connected
$27

...print
designconnected
moroso print computer generated 3d model. designed by wanders, marcel.
3ddd
free

Eichholtz Prints
...- eichholtz print central station i
13 - eichholtz print central station ii
14 - eichholtz print marisa
15 - eichholtz print tish
3ddd
$1

Eichholtz Prints
...print abstract - set of 2
10 - eichholtz print orange abstract
11 - eichholtz print buddha right
12 - eichholtz print buddha left
turbosquid
$1

... available on turbo squid, the world's leading provider of digital 3d models for visualization, films, television, and games.
3ddd
free

Eichholtz Prints
...of 4
2 - print dunbar 2 set of 4
3 - print guadeloupe 1 set of 4
4 - print guadeloupe 2 set of 4
5 - print giles
6 - print trett
3ddd
$1

Eichholtz Prints
...nt tutti frutti
3 - eichholtz prints watson - set of 2
4 - eichholtz prints antique nautilus - set of 2
5 - eichholtz print tiara
3d_export
$5

Monster for printing
...monster for printing
3dexport
monster 3d model printing
3ddd
free

printed rug
...printed rug
3ddd
ковер
very creative printed rug
3ddd
free

Eichholtz Prints
...иал: бумага
габариты (вхш): 72 x 62 см
описание: print sweetmeat - постер в деревянной раме.
3 - prints varsity set of 2
арти
3ddd
free

Art Print Posters
...art print posters
3ddd
прованс
art print posters by patrician prints