Thingiverse
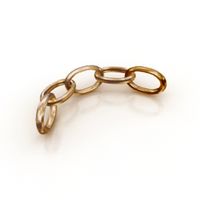
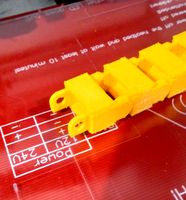
(remix 2021) Prusa Mini Cable Chains (x-axis, headbed) by vasilyd
by Thingiverse
Last crawled date: 3 years ago
I'm very greatfull to @Autotilt for the original model.
Thus, while printing and assembling thin parts broke (heatbed mount, x-axis low mount, x-axis upper mount). I improved those, the present remix is FULL. It includes some orig.parts and new if needed (marked with names xxx_V2.stl).
Improvements
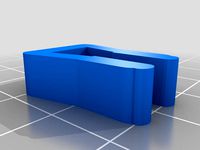
1) 04_-_x-axis_LowerMount V2.stl (stronger attachment to both: chain and vertical profile)
2) 01-_x-axis_Motor_Mountp2 V2.stl (shorted 2mm, it was touching vertical rail)
3) 06-_heatbedCover V2.stl 06-_heatbedCover V2.stl (stronger attachment to the chain)
4) 07-_heatbed_Mount V2.stl (stronger attachment to the chain)
5) updated printing instructions
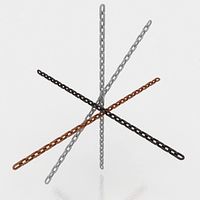
6) added 1 more chain-parts into each axis, it is bending nicer on the extreme extension
7) I include .3mf files for Prusa Mini (it includes sequential printing)
8) changed orig filenames from z-axis to corrent x-axis :))))
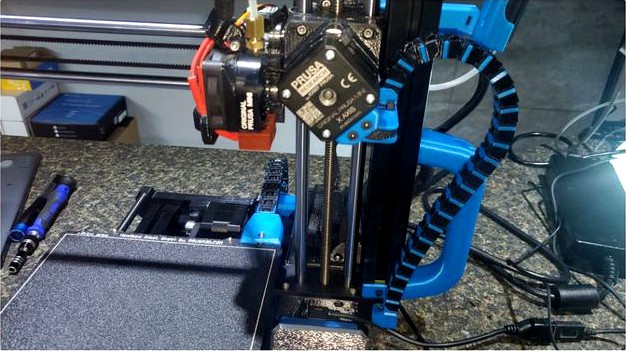
Cable Chain Setup for Prusa Mini x-axis and the heatbed.
This has some other prints remixed in it.
Prusa i3 MK3 Cable Chain Add-on (ALL AXIS)https://www.thingiverse.com/thing:2862375
X Stepper sleeve wire clamphttps://www.prusaprinters.org/prints/3436-x-stepper-sleeve-wire-clamp
The default heatbed cover from Prusa
Print Instructions
Additional Parts:
3 - Small Zipties
3 - m3*10 Bolts
3 - m3 nuts
Print one each of parts 1-8
24 each - part 9 for the x axis
25 each - part 10 for the x axis
16 each - part 9 for the Heatbed
17 each - part 10 for the Heatbed
(Advice: print few more part-10 elements - they break easily while assembled)
PLA or PETG work great.
0.20 Layer height.
15% infill.
No support needed
All parts are pre-oriented for printing.
sequential prints (see attached .3mf files)
IMPORTANT: print chain elements (part-10) into 10 pcs batches, and than sequentially. If print all 40 pcs they warping and detaching from the table - you loose very long print.
X-AXIS:
Remove electronics covers on the MINI and reroute x-axis wires under the frame. Slight cutting away of the electronics case will probably be necessary for cleanest look.
Place 2 nuts into part 1.
Ziptie part 1 to the x-axis motor.
Bolt part 3 to part 1 with the cable between them.
Place part 2 against part 1, route cable and ziptie part 2 and cable to part 1.
Place nut in t-nut, slide into bottom of x-axis frame, loosely bolt part 4 and route cable through.
Add x-axis Chain and clip parts starting from the motor side.
Tighten bolt on part 4.
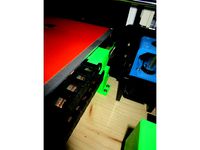
HEATBED:
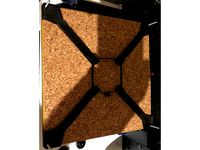
Replace bed cover with part 6.
Unplug heatbed wires and reroute through y-axis wire hole.
Add 15 chain and clip pieces starting from the headbed side.
Place part 8 Adapter on heatbed cables and snap into part 7 Mount with the adapter open end Up.
Some finagling may be necessary to get the cable length correct.
Attach part 7 mount to frame with the y-axis motor cables between the mount and the frame.
Reconnect heatbed and replace electronics cover.
Thus, while printing and assembling thin parts broke (heatbed mount, x-axis low mount, x-axis upper mount). I improved those, the present remix is FULL. It includes some orig.parts and new if needed (marked with names xxx_V2.stl).
Improvements
1) 04_-_x-axis_LowerMount V2.stl (stronger attachment to both: chain and vertical profile)
2) 01-_x-axis_Motor_Mountp2 V2.stl (shorted 2mm, it was touching vertical rail)
3) 06-_heatbedCover V2.stl 06-_heatbedCover V2.stl (stronger attachment to the chain)
4) 07-_heatbed_Mount V2.stl (stronger attachment to the chain)
5) updated printing instructions
6) added 1 more chain-parts into each axis, it is bending nicer on the extreme extension
7) I include .3mf files for Prusa Mini (it includes sequential printing)
8) changed orig filenames from z-axis to corrent x-axis :))))
Cable Chain Setup for Prusa Mini x-axis and the heatbed.
This has some other prints remixed in it.
Prusa i3 MK3 Cable Chain Add-on (ALL AXIS)https://www.thingiverse.com/thing:2862375
X Stepper sleeve wire clamphttps://www.prusaprinters.org/prints/3436-x-stepper-sleeve-wire-clamp
The default heatbed cover from Prusa
Print Instructions
Additional Parts:
3 - Small Zipties
3 - m3*10 Bolts
3 - m3 nuts
Print one each of parts 1-8
24 each - part 9 for the x axis
25 each - part 10 for the x axis
16 each - part 9 for the Heatbed
17 each - part 10 for the Heatbed
(Advice: print few more part-10 elements - they break easily while assembled)
PLA or PETG work great.
0.20 Layer height.
15% infill.
No support needed
All parts are pre-oriented for printing.
sequential prints (see attached .3mf files)
IMPORTANT: print chain elements (part-10) into 10 pcs batches, and than sequentially. If print all 40 pcs they warping and detaching from the table - you loose very long print.
X-AXIS:
Remove electronics covers on the MINI and reroute x-axis wires under the frame. Slight cutting away of the electronics case will probably be necessary for cleanest look.
Place 2 nuts into part 1.
Ziptie part 1 to the x-axis motor.
Bolt part 3 to part 1 with the cable between them.
Place part 2 against part 1, route cable and ziptie part 2 and cable to part 1.
Place nut in t-nut, slide into bottom of x-axis frame, loosely bolt part 4 and route cable through.
Add x-axis Chain and clip parts starting from the motor side.
Tighten bolt on part 4.
HEATBED:
Replace bed cover with part 6.
Unplug heatbed wires and reroute through y-axis wire hole.
Add 15 chain and clip pieces starting from the headbed side.
Place part 8 Adapter on heatbed cables and snap into part 7 Mount with the adapter open end Up.
Some finagling may be necessary to get the cable length correct.
Attach part 7 mount to frame with the y-axis motor cables between the mount and the frame.
Reconnect heatbed and replace electronics cover.
Similar models
thingiverse
free

Prusa Mini Cable Chains (z-axis, headbed) by Autotilt
...t 7 mount to frame with the y-axis motor cables between the mount and the frame.
reconnect heatbed and replace electronics cover.
thingiverse
free

Ender 3 Cable Chain
...without support.
15 links for heatbed.
10 links (or more) for x gantry.
please share your make, thank you.
[10:07 pm 2018-05-19]
thingiverse
free

Prusa Mini Raspberry PI Fisheye Camera X-Axis Mount by nad_22
...nice view on e.g.octoprint of the headbed.
i also added some basic cable clips to moutn the ffc cable to the x-axis motors cable
thingiverse
free

Prusa Mini X Axis Cable Chain and Mounts by Djkirkendall
...he chain housing.
it has a slight uphill angle to account for wear and time. this can be printed in pla and at 15% infill
enjoy!
thingiverse
free

i3 Cable Chain Mounts by JBFromOZ
...ttachment for i3 cable ducts, allows for neat wiring to the x and z carriages, with single axis cable chain motion for all wiring
thingiverse
free

Geeetech Aluminum Prusa i3 - Cable Chain Mounts by gsimpson2g
...tp://www.thingiverse.com/thing:11978 to easily be mounted on the geeetech aluminum prusa i3 extruder and x-axis end stop switch.
thingiverse
free

Bear Prusa heatbed cable chain mount by bombel82
.../www.aliexpress.com/i/32996244646.html, u need about 40cm of it.
for attaching to frame - m5x8, or m5x10 can be used with t-nuts.
thingiverse
free

Fan v2, Cable and filament Chain Mounts for Prusa I3 parts by ch1t0
...i3 parts by ch1t0
thingiverse
cable, fan v2 and filament chain mounts for prusa i3 parts http://www.thingiverse.com/thing:76660
thingiverse
free
Heatbed Chain Holder by da4id
...ts to remake it.
https://cad.onshape.com/documents/c89476dd401a4ea502fc63df/w/73516d51b5bbf27855e9a88a/e/7fdfdfc5678afc581eee7060
thingiverse
free

X-Axis Wiring Chain by Brraapp511
...agement holes for zipties.
hope you guys can make use of it.
im waiting to print it myself. will post pics once part is printed.
Vasilyd
thingiverse
free

Celtic ring by vasilyd
...celtic ring by vasilyd
thingiverse
printed with bronze filament, no support needed, 0.18 layer, 60mm speed.
thingiverse
free

ONA jew - brand logo by vasilyd
...ona jew - brand logo by vasilyd
thingiverse
ona jew - brand logos
thingiverse
free

Crank Arm 2 (small) by vasilyd
...for details and purpose.
you will be surprised that it is not a pure mechanics model :-)
http://www.thingiverse.com/thing:1167051
thingiverse
free

Celtic node 3D, coffee/tea pad by vasilyd
...celtic node 3d, coffee/tea pad by vasilyd
thingiverse
printed with bronze filament, very nice after little polishing.
thingiverse
free

Hexagon twisted sculpture base by vasilyd
...not needed, but slower print is suggested and with the continuous fan on, otherwise let filament drips when printing upper edges.
thingiverse
free
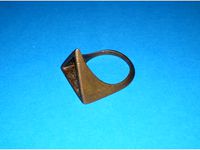
triange designer ring by vasilyd
...0mm speed.
it was polished nice and applied some opaque gold paint.
inspired by other well known designs, but did my own version.
thingiverse
free

3DD / Nunus Filament Clip (with handle) by vasilyd
...iginal clip from http://www.thingiverse.com/thing:42528 with my nails.
i have added a simple handle to the clip - now it is easy.
thingiverse
free
Raspberry PI Camera Rev 2.0 module by vasilyd
...s with several components.
fill free to use and enhance.
p.s. strange box on a side this is the external connector of the module.
thingiverse
free

Arduino - 4 digit display HW-069 by vasilyd
... with several components.
fill free to use and enchance.
p.s. strange box on a side this is the external connector of the module.
thingiverse
free

Forcola, gondola, Venezia by vasilyd
...(best link if you are familiar with 3d design and wanna make it :-) )
let work on getting more of those beautiful staff here :-)
Headbed
thingiverse
free

headB by sirchaos17
...headb by sirchaos17
thingiverse
headb by mike [created on 3dtin]
thingiverse
free

C270 Cammount for Headbed Holder
...c270 cammount for headbed holder
thingiverse
cameramount for headbed holder 3,5mm
thingiverse
free

HeadBed Tuerca 8mm by peslatino
...headbed tuerca 8mm by peslatino
thingiverse
para utilizar con tuerca 8mm y espacio salida de tornillo de 3mm.
thingiverse
free

i3 Mega headbed cork insulation holder revised by meistertlow
...sulation holder revised by meistertlow
thingiverse
revised version of https://www.thingiverse.com/thing:4680951, easier to print
thingiverse
free
Heizbett Klammer / Headbed Clip by Lucifor
...n können, 7mm breit, 6 stück davon, je drei pro seite und ggf hinten 4 dann sollte die glasplatte deutlich besser am bett sitzen.
thingiverse
free

Heizbett Level Hilfe / Headbed Level Helper by Lucifor
...es druckens gelevelt werden kann. druck von aussen nach innen. unbedingt ohne brim und skirt drucken! druck mit 10mm pro sekunde!
thingiverse
free
i3 Mega headbed cork insulation holder by meistertlow
...inted mounting holes need to be drilled to 3.5mm to fit the heatbed screws.
inspired by https://www.thingiverse.com/thing:2753110
thingiverse
free

Kossel- MicromakeDelta - HeatBedHolder by srini91
...kossel- micromakedelta - heatbedholder by srini91 thingiverse headbed holder and leveler for micromake delta...
thingiverse
free
G2S / Delta Heatbed Calibration Test by TeeZee
...is a simple test object to check if the headbed is aligned correctly....
thingiverse
free
Prusa Mini Cable Chains (z-axis, headbed) by Autotilt
...t 7 mount to frame with the y-axis motor cables between the mount and the frame.
reconnect heatbed and replace electronics cover.
2021
turbosquid
$15

Human-2021
...turbosquid
royalty free 3d model human-2021 for download as on turbosquid: 3d models for games, architecture, videos. (1175117)
3d_export
$26

Peugeot 208 2021
...peugeot 208 2021
3dexport
peugeot 208 2021 low poly version
turbosquid
$1

Present 2021
...y free 3d model present 2021 for download as ma, fbx, and obj on turbosquid: 3d models for games, architecture, videos. (1673576)
3d_export
$26

Shelby GT500 2021
...shelby gt500 2021
3dexport
shelby gt500 2021 low poly version with interior
3d_export
free

stone 2021
...stone 2021
3dexport
subscribe to my youtube channel:
3d_export
$8

imac 2021
... magic mouse and magic keyboard with pbr textures in the colors of the set. includes model in fbx and obj. does not include hdri.
3d_export
$10

racing 2021
...racing 2021
3dexport
c4d , v ray<br>3d environment
turbosquid
$3
2021 style armchair
... 2021 style armchair for download as blend, fbx, obj, and stl on turbosquid: 3d models for games, architecture, videos. (1694756)
turbosquid
free

New Year 2021
...del new year 2021 for download as c4d, obj, fbx, dae, and 3ds on turbosquid: 3d models for games, architecture, videos. (1547633)
3d_export
$7

Computer Huawei matebook D15 2021
...computer huawei matebook d15 2021
3dexport
computer huawei matebook d15 2021
Prusa
turbosquid
$2

Frame Filament Guide Clip-On for Prusa Mk3
...rame filament guide clip-on for prusa mk3 for download as stl on turbosquid: 3d models for games, architecture, videos. (1634730)
3d_export
free

prusa i3 mk3s laser mount for opt lasers
...to learn more about the blue laser technology that conceived the cutting and engraving laser heads from opt lasers, please visit:
turbosquid
free

Prusa small printer adapter holder
...er for download as ipt, skp, dwg, dxf, fbx, ige, obj, and stl on turbosquid: 3d models for games, architecture, videos. (1642936)
3d_export
$30

geisha by jonathan adler
...** i did a 3d printing test in the prusa software, you can find it among the attached images.<br>exchange:<br>.blend...
thingiverse
free

Prusa without Prusa (rc2) by madless
...prusa without prusa (rc2) by madless
thingiverse
just the main part of prusa rc2 faceshield, without writing.
enjoy :)
thingiverse
free

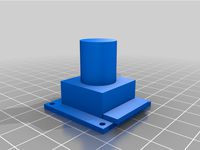
Prusa by acejbc
...prusa by acejbc
thingiverse
prusa knob info
m3 8mm screw
thingiverse
free

Prusa house
...prusa house
thingiverse
how prusa house could look like...
thingiverse
free

Prusa Mk2 "Fake Prusa" LCD cover by anraf1001
...r by anraf1001
thingiverse
version of prusa's lcd cover with "fake prusa" instead of "original prusa"
thingiverse
free

Prusa stabilizator by gutiueugen
...prusa stabilizator by gutiueugen
thingiverse
prusa stabilizator
thingiverse
free

Keychain Prusa by rbarbalho
...keychain prusa by rbarbalho
thingiverse
keychain with text prusa.
Axis
3ddd
$1

Мария Axis
...
3ddd
кухня , классическая , axis
модель кухни.
3d_export
$22

Axis robot 6-axis robotic arm
...ing parts drawings, standard parts purchased parts list, can be produced directly according to the drawings, welcome to download!
3ddd
free

Versatile Axis
...ddd
nexus , плитка
http://bvtileandstone.com/ceramic-porcelain/versatile-axis/
3d_export
$19

robot 2 axis
...robot 2 axis
3dexport
robot 2 axis
turbosquid
$40

Axis R5F
... available on turbo squid, the world's leading provider of digital 3d models for visualization, films, television, and games.
turbosquid
$40

Axis S5F
... available on turbo squid, the world's leading provider of digital 3d models for visualization, films, television, and games.
turbosquid
$30

Axis Athlon
... available on turbo squid, the world's leading provider of digital 3d models for visualization, films, television, and games.
turbosquid
$10

Linear Axis
... available on turbo squid, the world's leading provider of digital 3d models for visualization, films, television, and games.
3d_export
$15

drawing axis
...drawing axis
3dexport
simple rendering of the scene file
3ddd
$1

versatile axis ARC
...versatile axis arc
3ddd
versatile , плитка
versatile axis arc red dot design award
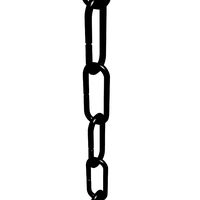
Chains
archibase_planet
free
Chain
...chain
archibase planet
chain chain link chain loop
chain n020708 - 3d model (*.gsm+*.3ds) for interior 3d visualization.
3d_export
$5
chain
...chain
3dexport
3d model chain
3d_export
$5
chain
...chain
3dexport
chain. obj,fbx,blend
archibase_planet
free

Chain
...se planet
chain circuit catena
chain - archicad parametrical gdl 3d model (*.gsm). regulation of the length, curvature and angle.
archibase_planet
free
Chain
...n
archibase planet
chain circuit catena
chain - archicad parametrical gdl 3d model(*.gsm). regulation of the length and angle xyz
3d_ocean
$5
Chain
...chain
3docean
3d models chain design elements
3d models, design elements
3d_ocean
$5

Chain
...chain
3docean
3d models chain design elements
3d models, design elements
turbosquid
$10
Chain
...hain
turbosquid
royalty free 3d model chain for download as on turbosquid: 3d models for games, architecture, videos. (1329200)
turbosquid
$9

chain
...hain
turbosquid
royalty free 3d model chain for download as on turbosquid: 3d models for games, architecture, videos. (1549461)
turbosquid
$2
Chain
...hain
turbosquid
royalty free 3d model chain for download as on turbosquid: 3d models for games, architecture, videos. (1148668)
Cable
3d_export
free

Cables
...cables
3dexport
cables for your purposes
3d_export
free
cable belt for cable organization
...ze your cables in 3d printers. it will bend only to one direction. the area to put the cables per piece is aprox. 1,6cmx2,6cmx1cm
3d_ocean
$16
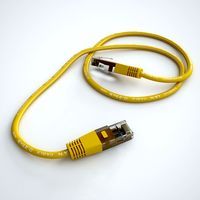
Ethernet Cable
...ethernet cable
3docean
cable computer electronics ethernet internet network connected
ethernet cable 3d model
3d_export
$65

cable
...cable
3dexport
simple rendering of the scene file
turbosquid
$14

Cable
...l cable for download as ma, max, fbx, 3ds, gltf, obj, and stl on turbosquid: 3d models for games, architecture, videos. (1631358)
3ddd
$1
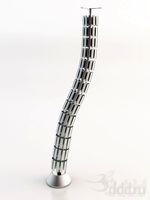
Cable Cover
...cable cover
3ddd
кабель
vertebra passacavo - cable cover
max + vray 2.20.03
3d_export
$15
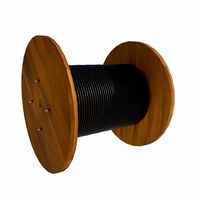
Cable reel
...without cable. textures 4k 4096x4096 targa, png, jpeg.<br>number of polygons without cable: 2896<br>with cable: 35328
3d_export
$7

short cable
...short cable
3dexport
rubber cord. very detailed. cable thickness: 2.55 mm total length: 55mm
3d_export
$5

USB CABLE
...usb cable
3dexport
turbosquid
$25
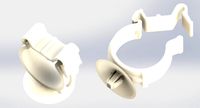
cable clip
...squid
royalty free 3d model cable clip for download as sldpr on turbosquid: 3d models for games, architecture, videos. (1232374)
Mini
turbosquid
$10

Mini Mini Luceplan
...
royalty free 3d model mini mini luceplan for download as max on turbosquid: 3d models for games, architecture, videos. (1227359)
3d_ocean
$39

Mini Cooper
...mini cooper
3docean
cabrioler cooper mini
mini cooper cabrioler
3d_export
$30

Mini lathe
...mini lathe
3dexport
mini lathe
3d_export
$5

mini mouse
...mini mouse
3dexport
mini mouse
3d_export
$5

mini house
...mini house
3dexport
mini house
3d_export
free

Mini Mecha
...mini mecha
3dexport
concept of mini mecha
3d_ocean
$20

Mini Gun
...mini gun
3docean
gatling gun gun machine gun mini gun weapon
model of a mini gatling gun.
3ddd
free

Herve mini
... кофейный , herve
http://www.mobiliavenanti.it/ru/products/hervè-mini
3d_export
$5

mini wall
...mini wall
3dexport
mini wall for living room
3d_export
$5

mini bank
...mini bank
3dexport
mini bank 3d model
Remix
turbosquid
$5

MODA Collection Remix Chair
... available on turbo squid, the world's leading provider of digital 3d models for visualization, films, television, and games.
3d_export
$12

remix yamaha rm1x
...remix yamaha rm1x
3dexport
geometry triangles 15.2k vertices 7.6k pbr no textures 1 materials 1 uv layers yes
3d_ocean
$5

Vray fabric Kvadrat remix green - tileable
...th vray and 3dsmax. high-resolution texture images (2000×2000 px) file included: shader vray 2.40 texture image 3ds max 2011 file
3d_export
$10

multicolored remix parametric table furniture
... fbx, obj, mtl, archive with textures. the model has no glitches. render and materials - vray . without using plugins. good use!
3ddd
$1

Barovier&Toso / Manhattan Remix 7192
... 004293-142405
в коллекции есть люстры 7, 9, 12 рожковые. диаметр соответственный 1000, 1250, 1500 мм.
3ddd
$1

Muuto fiber chair
...grey/grey, dusty green/dusty green, nature/oak, natural white/oak upholstery options remix 183/black, remix 133/grey, remix 643/dusty red leather options black...
3ddd
$1

Barovier&Toso 7190-7195
...7190-7195 3ddd barovier&toso потолочнай люстра фабрики barovier&toso;, коллекция manhattan remix артикул 7190-7195. размеры в inches: 39"...
3d_export
$5

3D Locking Handle Weatherproof Storage Box Container
...handle weatherproof storage box container 3dexport new, improved and remixd! no screws required. print-in-place. weatherproof. parametric. 2 parts. easy...
cg_studio
$49

HTC One Mini 2 Amber Gold3d model
...cell phone mobile cellular super lcd touchscreen touch screen remix amber gold .max .obj .mb .lwo .fbx .c4d .3ds...
cg_studio
$49
HTC One Mini 2 Gunmetal Gray3d model
...cell phone mobile cellular super lcd touchscreen touch screen remix gunmetal grey silver .max .obj .mb .lwo .fbx .c4d...