Thingiverse
Reinforcement brackets for Creality CR-10 / CR-10S / Mini by Ludomante
by Thingiverse
Last crawled date: 3 years ago
ENGLISH
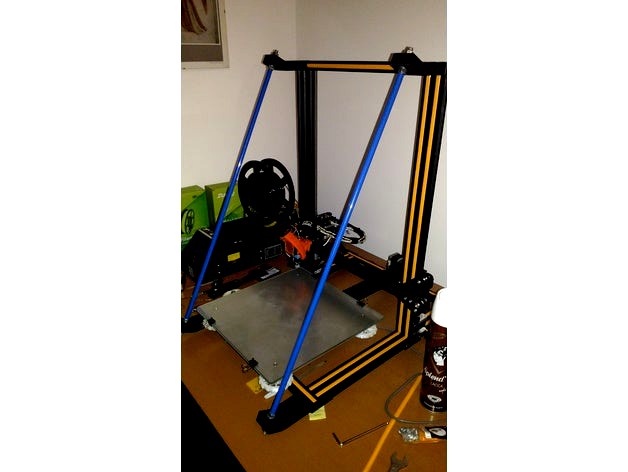
I had been thinking about doing Z-axis reinforcements for my Creality CR-10S printer for a while, but I could not find anything that would work for my hotend group. The problem was of course the height that I could have missed because the changes made have greatly increased its size (MicroSwiss, BLTouch, fangs). So I designed the whole thing with Autodesk Fusion 360 in order to still have the maximum travel on the Z axis available on the machine and with the fewest possible number of pieces. The material I used for printing is the Sunlu PET-G. I love this material! I printed it at 240 ° C with a bed at 60 ° C and a 50% fan. However, these brackets can also be made with PLA or ABS. All you need is described below:
Filament (of course!)
2 threaded bars diameter 8 mm. and 690 mm. in length (on the market you can find them from 1 meter and then equip yourself with a hacksaw to cut them)
8 M8 nuts and 8 washers
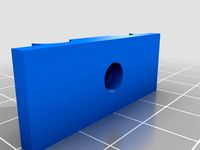
4 M5 Allen screws 60 mm long (with the head) to replace those already installed on the machine
2x605 mm. of flexible tube 10x1 RILSAN PA11 DIN 73378/74324 PHL of the color you like best to coat the threaded rods (optional).
That's all!
For the two upper brackets make sure you have a correct STEP / MM ratio. The dovetail joints must be very precise if you want them to stay still. If you find it hard to get into the throat, do not be afraid! With a small file or a cutter (careful not to cut yourself!) You can correct any smudging.
Some may say that these brackets are cumbersome, especially in front, but I did so because in this way they go to protect the entire bed when the Y axis is at its maximum excursion. In addition, they leave me plenty of space to be able to conveniently remove my prints.
If you like it and build it, thank you for your photos and your comments.
ITALIANO
Da un po' di tempo pensavo di fare dei rinforzi per l'asse Z della mia stampante Creality CR-10S ma non riuscivo a trovare qualcosa che potesse andare bene per il mio gruppo hotend. Il problema era naturalmente l'altezza che avrei potuto perdere visto che le modifiche fatte hanno notevolmente aumentato il suo ingombro (MicroSwiss, BLTouch, fangs). Ho quindi progettato il tutto con Autodesk Fusion 360 in modo da avere ancora il massimo della corsa sull'asse Z disponibile sulla macchina e con il minor numero di pezzi possibile. Il materiale che ho usato per la stampa è il PET-G della Sunlu. Adoro questo materiale! L'ho stampato a 240 °C con bed a 60°C e ventola al 50%. Comunque è possibile realizzare queste staffe anche con PLA o ABS. Tutto quello che vi serve è descritto qui sotto:
Filamento (ovviamente!)
2 barre filettate diametro 8 mm. e 690 mm. di lunghezza (in commercio le trovate da 1 metro e quindi munitevi di un seghetto per tagliarle)
8 dadi M8 e 8 rondelle
4 viti a brugola M5 lunghe 60 mm. (compresa la testa) da sostituire a quelle già montate sulla macchina
2x605 mm. di tubicino flessibile 10x1 RILSAN PA11 DIN 73378/74324 PHL del colore che vi piace di più per rivestire le barre filettate (opzionale).
Questo è tutto!
Per quanto riguarda le due staffe superiori assicuratevi di avere un corretto rapporto STEP/MM. Gli incastri a coda di rondine devono essere molto precisi se volete che stiano ben fermi. Se vi dovesse capitare che faticano ad entrare nella gola non vi spaventate! Con una piccola lima o con un cutter (attenti a non tagliarvi!) potete correggere eventuali sbavature.
Qualcuno potrà dire che queste staffe sono ingombranti, soprattutto davanti, ma le ho fatte così perchè in questo modo vanno a proteggere l'intero piatto quando l'asse Y è al massimo della sua escursione. Inoltre mi lasciano molto spazio per poter staccare con comodità le mie stampe.
Se vi piace e lo costruite, vi ringrazio per le vostre foto e i vostri commenti.
I had been thinking about doing Z-axis reinforcements for my Creality CR-10S printer for a while, but I could not find anything that would work for my hotend group. The problem was of course the height that I could have missed because the changes made have greatly increased its size (MicroSwiss, BLTouch, fangs). So I designed the whole thing with Autodesk Fusion 360 in order to still have the maximum travel on the Z axis available on the machine and with the fewest possible number of pieces. The material I used for printing is the Sunlu PET-G. I love this material! I printed it at 240 ° C with a bed at 60 ° C and a 50% fan. However, these brackets can also be made with PLA or ABS. All you need is described below:
Filament (of course!)
2 threaded bars diameter 8 mm. and 690 mm. in length (on the market you can find them from 1 meter and then equip yourself with a hacksaw to cut them)
8 M8 nuts and 8 washers
4 M5 Allen screws 60 mm long (with the head) to replace those already installed on the machine
2x605 mm. of flexible tube 10x1 RILSAN PA11 DIN 73378/74324 PHL of the color you like best to coat the threaded rods (optional).
That's all!
For the two upper brackets make sure you have a correct STEP / MM ratio. The dovetail joints must be very precise if you want them to stay still. If you find it hard to get into the throat, do not be afraid! With a small file or a cutter (careful not to cut yourself!) You can correct any smudging.
Some may say that these brackets are cumbersome, especially in front, but I did so because in this way they go to protect the entire bed when the Y axis is at its maximum excursion. In addition, they leave me plenty of space to be able to conveniently remove my prints.
If you like it and build it, thank you for your photos and your comments.
ITALIANO
Da un po' di tempo pensavo di fare dei rinforzi per l'asse Z della mia stampante Creality CR-10S ma non riuscivo a trovare qualcosa che potesse andare bene per il mio gruppo hotend. Il problema era naturalmente l'altezza che avrei potuto perdere visto che le modifiche fatte hanno notevolmente aumentato il suo ingombro (MicroSwiss, BLTouch, fangs). Ho quindi progettato il tutto con Autodesk Fusion 360 in modo da avere ancora il massimo della corsa sull'asse Z disponibile sulla macchina e con il minor numero di pezzi possibile. Il materiale che ho usato per la stampa è il PET-G della Sunlu. Adoro questo materiale! L'ho stampato a 240 °C con bed a 60°C e ventola al 50%. Comunque è possibile realizzare queste staffe anche con PLA o ABS. Tutto quello che vi serve è descritto qui sotto:
Filamento (ovviamente!)
2 barre filettate diametro 8 mm. e 690 mm. di lunghezza (in commercio le trovate da 1 metro e quindi munitevi di un seghetto per tagliarle)
8 dadi M8 e 8 rondelle
4 viti a brugola M5 lunghe 60 mm. (compresa la testa) da sostituire a quelle già montate sulla macchina
2x605 mm. di tubicino flessibile 10x1 RILSAN PA11 DIN 73378/74324 PHL del colore che vi piace di più per rivestire le barre filettate (opzionale).
Questo è tutto!
Per quanto riguarda le due staffe superiori assicuratevi di avere un corretto rapporto STEP/MM. Gli incastri a coda di rondine devono essere molto precisi se volete che stiano ben fermi. Se vi dovesse capitare che faticano ad entrare nella gola non vi spaventate! Con una piccola lima o con un cutter (attenti a non tagliarvi!) potete correggere eventuali sbavature.
Qualcuno potrà dire che queste staffe sono ingombranti, soprattutto davanti, ma le ho fatte così perchè in questo modo vanno a proteggere l'intero piatto quando l'asse Y è al massimo della sua escursione. Inoltre mi lasciano molto spazio per poter staccare con comodità le mie stampe.
Se vi piace e lo costruite, vi ringrazio per le vostre foto e i vostri commenti.
Similar models
thingiverse
free
Prusa i3 Y-motor stabilizzatore by Giovannicmr
...pendendo di allentare la cinghia del carrello.
il blocco è facilmente chiedibile con un dado m3 e un vite m3 circa lunghezza 15mm
3dwarehouse
free

casa 3D 2019!!!!!
...e delle modifiche giornaliere al prodotto, e ci vorranno un'po di giorni per publicare questo prodotto, e con questo chiudo!!
3dwarehouse
free

(Fixed) Chiesa di San Martino (Printable)
...llo della chiesa di san martino a cirié stampabile. l'altro a me dava problemi così l'ho sistemato e questo è il modello.
thingiverse
free

Frame mount tripode GoPro Hero 3+ by Gil66
...a base minore mm32x32 che si riferiscono all'attacco del tripode hama gamma style, il tutto stampato con risoluzione mm 0,30.
thingiverse
free

Opera 3DP by Raleon
...
asse z 2x230 mm.
il supporto del display è di trigubovich, https://www.thingiverse.com/thing:1116163 modificato in alcune parti.
thingiverse
free
GEEETech i3B: Y-Plate Chain by Luca_Benedetto
... pezzo di catenamento che ho montato, la caveria per scaldare il piano xy vengono messi al riparo da gesti "inconsulti"
cg_trader
$7

pista 3d autodromo internazionale San Angustino
...vostro. (29/12/12 aggiornamento: correzione degli alberi galleggianti, ho impostato il palcoscenico e informazioni sullo schermo)
thingiverse
free

Whirpool ADG7756M angolare lavastoviglie by Tenebroso
... ma con questo oggetto personalizzato e stampato ho risolto il problema sena nessun acquiso. perfetto senza modifiche nè limature
thingiverse
free

placchetta per schermo lcd by Valdan
...rmo. c'è anche lo spazio per la manopola a rotella ed ho inserito il tasto per il reset.
appena ho tempo vi allego le foto :)
thingiverse
free

Vaso by Paolo88
... e posterò le foto.
aggiornamento: ho stampato il file l'ho stampato un pò piu piccolo per testare il disegno e il filamento.
Ludomante
thingiverse
free

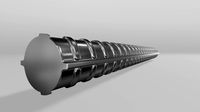
Reinforced Screw for Vorwerk Folletto (Kobold) VK117 by Ludomante
...sack of my old vacuum cleaner. it always broke. now, the challenge to break, has a thickness more than double the original piece!
thingiverse
free

Aluminum extrusion endcap 2020 - 3 or 4 slots by Ludomante
... on others still loose. every cook has his own recipe!
increase or decrease the ratio and find the perfect size for your 2020 !!!
thingiverse
free
Carriage plate for fang (ozfunghi) by Ludomante
.... for all directions and mounting recommendations i refer you to the link of ozfunghi:
https://www.thingiverse.com/thing:2763931
thingiverse
free

Silencers for NEMA 17 by Ludomante
...#39;app che ho scaricato per android (sound meter) mi da un picco di 61 db contro gli 84 db che avevo prima di fare le modifiche.
thingiverse
free

Filament Sensor Vertical Guide for Creality CR-10 by Ludomante
...rip.
note:
added .stl file of the support without logo.
if you like it and build it, thank you for your photos and your comments.
Creality
turbosquid
$7

filament roller single print creality
...del filament roller single print creality for download as stl on turbosquid: 3d models for games, architecture, videos. (1619309)
3d_export
free

Creality ender enclosure webcam mount
...e creality enclosure. sure is better than a tripod. change it up if it helps. i printed pla with 50% infill on my dd ender 3 pro.
3d_export
free

ender 3 frame cavity covers
...3 inserts,<br>made these inserts for the framework of the creality ender 3 - makes it look a bit more...
3d_export
$42

excavator
...width is the original size. 0.12 mm printing surface creality ender-5...
3d_export
free

ender 3 3d print bed clips
...glass bed + normal aluminium bed frame of the creality ender 3 = 6mm (b) these clips are designed...
3d_export
free

ender 3 enclosure corners
...that i could build my enclosure frame for my creality ender 3 - so i printed them in a...
thingiverse
free

Toolbox Creality
...ingiverse
this is a toolbox for tools that comes with creality printers, with a guide to cut capricorn ptfe with a cutter blade.
thingiverse
free

Creality Hotend Plate
... from creality themselves as the ender 3 is open source. this means i did not create this design and all credit goes to creality.
thingiverse
free
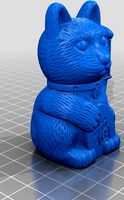
Creality Cat by alexander125
...creality cat by alexander125
thingiverse
this is the cat that comes on the sd card for all creality 3d printers.
thingiverse
free

Creality Dog by alexander125
...creality dog by alexander125
thingiverse
this is the dog that comes on the sd card for all creality 3d printers.
Reinforcement
3d_export
$6

reinforced slabs
...reinforced slabs
3dexport
3d model created by blender 2.90 render eevee.
turbosquid
$17

Reinforced Wooden Crate
... 3d model reinforced wooden crate for download as obj and fbx on turbosquid: 3d models for games, architecture, videos. (1263805)
3d_ocean
$6
Construction Site Reinforcement
...uctions. this is a low polygonal model, easy to animate. - poly count: 778 - formats: max /obj /fbx/3ds/dxf - high detail was ...
3d_export
free
tmt reinforced steel bar
...orced steel bar
3dexport
tmt reinforced steel bar https://sketchfab.com/3d-models/tmt-bar--anil-5e940bd6b61d46aeb22346f1886d0597
3d_export
$15
Reinforced concrete foundation 3D Model
...reinforced concrete foundation 3d model
3dexport
reinforced concrete foundation 3d model bu1266 74497 3dexport
turbosquid
$750

THE ES1d2O HOUSE (reinforced concrete)
... available on turbo squid, the world's leading provider of digital 3d models for visualization, films, television, and games.
turbosquid
$1
Retro Gaming - Reinforced Door
... available on turbo squid, the world's leading provider of digital 3d models for visualization, films, television, and games.
3d_ocean
$4

Wire Reinforced Glass
...ing is seamless, as you can see in the preview. the largest images are 2048×2048 pixels. also included are 1024, 512 and 256 p...
turbosquid
$10
Fibre-reinforced plastic rebar factory
... plastic rebar factory for download as mat, max, obj, and fbx on turbosquid: 3d models for games, architecture, videos. (1297054)
turbosquid
$13
Medieval Noble's Reinforced Door (8k)
...reinforced door (8k) for download as obj, fbx, blend, and dae on turbosquid: 3d models for games, architecture, videos. (1473809)
Cr
turbosquid
$15
Creazioni CR-673 CR-4461
... available on turbo squid, the world's leading provider of digital 3d models for visualization, films, television, and games.
3ddd
$1
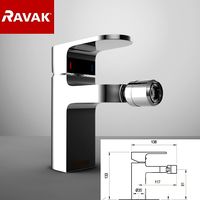
Ravak CR 055.00
...ravak cr 055.00
3ddd
ravak , смеситель
ravak cr 055.00
turbosquid
$100

CR-002
...
turbosquid
royalty free 3d model cr-002 for download as stl on turbosquid: 3d models for games, architecture, videos. (1686037)
3ddd
$1

Ravak CR 012.00
...ravak cr 012.00
3ddd
ravak , смеситель
смеситель ravak cr 012.00
3ddd
free
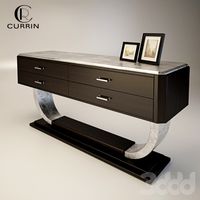
Консоль CR Currin
...ь , cr currin
консоль cr currin
ширина - 1675 мм
глубина - 510 мм
общая высота - 810 мм
3ddd
$1
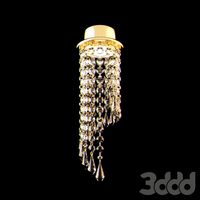
CR 39444
...0
диаметр: 100
тип патрона: gu5,3 gu10
количество ламп: 1
мощность: 35w
цвет: золото хрусталь
материал: металл хрусталь exclusive
3d_ocean
$89

Honda CR-Z
...www.youtube.com/watch?v=rrbb4d4lypk ` he honda cr-z‘s exterior styling is formed around a “one-motion wedge” concept with a lo...
3ddd
$1

Creazoni / STEFY CR-8901
...creazoni / stefy cr-8901
3ddd
creazoni
creazioni stefy cr-8901
turbosquid
$60

Chain-CR-001
...squid
royalty free 3d model chain-cr-001 for download as stl on turbosquid: 3d models for games, architecture, videos. (1680536)
turbosquid
$99

Honda CR-Z
... available on turbo squid, the world's leading provider of digital 3d models for visualization, films, television, and games.
Brackets
archibase_planet
free

Bracket
...bracket
archibase planet
bracket corbel holder
bracket 1 - 3d model (*.gsm+*.3ds) for interior 3d visualization.
archibase_planet
free

Bracket
...bracket
archibase planet
bracket corbel console
bracket 5 - 3d model (*.gsm+*.3ds) for interior 3d visualization.
archibase_planet
free

Bracket
...bracket
archibase planet
corbel holder bracket
bracket 6 - 3d model (*.gsm+*.3ds) for interior 3d visualization.
archibase_planet
free

Bracket
...bracket
archibase planet
bracket corbel console
bracket 8 - 3d model (*.gsm+*.3ds) for interior 3d visualization.
archibase_planet
free

Bracket
...bracket
archibase planet
bracket corbel holder
bracket n280911 - 3d model (*.gsm+*.3ds) for interior 3d visualization.
archibase_planet
free

Bracket
...bracket
archibase planet
holder corbel bracket
bracket 9 - 3d model (*.gsm+*.3ds) for interior 3d visualization.
archibase_planet
free

Bracket
...bracket
archibase planet
corbel holder bracket
bracket 10 - 3d model (*.gsm+*.3ds) for interior 3d visualization.
archibase_planet
free

Bracket
...bracket
archibase planet
corbel console bracket
bracket 11 - 3d model (*.gsm+*.3ds) for interior 3d visualization.
archibase_planet
free

Bracket
...bracket
archibase planet
holder console bracket
bracket 12 - 3d model (*.gsm+*.3ds) for interior 3d visualization.
archibase_planet
free

Bracket
...bracket
archibase planet
bracket corbel holder
bracket 13 - 3d model (*.gsm+*.3ds) for interior 3d visualization.
Mini
turbosquid
$10

Mini Mini Luceplan
...
royalty free 3d model mini mini luceplan for download as max on turbosquid: 3d models for games, architecture, videos. (1227359)
3d_ocean
$39

Mini Cooper
...mini cooper
3docean
cabrioler cooper mini
mini cooper cabrioler
3d_export
$30

Mini lathe
...mini lathe
3dexport
mini lathe
3d_export
$5

mini mouse
...mini mouse
3dexport
mini mouse
3d_export
$5

mini house
...mini house
3dexport
mini house
3d_export
free

Mini Mecha
...mini mecha
3dexport
concept of mini mecha
3d_ocean
$20

Mini Gun
...mini gun
3docean
gatling gun gun machine gun mini gun weapon
model of a mini gatling gun.
3ddd
free

Herve mini
... кофейный , herve
http://www.mobiliavenanti.it/ru/products/hervè-mini
3d_export
$5

mini wall
...mini wall
3dexport
mini wall for living room
3d_export
$5

mini bank
...mini bank
3dexport
mini bank 3d model
10S
turbosquid
$25

10
... available on turbo squid, the world's leading provider of digital 3d models for visualization, films, television, and games.
turbosquid
$10

a-10
... available on turbo squid, the world's leading provider of digital 3d models for visualization, films, television, and games.
3ddd
$1

EX 10
...ex 10
3ddd
samsung , фотоаппарат
ex 10
3ddd
$1

Bed 10
...bed 10
3ddd
постельное белье
bed 10
evermotion
$25

Scene 10 Archinteriors vol. 10
...dering design interior
take a look at textured and shadered visualization scene ready to be rendered.. evermotion 3d models shop.
3ddd
$1

Curtains 10
...curtains 10
3ddd
curtains 10
3ds max 2011,fbx + textures
polys: 100355
3ddd
free

PLANTS 10
...plants 10
3ddd
цветок , горшок
plants 10,, with 3 different color planter boxes
turbosquid
$24

Chandelier MD 89310-10+10 Osgona
... chandelier md 89310-10+10 osgona for download as max and fbx on turbosquid: 3d models for games, architecture, videos. (1218762)
design_connected
$29

Nuvola 10
...nuvola 10
designconnected
gervasoni nuvola 10 computer generated 3d model. designed by navone, paola.
design_connected
$22

Kilt 10
...kilt 10
designconnected
zanotta kilt 10 computer generated 3d model. designed by progetti, emaf.
10
turbosquid
$25
10
... available on turbo squid, the world's leading provider of digital 3d models for visualization, films, television, and games.
turbosquid
$10
a-10
... available on turbo squid, the world's leading provider of digital 3d models for visualization, films, television, and games.
3ddd
$1
EX 10
...ex 10
3ddd
samsung , фотоаппарат
ex 10
3ddd
$1
Bed 10
...bed 10
3ddd
постельное белье
bed 10
evermotion
$25
Scene 10 Archinteriors vol. 10
...dering design interior
take a look at textured and shadered visualization scene ready to be rendered.. evermotion 3d models shop.
3ddd
$1
Curtains 10
...curtains 10
3ddd
curtains 10
3ds max 2011,fbx + textures
polys: 100355
3ddd
free
PLANTS 10
...plants 10
3ddd
цветок , горшок
plants 10,, with 3 different color planter boxes
turbosquid
$24
Chandelier MD 89310-10+10 Osgona
... chandelier md 89310-10+10 osgona for download as max and fbx on turbosquid: 3d models for games, architecture, videos. (1218762)
design_connected
$29
Nuvola 10
...nuvola 10
designconnected
gervasoni nuvola 10 computer generated 3d model. designed by navone, paola.
design_connected
$22
Kilt 10
...kilt 10
designconnected
zanotta kilt 10 computer generated 3d model. designed by progetti, emaf.