Thingiverse
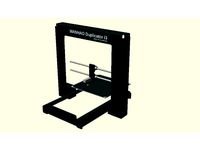
ReDuplicator i3 MK3x - Wanhao i3 Complete Aluminium Extrusion & Prusa Mk3 Overhaul by OmNomNomagon
by Thingiverse
Last crawled date: 3 years ago
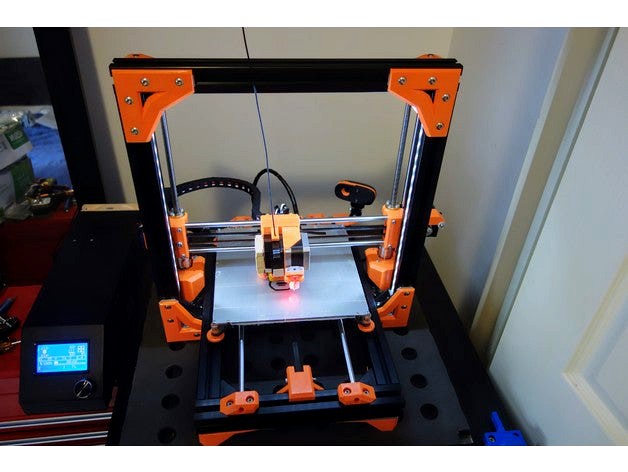
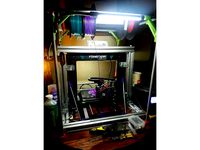
This project is a complete overhaul of the original Wanhao i3 with a few main objectives:
Keep the core components of the printer while upgrading its structure.
Create maximum rigidity through a sturdy 3030 Aluminium extrusion frame.
Allow for future proofing and commonality of parts by basing all printed parts on the current Original Prusa MK3 files.
Reduce the weight of the X and Y carriages where possible to improve print speed and quality.
The Wanhao i3 is a fabulous printer, but new generations of printers have begun pushing the boundaries. It has become apparent that in comparison, the Wanhao has a few deficiencies. Deficiencies which we will address in this project. The key improvements of this upgrade include:
Much better rigidity through 3030 extrusions and metal brackets. Even with my or Azza’s excellent z braces the printer was still susceptible to slight wobble, especially under twisting forces (pull left tower and push right tower). When moving the printer it would require constant releveling due these small movements. Now i can barely get any movement using my full strength.
Comfortably increase Z height to ~200mm
Reduce noise. By not screwing the motors directly onto the metal frame, motor vibrations and noise is reduced significantly.
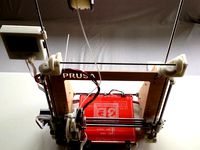
Move towards more standard Prusa files for future upgradability, but with added strength improvements.
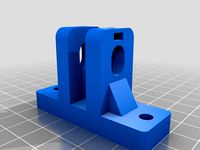
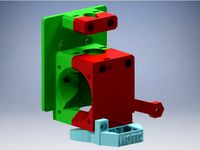
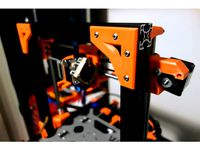
Modular hotend, This design allows for the hotend to be replaced easily replaced without disassembling the printer. I have created a Titan Aero mount as an alternative to the original MK10 with a E3DV6 mount incoming.
Sturdier 4 bearing Prusa style X-gantry. Not sure if it was specific to my printer or a common Wanhao problem, but my X gantry always had a lot of wobble which may have been a source of printing artifacts.
Noticeably better print quality due to a combination of everything above. I am able to print faster with better quality.
All Wanhao i3 variants and rebrands are compatible, however the plus will require additional work to create an enclosure for the electronics. This project can also be built from scratch, or salvaged from other printers as long as measurements are altered accordingly.
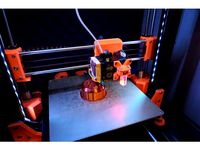
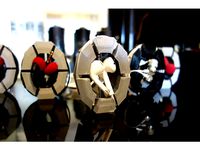
Sample Print @100mm/s on the titan aero extruder.
Sample of improved print quality. 0.24mm layer height @ 70mm/s (titan aero).
This project will be maintained both at github and at thingiverse.
The files were created using a combination of Fusion360 and tinkercad. They can be viewed and edited via this Tinkercad link.
Table Of Contents
1. Bill Of Materials
2. Printing Parts & Pre Assembly
3. Base
4. Begin The ZTower
5.1 Hotend MK10 Original
5.2 Hotend Titan Aero Upgrade
6. XAxis Gantry
7. Complete the ZTower
8. YAxis
9. Cabling
9.1. Recommendations & Future Dev
Thanks and Acknowledgements
Prusa Research MK2s
Datvr's Prusa MK2S-x
Thorped's excellent Wanhao Fan Duct
Cyul's spool holder
Thingiverse Issues
After its recent update, Thingiverse no longer displays markup language properly. Please go to github or riganti.com for complete instructions.
Bill Of Materials
Total BOM is approx 100-150USD. However this is highly dependent on what you have laying around, where you source your parts from, what you want to carry over, and where in the world you are. A lot of my costs in Australia were shipping related.
I recommend Misumi for the core parts and will provide part numbers for each of those. Misumi regularly have a 30% off code for first time orders, which helps to keep costs down. For everything else cheap Ebay / Aliexpress parts will do. Many of the printed parts are designed around the Misumi plate bracket hole spacings. If you can’t source these parts (as misumi can be a pain to order from if you are outside of the US), I have another Thingiverse remix filled with tabbed printed brackets. These definitely won't be as strong or sturdy as the proper metal braces however.
Summarised Parts List:
Part
Description
Number Reqd
3030 Extrusion 355mm
Z Axis HFSLB6-3030-355
2
3030 Extrusion 350mm
Y Axis HFSLB6-3030-350
2
3030 Extrusion 380mm
X Axis Tower HFSLB6-3030-380
2
3030 Extrusion 258mm
X Axis Base HFSLB6-3030-258
2
30x30x35 Corner Brackets
Tabbed on SINGLE Side only HBLFSNB6
14
Alluminium Flat bracket
4 mount holes HPTLS6
8
LM8UU Bearings
Std 8mm 15mm long bearings LMU8
4
M5 12mm
Button Head Screw M5
70
M5 16mm
Button Head Screw M5
10
M5 T-Nuts
3030 T-Nuts Drop in preferred
80
M5 20-25mm
Low Profile Button head (less than 4.2mm)
1
M5 30-35mm
Screw M5
1
M3 Heatserts
Brass heat inserts M3 thread M3-UHBRHESF
22
M3 4-8mm
Button Head Screw M3
8
M3 12mm
Button Head Screw M3
6
M3 16mm
Button Head Screw M3
6
M3 30mm
Screw M3
3
M3 6-8mm
Countersunk M3
4
M3 6-12mm
Countersunk M3
8
M5 Nylock
Nuts for Idlers
2
M3 Nylock
Nut for part cooling and heat sert substitute
1 - 15
M5 Smooth Idler Pulley
(Optional) 9mm wide replacement
2
M5 Fibrous Washers
For idler Pulleys
3 - 10
GT2 Belt
6mm belt
1m
50mm Blower
Part Cooling
1
In Depth Descriptions:
A Wanhao i3 Duh! (these parts will also allow you to upgrade most other prusa style printers, just adjust the lengths of your printer compared to the Wanhao’s smooth rods (X=320mm Z=320mm Y=380mm)
Various 3030 T-slot Aluminium Extrusions
2x 380MM - Tower X - HFSLB6-3030-380
2x 355MM - Tower Z - HFSLB6-3030-355
2x 350MM - Base Y - HFSLB6-3030-350
2x 258MM - Base X - HFSLB6-3030-258
14x Corner Brackets 30x30x25 - Importantly these should be reversible or only be tabbed on one side! We are stacking two extrusions perpendicular on top of eachother. If they are fully tabbed on both sides they will NOT fit. HBLFSNB6 with low profile T-nuts or the single tabbed version HBLFSNK6.
8x Aluminium Corner plates with 4 mounting holes. The legs and printed corner parts are all based on the misumi hole spacing HPTLS6.
4x LM8UU Bearings. These replace the stock Z bearings. It is also worthwhile purchasing some of the longer LM8LUU bearing to replace the X and Y axises if you are coming from a pre 2.1 wanhao. These misumi ones are much higher quality than the originals. LMU8, LMUW8.
70x M5 12mm Button head screws
10x M5 16mm Button head screws
80 M5 T-Nuts. Drop in T-nuts are recommended as they are easier to work with. Some drop in T-Nuts have a longer neck which can cause issues with the Misumi HBLFSNB6 corner brackets. One side of the bracket is protruded, so that even when screwed in very tightly they don't apply enough compression force to secure the frame. In this case 14 T-nuts can be substituted with flat style ones, or pieces of fibre washers can be glued into the grooved areas to reduce the protrusion depth. Misumi also have t-nuts designed specifically for this bracket HNTT6-5. 14 of these can be used.
1x M5 20-25 mm Button Head screw (low profile) The head needs to be 4.2mm or less long as this sits between the idler part and the leadscrew.
1x M5 30-35mm screw
22x M3 Heat-sert Brass inserts (M3-UHBRHESF) W4.4mm x H5.8mm or similar. These are set into parts using a hot soldering iron and are great for making strong functional parts without having to worry about screw threads stripping over time. Proper thermal inserts are recommended, but the easier to source injection molding type ones should work almost as well.
7x 4-8mm M3 Button head
6x 12mm M3 Button head
6x 16mm M3 Button head
3x 30mm M3 screw
4x 6-8mm M3 countersunk
8x 6-12mm countersunk (for leadscrew nuts) you also may want to secure these with nylocks m3 x8
2x M5 Nylock nut
1x M3 Nylock for part cooling bracket. 6 more can be used as a substitute for the extruder assembly if Heat-serts cannot be found.
Some fasteners are carried across from the Wanhao. This includes the hotend screws, and the M4 x-carriage screws.
(Optional) 2x M5 Smooth Idler Pulleys. The original Wanhao pulleys are prone to failure over time and are 11mm wide. i recommend switching them out with new ones while doing this mod. Most replecement ones are 9mm wide which allows you to use the X Gantry Idler 9MM part instead of the X Gantry Idler 11mm (Stock idler) part. The 9mm version has thicker walls which should make it more durable over time.
3-10 M5 washers (Steel or fibrous). Used to secure the X and Y idlers. Variable number required depending on their thickness and whether you are using stock idlers or the usually thinner aftermarket ones.
1 Meter of GT2 6mm belt. The X carriage distances are increased and the stock belt may not be long enough. aprox 770mm is required.
50mm Blower Fan. Hopefully you should already have one of these in your arsenal as they make a huge improvement to print quality
Summarised Misumi Parts List
HFSLB6-3030-355 2
HFSLB6-3030-380 2
HFSLB6-3030-350 2
HFSLB6-3030-258 2
HPTLS6 8
HBLFSNB6 14
LMU8 4
Notes:
Substitute with HFSL6-3030 if you would like non anodized silver
HFS-3030 (Standard) or any other type of 3030 can be substituted instead.
Essential Tools
Set Square, ruler, measuring tape. - to ensure everything is a flush 90 degrees
Xacto Knife to clean prints, especially screw holes
soldering iron to insert the brass heat-serts
Printed Parts and Pre Assembly
I recommend ABS or an ABS composite if you have an enclosure or if your printer can produce prints with minimal warping. ABS was chosen as this is what the Prusa MK2s was manufactured with. As of the MK3, Prusa is using PETG which is also fantastic choice. Otherwise PLA may work except for the extruder carriage parts.
If using ABS please allow for a few percent of shrinkage. This is especially important for the feet parts, which need to be exactly level with the underside crossbeam.
Recommended 40-60% infill and 3-4 outer shells for maximum strength.
These parts make use of brass heat inserts in order to make the strongest prints in the space available. They are installed with a soldering iron. Slowly push the insert into the hole while being careful to keep it as square as possible. Use an Xacto blade to clear the surrounding area of any excess plastic.
These inserts are used on the following parts.
2x X Carriage Front Extruder Plate
6x X Carriage Rear Bearing Plate
2x Part Fan Bracket
2x X Gantry Cable Box Bottom
4x X Gantry Idler 9MM
2x X Gantry Motor Mount
2x Y Axis Belt Idler
2x Z Rod Securer X2
You will need multiple copies of the following parts:
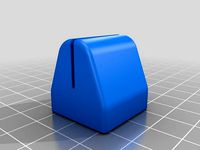
Base Leg H26.8mm X4
Cable Guide Drop In X2-4
Cable Guide Slide In X2-4
Tower Corner Bracket Large 80x80x5 V2 (Better Z Clearance) X2 or Tower Corner Bracket Large 80x80x5 V1 X2
Y Axis Rod Holder Left X2
Z Rod Securer X2
Most parts can be printed without issue. Supports should not be required in most cases. However some parts are a little trickier and may benefit from a brim to ensure they print flat. This includes:
X Carriage Front Extruder Plate
X Carriage Rear Bearing Plate
Y Axis Rod Holder Left X2
Y Axis Rod Holder Right
Y Axis Rod Holder Right & Endstop
Pre Assembly Decisions
A few decisions will need to be made before assembly.
The tower top corner bracket is available in 2 forms. Tower Corner Bracket Large 80x80x5 V1 X2 parts are the ones in the photos, and Tower Corner Bracket Large 80x80x5 V2 (Better Z Clearance) X2 parts provide better z clearance.
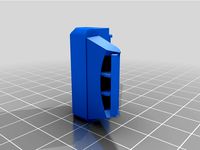
If you use the stock idler pulleys you will need to use X Gantry Idler 11mm (Stock idler). If using a replacement 9mm idler, the X Gantry Idler 9MM part can be used which should be stronger.
if you have no access to Misumi parts it is possible to either:
Replace the metal brackets with ones from other sources and don't bother with the plastic brackets on top.
Use printed brackets, from the Non Metal Tabbed Brackets folder which will not be as strong.
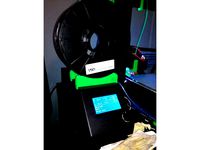
Spool Holder and filament guides. Even with the increased rigidity I recommend a control box spool holder. The Alternative & Optional Parts folder contains a control box filament guide as well as a top mounted spool roller with PTFE guides and cleaners. This folder also contains alternative stls for cheap Bunnings brackets https://www.bunnings.com.au/zenith-75mm-zinc-plated-corner-brace-bracket-4-pack_p2760923. Also alternative cable routing parts.
Finally the printer can be assembled in two different ways. It can be assembled as outlined here with the vertical rods on the backside of the tower. The large brackets become the front face of the printer. Alternatively is can be assembled similar to the Prusa MK2s where the motors and rods face forward. The benefits of this include a slightly increased Z-height of ~210mm. However i don't have official cable routing for this version but a number of cable chain brackets are available in the Alternative & Optional Parts folder. Instructions are similar but you will need to recheck the placement of your z axis crossbeam and the extruder faces the opposite direction.
Original Configuration. CAD files available here
Reversed Configuration. CAD files available here
Assembly
Full Assembly instructions are available on the Gitub wiki of this project Here
Table Of Contents
1. Bill Of Materials
2. Printing Parts & Pre Assembly
3. Base
4. Begin The ZTower
5.1 Hotend MK10 Original
5.2 Hotend Titan Aero Upgrade
6. XAxis Gantry
7. Complete the ZTower
8. YAxis
9. Cabling
9.1. Recommendations & Future Dev
Good Luck!
Changelog
1.0 - Initial Release
1.01 - Updated idler files with multiple z endstop mount points for upcoming Titan Aero upgrade. Sturdier cable cover box. Added 1Meter GT2 belt to BOM as the stock belt may not be long enough (can anyone confirm?)
1.02 - Updated the Part Fan Bracket to Part Fan Bracket V1.1 The original doesn't align with the carriage plates properly. Please print the revised one.
1.03 - Uploaded a new Y Carriage Belt Holder. This one is based on the current MK3 design and is much easier to fix and tension.
1.04 - X Gantry Idler 9MM V2 was missing the heat-sert insert holes to mount the cable box. Updated and fixed with X Gantry Idler 9MM V3. If you have already printed V2, you can keep the part and manually drill 2x 4mm holes spaced 9mm wide and 6mm deep.
1.1 - 11/03/2018 Major Prusa MK3 Update. This updates an update of many of the original MK2s based parts to MK3 Based parts. This includes;
MK3 Based Part Cooling shroud and mount. It performs much better than the original Thorped based one. flawless @60 degree overhang with some sagging @70 degree overhang. The original would show artefacts @60 degrees.. Almost comparable to the Dii Cooler.
Much improved X Carriage. This uses the new MK3 belt mounting method which is much easier to install under tension. The whole extruder assembly can now also easily slide on and off the rods to greatly simplify installation and maintenance. 16mm M3 screws are used to secure the bearings. I've also made and tested changes which allow the extruder assembly to be built without heat-serts and can be substituted with M3 nylocks. NOTE: due to these changes the Rear carriage plate is NOT compatible with the existing Front extruder plate as the hole spacing has been changed. The New Front extruder plate must be used.
Front Extruder Plate. Better spacing around the hotend to improve the filament path. Updating Hole Spacing to be compatible with the new Rear Carriage Plate. Strengthened BLTouch mount. Increase spacing around heater block to reduce residual heat. Not compatible with old extruder plate.
X Axis Motor Mount. Incorporates the new MK3 design. Better Spacing to ensure a straighter belt path. Includes new MK3 tensioner to easily tension X belt. Requires M3nS Nut and 20mm M3 screw. (Enough tension can be applied by without the M3nS) Installation is similar to the Prusa instructions here, steps 11-18.
As this project contains dozens of files already, Older retired files are retired to the Retired Versions directory in github
1.1.1 - Endstop Part For sensorless homing with TMC2130 Drivers.
1.2 - 05/11/2018 - Multiple improvements based on Prusa MK3 R3 release. This includes:
Prusa MK3 R3 based part cooling shroud. This gives a noticeable improvement over the original shroud. Also improved the clearance between the shroud and the nozzle.
Improved X Carriage rear plate. This was strengthend to better handle bumps and knocks. Rigidity is also improved. It is still a common part between the MK10 and titan aero extruders.
Strengthened Z Rod Securer parts. Some people had issues with these snapping in PLA but should no longer be an issue.
1.3 - 17/02/2020 - E3D Hemera mount. Updated fan duct to the most recent R4 release. Added an angle for increased rear fan duct clearance. This will filter down to the other hotend designs shortly. Initial update of parts across to fusion 360. A number of parts have been converted and this will continue over time.
Improved cable mounting system by clipping onto the X axis motor
1.3.1 - 19/02/2020 - MK52 Removeable heatbed Mod - resized rods and extrusions to accommodate the prusa MK3 heatbed.
1.4 - 05/08/2020 - Mk52 and Hemera Parts update. Significantly improved X idler, tensioner and motor holder, new Z Rod Holder design for much easier installations and accuracy. Improved Hemera fan shroud with improved airflow. Continued conversion from tincercad to F360 parts. These changes will filter down to the original reduplicator parts.
Keep the core components of the printer while upgrading its structure.
Create maximum rigidity through a sturdy 3030 Aluminium extrusion frame.
Allow for future proofing and commonality of parts by basing all printed parts on the current Original Prusa MK3 files.
Reduce the weight of the X and Y carriages where possible to improve print speed and quality.
The Wanhao i3 is a fabulous printer, but new generations of printers have begun pushing the boundaries. It has become apparent that in comparison, the Wanhao has a few deficiencies. Deficiencies which we will address in this project. The key improvements of this upgrade include:
Much better rigidity through 3030 extrusions and metal brackets. Even with my or Azza’s excellent z braces the printer was still susceptible to slight wobble, especially under twisting forces (pull left tower and push right tower). When moving the printer it would require constant releveling due these small movements. Now i can barely get any movement using my full strength.
Comfortably increase Z height to ~200mm
Reduce noise. By not screwing the motors directly onto the metal frame, motor vibrations and noise is reduced significantly.
Move towards more standard Prusa files for future upgradability, but with added strength improvements.
Modular hotend, This design allows for the hotend to be replaced easily replaced without disassembling the printer. I have created a Titan Aero mount as an alternative to the original MK10 with a E3DV6 mount incoming.
Sturdier 4 bearing Prusa style X-gantry. Not sure if it was specific to my printer or a common Wanhao problem, but my X gantry always had a lot of wobble which may have been a source of printing artifacts.
Noticeably better print quality due to a combination of everything above. I am able to print faster with better quality.
All Wanhao i3 variants and rebrands are compatible, however the plus will require additional work to create an enclosure for the electronics. This project can also be built from scratch, or salvaged from other printers as long as measurements are altered accordingly.
Sample Print @100mm/s on the titan aero extruder.
Sample of improved print quality. 0.24mm layer height @ 70mm/s (titan aero).
This project will be maintained both at github and at thingiverse.
The files were created using a combination of Fusion360 and tinkercad. They can be viewed and edited via this Tinkercad link.
Table Of Contents
1. Bill Of Materials
2. Printing Parts & Pre Assembly
3. Base
4. Begin The ZTower
5.1 Hotend MK10 Original
5.2 Hotend Titan Aero Upgrade
6. XAxis Gantry
7. Complete the ZTower
8. YAxis
9. Cabling
9.1. Recommendations & Future Dev
Thanks and Acknowledgements
Prusa Research MK2s
Datvr's Prusa MK2S-x
Thorped's excellent Wanhao Fan Duct
Cyul's spool holder
Thingiverse Issues
After its recent update, Thingiverse no longer displays markup language properly. Please go to github or riganti.com for complete instructions.
Bill Of Materials
Total BOM is approx 100-150USD. However this is highly dependent on what you have laying around, where you source your parts from, what you want to carry over, and where in the world you are. A lot of my costs in Australia were shipping related.
I recommend Misumi for the core parts and will provide part numbers for each of those. Misumi regularly have a 30% off code for first time orders, which helps to keep costs down. For everything else cheap Ebay / Aliexpress parts will do. Many of the printed parts are designed around the Misumi plate bracket hole spacings. If you can’t source these parts (as misumi can be a pain to order from if you are outside of the US), I have another Thingiverse remix filled with tabbed printed brackets. These definitely won't be as strong or sturdy as the proper metal braces however.
Summarised Parts List:
Part
Description
Number Reqd
3030 Extrusion 355mm
Z Axis HFSLB6-3030-355
2
3030 Extrusion 350mm
Y Axis HFSLB6-3030-350
2
3030 Extrusion 380mm
X Axis Tower HFSLB6-3030-380
2
3030 Extrusion 258mm
X Axis Base HFSLB6-3030-258
2
30x30x35 Corner Brackets
Tabbed on SINGLE Side only HBLFSNB6
14
Alluminium Flat bracket
4 mount holes HPTLS6
8
LM8UU Bearings
Std 8mm 15mm long bearings LMU8
4
M5 12mm
Button Head Screw M5
70
M5 16mm
Button Head Screw M5
10
M5 T-Nuts
3030 T-Nuts Drop in preferred
80
M5 20-25mm
Low Profile Button head (less than 4.2mm)
1
M5 30-35mm
Screw M5
1
M3 Heatserts
Brass heat inserts M3 thread M3-UHBRHESF
22
M3 4-8mm
Button Head Screw M3
8
M3 12mm
Button Head Screw M3
6
M3 16mm
Button Head Screw M3
6
M3 30mm
Screw M3
3
M3 6-8mm
Countersunk M3
4
M3 6-12mm
Countersunk M3
8
M5 Nylock
Nuts for Idlers
2
M3 Nylock
Nut for part cooling and heat sert substitute
1 - 15
M5 Smooth Idler Pulley
(Optional) 9mm wide replacement
2
M5 Fibrous Washers
For idler Pulleys
3 - 10
GT2 Belt
6mm belt
1m
50mm Blower
Part Cooling
1
In Depth Descriptions:
A Wanhao i3 Duh! (these parts will also allow you to upgrade most other prusa style printers, just adjust the lengths of your printer compared to the Wanhao’s smooth rods (X=320mm Z=320mm Y=380mm)
Various 3030 T-slot Aluminium Extrusions
2x 380MM - Tower X - HFSLB6-3030-380
2x 355MM - Tower Z - HFSLB6-3030-355
2x 350MM - Base Y - HFSLB6-3030-350
2x 258MM - Base X - HFSLB6-3030-258
14x Corner Brackets 30x30x25 - Importantly these should be reversible or only be tabbed on one side! We are stacking two extrusions perpendicular on top of eachother. If they are fully tabbed on both sides they will NOT fit. HBLFSNB6 with low profile T-nuts or the single tabbed version HBLFSNK6.
8x Aluminium Corner plates with 4 mounting holes. The legs and printed corner parts are all based on the misumi hole spacing HPTLS6.
4x LM8UU Bearings. These replace the stock Z bearings. It is also worthwhile purchasing some of the longer LM8LUU bearing to replace the X and Y axises if you are coming from a pre 2.1 wanhao. These misumi ones are much higher quality than the originals. LMU8, LMUW8.
70x M5 12mm Button head screws
10x M5 16mm Button head screws
80 M5 T-Nuts. Drop in T-nuts are recommended as they are easier to work with. Some drop in T-Nuts have a longer neck which can cause issues with the Misumi HBLFSNB6 corner brackets. One side of the bracket is protruded, so that even when screwed in very tightly they don't apply enough compression force to secure the frame. In this case 14 T-nuts can be substituted with flat style ones, or pieces of fibre washers can be glued into the grooved areas to reduce the protrusion depth. Misumi also have t-nuts designed specifically for this bracket HNTT6-5. 14 of these can be used.
1x M5 20-25 mm Button Head screw (low profile) The head needs to be 4.2mm or less long as this sits between the idler part and the leadscrew.
1x M5 30-35mm screw
22x M3 Heat-sert Brass inserts (M3-UHBRHESF) W4.4mm x H5.8mm or similar. These are set into parts using a hot soldering iron and are great for making strong functional parts without having to worry about screw threads stripping over time. Proper thermal inserts are recommended, but the easier to source injection molding type ones should work almost as well.
7x 4-8mm M3 Button head
6x 12mm M3 Button head
6x 16mm M3 Button head
3x 30mm M3 screw
4x 6-8mm M3 countersunk
8x 6-12mm countersunk (for leadscrew nuts) you also may want to secure these with nylocks m3 x8
2x M5 Nylock nut
1x M3 Nylock for part cooling bracket. 6 more can be used as a substitute for the extruder assembly if Heat-serts cannot be found.
Some fasteners are carried across from the Wanhao. This includes the hotend screws, and the M4 x-carriage screws.
(Optional) 2x M5 Smooth Idler Pulleys. The original Wanhao pulleys are prone to failure over time and are 11mm wide. i recommend switching them out with new ones while doing this mod. Most replecement ones are 9mm wide which allows you to use the X Gantry Idler 9MM part instead of the X Gantry Idler 11mm (Stock idler) part. The 9mm version has thicker walls which should make it more durable over time.
3-10 M5 washers (Steel or fibrous). Used to secure the X and Y idlers. Variable number required depending on their thickness and whether you are using stock idlers or the usually thinner aftermarket ones.
1 Meter of GT2 6mm belt. The X carriage distances are increased and the stock belt may not be long enough. aprox 770mm is required.
50mm Blower Fan. Hopefully you should already have one of these in your arsenal as they make a huge improvement to print quality
Summarised Misumi Parts List
HFSLB6-3030-355 2
HFSLB6-3030-380 2
HFSLB6-3030-350 2
HFSLB6-3030-258 2
HPTLS6 8
HBLFSNB6 14
LMU8 4
Notes:
Substitute with HFSL6-3030 if you would like non anodized silver
HFS-3030 (Standard) or any other type of 3030 can be substituted instead.
Essential Tools
Set Square, ruler, measuring tape. - to ensure everything is a flush 90 degrees
Xacto Knife to clean prints, especially screw holes
soldering iron to insert the brass heat-serts
Printed Parts and Pre Assembly
I recommend ABS or an ABS composite if you have an enclosure or if your printer can produce prints with minimal warping. ABS was chosen as this is what the Prusa MK2s was manufactured with. As of the MK3, Prusa is using PETG which is also fantastic choice. Otherwise PLA may work except for the extruder carriage parts.
If using ABS please allow for a few percent of shrinkage. This is especially important for the feet parts, which need to be exactly level with the underside crossbeam.
Recommended 40-60% infill and 3-4 outer shells for maximum strength.
These parts make use of brass heat inserts in order to make the strongest prints in the space available. They are installed with a soldering iron. Slowly push the insert into the hole while being careful to keep it as square as possible. Use an Xacto blade to clear the surrounding area of any excess plastic.
These inserts are used on the following parts.
2x X Carriage Front Extruder Plate
6x X Carriage Rear Bearing Plate
2x Part Fan Bracket
2x X Gantry Cable Box Bottom
4x X Gantry Idler 9MM
2x X Gantry Motor Mount
2x Y Axis Belt Idler
2x Z Rod Securer X2
You will need multiple copies of the following parts:
Base Leg H26.8mm X4
Cable Guide Drop In X2-4
Cable Guide Slide In X2-4
Tower Corner Bracket Large 80x80x5 V2 (Better Z Clearance) X2 or Tower Corner Bracket Large 80x80x5 V1 X2
Y Axis Rod Holder Left X2
Z Rod Securer X2
Most parts can be printed without issue. Supports should not be required in most cases. However some parts are a little trickier and may benefit from a brim to ensure they print flat. This includes:
X Carriage Front Extruder Plate
X Carriage Rear Bearing Plate
Y Axis Rod Holder Left X2
Y Axis Rod Holder Right
Y Axis Rod Holder Right & Endstop
Pre Assembly Decisions
A few decisions will need to be made before assembly.
The tower top corner bracket is available in 2 forms. Tower Corner Bracket Large 80x80x5 V1 X2 parts are the ones in the photos, and Tower Corner Bracket Large 80x80x5 V2 (Better Z Clearance) X2 parts provide better z clearance.
If you use the stock idler pulleys you will need to use X Gantry Idler 11mm (Stock idler). If using a replacement 9mm idler, the X Gantry Idler 9MM part can be used which should be stronger.
if you have no access to Misumi parts it is possible to either:
Replace the metal brackets with ones from other sources and don't bother with the plastic brackets on top.
Use printed brackets, from the Non Metal Tabbed Brackets folder which will not be as strong.
Spool Holder and filament guides. Even with the increased rigidity I recommend a control box spool holder. The Alternative & Optional Parts folder contains a control box filament guide as well as a top mounted spool roller with PTFE guides and cleaners. This folder also contains alternative stls for cheap Bunnings brackets https://www.bunnings.com.au/zenith-75mm-zinc-plated-corner-brace-bracket-4-pack_p2760923. Also alternative cable routing parts.
Finally the printer can be assembled in two different ways. It can be assembled as outlined here with the vertical rods on the backside of the tower. The large brackets become the front face of the printer. Alternatively is can be assembled similar to the Prusa MK2s where the motors and rods face forward. The benefits of this include a slightly increased Z-height of ~210mm. However i don't have official cable routing for this version but a number of cable chain brackets are available in the Alternative & Optional Parts folder. Instructions are similar but you will need to recheck the placement of your z axis crossbeam and the extruder faces the opposite direction.
Original Configuration. CAD files available here
Reversed Configuration. CAD files available here
Assembly
Full Assembly instructions are available on the Gitub wiki of this project Here
Table Of Contents
1. Bill Of Materials
2. Printing Parts & Pre Assembly
3. Base
4. Begin The ZTower
5.1 Hotend MK10 Original
5.2 Hotend Titan Aero Upgrade
6. XAxis Gantry
7. Complete the ZTower
8. YAxis
9. Cabling
9.1. Recommendations & Future Dev
Good Luck!
Changelog
1.0 - Initial Release
1.01 - Updated idler files with multiple z endstop mount points for upcoming Titan Aero upgrade. Sturdier cable cover box. Added 1Meter GT2 belt to BOM as the stock belt may not be long enough (can anyone confirm?)
1.02 - Updated the Part Fan Bracket to Part Fan Bracket V1.1 The original doesn't align with the carriage plates properly. Please print the revised one.
1.03 - Uploaded a new Y Carriage Belt Holder. This one is based on the current MK3 design and is much easier to fix and tension.
1.04 - X Gantry Idler 9MM V2 was missing the heat-sert insert holes to mount the cable box. Updated and fixed with X Gantry Idler 9MM V3. If you have already printed V2, you can keep the part and manually drill 2x 4mm holes spaced 9mm wide and 6mm deep.
1.1 - 11/03/2018 Major Prusa MK3 Update. This updates an update of many of the original MK2s based parts to MK3 Based parts. This includes;
MK3 Based Part Cooling shroud and mount. It performs much better than the original Thorped based one. flawless @60 degree overhang with some sagging @70 degree overhang. The original would show artefacts @60 degrees.. Almost comparable to the Dii Cooler.
Much improved X Carriage. This uses the new MK3 belt mounting method which is much easier to install under tension. The whole extruder assembly can now also easily slide on and off the rods to greatly simplify installation and maintenance. 16mm M3 screws are used to secure the bearings. I've also made and tested changes which allow the extruder assembly to be built without heat-serts and can be substituted with M3 nylocks. NOTE: due to these changes the Rear carriage plate is NOT compatible with the existing Front extruder plate as the hole spacing has been changed. The New Front extruder plate must be used.
Front Extruder Plate. Better spacing around the hotend to improve the filament path. Updating Hole Spacing to be compatible with the new Rear Carriage Plate. Strengthened BLTouch mount. Increase spacing around heater block to reduce residual heat. Not compatible with old extruder plate.
X Axis Motor Mount. Incorporates the new MK3 design. Better Spacing to ensure a straighter belt path. Includes new MK3 tensioner to easily tension X belt. Requires M3nS Nut and 20mm M3 screw. (Enough tension can be applied by without the M3nS) Installation is similar to the Prusa instructions here, steps 11-18.
As this project contains dozens of files already, Older retired files are retired to the Retired Versions directory in github
1.1.1 - Endstop Part For sensorless homing with TMC2130 Drivers.
1.2 - 05/11/2018 - Multiple improvements based on Prusa MK3 R3 release. This includes:
Prusa MK3 R3 based part cooling shroud. This gives a noticeable improvement over the original shroud. Also improved the clearance between the shroud and the nozzle.
Improved X Carriage rear plate. This was strengthend to better handle bumps and knocks. Rigidity is also improved. It is still a common part between the MK10 and titan aero extruders.
Strengthened Z Rod Securer parts. Some people had issues with these snapping in PLA but should no longer be an issue.
1.3 - 17/02/2020 - E3D Hemera mount. Updated fan duct to the most recent R4 release. Added an angle for increased rear fan duct clearance. This will filter down to the other hotend designs shortly. Initial update of parts across to fusion 360. A number of parts have been converted and this will continue over time.
Improved cable mounting system by clipping onto the X axis motor
1.3.1 - 19/02/2020 - MK52 Removeable heatbed Mod - resized rods and extrusions to accommodate the prusa MK3 heatbed.
1.4 - 05/08/2020 - Mk52 and Hemera Parts update. Significantly improved X idler, tensioner and motor holder, new Z Rod Holder design for much easier installations and accuracy. Improved Hemera fan shroud with improved airflow. Continued conversion from tincercad to F360 parts. These changes will filter down to the original reduplicator parts.
Similar models
thingiverse
free
Hictop 3dp11 Adjustable Y Idler Mount by SaberShip
...rts:
x1 stock 608zz idler bearing
x1 stock m3 bolt and nut
x2 stock m5 bolts
x2 stock m5 t-slot nuts
x2 m3 x 10 screws
x2 m3 nuts
grabcad
free

autorobotics FLE-X-trude
... 5x13x4, mk8 filament screw, screws (m3 (2x))+ springs, m3 screw nuts (2x)
for wade: no fixing plate, but carriage + screws, ...
thingiverse
free

Simple i3 x-axis strain relief bracket by DrRalph
... some work to get the larger nuts to fit outside the x-axis rod holes without weakening the bracket too much. i use m3 just fine.
thingiverse
free
One Z-Motor / Filament holder solution for Prusa i3 Rework by WieMi
...t)
360mm m8 threaded rod (middle)
2x 380mm m8 threaded rod (right)
11x m3 nut
8x m3 - 8mm grub screw
8x m8 nut
5x 688zz bearing
thingiverse
free

Y-Idler Holder 3030 and 2020 extrusion by GaryK47
... with t-nuts for 3030 and 2020 extrusion.
2x m3 x 30mm (3030) oder m3 x 20mm (2020)
1x m3 x 25mm
2x m3 x 10mm
2x washer for idler
thingiverse
free

Prusa MK3S MMU2S IR sensor mount (Bondtech, BMG)
...ruder and revised x-axis x-carriage by vekoj https://www.thingiverse.com/thing:3560116
parts required:
m3*8mm screw
m3 square nut
thingiverse
free

ALU3030 Prusa i3 MK3S - v0.9 by Knedlikos
....
used 3030 alu extrusions:
3x 354mm
2x 330mm
2x 320mm
used 8mm steel rods:
2x 370mm (x axis)
2x 355mm (y axis)
2x 320mm (z axis)
thingiverse
free

Prusa Steel X axis with tensioner and 8mm leadscrew support by fedewolfie
...ner and a m5 screw and nut for the toothed idler, i use a cheap aliexpress toothed idler with a m5 bore.
prints without supports.
thingiverse
free
Prusa i3 MK3 Bowden Extruder for E3D v6 by FabLabCordoba
...e by @karimkfoure.
based on original prusa i3 mk3.
inspired by "bowden x-carriage mount for e3d v6" by jackwaterfall.
thingiverse
free

M5 T-nut for Prusa i3 MK2 by stanoba
...t allows to use m5 threaded rod instead of trapezoidal screw in original prusa i3 mk2 x-end-motor and x-end-idler printed parts.
Mk3X
thingiverse
free

ReDuplicator i3 MK3x - Cable Guide Alternate for 42x42mm X Stepper by Plower
...unt 360.stl part, so that it clamps properly onto the stepper.
i'm using usongshine steppers, these are 42x42mm base as well.
thingiverse
free
ReDuplicator i3 MK3x - Non Metal 3030 Tabbed Brackets by OmNomNomagon
...ner 30x30 tabbed bracket
alternate 30mm high leg file
tabbed corner plate brackets.
see the original project for complete details
thingiverse
free

ReDuplicator i3 MK3x - MK52 Removable Heatbed Expansion
... this requires new extrusions and rods. some extrusions and printed parts are carried over from the original reduplicator design.
thingiverse
free

ReDuplicator i3 MK3x - Titan Aero Mount Piezo Remix by silvrswt
...should work if installed in the same fashion as the djdemond's piezo z-probe mount:
https://www.thingiverse.com/thing:2526978
thingiverse
free

ReDuplicator i3 MK3x - Alternative & Optional Parts by OmNomNomagon
...and a ptfe mount in order to run ptfe directly to the extruder.
complete instructions are available on the main thingiverse page.
thingiverse
free

Prusa Bed Holder/Sheet Holder
...you got an pei and powercoated sheet for you mk3x here is the solution for you. follow me on...
thingiverse
free

ReDuplicator i3 MK3x - Titan Aero Mount by OmNomNomagon
....
probe offset values for marlin configuration
#define x_probe_offset_from_extruder -16
#define y_probe_offset_from_extruder -42
thingiverse
free

ReDuplicator i3 MK3x Tower Corners & Feet for AliExpress L Brackets
...holes per bracket with a 5mm drill to make the bolts fit.
all models except the foot with cutout can be printed without supports.
thingiverse
free
ReDuplicator i3 MK3x - E3D Hemera Mount with Bltouch and Filament Sensor
... sensor is available for testing via github, and will be published once properly tested. a pinda2 probe mount is also on the way.
Reduplicator
thingiverse
free

ReDuplicator i3 corner alu profile 30x30 by menyiv
... z axis portal for reduplicator i3 printer clones.
it contains only one .stl file. for correct side should be mirrored in slic3r.
thingiverse
free
ReDuplicator i3 MK3x - MK52 Removable Heatbed Expansion
... this requires new extrusions and rods. some extrusions and printed parts are carried over from the original reduplicator design.
thingiverse
free
ReDuplicator i3 MK3x - Non Metal 3030 Tabbed Brackets by OmNomNomagon
...ner 30x30 tabbed bracket
alternate 30mm high leg file
tabbed corner plate brackets.
see the original project for complete details
thingiverse
free
ReDuplicator i3 MK3x - Cable Guide Alternate for 42x42mm X Stepper by Plower
...unt 360.stl part, so that it clamps properly onto the stepper.
i'm using usongshine steppers, these are 42x42mm base as well.
thingiverse
free
ReDuplicator i3 MK3x - Alternative & Optional Parts by OmNomNomagon
...and a ptfe mount in order to run ptfe directly to the extruder.
complete instructions are available on the main thingiverse page.
thingiverse
free
ReDuplicator i3 MK3x Tower Corners & Feet for AliExpress L Brackets
...holes per bracket with a 5mm drill to make the bolts fit.
all models except the foot with cutout can be printed without supports.
thingiverse
free
ReDuplicator i3 MK3x - Titan Aero Mount by OmNomNomagon
....
probe offset values for marlin configuration
#define x_probe_offset_from_extruder -16
#define y_probe_offset_from_extruder -42
thingiverse
free
ReDuplicator i3 MK3x - Titan Aero Mount Piezo Remix by silvrswt
...should work if installed in the same fashion as the djdemond's piezo z-probe mount:
https://www.thingiverse.com/thing:2526978
thingiverse
free
ReDuplicator i3 MK3x - E3D Hemera Mount with Bltouch and Filament Sensor
... sensor is available for testing via github, and will be published once properly tested. a pinda2 probe mount is also on the way.
thingiverse
free

BigTree TFT35 V2 Display Only
...can be used stand-alone. i created this for my reduplicator ...
Omnomnomagon
thingiverse
free

Stealthy Faceted Wall Hook by OmNomNomagon
...erse
a faceted hook remix with a pronounced angle to allow it to hold bigger objects.
works perfectly with 3m double sided tape.
thingiverse
free

Lego Saturn V Stands by OmNomNomagon
..., one per stage. these can be a little precarious, so i created some additional stands in the same style as the originals. enjoy.
thingiverse
free
Earbuddy - Earphone holder by OmNomNomagon
...nes and buds perfectly. you may need to increase or decrease the %size depending on if your buds are larger or smaller than most.
thingiverse
free

Alco Bottle Headphone Stand by OmNomNomagon
... scotch.
update
check out my evolution of this design here
it offers a cleaner look and forms a more secure hold on the bottle.
thingiverse
free

Sturdy Filament Guide Wanhao i3 by OmNomNomagon
...atible with this filament locker https://www.thingiverse.com/thing:1280498 and other thingy's created for the original holder
thingiverse
free

Whisky Bottle headphone Stand by OmNomNomagon
...ollowing whisky bottles:
lapphroaig
lagavulin
yamasaki
jack daniels
glenfiddich
cragganmore
ardberg
glenlivet
glenmorangie
enjoy.
thingiverse
free

Z Brace Yourself by OmNomNomagon with Added Bolting Flanges by shroppy
...
i think it made the whole unit look much better than the shiny zinc plated threaded rod you get from the typical hardware store.
thingiverse
free

Low Poly Planter - Wide Top by OmNomNomagon
...ed it and included a normal (96x96x48mm) and a mini (65x65x35mm) size.
changelog
1.1. added a solid model for vase mode printing.
thingiverse
free
ReDuplicator i3 MK3x - Non Metal 3030 Tabbed Brackets by OmNomNomagon
...ner 30x30 tabbed bracket
alternate 30mm high leg file
tabbed corner plate brackets.
see the original project for complete details
thingiverse
free

Quad Vacuum Tube Display Stand - ECC88 6DJ8 6922 6BZ7 by OmNomNomagon
...22, e88cc, pcc88, e188cc, 6bz7, cca. these are the tubes commonly used in schiit audio products such as the valhalla and the lyr,
Overhaul
3d_ocean
$89

Opel Corsa 3door 2011
...spin: http://www.youtube.com/watch?v=0pr3xhlbjxq the opel corsa’s makeover continues: following the overhaul of everything under its skin in 2010, opel’s successful...
3d_export
$360

leahy class guided missile cruiser
...areas were refurbished, and the engineering plant was fully overhauld. cg 16 uss leahy1962 bath iron works, bath, maine...
thingiverse
free

Overhaul - BattleBots Season 2 by teamtestbot
...ot overhaul, shown in its season 2 form! movable, posable joints!
note: this model may not be reproduced for commercial purposes.
thingiverse
free
Wanhao Brace Overhaul by carternick01
...rhaul by carternick01
thingiverse
this brace was part of my addition to making my tower frame extremely rigid. very great print.
thingiverse
free

XYZ DaVinci PRO Complete Arduino Overhaul by Indigo4
...t with any regular software like repetier host.
more stl's for parts coming soon.
https://www.youtube.com/watch?v=iflgxwv9s-8
thingiverse
free

Overhaul's Mask BNHA
...n area out and add foam padding to make it more comfortable. i can even throw in the blend file if anyone wants to improve on it.
thingiverse
free

Davinci MiniMaker Complete Overhaul by s-kybound
...mk8 hotend
-direct drive
-part cooling fan
-new psu
-small heated bed
-new motherboard + raspberry pi to use klipper
-lcd display
thingiverse
free

Anycubic i3 Mega Hotend Overhaul Remix
...ps into place onto the belt. enough space is provided on the belt clips to go over any of the cable ties used to fasten the belt.
thingiverse
free

FLSun i3 OVERHAUL by Choutos2
...s with this mod, or if you find better mod combinations, or if you just find it great or crap.
comments and thumbs are wellcome!
thingiverse
free

Monoprice MP Select Mini V2 (MPSM V2) Electronics Overhaul by 8FootedAlgaeEater
...t: https://www.tardigradeoutdoors.com/blog/overhauling-a-monoprice-mp-select-mini-v2-mpsm-v2-with-skr-14-board-octoprint-and-more
Wanhao
thingiverse
free
Wanhao Logo Plate / Wanhao Logo Schild by JMDesigns
...wanhao logo plate / wanhao logo schild by jmdesigns
thingiverse
wanhao logo plate / wanhao logo schild
thingiverse
free
Wanhao logo by nebtio
...wanhao logo by nebtio
thingiverse
wanhao logo
thingiverse
free
Wanhao keychain by Rein3003
...wanhao keychain by rein3003
thingiverse
a keychain with the logo of wanhao
thingiverse
free
Wanhao Di3 v2 Light / Wanhao Di3 v2 Beleuchtung by JMDesigns
...wanhao di3 v2 light / wanhao di3 v2 beleuchtung by jmdesigns
thingiverse
wanhao di3 v2 light / wanhao di3 v2 beleuchtung
thingiverse
free
TUSH For Wanhao by wtmi1992
...tush for wanhao by wtmi1992
thingiverse
the ultimate spool holder, modified for the top of the wanhao control box. fits snug.
thingiverse
free
fanduct wanhao d12 by theopoilmek
...fanduct wanhao d12 by theopoilmek
thingiverse
fanduct pour wanhao d12
thingiverse
free
Wanhao i3 Marlin by johan21
...wanhao i3 marlin by johan21
thingiverse
marlin for wanhao i3 rampsboard 1.4.
thingiverse
free
Wanhao Duplicator i3 by imagineering4
...wanhao duplicator i3 by imagineering4
thingiverse
these are the stl files for the improvements to the wanhao duplicator i3, v2
thingiverse
free

Wanhao D6 filament guard
...wanhao d6 filament guard
thingiverse
this is a filament guard for wanhao d6 machine to avoid the filament unrolling
thingiverse
free
Wanhao Duplicator i3 Model by Hilde3D
...wanhao duplicator i3 model by hilde3d
thingiverse
wanhao duplicator i3 model
Mk3
turbosquid
$50

cention mk3
...ty free 3d model cention mk3 for download as ma, obj, and fbx on turbosquid: 3d models for games, architecture, videos. (1454148)
turbosquid
$129

MK3 Tank
... available on turbo squid, the world's leading provider of digital 3d models for visualization, films, television, and games.
turbosquid
$100

Toyota Supra MK3
... available on turbo squid, the world's leading provider of digital 3d models for visualization, films, television, and games.
turbosquid
$44

cention mk3 low poly
...d model cention mk3 low poly for download as ma, obj, and fbx on turbosquid: 3d models for games, architecture, videos. (1454666)
turbosquid
$30

Challenger I Mk3 Falcon
... available on turbo squid, the world's leading provider of digital 3d models for visualization, films, television, and games.
turbosquid
$10

American Frag hand grenade MK3
...free 3d model american frag hand grenade mk3 for download as on turbosquid: 3d models for games, architecture, videos. (1393624)
turbosquid
$20

Mk3 US Navy Combat Knife
...ty free 3d model mk3 us navy combat knife for download as fbx on turbosquid: 3d models for games, architecture, videos. (1172791)
3d_export
$29

Ford Fiesta MK3 Modified 3D Model
...7 tumerfx mtumer mehmet t?mer 1993 1995 1996 wrc special modifed modifiye
ford fiesta mk3 modified 3d model mtumer 30698 3dexport
3d_export
$99

Toyota Supra Mk3 19861993 3D Model
...ort fast coupe japan 1986 1987 1988 1989 1990 1991 1992 1993 tuning turbo
toyota supra mk3 19861993 3d model squir 62530 3dexport
turbosquid
$5

Timothy Oulton Mars Chair MK3
...on mars chair mk3 for download as 3ds, max, obj, fbx, and dae on turbosquid: 3d models for games, architecture, videos. (1209782)
Extrusion
turbosquid
free

aluminum extrusion profiles
...free 3d model aluminum extrusion profiles for download as max on turbosquid: 3d models for games, architecture, videos. (1381707)
turbosquid
$5
Cable Cover Extrusion
... available on turbo squid, the world's leading provider of digital 3d models for visualization, films, television, and games.
3d_export
free

30 x 30 extrusion
... x 30 x 40.sldprt<br>30 x 30 x 50.sldprt<br>30 x 30 x 606.sldprt<br>the sketch.sldprt<br>30 x 30 x 40.stl
3d_export
$300
melt-blown fabric extrusion molding machine
...an email to me.<br>designed with solidworks 2017, render with photoview 360<br>**************************************
3d_export
$5

Spaceship - Galaxy Crusher
...with a more ominous twist. it has lots of extrusion and cubes and comes with a whopping 4k texture,...
3d_export
$20
1600 Meltblown cloth production line set drawing CAD
...width of 1600mm. the steel structure frame, feeding host, extrusion screw, heating system, screen changer, metering pump, melting it...
3d_export
$5

one-eyed scary virus
...cinema, the body relief is formed by the standard extrusion noise. the eye texture is...
3d_export
$20
GE TF34 Fan Blade and Nose Cone
...and appropriately sized fillet features are provided.<br>also, a threaded extrusion profile is provided on the fan blade component and...
3d_export
$10
glue injection machine
...injection technology. the ordinary glue injection machine is screw extrusion type, and its instantaneous pressure can reach more than...
3d_export
$1000
bead triangle adhesive laminating machine
...a triangular rubber head with the shape required for extrusion the rear end of the extruder is also provided...
Aluminium
3d_ocean
$3

Vray Aluminium
...vray aluminium
3docean
3d max aluminium material metal vray
vray aluminium material for 3dmax
design_connected
$13

Aluminium Chair
...aluminium chair
designconnected
sebastian scherer aluminium chair computer generated 3d model. designed by scherer, sebastian.
3ddd
$1
Baxter Sellerina Aluminium
... baxter , sellerina aluminium
итальянское кресло sellerina aluminium фабрики baxter
turbosquid
free
Aluminium Foil
...
turbosquid
free 3d model aluminium foil for download as dae on turbosquid: 3d models for games, architecture, videos. (1175978)
3ddd
$1
Hafele handles - Aluminium
...hafele handles - aluminium
3ddd
фурнитура
hafele handles - aluminium
turbosquid
$29
aluminium can
...quid
royalty free 3d model aluminium can for download as max on turbosquid: 3d models for games, architecture, videos. (1632245)
turbosquid
$4

Aluminium Chair
...id
free 3d model aluminium chair for download as max and fbx on turbosquid: 3d models for games, architecture, videos. (1318406)
turbosquid
free

Aluminium Chair
...ee 3d model aluminium chair for download as max, skp, and 3ds on turbosquid: 3d models for games, architecture, videos. (1694764)
3d_ocean
$10

Aluminium Keyboard
...keyboard. ready to render with included scene and textures (c4d only). • fast renders • lights and cameras included • textures...
turbosquid
$9
Aluminium Stool
...ee 3d model aluminium stool for download as max, skp, and 3ds on turbosquid: 3d models for games, architecture, videos. (1694695)
I3
3d_export
$10

suv i3
...suv i3
3dexport
suv i3 2013 series
3d_ocean
$89

BMW i3 2012
...y, in real units of measurement, qualitatively and maximally close to the original. model formats: - *.max (3ds max 2008 scanl...
cg_studio
$99

BMW i3 20143d model
...
cgstudio
.3ds .c4d .fbx .lwo .max .obj - bmw i3 2014 3d model, royalty free license available, instant download after purchase.
cg_studio
$99

BMW i3 20123d model
...tudio
.3ds .c4d .fbx .lwo .max .mb .obj - bmw i3 2012 3d model, royalty free license available, instant download after purchase.
cg_studio
$99

BMW i3 20143d model
...tudio
.3ds .c4d .fbx .lwo .max .mb .obj - bmw i3 2014 3d model, royalty free license available, instant download after purchase.
humster3d
$75

3D model of BMW i3 2014
...
buy a detailed 3d model of bmw i3 2014 in various file formats. all our 3d models were created maximally close to the original.
humster3d
$40

3D model of Kitchen Set I3
...uy a detailed 3d model of kitchen set i3 in various file formats. all our 3d models were created maximally close to the original.
3d_ocean
$30

Kitchen set i3
...ensils oven plates shelves sink table ware
kitchen set i3 include 3d models: cooker, oven, sink, cupboards, table, chair, plates.
3d_ocean
$89

BMW i3 2014
...y, in real units of measurement, qualitatively and maximally close to the original. model formats: - *.max (3ds max 2008 scanl...
cg_studio
$99

BMW i3 Concept 20113d model
...i3
.3ds .c4d .fbx .lwo .max .obj - bmw i3 concept 2011 3d model, royalty free license available, instant download after purchase.
Prusa
turbosquid
$2

Frame Filament Guide Clip-On for Prusa Mk3
...rame filament guide clip-on for prusa mk3 for download as stl on turbosquid: 3d models for games, architecture, videos. (1634730)
3d_export
free

prusa i3 mk3s laser mount for opt lasers
...to learn more about the blue laser technology that conceived the cutting and engraving laser heads from opt lasers, please visit:
turbosquid
free

Prusa small printer adapter holder
...er for download as ipt, skp, dwg, dxf, fbx, ige, obj, and stl on turbosquid: 3d models for games, architecture, videos. (1642936)
3d_export
$30

geisha by jonathan adler
...** i did a 3d printing test in the prusa software, you can find it among the attached images.<br>exchange:<br>.blend...
thingiverse
free

Prusa without Prusa (rc2) by madless
...prusa without prusa (rc2) by madless
thingiverse
just the main part of prusa rc2 faceshield, without writing.
enjoy :)
thingiverse
free

Prusa by acejbc
...prusa by acejbc
thingiverse
prusa knob info
m3 8mm screw
thingiverse
free

Prusa house
...prusa house
thingiverse
how prusa house could look like...
thingiverse
free

Prusa Mk2 "Fake Prusa" LCD cover by anraf1001
...r by anraf1001
thingiverse
version of prusa's lcd cover with "fake prusa" instead of "original prusa"
thingiverse
free

Prusa stabilizator by gutiueugen
...prusa stabilizator by gutiueugen
thingiverse
prusa stabilizator
thingiverse
free

Keychain Prusa by rbarbalho
...keychain prusa by rbarbalho
thingiverse
keychain with text prusa.
Complete
turbosquid
$35

complete plan
...quid
royalty free 3d model complete plan for download as max on turbosquid: 3d models for games, architecture, videos. (1221693)
turbosquid
$10
COMPLETE WASHROOM
...
royalty free 3d model complete washroom for download as max on turbosquid: 3d models for games, architecture, videos. (1413853)
turbosquid
$1

Complete Office
...id
royalty free 3d model complete office for download as max on turbosquid: 3d models for games, architecture, videos. (1323641)
vizpark
$509

VP COMPLETE
...e is the ultimate collection of 3d archviz assets, including 900 3d models, 50 hdris, 100 tileable textures and pattern software.
turbosquid
$15
excercise complete
... available on turbo squid, the world's leading provider of digital 3d models for visualization, films, television, and games.
turbosquid
$1
complete cabinet
... available on turbo squid, the world's leading provider of digital 3d models for visualization, films, television, and games.
turbosquid
free

complete Desk.lwo
... available on turbo squid, the world's leading provider of digital 3d models for visualization, films, television, and games.
3d_export
$5

Complete Wall Pack
...complete wall pack
3dexport
a complete set of 14 walls
3d_ocean
$12

Complete Model
... any other purpose. model includes, tree, street light, bench with urn, horse model. total poly and verts are 282,036 and 334,...
turbosquid
$80

sasuke complete susanoo
...oyalty free 3d model sasuke complete susanoo for download as on turbosquid: 3d models for games, architecture, videos. (1693376)