Thingiverse
recycle failed 3d Print Shredder by stefi01
by Thingiverse
Last crawled date: 3 years ago
Will update when finished, box box and hoper are now built, next is to think of a way to add a gear motor with chain drive.
IF ANYONE NEEDS EXTRA PHOTOS THEN LET ME KNOW WHAT OF AND I WILL POST THEM HERE.
We had printed and built the compost shredder we’d seen on Thingiverse which had been put up by THYMARK
It worked reasonably well, but there just wasn’t enough “beef” to it for our “wants”.
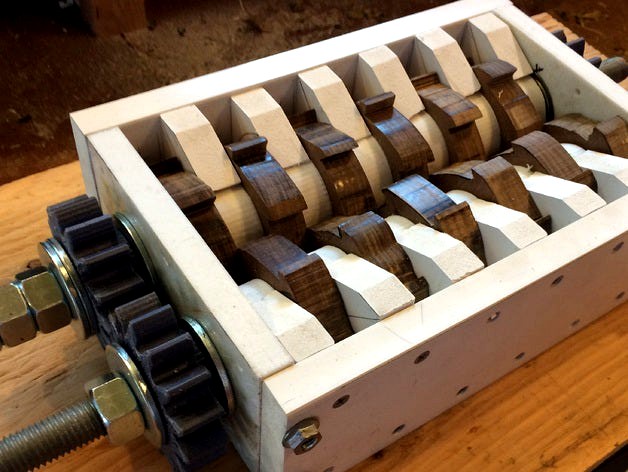
Casting around a few ideas and we came up with a design that has wooden grinding gears.
To be sure that the teeth would hold up, I went to a wood specialty shop and asked for the hardest wood they had in stock. I was expecting maple or ash, but he had some Arizona Iron Wood. One look and a quick hefting told me all I needed to know. This stuff is truly like “iron”, tight grain and VERY dense. Perfect for what I wanted. BTW this stuff “ain’t cheap”. One 8 ft. length would do me just fine. We used the original end piece design to hold the bearings. They’re perfect.
I had some left over 1” pre-punch square tubing from the first one. I took the grinder apart to get the dimensions of the gear teeth. Traced a gear outline on the wood, outside profile and inside to be able to cut them out. This is where a scroll saw or band saw with a fine blade is perfect.
The original design shows four teeth on a side. Like Tim the Tool Man says “More Power” ,,, we went with 6 gears on each side. This is where patience and a steady hand is good to have. The wood is very tough to cut with a scroll saw. I ended up using a band saw to get the outline. Be careful or you’ll break the blade (guilty look) .. To get the inner hole cut, at first I was drilling out a few holes to get the scroll saw blade set up and then follow the lines. After a few times, I got out my Forstner bit and drilled away the majority of the excess material. NOTE HERE ,,,, be very careful drilling, the thing can get away and with those sharp teeth can destroy your fingers. I used a drill vise to hold each one as I was drilling. As I got each hole finished I tested it on the tubing. Any “modification” (ie make larger) was done with my wood rasp to ensure a tight fit on the tubing. I was careful to mark the position of how they fit and in which order they went. We also printed the spacers for the teeth. They slid onto the square tubing quite well. As for the end gears they got printed too, BUT they ended up a whole bunch thicker than the original.
Now as for how to turn the teeth. I got some ¾ threaded rod and about a dozen nuts and flat washers. I measured the tubing length to accommodate the teeth and spacers. Putting two nuts on a bit of the threaded rod and inserting it inside the tubing was a bit tricky. You’ll need to grind off some of the end of the nut to make it fit in line with the other nut plus be able to slide inside the tubing. A grinding wheel is handy for this. (WEAR YOUR SAFETY GLASSES) To make sure it wouldn’t slide out I used my MIG welder to fasten the nuts inside of the tubing,
To be sure the rod turned inside of the bearings we printed some circles to go over the rod and inside of the bearings. (Think a round shim) The gears have a HEX internal of 1 1/8 to allow the nut to slide in. Because of the thickness of the gear I ground down the thickness of one of the nuts to be able to have two nuts in each gear. I held them in place with a flat washer and two nuts jammed tight to allow freedom of motion yet not slid out of alignment.
As for the side panels, we tried printing them. Our printer just wasn’t up to the task (It’s only a 12 x 12) some of the “work” was too close to the edge even with putting it on a diagonal. I decided to get some 3 ½ wide PVC molding at the Local Lowe’s. One 8 foot length was fine.
I cut the length to fit on the end panels with a bit of “overage” by about 1/16 th. The drill press did the work of the 3/8 holes to line up with the end panels. Some Helicoil inserts made sure the mounting bolts or studs (which ever you desire) would have a secure bite.
As for the angled guides that ride on the spacers, I used my brace and bit to drill out a proper hole (for me this came to 2 1/8 … not wanting to spend the money on a hole saw I did that part by hand) to get the center use your small framing square to make a 45 degree angle on each side and where they cross use a center punch to allow your bit to start.
Chop saw to cut the pieces to length. I decided to make the centerline cut a bit off center to allow for the saw blade kerf. (I know that uses up a bit more material but it’s worth it for the finish look.) Once cut to fit I put the blade at an angle to make the cuts that fit over the spacer. NOTE WELL … BE VERY CAREFUL OF YOUR FINGERS WHEN USING THIS SAW. …. UNLESS YOU LIKE THE NICK NAME OF “STUMPY”
Once the guides were cut to fit, I placed them inside of the grinder and gave it a few turns to check for freedom of motion. EXCELLENT result.
I then marked the inside of the side panel to preset for drilling some mounting screws. HINT once marked out drill a small pilot hole from the inside and counter sink the outside for wood screws. Align and pre drill for each screw.
I put my 3/8 drill to it and checked for smoothness of operation. SWEEEET. I did find that I do need a more powerful drill to be able to grind some of the thicker items or I’m gonna have to make a gear reduction set up for the power.
tooth size
x and y, veries between 82 and 85mm
z 20.0 to20.5mm high
79.5 x,y
27.0 z
bearing side plate 16mm x 90mm x 160mm
4x ball bearings - SKF 6006 ZZ or 2RS
helicoil kit 5/16 or metric equivalent plus bolts
3/4 rod for the center
bunch of 3/4 nuts and washers
8ft length of wood (harder the better)
some parts from the compost shredder project are also compatible
added to the stl files are templates as well as full prints so depending which way this is made then not all files are needed
needed stl files
4 x bearing spacers,
2 x bearing sides,
same number as teeth spacers as cutter teeth,
the shredder spacer stl is a template only.
rest is up to the builder.
some tools needed.
grinder
welder
skill or band saw (preferably both)
if welding or cutting is needed then pm me and can might be able to help.
tottal cost was..
rod rod from ace hardware, $15
squa ubing was $5
gears wee $8 on ebay and need 4.
helicoil 5/16 x 4.
iron wood from local wood store, not like home depot or lowes but a family ran place where they know what they are talking about and never had to say. do you want fries with that.
the other bits are printed,
there is welding involved
https://www.youtube.com/watch?v=pjqRlK4ZUgk
unsure on anuthing then just ask, thats why we are a community :)
IF ANYONE NEEDS EXTRA PHOTOS THEN LET ME KNOW WHAT OF AND I WILL POST THEM HERE.
We had printed and built the compost shredder we’d seen on Thingiverse which had been put up by THYMARK
It worked reasonably well, but there just wasn’t enough “beef” to it for our “wants”.
Casting around a few ideas and we came up with a design that has wooden grinding gears.
To be sure that the teeth would hold up, I went to a wood specialty shop and asked for the hardest wood they had in stock. I was expecting maple or ash, but he had some Arizona Iron Wood. One look and a quick hefting told me all I needed to know. This stuff is truly like “iron”, tight grain and VERY dense. Perfect for what I wanted. BTW this stuff “ain’t cheap”. One 8 ft. length would do me just fine. We used the original end piece design to hold the bearings. They’re perfect.
I had some left over 1” pre-punch square tubing from the first one. I took the grinder apart to get the dimensions of the gear teeth. Traced a gear outline on the wood, outside profile and inside to be able to cut them out. This is where a scroll saw or band saw with a fine blade is perfect.
The original design shows four teeth on a side. Like Tim the Tool Man says “More Power” ,,, we went with 6 gears on each side. This is where patience and a steady hand is good to have. The wood is very tough to cut with a scroll saw. I ended up using a band saw to get the outline. Be careful or you’ll break the blade (guilty look) .. To get the inner hole cut, at first I was drilling out a few holes to get the scroll saw blade set up and then follow the lines. After a few times, I got out my Forstner bit and drilled away the majority of the excess material. NOTE HERE ,,,, be very careful drilling, the thing can get away and with those sharp teeth can destroy your fingers. I used a drill vise to hold each one as I was drilling. As I got each hole finished I tested it on the tubing. Any “modification” (ie make larger) was done with my wood rasp to ensure a tight fit on the tubing. I was careful to mark the position of how they fit and in which order they went. We also printed the spacers for the teeth. They slid onto the square tubing quite well. As for the end gears they got printed too, BUT they ended up a whole bunch thicker than the original.
Now as for how to turn the teeth. I got some ¾ threaded rod and about a dozen nuts and flat washers. I measured the tubing length to accommodate the teeth and spacers. Putting two nuts on a bit of the threaded rod and inserting it inside the tubing was a bit tricky. You’ll need to grind off some of the end of the nut to make it fit in line with the other nut plus be able to slide inside the tubing. A grinding wheel is handy for this. (WEAR YOUR SAFETY GLASSES) To make sure it wouldn’t slide out I used my MIG welder to fasten the nuts inside of the tubing,
To be sure the rod turned inside of the bearings we printed some circles to go over the rod and inside of the bearings. (Think a round shim) The gears have a HEX internal of 1 1/8 to allow the nut to slide in. Because of the thickness of the gear I ground down the thickness of one of the nuts to be able to have two nuts in each gear. I held them in place with a flat washer and two nuts jammed tight to allow freedom of motion yet not slid out of alignment.
As for the side panels, we tried printing them. Our printer just wasn’t up to the task (It’s only a 12 x 12) some of the “work” was too close to the edge even with putting it on a diagonal. I decided to get some 3 ½ wide PVC molding at the Local Lowe’s. One 8 foot length was fine.
I cut the length to fit on the end panels with a bit of “overage” by about 1/16 th. The drill press did the work of the 3/8 holes to line up with the end panels. Some Helicoil inserts made sure the mounting bolts or studs (which ever you desire) would have a secure bite.
As for the angled guides that ride on the spacers, I used my brace and bit to drill out a proper hole (for me this came to 2 1/8 … not wanting to spend the money on a hole saw I did that part by hand) to get the center use your small framing square to make a 45 degree angle on each side and where they cross use a center punch to allow your bit to start.
Chop saw to cut the pieces to length. I decided to make the centerline cut a bit off center to allow for the saw blade kerf. (I know that uses up a bit more material but it’s worth it for the finish look.) Once cut to fit I put the blade at an angle to make the cuts that fit over the spacer. NOTE WELL … BE VERY CAREFUL OF YOUR FINGERS WHEN USING THIS SAW. …. UNLESS YOU LIKE THE NICK NAME OF “STUMPY”
Once the guides were cut to fit, I placed them inside of the grinder and gave it a few turns to check for freedom of motion. EXCELLENT result.
I then marked the inside of the side panel to preset for drilling some mounting screws. HINT once marked out drill a small pilot hole from the inside and counter sink the outside for wood screws. Align and pre drill for each screw.
I put my 3/8 drill to it and checked for smoothness of operation. SWEEEET. I did find that I do need a more powerful drill to be able to grind some of the thicker items or I’m gonna have to make a gear reduction set up for the power.
tooth size
x and y, veries between 82 and 85mm
z 20.0 to20.5mm high
79.5 x,y
27.0 z
bearing side plate 16mm x 90mm x 160mm
4x ball bearings - SKF 6006 ZZ or 2RS
helicoil kit 5/16 or metric equivalent plus bolts
3/4 rod for the center
bunch of 3/4 nuts and washers
8ft length of wood (harder the better)
some parts from the compost shredder project are also compatible
added to the stl files are templates as well as full prints so depending which way this is made then not all files are needed
needed stl files
4 x bearing spacers,
2 x bearing sides,
same number as teeth spacers as cutter teeth,
the shredder spacer stl is a template only.
rest is up to the builder.
some tools needed.
grinder
welder
skill or band saw (preferably both)
if welding or cutting is needed then pm me and can might be able to help.
tottal cost was..
rod rod from ace hardware, $15
squa ubing was $5
gears wee $8 on ebay and need 4.
helicoil 5/16 x 4.
iron wood from local wood store, not like home depot or lowes but a family ran place where they know what they are talking about and never had to say. do you want fries with that.
the other bits are printed,
there is welding involved
https://www.youtube.com/watch?v=pjqRlK4ZUgk
unsure on anuthing then just ask, thats why we are a community :)
Similar models
thingiverse
free

Ender 3 Hot End Fix Spacer with tube guide
... 32.4mm.
this has worked perfectly so far with trying out tpu printing as it clogged the whole hot end every time i tried before.
thingiverse
free

13mm Idler Bearing Toothed Cover CR10 by watercooled3dprinter
...eep them the same length and the guide bearing near the stepper motor might need a longer bolt. used pla with a slow print speed.
thingiverse
free

Idler for Direct-drive extruder, easy pull desing ( 695z Bearing ) by Portillo
...se a round pcb spacer with the desire size. other option is cut some rod you have, like a 5mm drill to 10mm length.
best regards.
thingiverse
free

Axial scx24 pass through middle axle for 6x6 by Gm1972
...r, use an drill as an lathe to get the correct size and then just drill an hole through the stock diff cover for the axle output)
thingiverse
free

EZ3D X axis block with extra adjustable bearing (Left side) by leesteve2005
...t spacing. after 4 failures at 5 hours of printing, i figured you can run the rod into the other side line up the end and drill.
thingiverse
free

Mini table saw by jdh30
...ped into any workmate to cut wood up to 6mm thick.
you'll need some m6 bolts and bearings and a dremel saw with an m6 hole.
thingiverse
free

1kg filament holder by RoSt
...pacer, bearing, washer, nut, thick spacer, filament feeder, thick spacer, nut, washer, bearing, thin spacer, holder, washer, nut.
3dwarehouse
free

hole saw
...hole saw
3dwarehouse
no way!!?! a hole saw #bit #drill #wood
thingiverse
free

Bissell Pet Vacuum Wand End Fix by JeenyusPete
...rdingly and again drilled out the rivet behind the button and used that hole as a mount, it was also an m3 bolt and nut i believe
thingiverse
free

Wooden toilet paper holder by loumgg
... the drill jig
4-assemble printed parts to the wood part with glue
5-assemble the paper holder to the wall with double sided tape
Stefi01
thingiverse
free

Arduino stand by stefi01
...arduino stand by stefi01
thingiverse
needed extra breadboards
thingiverse
free

T4 Legs by stefi01
...t4 legs by stefi01
thingiverse
needed something inbetween
thingiverse
free

Head scan by stefi01
...head scan by stefi01
thingiverse
1st attempt at a head scan using 123d catch
thingiverse
free
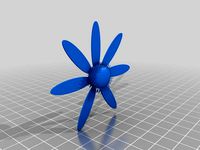
Flower by stefi01
...e
i liked this http://www.thingiverse.com/thing:84075
and decided to make a few flowers for a vase but did not want all the same
thingiverse
free

random shape by stefi01
...random shape by stefi01
thingiverse
was board so just did some random shape thing
thingiverse
free

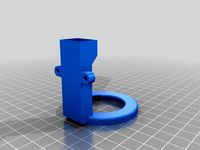
pipe vent grill by stefi01
...pipe vent grill by stefi01
thingiverse
designed for the end of pipes
thingiverse
free
remixed fan duct by stefi01
...remixed fan duct by stefi01
thingiverse
not sure how it would fan with a sensor
thingiverse
free

deeper LCD box by stefi01
...deeper lcd box by stefi01
thingiverse
deeper box which sorts out the focus problem
thingiverse
free
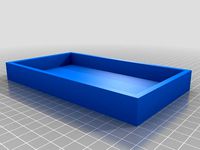
Post it note tray by stefi01
...post it note tray by stefi01
thingiverse
was made for a friend as a post it note tray in his office
thingiverse
free

Crossfire T2 Arm by stefi01
...crossfire t2 arm by stefi01
thingiverse
wanted stronger, same as the orignial file, just added bits
Shredder
turbosquid
$49

Shredder
...urbosquid
royalty free 3d model shredder for download as ige on turbosquid: 3d models for games, architecture, videos. (1464895)
turbosquid
$10

Shredder
...3d model wood shredder for download as obj, fbx, skp, and stl on turbosquid: 3d models for games, architecture, videos. (1467415)
turbosquid
$39

Soap shredder
...y free 3d model soap shredder for download as sldpr and sldas on turbosquid: 3d models for games, architecture, videos. (1423317)
3d_export
$5

Low speed universal shredder
...low speed universal shredder
3dexport
low speed universal shredder
turbosquid
$50

mini shredder and crusher
...odel shredder for download as ige, obj, stl, sldpr, and sldas on turbosquid: 3d models for games, architecture, videos. (1410906)
evermotion
$12

paper shredder 09 AM87
...r shredder with all textures, shaders and materials. it is ready to use, just put it into your scene.. evermotion 3d models shop.
evermotion
$10
paper shredder 06 AM87
...r shredder with all textures, shaders and materials. it is ready to use, just put it into your scene.. evermotion 3d models shop.
evermotion
$10

paper shredder 08 AM87
...r shredder with all textures, shaders and materials. it is ready to use, just put it into your scene.. evermotion 3d models shop.
evermotion
$10

paper shredder 07 AM87
...r shredder with all textures, shaders and materials. it is ready to use, just put it into your scene.. evermotion 3d models shop.
turbosquid
$10

Shredder Blade shuriken
... available on turbo squid, the world's leading provider of digital 3d models for visualization, films, television, and games.
Failed
3d_export
$10

Brass Knuckles-claws
...uckles-claws
3dexport
this is "brass knuckles-claws". fail in .obj. in the fail i create in blender. in fail 2 object.
3d_export
$10

Katana
...katana
3dexport
it is katana i bild model at blender. "katana"- fail in .blender "katana1"- fail in .obj.
3ddd
$1

Мебель
...мебель
3ddd
fail arxiv vnutri max 2010 , obj , textura
3d_export
$5

jte
...jte
3dexport
tam 5 tipov formatov faile pod blend 3dmax. mtl. fbx. obj.
3d_export
$5

bunny with animations
...bunny with animations
3dexport
low poly bunny model with animation: run, fail, die, jump. maybe game assets
3d_export
$20

robot
...- robot, modeling in blender, texturing in substance painter, archive include low and high poly models fbx formats and blend fail
3d_export
$8

Basketball PBR
...
basketball pbr .map 2048*2048 diffuse,roughness,normal,there is 3d- coat fail . vertice 3458 . poly 3456 format:obj,fbx,blendr.
3d_ocean
$8

Office Building
...cial toon
a 3d model for social games of a standar office bluidong, with all the setup ready, inside de main fail is the turotial
3d_export
$60

republic xp-47h thunderbolt prototype
...series inline engine during world war 2 - it failed to make a...
3d_export
$5
miniature of nuri
...successfully lifted off and reached its target altitude but failed to place a dummy satellite into orbit. nuri, or...
Recycle
turbosquid
$1

RECYCLE
... available on turbo squid, the world's leading provider of digital 3d models for visualization, films, television, and games.
3ddd
$1

Recycle bin
...ycle bin. rendered in 3ds max and vray.
you can replace your own logo and change the color of the bin.
modifier stack available.
3d_ocean
$25

Recycle Bins
...ens in older versions. uses vray 1.5 sp5 for the lighting setup used for the preview. please contact me if you need in another...
3d_ocean
$2

Recycle Arrow
...l three-dimensional shape triangle white background
3d recycle arrow polygon 990 face include 3dsmax2010, c4d, fbx, obj, 3ds, lwo
turbosquid
$9

Recycling Bin
...quid
royalty free 3d model recycling bin for download as fbx on turbosquid: 3d models for games, architecture, videos. (1386366)
turbosquid
$10

Recycle Bin
...ty free 3d model recycle bin for download as ma, obj, and fbx on turbosquid: 3d models for games, architecture, videos. (1203083)
turbosquid
$9

Recycle Bin
...y free 3d model recycle bin for download as max, obj, and fbx on turbosquid: 3d models for games, architecture, videos. (1152735)
turbosquid
$2

Recycle Basket
...e 3d model recycle basket for download as blend, obj, and fbx on turbosquid: 3d models for games, architecture, videos. (1702963)
turbosquid
$29

recycling bin
...3d model recycling bin for download as 3ds, obj, c4d, and fbx on turbosquid: 3d models for games, architecture, videos. (1400375)
turbosquid
$15

Recycling Stand
...l recycling stand for download as max, max, fbx, obj, and 3ds on turbosquid: 3d models for games, architecture, videos. (1642505)
design_connected
$27

...print
designconnected
moroso print computer generated 3d model. designed by wanders, marcel.
3ddd
free

Eichholtz Prints
...- eichholtz print central station i
13 - eichholtz print central station ii
14 - eichholtz print marisa
15 - eichholtz print tish
3ddd
$1

Eichholtz Prints
...print abstract - set of 2
10 - eichholtz print orange abstract
11 - eichholtz print buddha right
12 - eichholtz print buddha left
turbosquid
$1

... available on turbo squid, the world's leading provider of digital 3d models for visualization, films, television, and games.
3ddd
free

Eichholtz Prints
...of 4
2 - print dunbar 2 set of 4
3 - print guadeloupe 1 set of 4
4 - print guadeloupe 2 set of 4
5 - print giles
6 - print trett
3ddd
$1

Eichholtz Prints
...nt tutti frutti
3 - eichholtz prints watson - set of 2
4 - eichholtz prints antique nautilus - set of 2
5 - eichholtz print tiara
3d_export
$5

Monster for printing
...monster for printing
3dexport
monster 3d model printing
3ddd
free

printed rug
...printed rug
3ddd
ковер
very creative printed rug
3ddd
free

Eichholtz Prints
...иал: бумага
габариты (вхш): 72 x 62 см
описание: print sweetmeat - постер в деревянной раме.
3 - prints varsity set of 2
арти
3ddd
free

Art Print Posters
...art print posters
3ddd
прованс
art print posters by patrician prints