Thingiverse

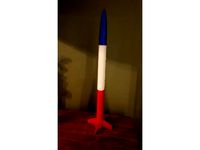
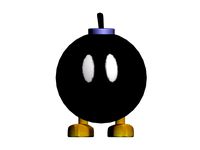
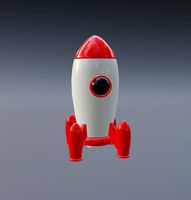
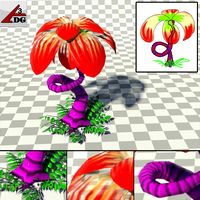
Rear Eject Bomb Rocket MK II
by Thingiverse
Last crawled date: 4 years, 2 months ago
This is an update to my original Rear Eject Bomb Rocket: https://www.thingiverse.com/thing:3138410
Instead of using an obscure paper towel tube, however, it uses a standard Estes BT-60 tube.
To build this rocket you will need:
A standard Pringles Can
290 mm or so of BT-60 body tube.
240 mm or so of BT-50 body tube (for the motor pod)
A 15" Chute
A 9" Chute
Kevlar Line
Elastic for a shock cord
A 3d Printer, of course and filament to print the parts
Paint to preference
Decal inkjet paper if you choose to print the decals from the original design.
This rocket is designed to use Estes engines up to the E size (95mm) or Aerotech engines up to F size. Mind you I don't know if it will survive motors that size, but it should.
Build notes:
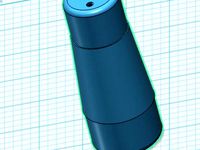
1) The parachute attaches to a screw eye threaded through the center of the "Centering Ring" part, which goes on top of the BT-60 tube. Tie kevlar line to this and run it through the tube. This line WILL be exposed to exhaust gasses. I also used a piece of nomex cloth against the inside of this centering ring to protect the plastic.
2) The kevlar line runs between the BT-60 tube and the "motor top" ring. It's important that the entire motor tube assembly slide easily in and out of the paper towel tube, but not be so loose as to fall out when assembled. To this end, this part has a notch for the kevlar line. Depending on the line you use you may have to widen this notch. The part has an arrow on it you can paint (or use a marker on) to highlight where the line is to go.
3) I only used enough Kevlar to get beyond the bottom of the rocket, then tied elastic to it. This shortens the amount of line you should need. The parachute for the bomb part of the rocket attaches to the bottom of the elastic cord.
4) There is a centering ring for the middle of the motor pod. This ring has a raised nub for screwing in a screw eye that the parachute for the pod can connect to. This nub should be facing the BOTTOM of the rocket. The intent is for the "Bomb" chute and shock cord to be isolated in the upper part of the motor bay by this ring and the pod chute to be isolated in the lower part of the motor bay. ALL RINGS SHOULD BE SANDED TO ALLOW THE MOTOR TUBE TO SLIDE EASILY OUT OF THE MOTOR BAY, but not so loose that it falls out.
5) I used an 15" chute for the bomb and a 9" chute for the motor pod.
6) If you're really good with an airbrush, you should be able to re-create the "sprayed through a stencil" effect for the lettering on the bomb. Or you could print the stencils I've provided and literally spray through them for the same effect. Optionally you can go to the original design and download the decals included there.
I've flown this on an Estes E12-4 and it went perfectly. In my case I didn't need to weight the nose but your mileage may vary there. Do a swing test for stability to be sure.
Here is the (fuzzy) video of my launch...
https://www.youtube.com/watch?v=6Rw_B7iuyM8
Onboard video from another launch (ignore the date, camera's date/time wasn't set)
https://www.youtube.com/watch?v=gt958Wjc7TY
UPDATE: Thingiverse didn't get all the STLs when I first created this thing. I've added the missing ones.
UPDATE AGAIN: DON'T use an elastic shock cord on this. Just use the Kevlar line. I launched it with an E12-4 today and the elastic failed on ejection causing the rocket to plummet nose first to the ground carrying not only my cheap 808 camera, but a $100 altimeter. Luckily it landed in soft ground (looking like unexploded ordnance) and everything, including the rocket, survived. Considering it reached 450 feet, that's no small miracle. Here's the video, you can clearly see it loose it's main chute.
https://www.youtube.com/watch?v=hWNZXObw-RY
Instead of using an obscure paper towel tube, however, it uses a standard Estes BT-60 tube.
To build this rocket you will need:
A standard Pringles Can
290 mm or so of BT-60 body tube.
240 mm or so of BT-50 body tube (for the motor pod)
A 15" Chute
A 9" Chute
Kevlar Line
Elastic for a shock cord
A 3d Printer, of course and filament to print the parts
Paint to preference
Decal inkjet paper if you choose to print the decals from the original design.
This rocket is designed to use Estes engines up to the E size (95mm) or Aerotech engines up to F size. Mind you I don't know if it will survive motors that size, but it should.
Build notes:
1) The parachute attaches to a screw eye threaded through the center of the "Centering Ring" part, which goes on top of the BT-60 tube. Tie kevlar line to this and run it through the tube. This line WILL be exposed to exhaust gasses. I also used a piece of nomex cloth against the inside of this centering ring to protect the plastic.
2) The kevlar line runs between the BT-60 tube and the "motor top" ring. It's important that the entire motor tube assembly slide easily in and out of the paper towel tube, but not be so loose as to fall out when assembled. To this end, this part has a notch for the kevlar line. Depending on the line you use you may have to widen this notch. The part has an arrow on it you can paint (or use a marker on) to highlight where the line is to go.
3) I only used enough Kevlar to get beyond the bottom of the rocket, then tied elastic to it. This shortens the amount of line you should need. The parachute for the bomb part of the rocket attaches to the bottom of the elastic cord.
4) There is a centering ring for the middle of the motor pod. This ring has a raised nub for screwing in a screw eye that the parachute for the pod can connect to. This nub should be facing the BOTTOM of the rocket. The intent is for the "Bomb" chute and shock cord to be isolated in the upper part of the motor bay by this ring and the pod chute to be isolated in the lower part of the motor bay. ALL RINGS SHOULD BE SANDED TO ALLOW THE MOTOR TUBE TO SLIDE EASILY OUT OF THE MOTOR BAY, but not so loose that it falls out.
5) I used an 15" chute for the bomb and a 9" chute for the motor pod.
6) If you're really good with an airbrush, you should be able to re-create the "sprayed through a stencil" effect for the lettering on the bomb. Or you could print the stencils I've provided and literally spray through them for the same effect. Optionally you can go to the original design and download the decals included there.
I've flown this on an Estes E12-4 and it went perfectly. In my case I didn't need to weight the nose but your mileage may vary there. Do a swing test for stability to be sure.
Here is the (fuzzy) video of my launch...
https://www.youtube.com/watch?v=6Rw_B7iuyM8
Onboard video from another launch (ignore the date, camera's date/time wasn't set)
https://www.youtube.com/watch?v=gt958Wjc7TY
UPDATE: Thingiverse didn't get all the STLs when I first created this thing. I've added the missing ones.
UPDATE AGAIN: DON'T use an elastic shock cord on this. Just use the Kevlar line. I launched it with an E12-4 today and the elastic failed on ejection causing the rocket to plummet nose first to the ground carrying not only my cheap 808 camera, but a $100 altimeter. Luckily it landed in soft ground (looking like unexploded ordnance) and everything, including the rocket, survived. Considering it reached 450 feet, that's no small miracle. Here's the video, you can clearly see it loose it's main chute.
https://www.youtube.com/watch?v=hWNZXObw-RY
Similar models
thingiverse
free

Rear Eject Bomb Rocket (18mm motors) by Aslansmonkey
...an 18mm design. so here it is. assembly is similar to the 24mm versions so see my things on...
thingiverse
free

Little Boy Rear Eject Bomb Rocket by Aslansmonkey
...print the parts
paint to preference
the bomb cradle shown in the photo can be found at: https://www.thingiverse.com/thing:4622791
thingiverse
free

Special Delivery/Rear Eject Bomb Rocket
... it but it flew fine for me on that. attached is a video poorly taken with my phone.
https://www.youtube.com/watch?v=zxtobejfvtu
thingiverse
free

Mini Rear Eject Bomb Rocket
... the photo. these drop just a little too fast on streamers alone. not because of weight, but because they come down nose first.
thingiverse
free
Model Rocket I by daves28104
...s member to keep wadding and chute from sliding down.
integrated 1/8" launch lug.
for use with estes 18mm motor (b6-5; c6-5)
thingiverse
free
Model rocket transition from BT-55 to BT-60 by smathematics
...ng sizes bt-55 to bt-60. there is a channel on either end where one can attach a zip-tie for attaching a parachute or shock cord.
thingiverse
free

Mini M&M Rocket for 18mm Motors
... launched this on an a8-3 as seen in this video...https://www.youtube.com/watch?v=gjyxiius168
...but it should take up to a c6-7.
thingiverse
free

BT-55 model rocket parts by Aslansmonkey
...hese in actual rockets at your own risk. i designed the tube mainly to test fit when i didn't have an actual tube available.
thingiverse
free

Estes Rocket Parachute Ejection Pistons by JAMott
...etween the piston and the nose cone (or payload base bulkhead) to fit the parachute(s) to be used.
hope you can find this useful.
thingiverse
free

18mm Rocket Kits by Aslansmonkey
...fnuknoa
ellipsis (b6-4): https://www.youtube.com/watch?v=pr781x4bs-m
stiletto (c6-3): https://www.youtube.com/watch?v=ov_a_whr3xa
Eject
3d_export
$50

Ejection seat 3D Model
...ion seat 3d model
3dexport
martin baker ejection seat eject martin-baker jet fighter
ejection seat 3d model tartino 1951 3dexport
3d_export
$55

Spacecraft ejection seat
... this ejection<br>seat to exit the descent module upon re-entry, after completing the<br>first manned orbit of earth.
cg_studio
$50

Ejection seat3d model
... seat3d model
cgstudio
.3ds .obj .obp - ejection seat 3d model, royalty free license available, instant download after purchase.
turbosquid
$199

ADAMS EJECTIONS SEAT
...oyalty free 3d model adams ejections seat for download as stl on turbosquid: 3d models for games, architecture, videos. (1290750)
turbosquid
$150

AIRCRAFT EJECTION SEAT
...alty free 3d model aircraft ejection seat for download as stl on turbosquid: 3d models for games, architecture, videos. (1290745)
turbosquid
$150

AIRCRAFT EJECTION SEAT
...alty free 3d model aircraft ejection seat for download as stl on turbosquid: 3d models for games, architecture, videos. (1290744)
turbosquid
$150

GEORGE EJECTION SEAT
...oyalty free 3d model george ejection seat for download as stl on turbosquid: 3d models for games, architecture, videos. (1290756)
turbosquid
$50
Saber ejecter seat
... available on turbo squid, the world's leading provider of digital 3d models for visualization, films, television, and games.
cg_studio
$45

F15 Ejection Seat3d model
...ection seat3d model
cgstudio
.max - f15 ejection seat 3d model, royalty free license available, instant download after purchase.
turbosquid
$40

Lowpoly Laptop with Ejectable Disk Drive
...ejectable disk drive for download as blend, max, fbx, and obj on turbosquid: 3d models for games, architecture, videos. (1614232)
Bomb
3d_ocean
$5
Bomb
...bomb
3docean
3d model bomb explosion medieval old war weapon wicks
medieval bomb
turbosquid
$3
Bomb bomb.7z
... available on turbo squid, the world's leading provider of digital 3d models for visualization, films, television, and games.
3d_ocean
$5

The Bomb
...the bomb
3docean
3d model design furnishings indoor lamps lighting
the bomb lighting 3d model
turbosquid
$1
The bomb
...urbosquid
royalty free 3d model the bomb for download as 3ds on turbosquid: 3d models for games, architecture, videos. (1145276)
3d_export
free

C4 Bomb
...c4 bomb
3dexport
c4 bomb
turbosquid
$13

Bomb
...squid
royalty free 3d model bomb for download as max and fbx on turbosquid: 3d models for games, architecture, videos. (1674821)
3d_export
$5
stylize bomb
...stylize bomb
3dexport
stylize bomb,gem
turbosquid
$2
bomb
...oyalty free 3d model bomb for download as blend, fbx, and obj on turbosquid: 3d models for games, architecture, videos. (1539243)
3d_export
$5
Bath bomb
...bath bomb
3dexport
cat bath bomb mold
turbosquid
$1

Bomb
...lty free 3d model bomb for download as max, max, fbx, and obj on turbosquid: 3d models for games, architecture, videos. (1629937)
Mk
3d_export
$5
scorpion mk
...scorpion mk
3dexport
scorpion mk .zpr,stl,obj,stl,
turbosquid
$6

MK 11
...turbosquid
royalty free 3d model mk 11 for download as blend on turbosquid: 3d models for games, architecture, videos. (1223895)
3d_export
$5

Qubeley MK-II
...qubeley mk-ii
3dexport
3d lowpoly type qubeley mk-ii
turbosquid
$3

MK killer
...lty free 3d model mk killer for download as fbx, obj, and 3ds on turbosquid: 3d models for games, architecture, videos. (1638698)
turbosquid
$25

Valentine Mk
... available on turbo squid, the world's leading provider of digital 3d models for visualization, films, television, and games.
turbosquid
$10

Mk-16
... available on turbo squid, the world's leading provider of digital 3d models for visualization, films, television, and games.
turbosquid
$7
Mk-16
... available on turbo squid, the world's leading provider of digital 3d models for visualization, films, television, and games.
turbosquid
free

mk-2
... available on turbo squid, the world's leading provider of digital 3d models for visualization, films, television, and games.
3d_export
$25
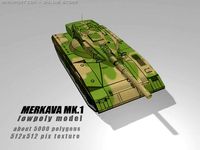
Merkava MK 1 3D Model
... 1 3d model
3dexport
merkava mk-1 tank low-poly model maya mk1 mk mk-2 mk-3 israel army
merkava mk 1 3d model rom64 5311 3dexport
3ddd
$1
мясорубка Panasonic MK G1800P
...мясорубка panasonic mk g1800p
3ddd
мясорубка , panasonic
мясорубка panasonic mk g1800p
Rocket
3d_export
$5
rocket
...rocket
3dexport
rocket 3d model low poly
3d_export
$5

rocket
...rocket
3dexport
rocket low poly 3d model cartoon
archibase_planet
free

Rocket
...rocket
archibase planet
rocket toy
rocket tintin's n290813 - 3d model (*.gsm+*.3ds+*.max) for interior 3d visualization.
3d_export
$5

Rocket
...rocket
3dexport
the rocket is made from a cylinder made in blender 3.0
turbosquid
$6

Rocket Baby Rocket Stool
...el rocket baby rocket stool for download as max, obj, and fbx on turbosquid: 3d models for games, architecture, videos. (1502645)
turbosquid
$15

rocket
...ket
turbosquid
royalty free 3d model rocket for download as on turbosquid: 3d models for games, architecture, videos. (1340796)
turbosquid
$10
Rocket
...ket
turbosquid
royalty free 3d model rocket for download as on turbosquid: 3d models for games, architecture, videos. (1247547)
3d_export
$5

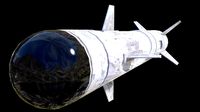
scifi rocket
...scifi rocket
3dexport
scifi rocket
turbosquid
$199

rockets
...turbosquid
royalty free 3d model rockets for download as max on turbosquid: 3d models for games, architecture, videos. (1233135)
turbosquid
$30
Rocket
...
turbosquid
royalty free 3d model rocket for download as fbx on turbosquid: 3d models for games, architecture, videos. (1290260)
Rear
3d_export
$48
engine case rear
...re efficient as it eliminates the need for the propeller shaft while the differential merges with the transmission to save space.
turbosquid
$39
rear rim
... available on turbo squid, the world's leading provider of digital 3d models for visualization, films, television, and games.
3d_export
$5
Rear Suspension 3D Model
... suspension 3d model
3dexport
rear suspension spring sport car disc brake chasis
rear suspension 3d model bayazoff 30675 3dexport
turbosquid
$20

Rear sport wheel
...del rear sport wheel for download as ige, obj, stl, and sldas on turbosquid: 3d models for games, architecture, videos. (1227527)
turbosquid
$99
Rear tyre set
... available on turbo squid, the world's leading provider of digital 3d models for visualization, films, television, and games.
turbosquid
$49
Wet Rear tyre
... available on turbo squid, the world's leading provider of digital 3d models for visualization, films, television, and games.
turbosquid
$49
Hard rear tyre
... available on turbo squid, the world's leading provider of digital 3d models for visualization, films, television, and games.
turbosquid
$49
Medium Rear tyre
... available on turbo squid, the world's leading provider of digital 3d models for visualization, films, television, and games.
turbosquid
$49

Supersoft Rear tyre
... available on turbo squid, the world's leading provider of digital 3d models for visualization, films, television, and games.
turbosquid
$39
tractor rim rear
... available on turbo squid, the world's leading provider of digital 3d models for visualization, films, television, and games.
Ii
3d_ocean
$5
inoplanet II
...inoplanet ii
3docean
3ds arman3dg games ii inoplanet low max poly trees
inoplanet ii
3ddd
$1

Novecento II
...novecento ii
3ddd
консоль
консоль: ii novecento
дизайнер: elia monterosso
3ddd
$1

Спальня VENERO II
...d
venero ii , venero , hulsta
спальня venero ii
3ddd
$1
PROPORTION II
...proportion ii
3ddd
malabar emotional
консоль proportion ii
malabar emotional design
коллекция euphoria
3ddd
$1
Regina II
...ltrona frau , капитоне
this is a custom version of the poltrona frau regina ii armchair.
3d_export
$119

cinderella ii
...cinderella ii
3dexport
3d_export
$119

lara ii
...lara ii
3dexport
3d_export
$119

doris ii
...doris ii
3dexport
3ddd
$1
Heracleum II
...s endless technical possibilities,
making this new version much more efficient while providing unique and sparkling illumination.
3ddd
$1

Towel Collection II
...towel collection ii
3ddd
полотенце
towel collection ii