Thingiverse
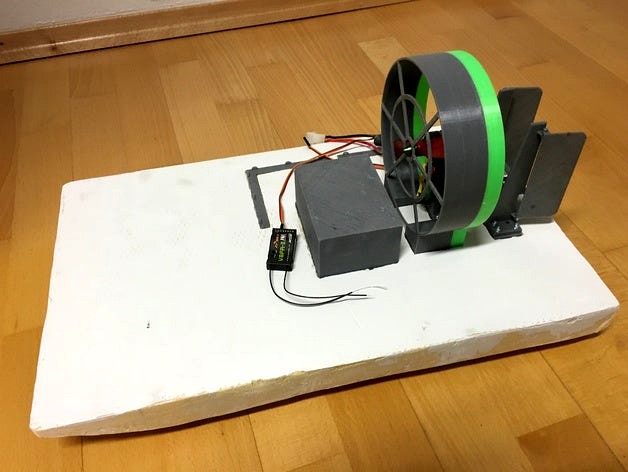
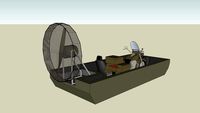
R/C - Swampboat by CRoesler
by Thingiverse
Last crawled date: 3 years ago
Update the mounts for the rudder, they were not stiff enough, as well as the mount for the motor, also optimized the cooling for the motor.
You need to print every part once, except for the skids (Sumpfboot_Kufe_xxx) those you need 2 of each and click them together with the dove tails (could not make them as one piece, because my printbed is only 200x200 mm).
Other parts you need:
14 x locking nuts M3 (insert them into the bottom side of the mounting plate)
14 x washers for M3 bolts
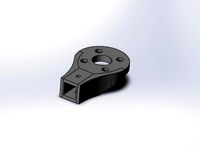
12 x M3x12 bolts (rudermount + motor)
4 x M3x10 bolts (motor mount)
2 x M3x8 bolts (servo mount)
6 x locking nuts M2.5
7 x washers for M2.5 bolts (the 7th one is for mounting the servo onto the guide)
6 x M2.5x8 bolts
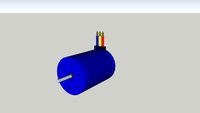
1 x Motor Multistar Elite 2204-2300KV (that is the one, for which the holes on the motor mount fit) https://www.hobbyking.com/hobbyking/store/uh_viewItem.asp?idProduct=70353
1 x fitting ESC for the motor: I used this one https://www.hobbyking.com/hobbyking/store/uh_viewItem.asp?idProduct=47810
1 x propeller 6x4 or 6x4.5 https://www.hobbyking.com/hobbyking/store/uh_viewItem.asp?idProduct=91765
1 x Servo Towerpro MG90S Metal Gear RC Micro Servo http://www.banggood.com/4-X-Towerpro-MG90S-Metal-Gear-RC-Micro-Servo-p-961967.html
1 x battery 3s, mine is a 3s5p, made out of 18650 cells from Panasonic with a custom holder (Dimensions 100x65x72 mm), if you use any other battery, you need to make a custom cover and mill a different hole into the hull
1 x remot control + receiver
1 x hull: I made mine out of a PUR (polyurethane) foam insulating wall panel, after cutting and sanding it was 500x300x50 mm with a suitable form, bow, etc. (should look like a swampboat), before cutting the bow, attached the skids temporary to get the proper angle for the bow. You also need to cut and/or mill the holes for battery, ruder_base, cableguides and the propguard into the hull (you need to check for balance a couple of times, basically put the hull in the bathtub or something similar and put the parts ontop, you should look for a trim with little more weight to the stern) print the parts first and put them on the hull to get the correct dimensions. At last you should cover the hull with glass fibre and epoxy to get it waterproof.
I haven't finished mine, yet, but I will provide more pictures of the finished boat.
You need to print every part once, except for the skids (Sumpfboot_Kufe_xxx) those you need 2 of each and click them together with the dove tails (could not make them as one piece, because my printbed is only 200x200 mm).
Other parts you need:
14 x locking nuts M3 (insert them into the bottom side of the mounting plate)
14 x washers for M3 bolts
12 x M3x12 bolts (rudermount + motor)
4 x M3x10 bolts (motor mount)
2 x M3x8 bolts (servo mount)
6 x locking nuts M2.5
7 x washers for M2.5 bolts (the 7th one is for mounting the servo onto the guide)
6 x M2.5x8 bolts
1 x Motor Multistar Elite 2204-2300KV (that is the one, for which the holes on the motor mount fit) https://www.hobbyking.com/hobbyking/store/uh_viewItem.asp?idProduct=70353
1 x fitting ESC for the motor: I used this one https://www.hobbyking.com/hobbyking/store/uh_viewItem.asp?idProduct=47810
1 x propeller 6x4 or 6x4.5 https://www.hobbyking.com/hobbyking/store/uh_viewItem.asp?idProduct=91765
1 x Servo Towerpro MG90S Metal Gear RC Micro Servo http://www.banggood.com/4-X-Towerpro-MG90S-Metal-Gear-RC-Micro-Servo-p-961967.html
1 x battery 3s, mine is a 3s5p, made out of 18650 cells from Panasonic with a custom holder (Dimensions 100x65x72 mm), if you use any other battery, you need to make a custom cover and mill a different hole into the hull
1 x remot control + receiver
1 x hull: I made mine out of a PUR (polyurethane) foam insulating wall panel, after cutting and sanding it was 500x300x50 mm with a suitable form, bow, etc. (should look like a swampboat), before cutting the bow, attached the skids temporary to get the proper angle for the bow. You also need to cut and/or mill the holes for battery, ruder_base, cableguides and the propguard into the hull (you need to check for balance a couple of times, basically put the hull in the bathtub or something similar and put the parts ontop, you should look for a trim with little more weight to the stern) print the parts first and put them on the hull to get the correct dimensions. At last you should cover the hull with glass fibre and epoxy to get it waterproof.
I haven't finished mine, yet, but I will provide more pictures of the finished boat.
Similar models
thingiverse
free
Tricopter Mounts by Daniel_Martell
...h_viewitem.asp?idproduct=11520
1x: shaft (5mm d shaft):http://www.hobbyking.com/hobbyking/store/uh_viewitem.asp?idproduct=24822
thingiverse
free

Mount LiPo by olo2000pm
...mount lipo by olo2000pm
thingiverse
mount for:http://www.hobbyking.com/hobbyking/store/uh_viewitem.asp?idproduct=36148
3dwarehouse
free
EZ-RUN Brushless Motor RC
...tor rc
3dwarehouse
ez-run brushless motor from hobbyking http://www.hobbyking.com/hobbyking/store/uh_viewitem.asp?idproduct=7194
thingiverse
free

70mm electric ducted fan housing by bblattbot
...ur own motor mounting holes too.
this edf unit is used in my electric football design. http://www.thingiverse.com/thing:191442
3dwarehouse
free

AX-2810Q KV-750 Brushless Motor
...
brushless motor purchased from hobbyking http://www.hobbyking.com/hobbyking/store/uh_viewitem.asp?idproduct=25556&aff=129354
thingiverse
free

Revision III Tricopter reinforced for 13mm aluminium by fabrimp
...w.hobbyking.com/hobbyking/store/uh_viewitem.asp?idproduct=22800
2 front arms with 250mm and back arm with 247 mm
videos soon...
thingiverse
free

F450 Flamewheel Pixhawk, FPV & Electronics Top plate, Canopy by ljbotero
...73&aff=1407499
gps: 50 mm diameterhttp://www.hobbyking.com/hobbyking/store/uh_viewitem.asp?idproduct=55558&aff=1407499
3dwarehouse
free
X-Quad
... 4 x turnigy plush 18amp speed controller -- http://www.hobbyking.com/hobbyking/store/uh_viewitem.asp?idproduct=4312; #megapirate
thingiverse
free

MOON ONE (((Cheburashka))) by Larkin_Michael
... is normal insulin syringes. they filled in a little water to stiffness. diameter of 6.5 mm
head designed for the camera gopro3
grabcad
free

Hobbyking Turnigy Talon Hexacopter frame
...urnigy talon haxacopter frame available from hobbyking (http://www.hobbyking.com/hobbyking/store/uh_viewitem.asp?idproduct=23790)
Croesler
thingiverse
free

Bottleholder - stackable by CRoesler
...r - stackable by croesler
thingiverse
print 2 for each bottle, can be joined via dove-tails. for bottles up to 85 mm in diameter
thingiverse
free

LED Desklamp for Patio table by CRoesler
...is intentional, i did not need full brightness (less blinding, more atmosphere :) ) and i wanted to keep it as small as possible.
Swampboat
renderosity
$25

MS17 Swamp Boat for DAZ
...artist many options.<br /> <br /> product name: ms17 swampboat for vue<br /> copyright 2017: don (london224)<br /> <br...
3dwarehouse
free
Military Air Boat
...#camo #camoflauge #cia #military #navy #navy_seals #socom #swamp #swamp_boat #swampboat #us...
3dwarehouse
free

Kaik / riverboat / swampboat
...riverboat from 17th , up to 20th century. also known as swampboat. #boat #bulgarian #river_transportation #riverboat #wooden_boat
R
3d_export
$99

Vauxhall Agila 2008 3D Model
...vauxhall agila 2008 3d model 3dexpor vauxhall agila 2008 2009 2010 europe suzuki wagon r+...
3d_export
$99

Volkswagen Golf VII R 5door 2015 3D Model
...or volkswagen vw detailed interior golf vii 2017 hothatch 5door 5d
volkswagen golf vii r 5door 2015 3d model squir 90150 3dexport
3d_export
$129
Scania R1000 2014 AeroTrailer 3D Model
...mi transport scania r1000 r-1000 hevy wheeler trailer tir aerotrailer
scania r1000 2014 aerotrailer 3d model squir 73046 3dexport
3d_export
$15

Wheel Detroit Cobra R rims and tire 3D Model
...ormance disk brake caliper brembo yokohama detroit cobra
wheel detroit cobra r rims and tire 3d model 3dlogicline 54693 3dexport
3ddd
$1
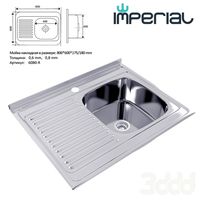
мойка накладная "Imperial" 6080-R
...мойка накладная "imperial" 6080-r
3ddd
мойка
мойка накладная "imperial", размер 800*600, арт. 6080-r
3ddd
$1
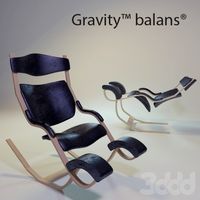
Gravity balans
...зводитель: varier
модель: gravity balans
дизайнер: peter opsvikhttp://www.varier.ru/collections/relax/gravity-balans-r/
3ddd
$1

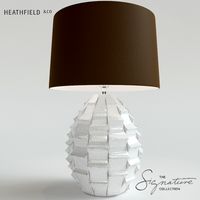
Maytoni СL1028-05-R
...dd
maytoni
люстра maytoni сl1028-05-r
(коллекция classic)
высота: 360
диаметр: 520
цвет: брасс
ламп: 5 x e14 (60w)
www.maytoni.ru
3d_ocean
$29
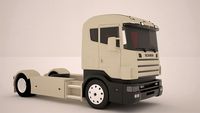
Scania Truck
...poly machine scania scania r scania r420 swedish car tractor truck trailer vehicle
high poly truck with vray lighting and camera.
3d_ocean
$49

English Family House
...the objects are modeled using real world dimensions. the r.. ...
3d_ocean
$85

Vauxhall Combo Tour H1L1 2015
...of measurment. all car parts are correctly named. model is created in autodesc maya 2012, visualization (rendering) – mental r...
C
3d_export
$99

MercedesBenz C coupe 2012 3D Model
...mercedes-benz c-class coupe sport fast car germany mb 2012 2013 2014 2015
mercedesbenz c coupe 2012 3d model squir 53725 3dexport
3ddd
$1
BAYERN IVORY
...code: white pvc base code: c/baye/iv shade code: 18rmd/lmoch cble: ivory twisted dimensions full height with shade: 700 mm...
3ddd
$1
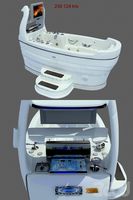
C-280REM Caribbean Paradize Limited Edition+TV
...ил. модель содержит 256 124 tris. материалы вирей, все текстуры присутствуют. версии 2010, 2011, фбх.
3ddd
$1
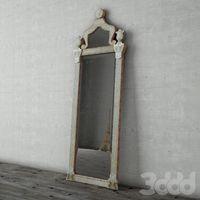
BAROQUE RAVENNA ETCHED LEANER MIRROR
...ror
3ddd
19th c.baroque ravenna , напольное
19th c. baroque ravenna etched leaner mirror
3ddd
$1

Molteni & C
...molteni & c
3ddd
molteni&c
светильник
3ddd
$1

ETHOS C
...d integrated solutions. ethos collection is enriched with a sauna module associated to a shower space with steam generator inside
3ddd
$1

Sphere C
... sphere
http://flashdq.com/upload_ru/collections/1351105993_fdq_sphere_catalogue_card_eng.pdf
3d_ocean
$5
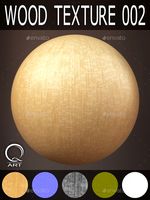
WOOD TEXTURES SET 002
...the interiors, or make great design solution with it! c.. ...
3d_ocean
$5
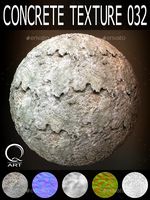
Concrete Textures 032
...textures that help to make your own project beautiful use it for texturize walls, ground or anything what you want! also you c...
3d_ocean
$5

WOOD TEXTURES SET 003
...the interiors, or make great design solution with it! c.. ...