Thingiverse

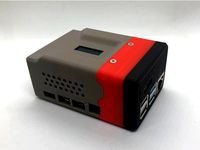
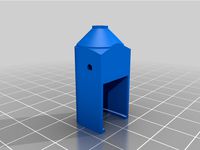
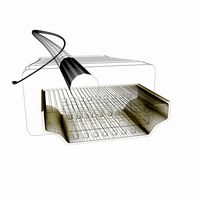
Raspberry Pi HQ Camera + HDMI Extender Mount for 16MM ball mount (Prusa Mount) by Lumute
by Thingiverse
Last crawled date: 3 years, 4 months ago
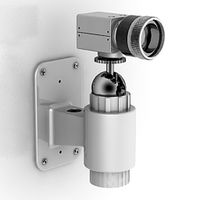
This is a remix of osunick's RaspBerry HQ Camera mount (Thanks!) to accommodate an Arducam CSI to HDMI Cable Extension Module, this allows you to use a regular HDMI cable vs the flimsy PITA flex cable that these raspberry camera's use.
You need to print all 3 parts, they snap together firmly and nicely.
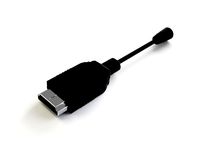
This is the HDMI module I used (You get 2 of them in the box):
Arducam CSI to HDMI Cable Extension Module with 15pin 60mm FPC Cable for Raspberry Pi Camera
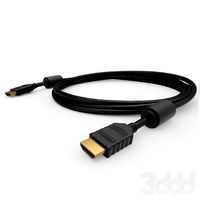
I originally used Amazon Basics HDMI angled cable but found it too thick and rigid so I later switched to a much more flexible HDMI cable with these angled adapters:
VCE 3 Combos Right Angle(90 Degree + 270 Degree) HDMI Male to Female Adapters Support 3D&4K
The Arducam HDMI extender can also be used to send 3 additional cables / signals through the HDMI cable using stereo audio jacks. The mount allows for this as shown in the picture although I'm not using it at the moment. I plan to eventually mount some LED lights on the front of the mount that can be controlled from the Raspberry Pi GPIO. So the connection would be like this:
Raspberry GPIO -> jack in HDMI module A next to the RaspBerry Pi -> HDMI Cable -> jack in HDMI Module B in the Camera mount -> NeoPixel bar attached to the Camera mount.
Notes:
I removed the metal mount from the HQ Camera, you just need to remove 2 small screws and it comes off.
I folded the flex cable that comes with the HDMI extender as shown in the picture, the mount was design with space for it and fits perfectly without getting it damaged.
Assembly:
Attach one of the provided small flex cables to the Camera board, make sure you attach
it in the right direction with the contacts touching the pins in the connector.
Put the Camera board in the front part (Camera Clip), you'll need to loosen the focus screw and remove the focus wheel completely, then put the camera board through the round opening and snap it in, then screw the wheel again. You can also install the camera lens to avoid getting dirt into the camera sensor.
Snap the mount middle part (Cam & HDMI base), if everything is inserted the right way it will fit together nicely.
Connect the flex cable to the HDMI module and put it inside the base, folding the flex cable below the module as shown in the picture.
Put the last part (Mount Base) and snap them all together.
Cheers.
You need to print all 3 parts, they snap together firmly and nicely.
This is the HDMI module I used (You get 2 of them in the box):
Arducam CSI to HDMI Cable Extension Module with 15pin 60mm FPC Cable for Raspberry Pi Camera
I originally used Amazon Basics HDMI angled cable but found it too thick and rigid so I later switched to a much more flexible HDMI cable with these angled adapters:
VCE 3 Combos Right Angle(90 Degree + 270 Degree) HDMI Male to Female Adapters Support 3D&4K
The Arducam HDMI extender can also be used to send 3 additional cables / signals through the HDMI cable using stereo audio jacks. The mount allows for this as shown in the picture although I'm not using it at the moment. I plan to eventually mount some LED lights on the front of the mount that can be controlled from the Raspberry Pi GPIO. So the connection would be like this:
Raspberry GPIO -> jack in HDMI module A next to the RaspBerry Pi -> HDMI Cable -> jack in HDMI Module B in the Camera mount -> NeoPixel bar attached to the Camera mount.
Notes:
I removed the metal mount from the HQ Camera, you just need to remove 2 small screws and it comes off.
I folded the flex cable that comes with the HDMI extender as shown in the picture, the mount was design with space for it and fits perfectly without getting it damaged.
Assembly:
Attach one of the provided small flex cables to the Camera board, make sure you attach
it in the right direction with the contacts touching the pins in the connector.
Put the Camera board in the front part (Camera Clip), you'll need to loosen the focus screw and remove the focus wheel completely, then put the camera board through the round opening and snap it in, then screw the wheel again. You can also install the camera lens to avoid getting dirt into the camera sensor.
Snap the mount middle part (Cam & HDMI base), if everything is inserted the right way it will fit together nicely.
Connect the flex cable to the HDMI module and put it inside the base, folding the flex cable below the module as shown in the picture.
Put the last part (Mount Base) and snap them all together.
Cheers.
Similar models
thingiverse
free

ArduCAM Raspberry Pi CSI to HDMI Extender Cases by jerryfudd
...eceiver just snap together with no fittings required. shouldn't be hard to graft on your own mount from the provided stl/step
thingiverse
free

Raspberry Pi Camera V2 HDMI Case
...uires 4 m2 x 15mm screws (or 20mm) + 2 m3 screws (variable length).
i went with the arducam csi to hdmi cable extension module.
thingiverse
free

Raspberry PI Camera NVision Module Case and Mounts by carl1961
...ified a ball mount from teachertech i found needs to be printed with carbon fiber petg
https://www.thingiverse.com/thing:3223979
thingiverse
free

Arducam IMX477 casing by DaviiD1984
... a side is printed from tpu and intended for getting cables for multi sensor sync out of the enclosure.
a m3-.50 nut is required.
thingiverse
free

Mount for the Pi HQ camera module by Worlds6440
...r shelf tripod mount, requires tripod screw.
v3 upright under shelf camera board mount that does not use the tripod mount at all.
thingiverse
free
Raspberry Pi Case w/ CSI to HDMI Adapter by evancli
...s pins to secure the cable extension module. adafruit has a great tutorial on how to use ssd1306 oled displays with raspberry pi.
thingiverse
free

Raspberry Pi Camera extension using HDMI Cable by wintermute29
...ere is not my design. i just happen to like it a lot and use it for a few of my projects:https://www.thingiverse.com/thing:922740
thingiverse
free

CSI to HDMI Pi Cam Mount
... way. have been very happy with this camera mount so made a crude remix to hold the csi to hdmi adapter and pi camera or arducam.
thingiverse
free

Raspberry pi zero + camera module v1.3 case by RachelBirdy
...y pi 0 + camera module cases that i liked so i made one. the tolerances on this are very tight and it snaps together very snugly.
thingiverse
free

Raspberry Pi Camera Mount Plate by mantisrobot
...to stand the hdmi cable far enough away from the mount.
you can mount direct without the standoffs if using the flat form cable.
Lumute
thingiverse
free
Optionals Parts for Hero Me Gen5 mod for Ender 5 Plus with Micro Swiss Direct Drive and Hotend by Lumute
... a little piece of electric tape at top to make it tight so it does not move / vibrate.
updates:
2020-10-05: added bltouch cover.
cg_trader
$6

Buyu Lumut | 3D
...i will see if i can sort it out. mountain landscape volcano terrain environment nature photogrammetry elevation dem science other
3dwarehouse
free

Titiwangsa Sentral Jalan Lumut
...2%. pengangkutan awam yang berdekatan: titiwangsa (monorail), titiwangsa (lrt), titiwangsa (mrt), chow kit (monorail), pwtc (lrt)
3dwarehouse
free

Menara Teo Chew Kuala Lumpur
...de centre (pwtc), which will take around 12 minutes, and commute to kl sentral. there is also monorail station nearby - chow kit.
Hdmi
3ddd
$1
HDMI-Кабель
... cable , кабель
высоко детализированный hdmi кабель с настроенными материалами для vray.
turbosquid
$1

vga to hdmi
...royalty free 3d model vga to hdmi for download as c4d and fbx on turbosquid: 3d models for games, architecture, videos. (1520819)
turbosquid
$2
HDMI wire
... 3d model hdmi wire for download as wire, wire, fbx, and wire on turbosquid: 3d models for games, architecture, videos. (1644937)
turbosquid
$9

HDMI Cable
... available on turbo squid, the world's leading provider of digital 3d models for visualization, films, television, and games.
turbosquid
free
HDMI cable
... available on turbo squid, the world's leading provider of digital 3d models for visualization, films, television, and games.
3ddd
$1
Набор кабелей, hdmi и тюльпаны
... провод , тюльпан
набор кабелей, hdmi и тюльпаны
turbosquid
$2

hdmi plug female
...
royalty free 3d model hdmi plug female for download as blend on turbosquid: 3d models for games, architecture, videos. (1629465)
turbosquid
$1

HDMI Connector Scaled
...ee 3d model hdmi connector scaled for download as obj and c4d on turbosquid: 3d models for games, architecture, videos. (1491827)
3d_export
$10

monitor black-gray
...3dexport 3d model of a computer monitor with an hdmi ...
3ddd
$1
DELL U2410
...lcd 24 ultrasharp u2410 [ips, 1920x1200, 800001, 178гор178вер, dvi, hdmi pip, cardreader,...
Hq
turbosquid
$99

character HQ
...osquid
royalty free 3d model character hq for download as ma on turbosquid: 3d models for games, architecture, videos. (1171231)
turbosquid
free

HQ Steel
...urbosquid
royalty free 3d model hq steel for download as obj on turbosquid: 3d models for games, architecture, videos. (1235891)
3ddd
free
ЖУРНАЛЬНЫЙ СТОЛИК HQ
... hq
http://www.houzz.ru/photos/27589396/zhurnalynyy-stolik-hq-sovremennyy-kofeynye-stoliki-other-metro
3d_export
free

Barrel hq
...barrel hq
3dexport
maked in blender<br>rendered by marmoset<br>hq models<br>materials and textures
turbosquid
$6

Dice HQ
... free 3d model dice hq for download as max, 3ds, fbx, and obj on turbosquid: 3d models for games, architecture, videos. (1579754)
turbosquid
$120
HQ Tables
... available on turbo squid, the world's leading provider of digital 3d models for visualization, films, television, and games.
turbosquid
$49

Sunglasses HQ
... available on turbo squid, the world's leading provider of digital 3d models for visualization, films, television, and games.
turbosquid
$20
HQ Bed
... available on turbo squid, the world's leading provider of digital 3d models for visualization, films, television, and games.
turbosquid
$20
![Curtains [HQ]](/t/13520156.jpg)
Curtains [HQ]
... available on turbo squid, the world's leading provider of digital 3d models for visualization, films, television, and games.
turbosquid
free

HQ Table
... available on turbo squid, the world's leading provider of digital 3d models for visualization, films, television, and games.
16Mm
3d_export
$30
Parth ring2 16mm stl diamond price stl 3D Model
...arth ring2 16mm stl diamond price stl 3d model download .c4d .max .obj .fbx .ma .lwo .3ds .3dm .stl gorgsalvatore 105374 3dexport
3d_export
$10
Korona 3D Model
...korona 3d model 3dexport parth ring2 16mm stl diamond price korona 3d model download .c4d .max...
3d_export
$25
Film Reels 3D Model
...hollywood theater theatre reels realistic c4d 35mm movie spool 16mm cinema 3ds strip filmstrip celluloid vintage retro film reels...
3d_export
$30

Film reel 3D Model
...oscar academy awards projector camera spool theatre cinema imax 16mm 35mm hollywood movie panavision motion picture frames images film...
3d_export
$5
Computer desk
...top: width - 1544mm length - 1344mm thickness - 16mm bedside table for the system unit: width - 510mm...
3d_export
$5

Cartouche-016
...carving on cnc machines length: 336mm width: 106mm height: 16mm ...
3d_ocean
$5
Realistic Film Reel
...realistic film reel 3docean 16mm 35mm 3d model 3ds camera can celluloid cinema film...
3d_export
$14

Brazier 1105 - v2
...550 mm - thickness - 2,5mm - diameter - 16mm ...
3d_export
$7

ring of blades
...game dark souls.<br>there are 24 models in the archive.<br>ring diameter:<br>16mm 17mm 18mm 19mm 20mm 21mm 22mm 23mm<br>in the archive...
3d_export
$10
carved art nouveau
...(l * h * d): 563 x 70 x 16mmlt;br>* polys: 56 422<br>* .stl file included<br>3d model of modern...
Raspberry
3d_export
free

raspberry
...raspberry
3dexport
3d model of a raspberry. i tried to make it realistic.
turbosquid
$27

Raspberries
...y free 3d model raspberries for download as max, obj, and stl on turbosquid: 3d models for games, architecture, videos. (1354176)
turbosquid
$14

Raspberries
...y free 3d model raspberries for download as max, obj, and fbx on turbosquid: 3d models for games, architecture, videos. (1364663)
3d_export
$5

raspberry pi
...raspberry pi
3dexport
carcasa para la raspberry pi
turbosquid
$99

Raspberry
... available on turbo squid, the world's leading provider of digital 3d models for visualization, films, television, and games.
turbosquid
$10

raspberries
... available on turbo squid, the world's leading provider of digital 3d models for visualization, films, television, and games.
archive3d
free

Raspberries 3D Model
...raspberries 3d model archive3d raspberries raspberry raspberries n300911 - 3d model (*.3ds) for interior 3d...
3d_export
$5

raspberry fruit
...raspberry fruit
3dexport
3d_export
$5

raspberry
...y different sizes. their color ranges from light burgundy to pink. there are formats: obj, 3ds, blend, dae, fbx, mtl.<br>:)
evermotion
$12

raspberries 23 am130
...evermotion raspberries 23 am130 evermotion key 23 food fruit raspberry fruits am130 raspberries highly detailed 3d model of raspberries...
Prusa
turbosquid
$2

Frame Filament Guide Clip-On for Prusa Mk3
...rame filament guide clip-on for prusa mk3 for download as stl on turbosquid: 3d models for games, architecture, videos. (1634730)
3d_export
free

prusa i3 mk3s laser mount for opt lasers
...to learn more about the blue laser technology that conceived the cutting and engraving laser heads from opt lasers, please visit:
turbosquid
free

Prusa small printer adapter holder
...er for download as ipt, skp, dwg, dxf, fbx, ige, obj, and stl on turbosquid: 3d models for games, architecture, videos. (1642936)
3d_export
$30

geisha by jonathan adler
...** i did a 3d printing test in the prusa software, you can find it among the attached images.<br>exchange:<br>.blend...
thingiverse
free

Prusa without Prusa (rc2) by madless
...prusa without prusa (rc2) by madless
thingiverse
just the main part of prusa rc2 faceshield, without writing.
enjoy :)
thingiverse
free

Prusa by acejbc
...prusa by acejbc
thingiverse
prusa knob info
m3 8mm screw
thingiverse
free

Prusa house
...prusa house
thingiverse
how prusa house could look like...
thingiverse
free

Prusa Mk2 "Fake Prusa" LCD cover by anraf1001
...r by anraf1001
thingiverse
version of prusa's lcd cover with "fake prusa" instead of "original prusa"
thingiverse
free

Prusa stabilizator by gutiueugen
...prusa stabilizator by gutiueugen
thingiverse
prusa stabilizator
thingiverse
free

Keychain Prusa by rbarbalho
...keychain prusa by rbarbalho
thingiverse
keychain with text prusa.
Extender
turbosquid
$39
Extending table
...id
royalty free 3d model extending table for download as max on turbosquid: 3d models for games, architecture, videos. (1290552)
turbosquid
$5
Extend Table
...squid
royalty free 3d model extend table for download as skp on turbosquid: 3d models for games, architecture, videos. (1372508)
turbosquid
$40
Engine Extended
... available on turbo squid, the world's leading provider of digital 3d models for visualization, films, television, and games.
turbosquid
$12

Triple extender
... available on turbo squid, the world's leading provider of digital 3d models for visualization, films, television, and games.
turbosquid
$99

Monica (Extended Pack)
... available on turbo squid, the world's leading provider of digital 3d models for visualization, films, television, and games.
turbosquid
$19
Berlino Extendable Table
... available on turbo squid, the world's leading provider of digital 3d models for visualization, films, television, and games.
turbosquid
$3
Extendable Modern Table
... available on turbo squid, the world's leading provider of digital 3d models for visualization, films, television, and games.
3d_export
$32

KC10 Extender 3D Model
...c 10 aircraft jet fighter bomber close support interceptor spy attacker plane
kc10 extender 3d model martialartist 24527 3dexport
3d_export
$50
Extended Range Trailer 3D Model
...railer 3d model
3dexport
extended range trailer military patrol equipment
extended range trailer 3d model dougmavs 75684 3dexport
design_connected
$13

Big Dining Tables Extended
...ining tables extended
designconnected
bonaldo big dining tables extended computer generated 3d model. designed by gilles, alain.
Pi
design_connected
$11

Pi
...pi
designconnected
ligne roset pi chairs computer generated 3d model. designed by thibault desombre.
3d_export
$5
raspberry pi
...raspberry pi
3dexport
carcasa para la raspberry pi
turbosquid
$18

pied
... available on turbo squid, the world's leading provider of digital 3d models for visualization, films, television, and games.
3ddd
$1

Emme pi light
...emme pi light
3ddd
emme pi light
люста emme pi light
3ddd
$1

Emme pi light
...emme pi light
3ddd
emme pi light
бра классическое emme pi light
3ddd
$1

Emme Pi Light
...emme pi light
3ddd
emme pi light
3ddd
$1

Emme Pi Light
...emme pi light
3ddd
emme pi light
design_connected
$16

Pi-Air
...pi-air
designconnected
living divani pi-air lounge chairs computer generated 3d model. designed by harry & camila.
3d_ocean
$15

Manneken Pis
...picting a naked little boy urinating into a fountain’s basin. (wikipedia) the model was sculpted in blender 2.70a rendered wit...
3ddd
$1

Emme pi light
...emme pi light
3ddd
emme pi light
люстра классическая фирма: emme pi light
артикул: 3595/5/cot/12/wh
Ball
turbosquid
$5

Ball on a Ball
...uid
royalty free 3d model ball on a ball for download as obj on turbosquid: 3d models for games, architecture, videos. (1484719)
archibase_planet
free

Ball
...ball
archibase planet
ball golf ball
ball - 3d model (*.gsm+*.3ds) for 3d visualization.
3d_export
$5

ball
...ball
3dexport
ball
archibase_planet
free

Ball
...ball
archibase planet
ball football soccer ball
ball n100714 - 3d model (*.gsm+*.3ds+*.max) for exterior 3d visualization.
3d_export
$5

ball
...ball
3dexport
soccer ball
archibase_planet
free

Ball
...ball
archibase planet
ball football
ball n100914 - 3d model (*.gsm+*.3ds+*.max) for 3d visualization.
3d_ocean
$5
Snooker Balls
... set balls snooker snooker balls white ball yellow ball
set snooker balls format include : .c4d .3ds .obj build in cinema 4d r13
3d_export
free

ball
...ball
3dexport
this is 3d model ball's
3d_ocean
$2

Soccer Ball
...soccer ball
3docean
ball red and yellow ball red ball soccer ball
a gorgeous red and yellow seamless soccer ball
3d_ocean
$5

Billard Balls
...low poly billiard balls. numbering from 1 to 15 plus the cue ball. each of the balls excluding the cue ball has a 4k texture map.
Camera
archibase_planet
free
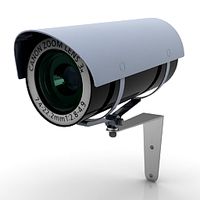
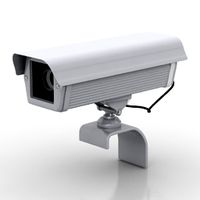
Camera
...base planet
camera surveillance camera video camera
camera surveillance n090211 - 3d model (*.3ds) for interior 3d visualization.
archibase_planet
free
Camera
...hibase planet
camera security camera video camera
camera security n210515 - 3d model (*.gsm+*.3ds) for exterior 3d visualization.
archibase_planet
free
Camera
...se planet
camera web camera webcam
camera butterfly usb pc camera n090713 - 3d model (*.gsm+*.3ds) for interior 3d visualization.
archibase_planet
free
Camera
...mera
archibase planet
surveillance camera video camera camcorder
camera n011211 - 3d model (*.3ds) for exterior 3d visualization.
archibase_planet
free
Camera
...camera
archibase planet
camera digital camera
camera canon digital n041211 - 3d model (*.3ds) for interior 3d visualization.
archibase_planet
free
Camera
...camera
archibase planet
camera film camera phototechnique
camera n100214 - 3d model (*.gsm+*.3ds) for interior 3d visualization.
archibase_planet
free

Camera
...amera
archibase planet
camera video camera camcorder
camera video n070315 - 3d model (*.gsm+*.3ds) for interior 3d visualization.
archibase_planet
free
Camera
...rchibase planet
camera video camera camcorder
camera studio n101213 - 3d model (*.gsm+*.3ds+*.max) for interior 3d visualization.
archibase_planet
free
Camera
...ibase planet
digital camera camera phototechnique
camera canon ixus 400 n310311 - 3d model (*.3ds) for interior 3d visualization.
archibase_planet
free
Camera
...ase planet
photocamera video camera camera
camera sony t300 black n291010 - 3d model (*.gsm+*.3ds) for interior 3d visualization.
Mount
3d_export
free

mounting bracket
...mounting plate is the portion of a hinge that attaches to the wood. mounting plates can be used indoors, cabinetry and furniture.
turbosquid
$2

MOUNTING
... available on turbo squid, the world's leading provider of digital 3d models for visualization, films, television, and games.
turbosquid
free

Mounts
... available on turbo squid, the world's leading provider of digital 3d models for visualization, films, television, and games.
turbosquid
free

Mount Fuji
...fuji
turbosquid
free 3d model mount fuji for download as obj on turbosquid: 3d models for games, architecture, videos. (1579977)
3d_export
$5

Headphone mount LR
...headphone mount lr
3dexport
headphone mount l+r
turbosquid
$39

Mount rainier
...quid
royalty free 3d model mount rainier for download as fbx on turbosquid: 3d models for games, architecture, videos. (1492586)
turbosquid
$5

pipe mounting
...quid
royalty free 3d model pipe mounting for download as obj on turbosquid: 3d models for games, architecture, videos. (1293744)
turbosquid
$3

Mounting Tires
...uid
royalty free 3d model mounting tires for download as fbx on turbosquid: 3d models for games, architecture, videos. (1708511)
3d_export
$5

Magnetic GoPro Mount
...pro mount
3dexport
cool magnetic mount for gopro. allows you to mount the camera on flat metal surfaces and get exclusive shots.
turbosquid
$5

Stone Mount
...ty free 3d model stone mount for download as ma, obj, and fbx on turbosquid: 3d models for games, architecture, videos. (1370306)