Thingiverse

Raspberry Pi 4 B and XL4015 Case for Ender 3 V2 by 5paceCadet
by Thingiverse
Last crawled date: 3 years, 4 months ago
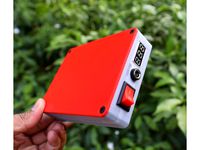
Raspberry Pi 4 B and XL4015 Case for Ender 3 V2
1-14-2021 Edit:
Added a lid with no camera hole as requested by another member. Enjoy
1-4-2021 Edit: I have revised the lid to version 6. I have added 4mm around the edge so that the lid sits higher. This eliminates any clearance issues for the fan/large heatsinks and also for the GPIO pins. The case is now almost flush with the top of extruded aluminum and looks better. The extra rim around the edge also adds to the rigidity of the lid, it now remains much flatter than the old one. As a result of the height increase you now have to use M3 bolts that are minimum of 32mm long. 32, 34 or 35mm will work. The same bolts for the fan will work. Please let me know in the comments if you need a lid with a different size fan hole and I can adjust accordingly to give more options. I have also added a picture of the inside hardware/wiring so that there is a better idea of how tidy everything is.
After looking around and not finding what I needed I decided to make my own from scratch. Everything was made original by me in SolidWorks. This is a simple and quick case to mount a Raspberry Pi 4 B, 30x30x7 fan and a XL4015 DC-DC Buck Converter to an Ender 3 V2 printer rail. Only a camera ribbon cable hole and fan hole on the top as that is all I needed for OctoPrint. I have included small hole in the back to route power cables to PSU and Small slits on side of case to evacuate hot air from fan.
PLEASE NOTE: this case is not designed to power the Raspberry Pi by USB, there is not enough space, you have to power it through the GPIO pin or solder directly to the pads under the USB C. I wanted a clean, slim and easy to print case with no wires showing from the front or side. I chose to use the mentioned bolts and fan because I stole them from a pre-made case. The fan is a tight fit so I used the bolts upside down. This will vary with the size of your heatsinks.
Hardware needed:
Case Bolts - M3x32 minimum, m3x35 are easy to find and will work.
Fan Bolts - Mine Measure 12.5mmx2.9mm (M3x12 to M3x16 should work)
Fan - 30x30x7mm Fan
Print Settings for Case Base
For the Base, print it exactly as shown in the picture. Align the base with the bottom edge of the slide that clips on the ender rail. Use support under the rest of the base to get it level. Use a tower between the two slides as shown. Brim is not necessary. 20% infill is fine.
Print Settings for Case Lid
Print exactly as shown in the photo, flat side down, no supports needed and no brim or raft necessary. 50% or higher infill recommended.
I had to chase my holes very lightly with a drill bit because bolt holes were too snug for my liking, before uploading I increased the hole size slightly. YMMV from your printer/print settings. Slides that go into printer rail were snug but mine fit perfect. Again, YMMV and might have to lightly sand.
Please leave any tips or findings as this is only my second design and I am constantly learning. If this gains a lot of traction I might modify it for the popular LM2596 Buck Converter and different fan sizes.
Similar models
thingiverse
free

Ender 3 Raspberry Pi 3 (No fan, No GPIO) by MakerKJS
...o) by makerkjs
thingiverse
remixed the lid since i do not need access to the gpio header. and a fan wasn't needed in my case
thingiverse
free

Raspberry Pi 3 (B/B+) Case (Top Cover) with 40mm Fan + GPIO access by CapuTech_96
...part from
so here it is.
if you like this model please send your makes and like this thing.
have a nice day
caputech_production
thingiverse
free

Raspberry Pi 3 B/B+ Case with 40mm fan slot and mount for Ender by Lanjelin
...les in the bottom cover.
a fan, and whatever best suited to fasten the fan.
when mounting to the v slot:
2pcs m3 nut
2pcs m3x10mm
thingiverse
free

Raspberry Pi 4 B Case by Gesoh
... with support but it got it working without.
also there are holes to mount the case on the wall/table/whatever.
hope you like it!
grabcad
free

Raspberry Pi 4 Model B heatsink case
...y as possible. only position of mounting holes was taken from the rpi specification. it was made for 3d printed nas case project.
thingiverse
free

Canakit Case Lid for Raspberry Pi 4 with GPIO opening and fan holder by mistapita
...lder by mistapita
thingiverse
added a hole in the case to access the gpios and added support for the canakit fan without screws.
thingiverse
free

ender 5 raspberry pi 4 case with dual fan heatsink by Gijsbert81
...pberry pi, first push in the bottem part of the heatsink and then screw on the rest by using the holes in the bottom of the case.
thingiverse
free

Back plate with heatsink cutout for Ender 3 Touchscreen Case & Holder for Raspberry Pi
...er for raspberry pi case but with a cutout for a heatsink. this provides more then cooling enough for the pi, a fan is not needed
thingiverse
free

Ender 3 V2 - Raspberry Pi 3B case (with 30mm fan mount and v-slot rail) by dsgipks
...int the original lamax, attached
i also removed the cavities at the bottom of the case.
soon i will do the same for the 40mm fan.
thingiverse
free

Raspberry Pi Model B Case - Cool by Gartenzwerg
...l.
a standard 40mm fan work very silent with 3.3volts and have a lot of power with 5volts. the fan is connected at the gpio pins.
5Pacecadet
thingiverse
free

Samsung Fridge French Door Seal Actuator by 5paceCadet
... and use a support. i designed this in solidworks. if anyone has any interest in the file still in solidworks format let me know.
thingiverse
free

Car Seat Cup Holder by 5paceCadet
...iest and quickest to print upright with tree support towers. don't forget to use a brim or raft to support the tree supports.
Xl4015
thingiverse
free
DIY Mini UPS for WiFi Router V2.0 by OpenGreenEnergy
...ups for wifi router / modem by using an xl4015 buck converter module and xl6019 boost converter. i am...
thingiverse
free

DIY Mini UPS for WiFi Router V2.0 by OpenGreenEnergy
...ups for wifi router / modem by using an xl4015 buck converter module and xl6019 boost converter. i am...
thingiverse
free

DMW-DCC12 DMC-GH3 GH3K DMC-GH4 GH4K DMC-GH5 DMC-GH5S Dummy Battery DC Coupler by amit13
...works. i have also included the files for the xl4015 module case. (the xl4015 case dimensions might not be...
thingiverse
free

XL4015 XL6009 buck/boost box by ffejrxx
...c xl4015 buck or xl6009 boost boards
screw hole on bottom, wire exits on ends
side clips to hold boards
slip together holds tight
thingiverse
free

DC-DC Stepdown Module Case & Lid (XL4015) by Couch_Mango
... (xl4015) by couch_mango
thingiverse
a simple case for the xl4015 dc-dc stepdown module. holes included for wires if applicable.
thingiverse
free

Case for XL4015 Buck Converter 5A with Display by yohannaftali
...case for xl4015 buck converter 5a with display by yohannaftali
thingiverse
case for xl4015 5a buck converter with display
thingiverse
free

DIY Mini Lab Power Supply by OpenGreenEnergy
...instructables link: https://www.instructables.com/diy-mini-lab-power-supply/ the power supply is based on xl4015 dc-dc buck converter module. this module can provide an...
thingiverse
free

Cover Buck Converter XL4015 with LCD by yohannaftali
...er buck converter xl4015 with lcd by yohannaftali
thingiverse
buck converter cover for xl4015 68mm x 40 mm with lcd
attached ipt
thingiverse
free

POWERBANK - 3D PRINTED - MODULAR CONCEPT by 3D_MACHAN
...module dc-dc adjustable buck step down power supply modulehttps://amzn.to/2v4pbpn 8.xl4015 module 5a dc-dc step down voltage converter module with...
Raspberry
3ddd
$1

the body shop
..., shampoo , box , lotion the body shop raspberry ...
archive3d
free

Bush 3D Model
...bush 3d model archive3d bush raspberry plant raspberry cane bush raspberry cane n250416 - 3d...
3ddd
$1

Raspberry cake
...pberry cake
3ddd
торт
на бисквите и креме - vraydisplacementmod.
на малине - turbosmooth. всё можно отключить для дальних планов.
3d_ocean
$19

Raspberry Bed
...(inspired in the bedding products of the “the land of nod”). modeled in 3d studio max 2015, but saved as 3ds max 2012-2013-201...
3d_ocean
$9
4 Cocktail Bottles
...drink fresh fruit glow juice mouthwatering multicolor orange pub raspberry rose shine sweet tasty tropical 4 cocktail bottles 3d...
3d_ocean
$6

11 Ice Cream Flavours
...ice-cream mint nut peach peanut butter pod pudding rainbow raspberry restaurant strawberry swirl toffee vanilla 11 ice cream flavours....
3ddd
$1

Raspberry and chocolate
...сный летний десерт, сочные ягоды с шоколадом. всем приятного аппетита....
форматы в архиве:
3d max 2011, 3d max 2014, fbx, obj.
3ddd
free

Disegno ceramica - Splash 152-DX
...square soap dish 3. подставка для украшений jewellery tree raspberry 4. ёршик напольный confetti toilet brush аксессуары могут быть...
archive3d
free

Raspberries 3D Model
...raspberries 3d model archive3d raspberries raspberry raspberries n300911 - 3d model (*.3ds) for interior 3d...
cg_studio
$159

Coca Cola Freestyle Jet Fountain of the Future3d model
...canned tinned fastfood retro vintage pininfarina ferrari lime vanilla raspberry orange diet light zero sprite grape peach vault red...
Ender
3d_ocean
$9

Ender Dragon Minecraft
...ojang obj poly videogames
ender dragon minecraft created with cinema 4d r15 formats included: max 2013 – fbx 2012 – c4d r15 – obj
3ddd
$1

Enders / Elegance
...enders / elegance
3ddd
обогреватель
уличный газовый обогреватель enders elegance
высота: 2200 мм
3d_export
$10

lamp shade
...feel and look. this was the best use of ender 3 pro...
3d_export
free

ender 3 enclosure corners
...er corners and 4 upper corners, using 25mmx25mm angled aluminium pieces that gets covered on inside of the frame with plexiglass
3d_export
free

ender 3 3d print bed clips
...ed + normal aluminium bed frame of the creality ender 3 = 6mm (b) these clips are designed for glass plate + aluminium bed = 4mm
3d_export
free

ender 3 frame cavity covers
... of the creality ender 3 - makes it look a bit more attractive it just slides into the open channels of the aluminium framework
3d_export
$5

Logs fire
...with one multi material for corona and vray r ender. albedo, normal, uvmap, roughness format jpg 4096x4096 models:...
3d_export
$42

excavator
...is the original size. 0.12 mm printing surface creality ender5 ...
3d_export
free

Creality ender enclosure webcam mount
...e creality enclosure. sure is better than a tripod. change it up if it helps. i printed pla with 50% infill on my dd ender 3 pro.
3d_export
$5

GRUMPY CAT
...grumpy cat 3dexport grumpy cat to print in ender ...
Pi
3ddd
$1
Sea Container письменный стол
...для крупных планов так и для средних. подробней о модели:http://loft-art.ru/sea-container-pi-mennyj-stol.html ...
3ddd
$1

SILVA Vario UT11315-PI
...silva vario ut11315-pi
3ddd
silva , vario
silva vario ut11315-pi
3ddd
$1

SILVA Vario UT11124-PI
...silva vario ut11124-pi
3ddd
silva , vario
silva vario ut11124-pi
3ddd
$1

Sea Container письменный стол (4 цвета)
...для крупных планов так и для средних. подробней о модели:http://loft-art.ru/sea-container-pi-mennyj-stol.html ...
3ddd
$1

Blu Dot / Pi Coffee Table
... круглый , журнальный
• powder-coated steel top
• solid walnut legs
3ddd
$1
Blu Dot / Pi Coffee Table
... кофейный , круглый
модель стола blu dot. 3dsmax2012
3ddd
$1
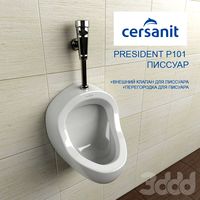
PRESIDENT P101 ПИСCУАР + ПЕРЕГОРОДКА
...+ перегородка 3ddd president , писcуар писcуар president артикул p-pia101 подвод воды сверху ширина [мм] 320 глубина [мм] 280...
3ddd
free
набор светильников
...набор светильников 3ddd emme pi light ,...
3ddd
free
Emme pi light | Masiero
... light | masiero
3ddd
emme pi light , masiero
masiero lampa,emme pi light – masiero,art.
3ddd
free

Emme pi light Masiero 3050
...emme pi light masiero 3050
3ddd
emme pi light , masiero
masiero, emme pi light 3050
V2
3d_export
$69

Female 01 3dpeople vol 02 v2 3D Model
...3d model
3dexport
female 3dpeople woman human body t-pose clothes
female 01 3dpeople vol 02 v2 3d model evermotion 82503 3dexport
3d_ocean
$9
HDRI Morning SunSet V2
...ojects. format: this file is in the following formats: hdr exr jpg resolution: this file is 4128×2083 pixels. it is 32 bit color.
3d_ocean
$9
HDRI Sunset V2
...jects. format: this file is in the following formats: hdr exr jpg resolution: this file is 10000×2500 pixels. it is 32 bit color.
3d_export
$10

Locker V2 3D Model
...al padlock indoor security middle
locker v2 3d model download .c4d .max .obj .fbx .ma .lwo .3ds .3dm .stl firdz3d 113155 3dexport
3d_ocean
$15

Element3D - iPhone 6S
...apple’s iphone 6s model collection for video copilot’s element3d v2 in all 4 color...
3d_ocean
$12

Fest Amsterdam Windlicht Tangare Lantern v2
...m. it was modeled and prepared for photorealistic renderings, close-ups, cg visualization. the lantern model is ready to be in...
3d_ocean
$49
HDRI Collection V2
...kydome sun
12 hdri collection .hdr, exr, jpg format for use as environment in 3d scenes. resolution: each sky hdri is 4000px wide
cg_studio
$49
Old Man v23d model
...cter people topology polygroups
.ztl .obj - old man v2 3d model, royalty free license available, instant download after purchase.
cg_studio
$79
Female Anatomy v23d model
...ence polygroups basemesh
.obj .ztl - female anatomy v2 3d model, royalty free license available, instant download after purchase.
3ddd
$1
Стена из листьев плюща v2
... примерный размер: 2500*5000мм
max2011+fbx
1,863,372 - polys
1,205,024 - verts
пойдет как для экстерьера так и для интерьера.
B
3d_export
$100
B 212 ASW Navy 3D Model
...ort
agusta bell 212 ab-212 ab212 uh-1n huey helicopter 214 206 war navy rescue asw
b 212 asw navy 3d model tartino 21560 3dexport
3ddd
$1

B&B | Husk - H2G
... husk , om
"om" b&b | husk - h2g
3ddd
$1
B&B Beverly
... b&b italia , beverly
cтул beverly от b&b.; текстуры в архиве
3ddd
$1

стеллаж в стиле "прованс" #2
...стиле "прованс". h=1600mm. l=570mm. b=450mm. в архиве присутствует файл fb. ...
3ddd
$1

BOOM / Wall luminaire B 1019
...boom / wall luminaire b 1019
3ddd
boom
тип: уличный светильник бра
материал: медь
в архиве каталог, инструкция, ies
3ddd
$1

FAT SOFA 2 SEAT
...seat 3ddd верёвка , подушка fat sofa 2 seat bamp;b; italia...
3ddd
$1
Tiziana S 120 B
...tiziana s 120 b
3ddd
капитоне
3d max 2009,vray 1,5 sp4a,fbx,obj
3ddd
$1

Butterfly sofa by B&B Italy
...ки 800х900 мм
в архиве содержатся текстуры цветов: бежевый, серый, терракота, молочный шоколад, желтый, малиновый, синий, бирюза
3ddd
$1

Кресло Husk фабрика B&B Италия
...ка b&b италия
3ddd
b&b italia , husk
кресло husk фабрика b&b; италия
3ddd
$1

Кровать Саронг
...саронг фирма: dream land размеры: h- 1015 l- 2340 b 1900 полигоны: 756 574 сетка:...
Case
3d_export
$8

Iphone 6 case Batman 3D Model
... model
3dexport
iphone iphone6 case batman smarthphone gadgets phone cases
iphone 6 case batman 3d model ffranco95 88201 3dexport
3d_export
$10
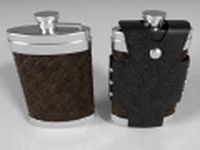
Flask with leather case 3D Model
...flask with leather case 3d model
3dexport
flask case
flask with leather case 3d model valgrush63640 93243 3dexport
3d_export
$59

Old workbag 3D Model
...beach travel trip dress clothes wheels people airport plane briefcase old work old workbag 3d model dzejsi.models 72700...
3d_export
$12

Shelf MAX 2011 3D Model
...shelf max 2011 3d model 3dexport books cd case lamp bookshelf modern wood art colours furniture livingroom house...
3d_ocean
$9

Workplace Low Poly
...workplace low poly 3docean book case computer cup desk grass keyboard lamp mouse phone picture...
3d_ocean
$15

Apple watch v1
...apple watch v1 3docean aluminum apple band blue buckle case classic clock edition gold iphone iwatch modern silver sport...
3d_ocean
$15

Apple watch v5
...apple watch v5 3docean aluminum apple band blue buckle case classic clock edition gold iphone iwatch modern silver sport...
3d_export
free

Download free Curio Cabinet 3D Model
...cabinet 3d model 3dexport curio cabinet furniture wood display case shelf shelves knickknacks curio cabinet 3d model download free...
3d_export
$15

Toothpick Holder 3D Model
...cocktail stick wooden bamboo clean oral pick casing holder case tube carry key chain toothpick holder 3d model download...
3d_ocean
$4

i Phone Casing
...i phone casing
3docean
casing i phone i phone casing phone casing
i phone casing,casing,i phone,phone casing
4
3d_export
$99
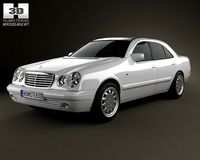
MercedesBenz EClass sedan W210 1996 3D Model
...w210 1996 1997 1998 1999 2000 2001 2002 2003 4door sedan saloon luxury germany mercedesbenz eclass sedan w210 1996...
3d_export
$89

Lamborghini Aventador LP 700 4 US spec 3D Model
... avto car vehicle auto automobile cars 3d model high poly
lamborghini aventador lp 700 4 us spec 3d model creatord 82681 3dexport
3d_export
$99
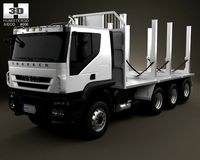
Iveco Trakker Log Truck 4axis 2012 3D Model
...-axis 2011 2012 2013 2014 truck heavy duty trucks industrial
iveco trakker log truck 4axis 2012 3d model humster3d 59446 3dexport
3d_export
$30

Samsung Galaxy Note 4 Charcoal Black 3D Model
...four phone flagship iphone apple quality blender cycles
samsung galaxy note 4 charcoal black 3d model dragosburian 96596 3dexport
3d_export
$99

Dodge Nitro 2011 3D Model
...jeep liberty family dodge nitro 2011 3d model humster3d 4048 ...
3d_export
$99

Kia Forte Cerato Naza Sedan 2011 3D Model
...kia forte cerato naza sedan 2011 3d model humster3d 4220 ...
3d_export
$15

Slums Building 4 3D Model
... house metal sheets deteriorated makeshift grunge shack shanty town udk
slums building 4 3d model aetherealstudios 81939 3dexport
3d_export
$99

Mazda 6 sedan 2013 3D Model
...third generation mazda 6 sedan 2013 3d model humster3d 6486 ...
3d_export
$99

Mazda 323 Familia 1994 3D Model
...allegro artis protege etude 1994 1995 1996 1997 1998 4-door sedan saloon
mazda 323 familia 1994 3d model humster3d 78115 3dexport
3d_export
$175

3D Models Building collection 4 3D Model
...office apartment balcony store town architecture game ready city
3d models building collection 4 3d model vkmodels 68692 3dexport
3
3d_export
$99
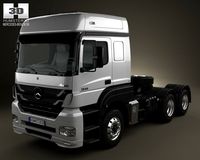
MercedesBenz Axor Tractor Truck 2011 3D Model
...012 2013 2014 2015 2016 truck heavy duty trucks industrial
mercedesbenz axor tractor truck 2011 3d model humster3d 93185 3dexport
3d_export
$99

Toyota Yaris 2012 5door 3D Model
...2012 5-door 5d 3d 3-door 2013 2014 2015 2016 hatchback japan small city car
toyota yaris 2012 5door 3d model squir 47702 3dexport
3d_export
$7

Pendant Lamp 3 3D Model
...pendant lamp 3 3d model
3dexport
pendant lights lighting bulb ceiling lamp
pendant lamp 3 3d model bessoo 87379 3dexport
3d_export
$99

Kia Pro Ceed 3door hatchback 2011 3D Model
...y hatchback hatch estate europe hyundai i30 south korea forte
kia pro ceed 3door hatchback 2011 3d model humster3d 50040 3dexport
3d_export
$30
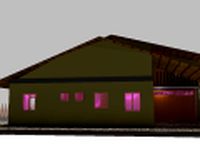
3 bedroom maisonette plus swimming pool 3D Model
...s swimming pool 3d model
3dexport
house swimming building
3 bedroom maisonette plus swimming pool 3d model camarra 59238 3dexport
3d_export
$25

Keyboard Workstation 3 3D Model
...etailed music instrument sound studio keyboard workstation key chrome metal
keyboard workstation 3 3d model cgaxis 70062 3dexport
3d_export
$24

Photorealistic Low Poly Building 3 3D Model
...hitecture urban residential suburb europe city cityscape vray
photorealistic low poly building 3 3d model vkmodels 64244 3dexport
3d_export
$99

Kia Pro Ceed 2014 3D Model
...rt
kia pro ceed 2014 2015 2016 2013 3-door hatchback compact city south korea
kia pro ceed 2014 3d model humster3d 64388 3dexport
3d_export
$60

RKG 3 Grenade 3D Model
...mb gun weapon explosives army marine explosion hand handgrenade russia soviet iraq
rkg 3 grenade 3d model blacks3d 52716 3dexport
3ddd
$1
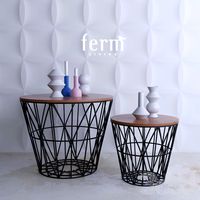
ferm_LIVING_baskets
...создаете себе красивый столик. в дополнение к столику идет декор.http://www.fermliving.com/webshop/shop/wire-baskets.aspx http://www.fermliving.com/webshop/shop/wire-baskets/wire-basket-top-3aspx http://www.fermliving.com/webshop/shop/all-products/winebottle-candleholder-5.aspx http://www.fermliving.com/webshop/shop/geometry-vase-1.aspx в архиве max...