Thingiverse
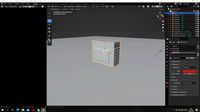
Raspberry Pi 3 Model B PC Gamer Case by yr3design
by Thingiverse
Last crawled date: 3 years, 1 month ago
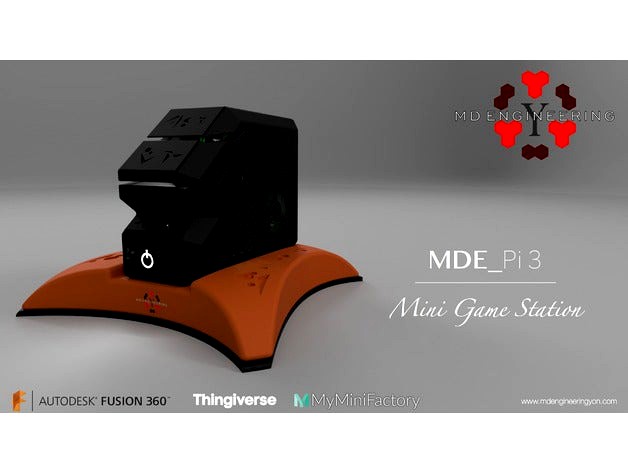
This is a case that i've designed for the raspberry pi 3 Model b in order to use as a retro game console.
*Pinting and post-printing
Step 1- Print all the files with the settings showed in the images above.
Note:
Before painting check the diameter of the neodymium magnets hole.
Step 2-The painting process
Sand each part starting with a 120 grid to remove all defects from the part, then move to an 180, 280 and finally wet sanding with 600, 1000 and 2000 grid.
Once the sanding process is complete us filler primer, use one or two coats, then paint with acrylic paint one or two coats.
*Instalation of RetroPie/Recallbox to your raspberry pie.
Step 1: Download Retropie/Recalbox from the following links:
https://retropie.org.uk/download/https://www.recalbox.com
Step 2: Download Etcher from the following links:
https://etcher.io
Step 3: Install and open Etcher on your computer.
Step 4:Insert your SD card on your computer.
Step 5: In Etcher click on "select image" and select your RetroPie image, then click on select "drive" and select your SD card. Finally click on flash.
Now everything it's setup.
*Mounting your raspberry pie and Fan 3010 to the case
Step 1: Drill each hole of the case with a 1/16 drill bit.
Step 2: Insert your raspberry Pie without the sd Card on to your case_L, press the raspberry until the USB ports get inside and the holes of the case and the raspberry fits perfectly.
Step 3: Mount the 3010 Fan on to the Case_R with the cable pointing downwards.
If you don't want a noisy fan remove the JST connector from the fan to get two separate wires. The red(positive) wire goes to a 3.3V pin(pin 1) on the raspberry pie and the black (negative) wire goes to ground(pin6).
Step 4: Mount the pushbutton switch to the case_L and connect red wire to pin GPIO3(Pin 5) and black wire to ground(Pin 39).
Step 5: Insert the magnets on to each hole, four for the stand and four for the case, use super glue.
*Setup your RetroPie/Recalbox
https://retropie.org.uk/docs/First-Installation/
https://forum.recalbox.com/category/5/international
Great YouTube Channel on this subject :
https://www.youtube.com/channel/UC_0CVCfC_3iuHqmyClu59Uw
Similar models
thingiverse
free

Pi Zero Snap-fit case by Triangle3D
...sy to print, leaving plenty of room for the necessary connectors and access to sd card. perfect for recalbox or retropie set ups.
thingiverse
free

Raspberry Pi Snap together case with 40mm fan mount by kwh32901
...se stick on feet work great with it, https://www.amazon.com/gp/product/b072hc6tbp/ref=oh_aui_detailpage_o00_s00?ie=utf8&psc=1
thingiverse
free

Raspberry pi with 5 "touch screen by Geri
... card is accessible via the lid on the back.
for the pin there is also a place on the back.
designed and drawn by wolfgang karner
thingiverse
free

Raspberry Pi Snap together case with 30mm fan mount by kwh32901
...se stick on feet work great with it, https://www.amazon.com/gp/product/b072hc6tbp/ref=oh_aui_detailpage_o00_s00?ie=utf8&psc=1
thingiverse
free

MY FAV RetroPie Case by Zq8blazer
...d be slightly larger and the top holes really need to be indented a little more in order to fully clear the type of screw i used.
thingiverse
free

Mini Nintendo NES case for Raspberry Pi 3 B by zumili
...-up.
for further informations have a look at: http://www.thingiverse.com/thing:449877
and http://www.thingiverse.com/thing:307832
thingiverse
free

Android Auto Head Unit for Vehicle
...5. you will need to change the config.ini to your display resolution
step 6. insert sd into pie
step 7. profit
have fun building!
thingiverse
free

Raspberry Pi 2 / B+ case (Apple TV lookalike) by SaschaK
...a case for raspberry pi 2 or b+
you can use it for the following projects:
-volumio
-runeaudio
-musicbox
-retropie
-recalbox
etc.
thingiverse
free

1U Raspberry Pi Case (for RPI4)
...for 1u server rack, with space for hats.
note: remove sd card prior to installing raspberrypi to prevent possible sd card damage.
thingiverse
free

RetroPie Handheld by craiglitwiller
...also testing a different battery and will update the list if it works out better. the current battery doesn't last very long.
Yr3Design
thingiverse
free
Bike Helmet by yr3design
...bike helmet by yr3design
thingiverse
bike helmet made in fusion 360
thingiverse
free
Anet A8 Fan Cover by yr3design
...anet a8 fan cover by yr3design
thingiverse
fan cover for anet a8.
thingiverse
free

Apple Pencil Stand by yr3design
...apple pencil stand by yr3design
thingiverse
apple pencil stand printed in an anet a8.
time: 2 hrs 10 min.
thingiverse
free

X-Wing Helmet by yr3design
...esign
thingiverse
luke skywalker x-wing helmet.
available as a single body or by parts, also is included the thermoforming part.
thingiverse
free

MDE Spool Holder by yr3design
...ol holder by yr3design
thingiverse
spool holder made in fusion 360 and 3d printed on an anet a8.
filament hatchbox pla 1.75mm.
thingiverse
free

Mario Kart "Green Shell" by yr3design
...mario kart "green shell" by yr3design
thingiverse
mario kart "green shell" in fusion 360!
thingiverse
free
Great Saiyaman Helmet by yr3design
...r3design
thingiverse
great saiyaman helmet made in fusion 360.
i'm still sanding and painting the helmet. more updates soon!
thingiverse
free

Mario Bros "Goomba" by yr3design
...s separately and then assembly using some glue.
the stl file named goomba_one_body can be printed in one part in sls 3d printers.
thingiverse
free

Proto Man Helmet by yr3design
...o can be printed in three parts.
use rafts to increase bed adhesion and stability.
use vacuum forming piece to create your visor.
thingiverse
free

Thumbstick Cover for ps4 controller by yr3design
...r bigger thumbs called adult size thumbstick.
thumbsticks cover for ps4 controller
printed a 0.12mm layer height and 100% infill.
Gamer
3d_export
$8
gamer headset audfonos gamer
...lender has subdivisions, low poly and shade smooth audifonos gamer hecho en blender tiene subdivisiones, low poly y shade smooth
3d_export
$5

Gamer Room
...gamer room
3dexport
gamer room with led lights
3d_export
$5
gamer room
...gamer room
3dexport
a gamer room with some geek items and hero stuff
turbosquid
$59

Gamer Table
...osquid
royalty free 3d model gamer table for download as max on turbosquid: 3d models for games, architecture, videos. (1542291)
turbosquid
$6

cuarto gamer
...uid
royalty free 3d model cuarto gamer for download as blend on turbosquid: 3d models for games, architecture, videos. (1701542)
turbosquid
$99
Gamer Girl
...d
royalty free 3d model gamer girl for download as ma and ma on turbosquid: 3d models for games, architecture, videos. (1412937)
turbosquid
$10

Gamer Table
...yalty free 3d model gamer table for download as blend and obj on turbosquid: 3d models for games, architecture, videos. (1631004)
turbosquid
$1

Gamer Chair
...
royalty free 3d model gamer chair for download as ma and fbx on turbosquid: 3d models for games, architecture, videos. (1456055)
3d_export
$5

gamer room
...gamer room
3dexport
3d_export
$5

Gamer table
...gamer table
3dexport
Raspberry
3d_export
free

raspberry
...raspberry
3dexport
3d model of a raspberry. i tried to make it realistic.
turbosquid
$27

Raspberries
...y free 3d model raspberries for download as max, obj, and stl on turbosquid: 3d models for games, architecture, videos. (1354176)
turbosquid
$14

Raspberries
...y free 3d model raspberries for download as max, obj, and fbx on turbosquid: 3d models for games, architecture, videos. (1364663)
3d_export
$5

raspberry pi
...raspberry pi
3dexport
carcasa para la raspberry pi
turbosquid
$99

Raspberry
... available on turbo squid, the world's leading provider of digital 3d models for visualization, films, television, and games.
turbosquid
$10

raspberries
... available on turbo squid, the world's leading provider of digital 3d models for visualization, films, television, and games.
archive3d
free

Raspberries 3D Model
...raspberries 3d model archive3d raspberries raspberry raspberries n300911 - 3d model (*.3ds) for interior 3d...
3d_export
$5

raspberry fruit
...raspberry fruit
3dexport
3d_export
$5

raspberry
...y different sizes. their color ranges from light burgundy to pink. there are formats: obj, 3ds, blend, dae, fbx, mtl.<br>:)
evermotion
$12

raspberries 23 am130
...evermotion raspberries 23 am130 evermotion key 23 food fruit raspberry fruits am130 raspberries highly detailed 3d model of raspberries...
Pi
design_connected
$11

Pi
...pi
designconnected
ligne roset pi chairs computer generated 3d model. designed by thibault desombre.
3d_export
$5
raspberry pi
...raspberry pi
3dexport
carcasa para la raspberry pi
turbosquid
$18

pied
... available on turbo squid, the world's leading provider of digital 3d models for visualization, films, television, and games.
3ddd
$1

Emme pi light
...emme pi light
3ddd
emme pi light
люста emme pi light
3ddd
$1

Emme pi light
...emme pi light
3ddd
emme pi light
бра классическое emme pi light
3ddd
$1

Emme Pi Light
...emme pi light
3ddd
emme pi light
3ddd
$1

Emme Pi Light
...emme pi light
3ddd
emme pi light
design_connected
$16

Pi-Air
...pi-air
designconnected
living divani pi-air lounge chairs computer generated 3d model. designed by harry & camila.
3d_ocean
$15

Manneken Pis
...picting a naked little boy urinating into a fountain’s basin. (wikipedia) the model was sculpted in blender 2.70a rendered wit...
3ddd
$1

Emme pi light
...emme pi light
3ddd
emme pi light
люстра классическая фирма: emme pi light
артикул: 3595/5/cot/12/wh
Pc
archibase_planet
free
PC
...pc
archibase planet
pc case pc tower pc equipment system unit
pc - 3d model (*.gsm+*.3ds) for interior 3d visualization.
3d_export
free
Pc
...pc
3dexport
pc
archibase_planet
free
PC
...pc
archibase planet
notebook pc computer equipment
pc - 3d model (*.gsm+*.3ds) for interior 3d visualization.
archibase_planet
free
PC
...pc
archibase planet
system unit pc equipment
pc - 3d model (*.gsm+*.3ds) for interior 3d visualization.
archibase_planet
free
PC
...pc
archibase planet
pc equipment cabinet system unit
pc 70 - 3d model (*.gsm+*.3ds) for interior 3d visualization.
3d_export
$5
pc
...pc
3dexport
computer
archibase_planet
free
PC
...pc
archibase planet
cabinet chassis system unit
pc case n241107 - 3d model (*.gsm+*.3ds) for interior 3d visualization.
turbosquid
$3

PC
...id
royalty free 3d model pc for download as ma, obj, and fbx on turbosquid: 3d models for games, architecture, videos. (1159175)
turbosquid
$7
lap top ,pc portable, PC
...ty free 3d model lap top ,pc portable, pc for download as c4d on turbosquid: 3d models for games, architecture, videos. (1352084)
turbosquid
$100
PC
... available on turbo squid, the world's leading provider of digital 3d models for visualization, films, television, and games.
B
3ddd
$1
B&B
...b&b
3ddd
b&b italia
statue b&b italy
3ddd
$1
B&B Italia
...b&b italia
3ddd
b&b italia
b&b; italia
3ddd
$1

b&b italia
...b&b italia
3ddd
b&b italia
b&b; italia
3ddd
$1
B&B LAZY
...b&b lazy
3ddd
b&b italia
b&b; lazy
3ddd
$1
B&B Italy
...b&b italy
3ddd
b&b italia
диван b&b; italy
3ddd
$1

b&b RAY
...b&b ray
3ddd
b&b italia , угловой
диван b&b; ray
3ddd
$1
B&B Beverly
... b&b italia , beverly
cтул beverly от b&b.; текстуры в архиве
3ddd
$1

B&B ITALIA
...lia , журнальный , круглый
стол b&b; italia
3ddd
$1
шезлонг B&B
...шезлонг b&b
3ddd
b&b italia , шезлонг
шезлонг b&b; terminal 1
3ddd
$1

B&B J.J
...b&b j.j
3ddd
b&b italia , журнальный
b&b;
j.j
45x40x49 cm
Case
3d_export
$1

case
...case
3dexport
case
archibase_planet
free

Case
...case
archibase planet
showcase show-case glass case
glass-case + cakes - 3d model for interior 3d visualization.
archibase_planet
free

Case
...case
archibase planet
showcase show-case glass case
glass-case for chips - 3d model for interior 3d visualization.
archibase_planet
free

Case
...case
archibase planet
case shelving drawer
case - 3d model for interior 3d visualization.
archibase_planet
free

Case
...case
archibase planet
case rack locker
case - 3d model for interior 3d visualization.
archibase_planet
free

Case
...case
archibase planet
case drawer kitchen furniture
case - 3d model for interior 3d visualization.
archibase_planet
free

Case
...case
archibase planet
case cupboard shelving
glass case - 3d model for interior 3d visualization.
archibase_planet
free

Case
...case
archibase planet
case handbag suitcase
case - 3d model (*.gsm+*.3ds) for interior 3d visualization.
archibase_planet
free

Case
...case
archibase planet
case suitcase
case 5 - 3d model (*.gsm+*.3ds) for interior 3d visualization.
archibase_planet
free

Case
...case
archibase planet
locker case dresser
case - 3d model (*.gsm+*.3ds) for interior 3d visualization.
3
turbosquid
$10

Mountain Bike 3 -3 of 3
...model mountain bike 3 (#3 of 3) for download as fbx and blend on turbosquid: 3d models for games, architecture, videos. (1438752)
turbosquid
$6

Rock 3-3
...urbosquid
royalty free 3d model rock 3-3 for download as obj on turbosquid: 3d models for games, architecture, videos. (1628065)
turbosquid
$29

Books 150 pieces 3-3-3
...books 150 pieces 3-3-3 for download as max, obj, fbx, and stl on turbosquid: 3d models for games, architecture, videos. (1384033)
turbosquid
$3

Genesis 3 Clothing 3
... available on turbo squid, the world's leading provider of digital 3d models for visualization, films, television, and games.
3d_export
$5

hinge 3
...hinge 3
3dexport
hinge 3
3ddd
$1

Розетка 3
...розетка 3
3ddd
розетка
розетка 3
turbosquid
$50

is-3
... available on turbo squid, the world's leading provider of digital 3d models for visualization, films, television, and games.
turbosquid
$10

Mountain Bike 3 -2 of 3
...model mountain bike 3 (#2 of 3) for download as fbx and blend on turbosquid: 3d models for games, architecture, videos. (1438750)
turbosquid
$10

Mountain Bike 1 -3 of 3
...model mountain bike 1 (#3 of 3) for download as fbx and blend on turbosquid: 3d models for games, architecture, videos. (1438743)
3d_export
$5

3 CATS
...3 cats
3dexport
3 cats pen holder