Thingiverse
PrusaSlicer configuration for FlashForge Creator Pro (Slic3r) by DrLex
by Thingiverse
Last crawled date: 3 years ago
This will no longer be updated.Go to my website for the latest version and instructions. If you already installed this, you can go directly to the GitHub repository for the newest files.
Old description below.
These are my PrusaSlicer settings for the FlashForge Creator Pro (or similar printers). I created a Thing for these files because this allows Thingiverse users to click the ‘Watch’ button to be notified of updates. For really important updates I'll add a comment so you immediately know what has changed.
Also included is the make_fcp_x3g script that invokes the GPX program with the correct parameters and performs some other magic.
The configs and the scripts are maintained in this GitHub repository. You can see the change history there, or submit your own changes through a pull request. Please read all documentation before filing an issue.
I will from now on only support PrusaSlicer, the Prusa3D fork of Slic3r because keeping the configs compatible with both this edition and the regular Slic3r is a hassle. It is likely the configs will still work with the latter, but I give no guarantees.
There is also a separate Thing for the G-code snippets, so I can update them separately and you don't need to reimport everything if only the G-code was changed.
As stated in my article, these configs are a sensible starting point. You can use them as-is for many objects but for specific prints you will need to fiddle with certain parameters. The things I change most often are top/bottom layers, infill ratio and pattern, number of perimeters, brim, and ‘infill only where needed’ or not. Obviously sometimes supports need to be enabled. For some prints you may need to make pretty drastic changes.
Be careful with the temperatures in the filament presets! Most likely you will need to reduce temperatures slightly because I tweaked them on a Micro Swiss all-metal hot-end with glass bed + hairspray and hardened steel nozzle, and this setup requires higher temperatures than the stock hot-ends. The temperatures for PLA and ABS are safe, but especially the temperatures for PETG, flexible filaments, and obviously polycarbonate are well above the 240°C limit for the stock hot-ends with their teflon liners. You should never exceed 240°C for longer than a few minutes if you have not upgraded your hot-ends to all-metal. For PETG you should be able to get decent results at 240°C but I do recommend an all-metal hot-end with a pointy nozzle and higher temperatures to obtain good results with PETG.
Installing (in a nutshell)
You should definitely read the webpage with detailed instructions. Some changes must be made to the config and the make_fcp_x3g script before they can be used. You should at the least read this section of the page to get things working. The following is just a quick reminder for those who have done it before.
There are two variations on the config bundle: most likely you will need the regular one. The other one with ‘MVF’ in its name is only to be used if you have upgraded your printer with the MightyVariableFan system.
make_fcp_x3g is a bash script that will work as-is in Linux and Mac OS X. You can also use it with WSL in the latest Windows releases (Windows 10 version 1803 or newer) by creating a BAT file: follow the instructions on GitHub.
If you open PrusaSlicer for the first time, try to bypass its config wizard. The way to do this seems to change with every release. If the wizard did make any Print, Filament, or Printer settings, delete them before loading the config bundle.
When importing the .ini bundle, PrusaSlicer will overwrite existing configs with the same names but other ones will be left untouched. If you have nothing custom, it is better to first wipe everything before importing so you don't accumulate old cruft. If you make modifications to a config and you want to preserve them, save it as a new config with a unique name to prevent it from being overwritten in a future update.
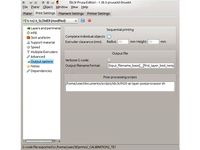
If you are updating existing configs, you still need to reset the post-processing script path in each Print Settings profile. See the webpage for more details.
You should calibrate your home offsets to be able to use the entire surface of the print bed. In a nutshell, make sure that the initial priming extrusion is at exactly 3 mm of the front edge of the bed. For more details, see my FFCP hints webpage.
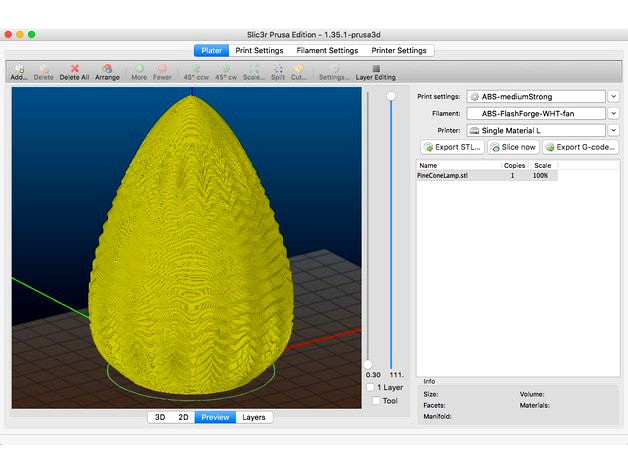
Just to have an actual 3D model attached to this Thing, I included my favourite variation on the boring 20 mm calibration cube which is usually the very first thing I print when testing a new filament.
Old description below.
These are my PrusaSlicer settings for the FlashForge Creator Pro (or similar printers). I created a Thing for these files because this allows Thingiverse users to click the ‘Watch’ button to be notified of updates. For really important updates I'll add a comment so you immediately know what has changed.
Also included is the make_fcp_x3g script that invokes the GPX program with the correct parameters and performs some other magic.
The configs and the scripts are maintained in this GitHub repository. You can see the change history there, or submit your own changes through a pull request. Please read all documentation before filing an issue.
I will from now on only support PrusaSlicer, the Prusa3D fork of Slic3r because keeping the configs compatible with both this edition and the regular Slic3r is a hassle. It is likely the configs will still work with the latter, but I give no guarantees.
There is also a separate Thing for the G-code snippets, so I can update them separately and you don't need to reimport everything if only the G-code was changed.
As stated in my article, these configs are a sensible starting point. You can use them as-is for many objects but for specific prints you will need to fiddle with certain parameters. The things I change most often are top/bottom layers, infill ratio and pattern, number of perimeters, brim, and ‘infill only where needed’ or not. Obviously sometimes supports need to be enabled. For some prints you may need to make pretty drastic changes.
Be careful with the temperatures in the filament presets! Most likely you will need to reduce temperatures slightly because I tweaked them on a Micro Swiss all-metal hot-end with glass bed + hairspray and hardened steel nozzle, and this setup requires higher temperatures than the stock hot-ends. The temperatures for PLA and ABS are safe, but especially the temperatures for PETG, flexible filaments, and obviously polycarbonate are well above the 240°C limit for the stock hot-ends with their teflon liners. You should never exceed 240°C for longer than a few minutes if you have not upgraded your hot-ends to all-metal. For PETG you should be able to get decent results at 240°C but I do recommend an all-metal hot-end with a pointy nozzle and higher temperatures to obtain good results with PETG.
Installing (in a nutshell)
You should definitely read the webpage with detailed instructions. Some changes must be made to the config and the make_fcp_x3g script before they can be used. You should at the least read this section of the page to get things working. The following is just a quick reminder for those who have done it before.
There are two variations on the config bundle: most likely you will need the regular one. The other one with ‘MVF’ in its name is only to be used if you have upgraded your printer with the MightyVariableFan system.
make_fcp_x3g is a bash script that will work as-is in Linux and Mac OS X. You can also use it with WSL in the latest Windows releases (Windows 10 version 1803 or newer) by creating a BAT file: follow the instructions on GitHub.
If you open PrusaSlicer for the first time, try to bypass its config wizard. The way to do this seems to change with every release. If the wizard did make any Print, Filament, or Printer settings, delete them before loading the config bundle.
When importing the .ini bundle, PrusaSlicer will overwrite existing configs with the same names but other ones will be left untouched. If you have nothing custom, it is better to first wipe everything before importing so you don't accumulate old cruft. If you make modifications to a config and you want to preserve them, save it as a new config with a unique name to prevent it from being overwritten in a future update.
If you are updating existing configs, you still need to reset the post-processing script path in each Print Settings profile. See the webpage for more details.
You should calibrate your home offsets to be able to use the entire surface of the print bed. In a nutshell, make sure that the initial priming extrusion is at exactly 3 mm of the front edge of the bed. For more details, see my FFCP hints webpage.
Just to have an actual 3D model attached to this Thing, I included my favourite variation on the boring 20 mm calibration cube which is usually the very first thing I print when testing a new filament.
Similar models
thingiverse
free

PETG temperature tower test (for CURA) by cuzzea
...sa3d/slic3r/wiki/slic3r-prusa-edition-macro-language. the comments for the thing point to another thing with a cura script."
thingiverse
free

Hot End Temperature Calibration Model by CU_Ninjaneer
...nd temperature to harmonize with your speeds/feeds and filament to get optimum print results. see instructions for more details.
thingiverse
free

Air Gun Holder (T-Track Mount) by Reckliss
...track mount) by reckliss
thingiverse
printed using pla filament
layer height: 0.175
hot end temperature: 240
bed temperature: 70
thingiverse
free
Prusa Original MK2 fan nozzel by Jimbo70
...yers - for pla cooling is max 80% min 75% disable fan for first 3 layers
replaced the fan nozzle with the version included here
thingiverse
free

PETG Temp Towers 260-240 / 225-260 by elhooty
...y gaazolee, and added the temp labels etc. this is just a model you have to adjust your settings in your slicer for this to work.
thingiverse
free
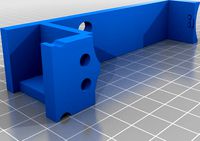
Filament Guide and Fault Detector by melrace
...3209211, so the tension on the sensor is light and steady due to the bearings.
so really, the only new thing here is the bracket.
grabcad
free

Lamp Shade
...:
printed with transparent plastic, but you can use any color. nozzle temperature 200-220 degrees, table temperature 50 degrees.
thingiverse
free

carrera racetrack parts by byctrldesign
...d but if i run them trough slic3r i can print a good result.
printed with < by ctrl design > filament
colors: black and red
thingiverse
free
M25-at-layer-postprocessor for Slic3r by BETLOG
...-02-08--00-54-06
.sh that doesnt keep finished terminal open
altered description text instructions to reflect previous .pl update
thingiverse
free

Stranger Things Croc Charm
...y need to widen the slot on the back of the logo, i used the end of my hot glue gun to melt it wider before i glued them together
Drlex
thingiverse
free

MAGNET THIEF by DrLex
...magnet thief by drlex
thingiverse
magnet
thingiverse
free
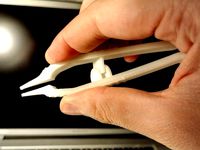
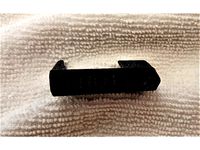
THE Tweezerer by DrLex
...ts of paper or adhesive tape).
this should be an easy print as long as your printer doesn't have problems with 45° overhangs.
thingiverse
free

Mini M3 hex key wrench by DrLex
...lex
thingiverse
this is a simple key-shaped wrench for m3 nuts, for those times when space is cramped. the socket is 14 mm deep.
thingiverse
free
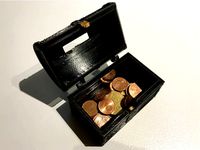
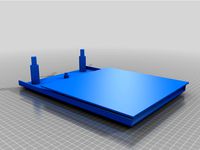
Piggybank Lid for Hinged Chest by DrLex by Skyline89
... hinged chest (https://www.thingiverse.com/thing:2803507)
you need the other parts from the original chest, this is just the lid.
thingiverse
free
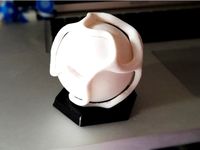
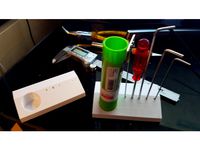
Display Stand for Ball in Vine by DrLex
...9;s ball in vine, which on its own tends to roll around very easily if you leave it on a flat surface, especially non-level ones.
thingiverse
free
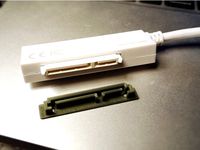
Dummy SATA plug by DrLex
...d eyeballing a real plug, so don't expect this to be perfectly according to specs. it is accurate enough for my needs though.
thingiverse
free

Dust cap for French power outlets by DrLex
...yle sockets with an earth pin. also included a hybrid schuko with a hole, that can be used on both the schuko and french sockets.
thingiverse
free

Paracord Vase Spool (Slic3r compatible) by DrLex
...that vase mode will work in slic3r (which fills any gaps smaller than 100 microns). for more information, see the original thing.
thingiverse
free

Lid for F-Puzzle by DrLex
...t, i provided an extra space in the lid for the fourth f. place the letters as shown in the (first) photo before closing the lid.
thingiverse
free

Mini Dualstrusion Test Gizmos by DrLex
...est and fastest. they require only about 0.5g to print, and somewhere around 5 to 8 minutes depending on your setup and settings.
Prusaslicer
thingiverse
free

PrusaSlicer config Settings
...usa_i3_hephestos
software prusaslicerhttps://www.prusa3d.com/prusaslicer/
firmware marlin 1.1.9http://marlinfw.org/meta/download/
thingiverse
free

Artillery Genius model for Prusaslicer by alpo16000
...artillery genius model for prusaslicer by alpo16000
thingiverse
artillery genius custom bed model for prusaslicer
thingiverse
free

PrusaSlicer - Sapphire Pro - Profile
..... working with my win10 ;-(
and i decided to use prusaslicer instead ;-)https://youtu.be/e3tpketyrxc
here is my profile....enjoy
thingiverse
free

Ender 3 Model for PrusaSlicer by FeedBackM
...er 3 model for prusaslicer by feedbackm
thingiverse
i've re-centered the ender 3 model so it fit perfectly with prusaslicer.
thingiverse
free

PrusaSlicer Infill Patterns Display by asimomagic
...fference between adaptive cubic and support cubic is not clear in this sample.
[note]
the version of prusaslicer i used is 2.3.0.
thingiverse
free

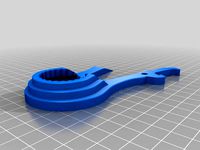
Wiper Cutter Renovator repaired for PrusaSlicer by A-make-designs
...ce properly with prusaslicer.
the top picture is the auto-repaired from prusaslicer, the bottom picture is this repaired version.
thingiverse
free

Bed PrusaSlicer Slic3r by PatBef
...sult on the bed
when loading for the first time, prusaslicer takes a little while to load
and then it's up to you to work ;-)
thingiverse
free

Customizable bed shape (for PrusaSlicer & other) by kanocz
...z
thingiverse
small openscad script to generate bed shape for prusaslicer (and probably other slicers)... just to get it nice :)
thingiverse
free
Sapphire Pro bed texture for Prusaslicer by zajacmannheim
...cer by zajacmannheim
thingiverse
twotrees sapphire pro druckbett modell und eine grafik für den prusaslicer.
viel spaß damit ;-)
thingiverse
free

PrusaSlicer Build plate for Creality CR-10S by Gregbloor
...e 'load...' button
load the file 'cr-10s_buildplate_prusa.svg' from wherever you saved it.
restart prusaslicer
Slic3R
3d_export
$79

3d print apple iphone 13 collection
...model all files are correct, checked by 3d builder, slic3r meshmixer topology of geometry: - forms and proportions of...
3d_export
$5

medallion depicting the deity baphomet that the knights templar were accused of worshipping file
...positioned for 3d printing<br>compatible with every slicer- simplify3d, care, slic3r etc ...<br>all the parts of the model have been...
thingiverse
free

Slic3r logo by Sound
...slic3r logo by sound
thingiverse
printable slic3r logo!
http://slic3r.org/
(the logo was designed by corey daniels.)
thingiverse
free

Articulated Tarantula (Slic3r fixed) by Smuk3D
...articulated tarantula (slic3r fixed) by smuk3d
thingiverse
somefixes for slic3r.
many thanks goes to owtcydur
thingiverse
free
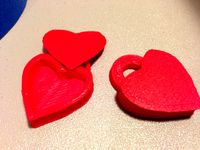
Heart Locket Slic3r Friendly by dblanton10
...rt locket slic3r friendly by dblanton10
thingiverse
the original did not slice well for me, so i made a slic3r friendly version.
thingiverse
free

Example files for a Slic3r issue by noordvyk
...hub. put the pieces here so i could refer to them in the issue.
if you are not debugging slic3r code, you can ignore this :-)
thingiverse
free

fish fossilz with ring(fix for slic3r) by Samie828
...fish fossilz with ring(fix for slic3r) by samie828
thingiverse
fish fossilz with ring (fix for slic3r) and modifly key ring
thingiverse
free

slic3r me nicer, OpenSCAD by BY_CRC
...slic3r me nicer, openscad by by_crc
thingiverse
:-)
thingiverse
free

Heart Gear Center for Slic3r by Salted
...giverse
for whatever reason, slic3r doesn't like the geometry in the original heart gear center. here's a fixed version.
thingiverse
free
UBO 4 Slic3r (working) by sobo84
...ubo 4 slic3r (working) by sobo84
thingiverse
xyz
Flashforge
thingiverse
free

Flashforge Logo
...flashforge logo
thingiverse
flashforge logo
thingiverse
free

flashforge logo by morive3d
...flashforge logo by morive3d
thingiverse
this is a flashforge stamphttps://www.youtube.com/channel/ucu6ge9qrju9cpgg6wrlxkqw
thingiverse
free

Flashforge Glass Bed by olo2000pm
...flashforge glass bed by olo2000pm
thingiverse
flashforge glass bed
thingiverse
free
Toolbox for FlashForge Finder by Gringo1970
...toolbox for flashforge finder by gringo1970
thingiverse
smal toolbox for flashforge finder
thingiverse
free
Flashforge / Dremel lid by Disco_Rob
...flashforge / dremel lid by disco_rob
thingiverse
lid extension for the flashforge dreamer
thingiverse
free

Flashforge Dreamer Filamentguide by PeterS1
...de for flashforge dreamer / dremel idea. you need also flashforge dreamer lid spacer (http://www.thingiverse.com/thing:1219953)
thingiverse
free
Flashforge creator legs by cybadigitals
...flashforge creator legs by cybadigitals
thingiverse
these legs gives a clearance of 25mm for flashforge creator series
thingiverse
free
Flashforge Inventor/Dreamer by Iprintr7
...orge inventor/dreamer by iprintr7
thingiverse
this is my first thingiverse project and is a model of the flashforge 3d printer
thingiverse
free

Flashforge Filiment Guide by russellscanlan
...flashforge filiment guide by russellscanlan
thingiverse
my design to feed filament through the door on a flashforge adventure 3
thingiverse
free
Flashforge Winder Adapter by newky2k
...winder adapter by newky2k
thingiverse
adapters for the flashforge 0.5 kg spools to the for the filament spool winder by ssinnott
Creator
3ddd
$1

CREATOR
... молдавия
круглая кровать молдавской мастерской creator.диаметр спального места - 1900мм,материалы настроены.
turbosquid
$75

Creators Realm
... available on turbo squid, the world's leading provider of digital 3d models for visualization, films, television, and games.
3ddd
$1

LEGO Creator Part 2
...
lego , конструктор , машина
lego creator №6753
turbosquid
free

Game Creator Pack
... available on turbo squid, the world's leading provider of digital 3d models for visualization, films, television, and games.
3ddd
$1
LEGO Creator №6753 Part 3
...
lego , конструктор , машина
lego creator №6753
3ddd
$1

LEGO Creator №6753 Part 1
...
lego , конструктор , машина
lego creator №6753
turbosquid
$29

Train Track Creator Pro
... available on turbo squid, the world's leading provider of digital 3d models for visualization, films, television, and games.
3d_ocean
$39

Train Track Creator Pro
...n tracks, for video game or rendering in a matter of minutes. all the models in this pack are low poly with high resolution te...
turbosquid
$7

FPS Creator Reloaded Rock Pack 1
... available on turbo squid, the world's leading provider of digital 3d models for visualization, films, television, and games.
3ddd
$1
Декоративные элементы BV Decor CREATOR III часть
...ментов и декорирования стен.
множество вариантов для вашей фантазии.https://bvdecor.com/es/category/list/cat/creator-es
Configuration
3d_export
free

snowman with configurator
...snowman with configurator
3dexport
create your own original snowman by using configurator:
design_connected
$27

Alison configuration 01
...ison configuration 01
designconnected
minotti alison configuration 01 computer generated 3d model. designed by dordoni, rodolfo.
design_connected
$27

Alison configuration 02
...ison configuration 02
designconnected
minotti alison configuration 02 computer generated 3d model. designed by dordoni, rodolfo.
design_connected
$27
Alison configuration 03
...ison configuration 03
designconnected
minotti alison configuration 03 computer generated 3d model. designed by dordoni, rodolfo.
design_connected
$27

Alison configuration 04
...ison configuration 04
designconnected
minotti alison configuration 04 computer generated 3d model. designed by dordoni, rodolfo.
turbosquid
$4
Multiple Configurations Chair
...e configurations chair for download as max, fbx, 3ds, and obj on turbosquid: 3d models for games, architecture, videos. (1595432)
turbosquid
$571
Battleship Missouri 1990s Configuration
...issouri 1990s configuration for download as max, obj, and fbx on turbosquid: 3d models for games, architecture, videos. (1364490)
3d_export
$35

Small configurable table 3D Model
...
3dexport
furniture wooden table textures riged ready to animate organised
small configurable table 3d model lukeb 26655 3dexport
3ddd
$1
GAUTIER FRANCE, Preface Configuration 7
... 305.5см x высота: 231см x глубина: 35.3/42смhttp://www.gautier.co.uk/our-products/living-room/bookcase/configuration-7
turbosquid
$1000
3D Suit Configurator - FULL 3D model
...onfigurator - full 3d model for download as max, obj, and fbx on turbosquid: 3d models for games, architecture, videos. (1492616)
Pro
turbosquid
$29

Pro
...ree 3d model mac pro for download as obj, c4d, fbx, and blend on turbosquid: 3d models for games, architecture, videos. (1505782)
turbosquid
$15

Apple Mac Pro and Pro Display
...ee 3d model apple mac pro and pro display for download as max on turbosquid: 3d models for games, architecture, videos. (1417078)
3d_export
$5

iphone 13 pro max and pro
...3 pro max and 13 pro the model is made in four colors (graphite, gold, silver, and blue), all of which are attached in the files.
3d_export
free

sapphire pro
...sapphire pro
3dexport
sapphire pro 3d printer head mask
3d_export
$4

macbook pro
...macbook pro
3dexport
macbook pro 13" inch 2020 years model
3ddd
free

GentleLase Pro
... syneron , candela
gentlelase pro аппарат для лазерной эпиляции
turbosquid
$25

PRO frame
...rbosquid
royalty free 3d model pro frame for download as max on turbosquid: 3d models for games, architecture, videos. (1148329)
turbosquid
$5

Alien pro
...osquid
royalty free 3d model alien pro for download as blend on turbosquid: 3d models for games, architecture, videos. (1678446)
turbosquid
$5

iphone11 pro
...uid
royalty free 3d model iphone11 pro for download as blend on turbosquid: 3d models for games, architecture, videos. (1562707)
3ddd
$1

Mac Pro (appel)
...mac pro (appel)
3ddd
компьютер , apple
mac pro