Thingiverse
Prusa i3 mk2s calibration squares by jjisnow
by Thingiverse
Last crawled date: 3 years, 1 month ago
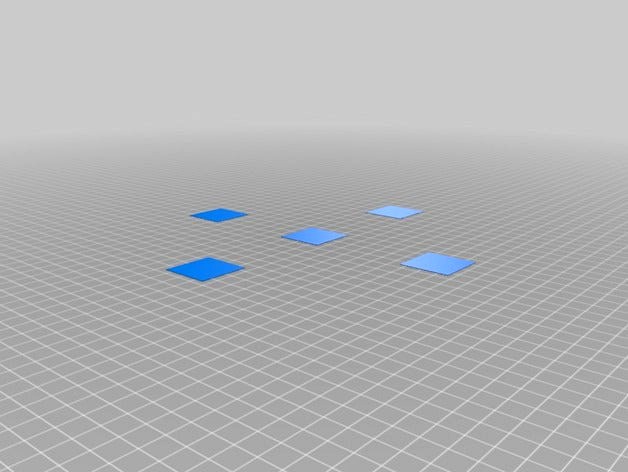
Since other printable calibration squares wouldn't give me the control I needed over my calibration, I decided to publish my own version.
The Prusa i3 mk2s allows you to control bed level in multiple ways.
Firstly, the mesh bed level gets you close to correct level - This will be perfectly sufficient for beginners
Second, the live Z and the prusa test print and watching for 'squish' gets you closer to level.
Thirdly, the bed level correction allows you much finer control ( I find to within about 30 microns accuracy) over the first layer level of a print.
Step 1
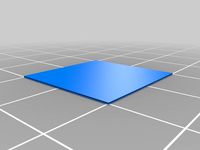
After obtaining the file, check from previous prints whether the centre of the printbed is level. You can delete the outside squares and print the central square only if this helps. By level, I mean too high = gaps start appearing between infill lines and too low = blobs and smears appear on the top layer as the nozzle is driven through the plastic .
Step 2
Print the 5 squares.
Step 3
Adjust the bed level in LCD menu Calibration->Bed Level Correction in steps of up to 20 microns (0.020mm) until the same appearance occurs in the other squares. This allows up to 50 microns of adjustment
Step 4
If needed, Adjust the Gcode in Slic3r, Printer Settings tab->Custom G-code->Start G-code box so the G80 line includes your bed level corrections.
eg G80 L20, R-10, F60, B40; mesh bed levelling
G80 = mesh bed level
L20 = raise nozzle above heatbed on the left side of the bed 20 microns
R-10 = lower nozzle towards heatbed on right side of the bed 10 microns
F60 = raise nozzle above heatbed on the front of the bed 60 microns
B40 = raise nozzle above heatbed on the back of the bed 40 microns
You can gain up to 100 microns of adjustment here, above which the printing software will simply throw an error and print with 0 microns of adjustment.
The Prusa i3 mk2s allows you to control bed level in multiple ways.
Firstly, the mesh bed level gets you close to correct level - This will be perfectly sufficient for beginners
Second, the live Z and the prusa test print and watching for 'squish' gets you closer to level.
Thirdly, the bed level correction allows you much finer control ( I find to within about 30 microns accuracy) over the first layer level of a print.
Step 1
After obtaining the file, check from previous prints whether the centre of the printbed is level. You can delete the outside squares and print the central square only if this helps. By level, I mean too high = gaps start appearing between infill lines and too low = blobs and smears appear on the top layer as the nozzle is driven through the plastic .
Step 2
Print the 5 squares.
Step 3
Adjust the bed level in LCD menu Calibration->Bed Level Correction in steps of up to 20 microns (0.020mm) until the same appearance occurs in the other squares. This allows up to 50 microns of adjustment
Step 4
If needed, Adjust the Gcode in Slic3r, Printer Settings tab->Custom G-code->Start G-code box so the G80 line includes your bed level corrections.
eg G80 L20, R-10, F60, B40; mesh bed levelling
G80 = mesh bed level
L20 = raise nozzle above heatbed on the left side of the bed 20 microns
R-10 = lower nozzle towards heatbed on right side of the bed 10 microns
F60 = raise nozzle above heatbed on the front of the bed 60 microns
B40 = raise nozzle above heatbed on the back of the bed 40 microns
You can gain up to 100 microns of adjustment here, above which the printing software will simply throw an error and print with 0 microns of adjustment.
Similar models
thingiverse
free

Bed Level Correction Calibration Squares by makeryo
...4 outer squares (and center square) printed with an equal squish. further live adjust z will set all sides equally going forward.
thingiverse
free

Bed Correct Print for Prusa by piep3d
...er of my bed falls away and the level correction is necessary for me to print anything that is not small and centered on the bed.
thingiverse
free

Calibration square Bed Levelling by 303055
...re bed levelling by 303055
thingiverse
calibration square bed levelling
150*150mm
print with a 0.35 or 0.4 nozzle
layer 0.3
thingiverse
free

Ooze Free Mesh Bed Level Gcode for Prusa i3 MK2/s by stevehlau
...er z to 0.2 mm
g1 y-3.0 f1000.0 ; go outside print area
g1 x60.0 e9.0 f1000.0 ; intro line
g1 x100.0 e12.5 f1000.0 ; intro line
thingiverse
free

Prusa I3 MK2 Bed Level Test File by r0ger
...le bed of the prusa i3 mk2 with a grid of 9 40mm squares 0.2mm thick which can be used to check and tweak bed level adjustments.
thingiverse
free

240 x 190 Calibration Square for Original Prusa MK2/S by kevtucker
... square for original prusa mk2/s by kevtucker
thingiverse
for prusa bed calibration. measures 190 x 240 so not the entire bed.
thingiverse
free

Bed Level Calibration Squares by dulfe
...bed level calibration squares by dulfe
thingiverse
customizable bed calibration squares. useful to fine adjust bed level.
thingiverse
free

Prusa i3 MK2 and MK3 Series Bed Level Test by Devezu
...is thing". it seems like there's something funky going on recently affecting the mk2 and the mk3 regarding bed leveling.
thingiverse
free

Prusa i3 Full Bed Test Print by junkie_ball
...ll you prusa i3 owners to run this print and see if you can fully utilise your whole bed and see how dialled in your machine is.
thingiverse
free
Prusa i3 MK2(S)/MK2.5/MK3 Live Z Calibration Steps by Bolerro
...eps.
each corner should measure out to 0.200 when you are done.
congratulations! your printer should be purring like a kitten now
Jjisnow
thingiverse
free
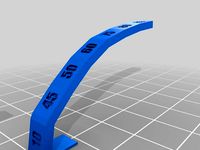
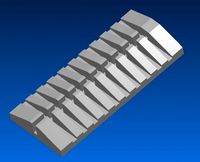
3d Printer Overhang test by jjisnow
...s yet, but hopefully it will be useful enough.
allows you to customise the thickness of the sections, the angles, the number etc.
thingiverse
free

Parallel Friction Fit Laser Cut Gauge by jjisnow
...
each 0.0 tab should be 15.000mm exactly, which means the tabs should reflect the laser kerf and need to compensate for each side
thingiverse
free

Customisable spiral pill box - Openscad by jjisnow
... a bit too tight. provided a bit of practice using openscad to produce a nice customisable file with all the parameters i wanted.
thingiverse
free

3d Printer Retraction Test by jjisnow
...ing with minimal wasted time and filament
bridging test - helps test performance on a 60mm bridge as standard - print with a brim
thingiverse
free

Avanti go cup plug by jjisnow
... drinking hole) under the lid flap.
https://www.ozkitchenware.com.au/avanti-go-cup-double-wall-stainless-steel-insulated-cup.html
thingiverse
free

Easy Print Monitor Shelf 6mm thick by jjisnow
...2179033, which is a remix of http://www.thingiverse.com/thing:1114319.
thanks go to riskable for making a quick printing shelf.
thingiverse
free

DJI Phantom 2 Prop balancing adapter for Dubro by jjisnow
...ancer. i printed it out of nylon and it works amazingly well. adapts from the 6x1mm metric threads to the 3mm dubro balancing rod
thingiverse
free

Customisable Labyrinth Cylinder Box by jjisnow
...so removed references to "twist" in the rotate_extrude() code parameters which was not compatible with openscad 2019.05
thingiverse
free

DJI Phantom 3 CSC Guard by jjisnow
...button in direction. feel free to tweak and remix. not sure what markings i should add to signify which side disables csc or not.
thingiverse
free

Neato Botvac side brush cover by jjisnow
...ve increased the flange diameter, which hopefully puts the screw holes past the brush housing. you will have to experiment sadly.
Mk2S
turbosquid
$4

Mk2
...
royalty free 3d model mk2 for download as max, obj, and fbx on turbosquid: 3d models for games, architecture, videos. (1305687)
turbosquid
$9
Mk2 Grenade
...osquid
royalty free 3d model mk2 grenade for download as fbx on turbosquid: 3d models for games, architecture, videos. (1175401)
turbosquid
$4

Mk2 Grenade
...quid
royalty free 3d model mk2 grenade for download as blend on turbosquid: 3d models for games, architecture, videos. (1228888)
turbosquid
$2

mk2 Grenade
...osquid
royalty free 3d model mk2 grenade for download as fbx on turbosquid: 3d models for games, architecture, videos. (1329079)
turbosquid
$2

Grenade Mk2
...osquid
royalty free 3d model grenade mk2 for download as max on turbosquid: 3d models for games, architecture, videos. (1658201)
turbosquid
$2

GRENADE MK2
...osquid
royalty free 3d model grenade mk2 for download as fbx on turbosquid: 3d models for games, architecture, videos. (1202615)
turbosquid
$75

Lanchester Mk2
...alty free 3d model lanchester mk2 for download as 3ds and max on turbosquid: 3d models for games, architecture, videos. (1497085)
turbosquid
$10

MK2 helmet
...
royalty free 3d model mk2 helmet for download as max and obj on turbosquid: 3d models for games, architecture, videos. (1371428)
turbosquid
$10

Grenade MK2
...royalty free 3d model grenade mk2 for download as max and fbx on turbosquid: 3d models for games, architecture, videos. (1146970)
turbosquid
free

MK2 Grenade
...
free 3d model mk2 grenade for download as png, obj, and fbx on turbosquid: 3d models for games, architecture, videos. (1225336)
Calibration
turbosquid
$15
DEFIBRILLATOR CALIBRATORS
... available on turbo squid, the world's leading provider of digital 3d models for visualization, films, television, and games.
turbosquid
$3
Calibration Test Benches
...libration test benches for download as 3ds, obj, c4d, and fbx on turbosquid: 3d models for games, architecture, videos. (1355804)
turbosquid
$79
Tag Heuer Monaco Calibre 11
...free 3d model tag heuer monaco calibre 11 for download as max on turbosquid: 3d models for games, architecture, videos. (1634427)
turbosquid
$50

Smith & Wesson 50 Calibre Magnum
... available on turbo squid, the world's leading provider of digital 3d models for visualization, films, television, and games.
3d_export
$10
Laboratory Calibration Weight Set 1 3D Model
... 3d model
3dexport
laboratory lab science equipment weight set
laboratory calibration weight set 1 3d model bessoo 88084 3dexport
3d_export
$15
Laboratory Scale and Calibration Weight Set 3D Model
...port
laboratory lab science equipment weight set scale
laboratory scale and calibration weight set 3d model bessoo 88203 3dexport
3d_export
$5
3D printer filament calibration tool 3D Model
...ernier
3d printer filament calibration tool 3d model download .c4d .max .obj .fbx .ma .lwo .3ds .3dm .stl locoman 107942 3dexport
3d_export
$59
tag heuer link calibre 16 watch
...built to real-world scale. units used: centimeters. model is 18 centimeters tall.<br>scene objects are organized by groups.
3d_export
free
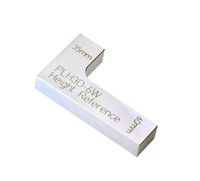
laser height reference calibration tool opt lasers
...ind out more about the engraving and cutting laser heads, this item was designed to work with, take a look at the following page:
3d_export
$99
Patek Philippe White Gold Calibre 89
...br>please note: this 3d model like all my other models cannot be used as nft, as is or modified<br>thank you for reading
I3
3d_export
$10

suv i3
...suv i3
3dexport
suv i3 2013 series
3d_ocean
$89

BMW i3 2012
...y, in real units of measurement, qualitatively and maximally close to the original. model formats: - *.max (3ds max 2008 scanl...
cg_studio
$99

BMW i3 20143d model
...
cgstudio
.3ds .c4d .fbx .lwo .max .obj - bmw i3 2014 3d model, royalty free license available, instant download after purchase.
cg_studio
$99

BMW i3 20123d model
...tudio
.3ds .c4d .fbx .lwo .max .mb .obj - bmw i3 2012 3d model, royalty free license available, instant download after purchase.
cg_studio
$99

BMW i3 20143d model
...tudio
.3ds .c4d .fbx .lwo .max .mb .obj - bmw i3 2014 3d model, royalty free license available, instant download after purchase.
humster3d
$75

3D model of BMW i3 2014
...
buy a detailed 3d model of bmw i3 2014 in various file formats. all our 3d models were created maximally close to the original.
humster3d
$40

3D model of Kitchen Set I3
...uy a detailed 3d model of kitchen set i3 in various file formats. all our 3d models were created maximally close to the original.
3d_ocean
$30

Kitchen set i3
...ensils oven plates shelves sink table ware
kitchen set i3 include 3d models: cooker, oven, sink, cupboards, table, chair, plates.
3d_ocean
$89

BMW i3 2014
...y, in real units of measurement, qualitatively and maximally close to the original. model formats: - *.max (3ds max 2008 scanl...
cg_studio
$99

BMW i3 Concept 20113d model
...i3
.3ds .c4d .fbx .lwo .max .obj - bmw i3 concept 2011 3d model, royalty free license available, instant download after purchase.
Prusa
turbosquid
$2

Frame Filament Guide Clip-On for Prusa Mk3
...rame filament guide clip-on for prusa mk3 for download as stl on turbosquid: 3d models for games, architecture, videos. (1634730)
3d_export
free

prusa i3 mk3s laser mount for opt lasers
...to learn more about the blue laser technology that conceived the cutting and engraving laser heads from opt lasers, please visit:
turbosquid
free

Prusa small printer adapter holder
...er for download as ipt, skp, dwg, dxf, fbx, ige, obj, and stl on turbosquid: 3d models for games, architecture, videos. (1642936)
3d_export
$30

geisha by jonathan adler
...** i did a 3d printing test in the prusa software, you can find it among the attached images.<br>exchange:<br>.blend...
thingiverse
free

Prusa without Prusa (rc2) by madless
...prusa without prusa (rc2) by madless
thingiverse
just the main part of prusa rc2 faceshield, without writing.
enjoy :)
thingiverse
free

Prusa by acejbc
...prusa by acejbc
thingiverse
prusa knob info
m3 8mm screw
thingiverse
free

Prusa house
...prusa house
thingiverse
how prusa house could look like...
thingiverse
free

Prusa Mk2 "Fake Prusa" LCD cover by anraf1001
...r by anraf1001
thingiverse
version of prusa's lcd cover with "fake prusa" instead of "original prusa"
thingiverse
free

Prusa stabilizator by gutiueugen
...prusa stabilizator by gutiueugen
thingiverse
prusa stabilizator
thingiverse
free

Keychain Prusa by rbarbalho
...keychain prusa by rbarbalho
thingiverse
keychain with text prusa.
Squares
turbosquid
free

Square
...squid
free 3d model square for download as max, obj, and stl on turbosquid: 3d models for games, architecture, videos. (1510355)
3d_export
$5

square table
...square table
3dexport
square table
turbosquid
$12

Square
...oyalty free 3d model square for download as max, obj, and fbx on turbosquid: 3d models for games, architecture, videos. (1294110)
3ddd
$1
Square Ottoman
...square ottoman
3ddd
пуф
square ottoman
turbosquid
$25

The Square
...ee 3d model the square for download as mat, max, dxf, and obj on turbosquid: 3d models for games, architecture, videos. (1186399)
3d_export
$65

square
...square
3dexport
simple rendering of the scene file
3d_export
$65

square
...square
3dexport
simple rendering of the scene file
3d_export
$65

square
...square
3dexport
simple rendering of the scene file
3d_export
$65

square
...square
3dexport
simple rendering of the scene file
3d_export
$65

square
...square
3dexport
simple rendering of the scene file