Thingiverse
Prototype Laser housing by Dranoweb
by Thingiverse
Last crawled date: 4 years, 11 months ago
This forms part of a now abandoned project of mine.
I had planned to use this as part of a laser fence system, complete with adjustable mounting etc.
I had intended to run this from a variety of power sources, most notably a 12v battery.
I have since discovered cheaper and more effective options.
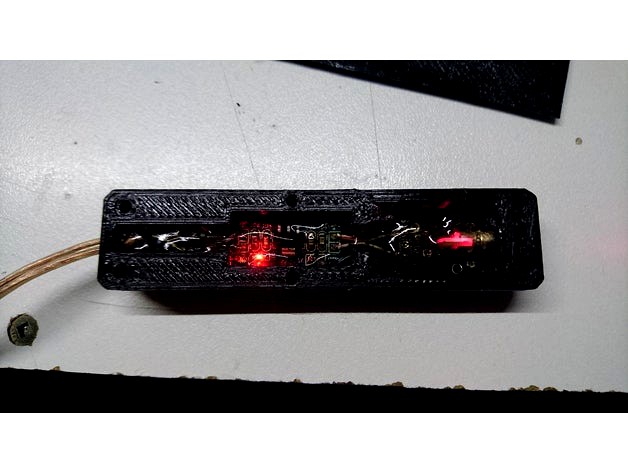
To make this component of the system you will need:
1 X Laser module from Jaycar Cat No: XC4490 AUD $5
1 X 5V regulator board AMS1117 5V (Aliexpress) AUD $0.25
4 X 1N4004 Diodes (Jaycar)
Assemble the diodes (optional) into a bridge rectifier arrangement for polarity protection.
Connect these between the input wires and the 5V regulator.
Connect the output of the 5V regulator to the GND and S pins of the laser
GND to Negative, S to positive.
Insert into case, and glue in.
WARNING: if like me, you plan to pot the laser for waterproofing, be careful, as you may screw up the collimator.
Hot glue is a bad idea, Two part epoxy is much better, but keep it clear of the rear of the laser aperture and collimator.
This project assumes you know not to look directly into a laser or do idiotic things like point them at aircraft - I'm not responsible.
Source files included, autocad 2010/Inventor 2015 formats.
I had planned to use this as part of a laser fence system, complete with adjustable mounting etc.
I had intended to run this from a variety of power sources, most notably a 12v battery.
I have since discovered cheaper and more effective options.
To make this component of the system you will need:
1 X Laser module from Jaycar Cat No: XC4490 AUD $5
1 X 5V regulator board AMS1117 5V (Aliexpress) AUD $0.25
4 X 1N4004 Diodes (Jaycar)
Assemble the diodes (optional) into a bridge rectifier arrangement for polarity protection.
Connect these between the input wires and the 5V regulator.
Connect the output of the 5V regulator to the GND and S pins of the laser
GND to Negative, S to positive.
Insert into case, and glue in.
WARNING: if like me, you plan to pot the laser for waterproofing, be careful, as you may screw up the collimator.
Hot glue is a bad idea, Two part epoxy is much better, but keep it clear of the rear of the laser aperture and collimator.
This project assumes you know not to look directly into a laser or do idiotic things like point them at aircraft - I'm not responsible.
Source files included, autocad 2010/Inventor 2015 formats.