Thingiverse
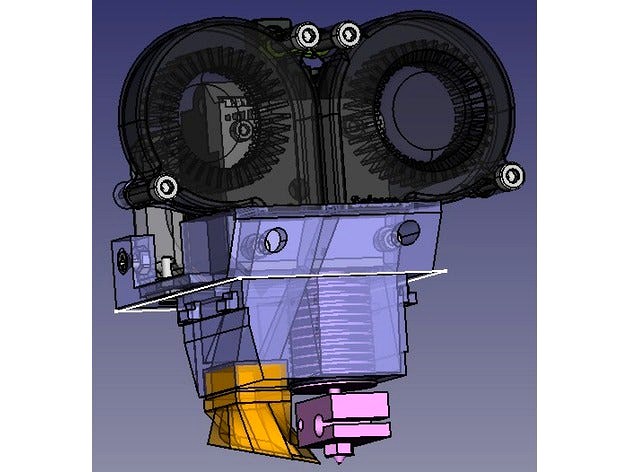
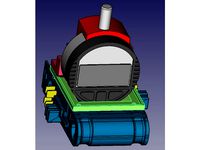
Protohead V7 "Zeus" - E3D v6 Full + E3D Titan for FABtotum by imarin
by Thingiverse
Last crawled date: 3 years ago
UPDATE 9/2/2018: I have printed this reworked version and it works great. This time I have printed it in PETG (my original was PLA). It feels way stronger and more beautiful. Still to see how durable it is.
PREVIOUS UPDATE: The design has been reworked to fix the original flaws. Still untested as my PLA original is working just fine and I have no motivation to print the reworked version. Full FreeCAD source is attached so that you can customize it as you wish.
At this moment, the original head is well tested. Printing awesome in ABS, ABS+, PLA so far. The result is amazing (thanks to e3d obviously, not that I did anything special).
Some videos printing a calibration cube:
Some simple videos:
PLA:https://youtu.be/oiGCqU7qlkYhttps://youtu.be/QDAGHRTxxmk
ABS:https://youtu.be/dO7hqFu-qFIhttps://youtu.be/UxlTan-TjxE
After having tried several low-cost hotends and extruders and learning their weaknesses, I want to be able to see what more reputed (and expensive) components can offer.
A main design limitation that is not per se a design flaw (it is intended), is that you will lose some printing area on the rear part. I just did not want to raise the titan and make it "extremely short bowden style". I wanted to use the Titan+e3dv6 as a single block. If anybody interested, you may just raise the titan a couple of cm and the stepper will go over the rear (or front if you want further redesign) part of the FABtotum.
Choosing the components:
I have the e3d v6 full original and the e3d titan original.
Blowers: Not all the 5015 blowers are the SAME.
a) Check your voltage. The fabtotum carriage blower fan is 5V. Unless you want to constantly have it activated, you need a 5V or skills to make a small PCB with a MOSFET to operate control the 24V in the head with the 5V blower fan as input. There is no 12V in the FAB head.
b) Current. There are different currents for the same voltage. Higher voltage generally means more air flow and/or air pressure. In general go for the higher current ones. It shall be noted that higher voltage blowers (and within the voltage those with higher current) generally have better performance than lower voltage blowers.
The blower used for cooling down the heatsink can operate at 5V (head has 5V) or at 24V (remember to enable the mill motor line in your gcode).
Printing tips:
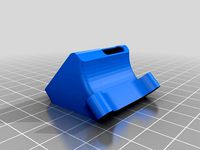
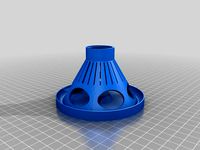
Support is needed for the HEAD and the Blower conduct.
Building tips:
Triple read the instructions:https://wiki.e3d-online.com/wiki/Titan_Assemblyhttps://wiki.e3d-online.com/wiki/E3D-v6_Assembly
Yes, please, read until the end. Yes, read the troubleshooting guides. My favorite is the "click when retraction" issue with Titan. If you do not get the meshing right, you WILL HAVE to disassemble the whole thing apart including the blowers and including any seal with thermal glue you might have made.
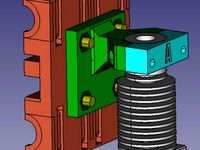
Use the longer supplied M3 titan bolts in the bottom part. You need a 35 mm for the left (of the viewer when looking front side) and a 30 mm for the right (standard titan mounting is 30 mm for left and 25 mm for right).
Seal the around the blowers input with thermal glue or any other sealant you like. Do this BEFORE mounting the titan, otherwise you will have to remove the titan later to seal the rear part of the blowers (the part closer to the titan).
You might want to put some drop of thermal glue in the rear part attaching the NEMA to the v7 head (you do not actually need to reinforce this a lot, as in operation it lies on the head holder part of the carriage).
The front titan supporting holes must be sealed before use, so that the air does not flow out that way. For the prototype I have just put some thermal glue.
To mount the hotend, insert first the hotend from above without the heater block. Then follow e3d full instructions from their wiki, except that you have to leave the assembly of the thermistor and heater cartridges for the end.
This head is compatible with the protohead PCBs, original and 24V version:https://github.com/imarin2/Protohead_PCB_v4_FAB_24Vhttps://github.com/imarin2/ProtoHead_v4
It is designed so that you thread the blower supporting holes (4 holes, 2 on the head structure and 2 on the blower joining part) with an M4 thread.
PREVIOUS UPDATE: The design has been reworked to fix the original flaws. Still untested as my PLA original is working just fine and I have no motivation to print the reworked version. Full FreeCAD source is attached so that you can customize it as you wish.
At this moment, the original head is well tested. Printing awesome in ABS, ABS+, PLA so far. The result is amazing (thanks to e3d obviously, not that I did anything special).
Some videos printing a calibration cube:
Some simple videos:
PLA:https://youtu.be/oiGCqU7qlkYhttps://youtu.be/QDAGHRTxxmk
ABS:https://youtu.be/dO7hqFu-qFIhttps://youtu.be/UxlTan-TjxE
After having tried several low-cost hotends and extruders and learning their weaknesses, I want to be able to see what more reputed (and expensive) components can offer.
A main design limitation that is not per se a design flaw (it is intended), is that you will lose some printing area on the rear part. I just did not want to raise the titan and make it "extremely short bowden style". I wanted to use the Titan+e3dv6 as a single block. If anybody interested, you may just raise the titan a couple of cm and the stepper will go over the rear (or front if you want further redesign) part of the FABtotum.
Choosing the components:
I have the e3d v6 full original and the e3d titan original.
Blowers: Not all the 5015 blowers are the SAME.
a) Check your voltage. The fabtotum carriage blower fan is 5V. Unless you want to constantly have it activated, you need a 5V or skills to make a small PCB with a MOSFET to operate control the 24V in the head with the 5V blower fan as input. There is no 12V in the FAB head.
b) Current. There are different currents for the same voltage. Higher voltage generally means more air flow and/or air pressure. In general go for the higher current ones. It shall be noted that higher voltage blowers (and within the voltage those with higher current) generally have better performance than lower voltage blowers.
The blower used for cooling down the heatsink can operate at 5V (head has 5V) or at 24V (remember to enable the mill motor line in your gcode).
Printing tips:
Support is needed for the HEAD and the Blower conduct.
Building tips:
Triple read the instructions:https://wiki.e3d-online.com/wiki/Titan_Assemblyhttps://wiki.e3d-online.com/wiki/E3D-v6_Assembly
Yes, please, read until the end. Yes, read the troubleshooting guides. My favorite is the "click when retraction" issue with Titan. If you do not get the meshing right, you WILL HAVE to disassemble the whole thing apart including the blowers and including any seal with thermal glue you might have made.
Use the longer supplied M3 titan bolts in the bottom part. You need a 35 mm for the left (of the viewer when looking front side) and a 30 mm for the right (standard titan mounting is 30 mm for left and 25 mm for right).
Seal the around the blowers input with thermal glue or any other sealant you like. Do this BEFORE mounting the titan, otherwise you will have to remove the titan later to seal the rear part of the blowers (the part closer to the titan).
You might want to put some drop of thermal glue in the rear part attaching the NEMA to the v7 head (you do not actually need to reinforce this a lot, as in operation it lies on the head holder part of the carriage).
The front titan supporting holes must be sealed before use, so that the air does not flow out that way. For the prototype I have just put some thermal glue.
To mount the hotend, insert first the hotend from above without the heater block. Then follow e3d full instructions from their wiki, except that you have to leave the assembly of the thermistor and heater cartridges for the end.
This head is compatible with the protohead PCBs, original and 24V version:https://github.com/imarin2/Protohead_PCB_v4_FAB_24Vhttps://github.com/imarin2/ProtoHead_v4
It is designed so that you thread the blower supporting holes (4 holes, 2 on the head structure and 2 on the blower joining part) with an M4 thread.
Similar models
thingiverse
free

Mount for E3D head on FabTotum by skintoss
... have created manual support and a heat sink to allow this to print well for me, depending on you printer this may not be needed.
thingiverse
free

AT-ST head rear panel by rejaak
...d for the original 2 rear pieces, just print this and glue it on.
update 3/22/2017: added rear section for "body" part.
thingiverse
free
Small bowden mount for rework i3 X Carriage and E3D v6/v5 by axelsp
...has a small "a" on it to differentiate from similar clamps. if you don't want it, cut last 0.3mm...
thingiverse
free

X5S 500 mods
...500 with a e3d volcano hotend.
i used one of these "tusk blower" concept for part cooling.
remember to get 24v blower.
thingiverse
free

TEVO Tarantula - E3D Titan carriage by VecteR
...his motor to drive the titan extruder on my m prime one.
currently untested. feedback welcome.
freecad source files included.
thingiverse
free

Storage shelf for FABtotum heads by LeiEn
...ad.
i designed it because my fabtotum head collection keeps growing and i need somewhere to store them when i don't use them.
thingiverse
free

Prusa i3 rework dual bowden mount E3D-v6 (J-Head) by s_s_
...fied version and everything seems well, only that my 2 e3d-v6 seem to be slightly different sized. take note of your hotend size!
thingiverse
free

E3d V6 extruder mount for Flying Bear Tornado by Sadcrow
...bowden in 24v 6 screws din 7981 m3,5 or similar ...
thingiverse
free
E3D Titan and V6 Ultimaker Upgrade by joshuarowley42
...titan).
documentation can be found at http://wiki.e3d-online.com/wiki/e3d-v6_on_ultimaker_2
please note this is work in progress.
thingiverse
free

Haribo 3030 Prusa MK3 Upgrade double PSU Meanwell RSP by thunder_88
...to "shorten" the y-axis a bit. i printed a 1 cm long part for "shortening" the y-axis. check out the picture!
Imarin
thingiverse
free

ATAG GAS KNOB by imarin
...atag gas knob by imarin
thingiverse
just another gas cooker knob. you have the freecad files, if you want to modify it!!
thingiverse
free

Small hollow 3D geometric shapes by imarin
...ngiverse
a plurality of hollow geometric shapes for education or calibration purposes.
they fit in a bounding box of 20x20x20 mm
thingiverse
free
wasp trap by imarin
...ith partdesign next wb, which means you need a very recent freecad, i use it from the freecad-daily launchpad ubuntu repository).
thingiverse
free

Base support for iRobot roomba 780 by imarin
...onally, allows you to have the transformer and cables neatly in the support.
i printed it with support, using slic3r pillars...
thingiverse
free
Dial Indicator head for FABtotum by imarin
...e.
the dial indicator is the one appearing most in ebay and coming from china. i think that in the us harbour freight had it too.
thingiverse
free

Fabtotum 4th axis/feeder support by imarin
... to the "feeder engage button".
it is based on the published step files imported in freecad.
the source is available.
thingiverse
free

Aeolos II by imarin
...n the case of the original aeolos apply.
as usually, full freecad v0.17 source attached.
i hope it will be useful for somebody :)
thingiverse
free

Eachine 1000TVL Camera Holder for Martian 215mm Carbon Fiber FPV Racing Frame by imarin
...or the 1000tvl eachine pal/ntsc camera and the martian 215mm carbon fiber fpv racing frame.
the freecad v0.17 source is included.
thingiverse
free

FABtotum Protohead v6 Bowden by imarin
...d this kicad library:https://github.com/imarin2/fabheadlibraries
the heads run this firmware:https://github.com/imarin2/protohead
thingiverse
free

Extended Spoolholders for the FAbtotum with innerstops by imarin
...have to make a new one, i would use this design, though it consumes more filament. the gcode fie for abs 230/90 is also included.
Fabtotum
thingiverse
free

FABtotum Logo Keychain by FABtotum
...fabtotum logo keychain by fabtotum
thingiverse
the fabtotum logo keychain, easy and fast to print!
fabtotum... make more!
thingiverse
free

FABtotum M3 tool by FABtotum
...fabtotum m3 tool by fabtotum
thingiverse
m3 tool used for upgrade the fabtotum hybrid bed to the rev 2.
thingiverse
free

Reed mask for FABtotum update by FABtotum
...cement of the new reed door switch on the fabtotum.
check the installation manual here: http://wiki.fabtotum.com/doku.php?id=reed
thingiverse
free

New FABtotum chuck for 4th axis by FABtotum
...
can be mounted on the fabtotum and used at the same time with the printing bed.
compatible only with the new fabtotum core rev4.
thingiverse
free
PSU cover by FABtotum by FABtotum
...psu, remove the power cord cable.
warning: do not operate or power the machine with the side panel opened, proceed on your risk.
thingiverse
free

FABtotum tube holder by Ivmar
...fabtotum tube holder by ivmar
thingiverse
fabtotum tube holder for printing head
thingiverse
free

Multi-color FABtotum by johnnytrapano
...
1:10 scale model of fabtotum.
designed to be printed using 2 colors, using the fabtotum personal replicator with mosaic palette.
thingiverse
free

FABtotum 4th Axis Chuck by FABtotum
...ing flat disc.
the 4th axis chuck can accomodate different material stocks of different shapes for 4 axes machining and scanning.
thingiverse
free

HDB Support for FABtotum by LeiEn
...hange to make some room for the solder pads on the bottom side of the pcb. so now the pcb will lay more flat against the plastic.
thingiverse
free

Palette+ Bowden tube adapter for FABtotum Printing Head PRO by FABtotum
... with the mosaic palette+.
check the page here: https://www.fabtotum.com/3d-printers/heads/palette-plus-multicolor-multimaterial/
Zeus
3ddd
$1

Zeus
...lantic , zeus
кресла zeus (руководителя и посетительское) от мебельной фабрики atlantic.
3d_export
$5

zeus
...zeus
3dexport
zeus 3d model good quality for animation
3ddd
$1
Zeus
...zeus
3ddd
светодиодная , лампа
светодиодная уличная лампа zeus.
3ddd
$1
кресло ZEUS
...кресло zeus
3ddd
zeus , nicoline
кресло zeus
производитель: nicoline
3ddd
$1

диван ZEUS
...диван zeus
3ddd
zeus , nicoline
модель дивана zeus
производитель nicoline
turbosquid
$25

zeus
...us
turbosquid
royalty free 3d model zeus for download as vue on turbosquid: 3d models for games, architecture, videos. (1476165)
3ddd
$1
PORADA / Zeus
...d
porada , стеллаж
книжный шкаф porada zeus, по размерам с сайта.
porada zeus bookcase.
turbosquid
$2

Zeus
... available on turbo squid, the world's leading provider of digital 3d models for visualization, films, television, and games.
3ddd
free
Maletti Zeus
... maletti , кресло
парикмахерское кресло maletti zeus
3ddd
free
DAN-FORM ZEUS
...dan-form zeus
3ddd
dan-form , zeus
красивый стул dan-form zeus
V7
turbosquid
$7

surfboard V7
...e 3d model surfboard v7 for download as ma, max, obj, and fbx on turbosquid: 3d models for games, architecture, videos. (1169728)
3d_export
$8
Bunker Light v7
...bunker light v7
3dexport
turbosquid
$25

Drone V7 SciFi
... available on turbo squid, the world's leading provider of digital 3d models for visualization, films, television, and games.
turbosquid
free

Tree Oak V7
... available on turbo squid, the world's leading provider of digital 3d models for visualization, films, television, and games.
3d_ocean
$16

Headphones v7
...l use. it can be used in several creative ways, to make your usage more effective and easy. i have included a cinema4d project...
turbosquid
$35

Armored military vehicle v7
...armored military vehicle v7 for download as 3ds, fbx, and obj on turbosquid: 3d models for games, architecture, videos. (1613484)
turbosquid
$3
ZTE Blade V7 Lite Gold.
...del zte blade v7 lite gold. for download as max, obj, and fbx on turbosquid: 3d models for games, architecture, videos. (1215760)
3d_export
$65
Moto Guzzi V7 Cafe Classic 2010 3D Model
... v-twin motorcycle race motorbike moto gp vehicle brazil c4d 3ds
moto guzzi v7 cafe classic 2010 3d model gonzo_3d 29469 3dexport
turbosquid
$70
Aircraft Passenger Seat Rhino3D V7,FBX and STEP formats
...r seat rhino3d v7 anf fbx formats for download as 3dm and fbx on turbosquid: 3d models for games, architecture, videos. (1686997)
3d_export
$60
Moto Guzzi V7 Sport 3D Model
...lat track boardtrack ducati desmo chopper bobber bike biker cycle motorcycle
moto guzzi v7 sport 3d model gonzo_3d 23013 3dexport
Titan
design_connected
$18

Titan
...titan
designconnected
original btc titan computer generated 3d model.
3d_ocean
$25
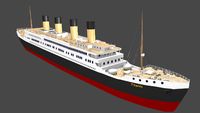
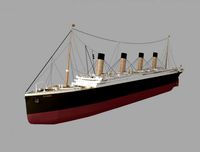
RMS Titanic
...rms titanic
3docean
ship steamer titanic
3d model of the rms titanic
turbosquid
$8

Titan
...d
royalty free 3d model titan for download as , fbx, and obj on turbosquid: 3d models for games, architecture, videos. (1545505)
3d_export
$15

eren yeager titan from attack on titan
...eren yeager titan from attack on titan
3dexport
3d model of eren titan
3d_export
$5
titanic new
...titanic new
3dexport
titanic 3d model normal quality for animation
3d_export
$100
Titan 3D Model
...titan 3d model
3dexport
silo launcher rocket titan
titan 3d model acquarius 37854 3dexport
3d_ocean
$25
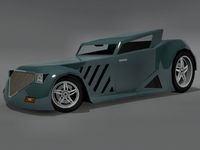
Titan
...nfs nfshs one ps ps1 psone rod speed sports stakes titan transport vehicle
quality exterior and low polygon interior concept car.
3ddd
$1

Titanic Lamp(table)
...titanic lamp(table)
3ddd
titanic lamp(table)
turbosquid
$10

Titan chair
...osquid
royalty free 3d model titan chair for download as max on turbosquid: 3d models for games, architecture, videos. (1301533)
turbosquid
$7

Colossal Titan
...d
royalty free 3d model colossal titan for download as blend on turbosquid: 3d models for games, architecture, videos. (1712491)
E3D
cg_studio
free

e3d model
...e3d model
cgstudio
- e 3d model, royalty free license available, instant download after purchase.
turbosquid
$2

Syringe C4D (E3D Ready)
...lty free 3d model syringe c4d (e3d ready) for download as c4d on turbosquid: 3d models for games, architecture, videos. (1336720)
turbosquid
$12

Microphone USB E3D and C4D
...ree 3d model microphone usb e3d & c4d for download as c4d on turbosquid: 3d models for games, architecture, videos. (1568216)
cg_studio
$35
Picture Frame Style E3d model
...
cgstudio
.3ds .max .obj .wrl - picture frame style e 3d model, royalty free license available, instant download after purchase.
cg_studio
$10

EVE from cartoon WALL-E3d model
...3d model
cgstudio
.3ds .max - eve from cartoon wall-e 3d model, royalty free license available, instant download after purchase.
cg_studio
$45
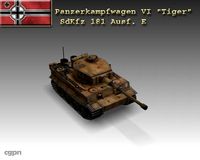
WW2 Pz VI Tiger SdKfz 181 Ausf. E3d model
....lwo .ma .max .obj - ww2 pz vi tiger sdkfz 181 ausf. e 3d model, royalty free license available, instant download after purchase.
3d_ocean
$6

Love Heart Element 3D & Cinema4D
...red heart romance valentines simple project simple heart models e3d files, cinema 4d files & obj files step 1...
3d_export
$14

Xiaomi mi band 6
...360. materials for rendering are configured in keyshot, v-ray, e3d blender. the keyshot has 6 strap colors configured. there...
3d_export
$20

apple airpods 3
...max vray, keyshot, e3d. - formats: 3dm, aep, bip, e3d f3d, iges, ksp, max 2013, max 2016, obj, fbx,...
3d_export
$20
Samsung galaxy tab s8 ultra
...blue, beige, white, black, graphite. - in blender and e3d one color of the model is configured, graphite. -...
V6
3d_export
$100

v6 engine
...engine
3dexport
complete v6 engine modeled on solidworks 2017 along with .stl, .sldprt and .sldasm of all th parts and assembly.
3d_export
$10

V6 engine
... the first v6 engines were designed and produced independently by marmon motor car company, deutz gasmotoren fabrik and delahaye.
3d_export
$35

v6 engine
...s a complete model of a v6 engine containing over 400 components. you can contact me for a video of all the components assembling
3d_export
$10

v6 engine
...v6 engine
3dexport
turbosquid
$25

Bed1001-v6
... available on turbo squid, the world's leading provider of digital 3d models for visualization, films, television, and games.
turbosquid
$22

Chair2-v6
... available on turbo squid, the world's leading provider of digital 3d models for visualization, films, television, and games.
turbosquid
$20

V6.mb
... available on turbo squid, the world's leading provider of digital 3d models for visualization, films, television, and games.
3d_export
$20

V6 engine
...rovided in this package is all the parts in sldprt format and assembly in sldasm format. i can also convert the format on demand.
3ddd
$1

Стол V6
...6" в стиле дизельпанк изготовлен из блока двигателя, 4х поршней и 4х шатунов.
столешница изготовлена из стекла толщиной 8мм.
cg_studio
$199

V6 VVTi3d model
...v6 vvti3d model
cgstudio
.3ds - v6 vvti 3d model, royalty free license available, instant download after purchase.
Full
3ddd
$1
Full Mobili
...ull mobili , шкаф
группа шкафов, серия мебели "классика" фабрики «full mobili»
turbosquid
$80
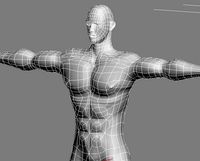
full man body+full facials
... available on turbo squid, the world's leading provider of digital 3d models for visualization, films, television, and games.
3ddd
$1
Full Mobili
...сика , стол
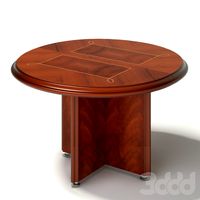
стол круглый офисный серия мебели "классика" фабрики «full mobili»
3ddd
$1

FULL MOBILI
... стол
cтол офисный серии мебели "классика" итальянской компании full mobili
design_connected
$16

Full Circle
...full circle
designconnected
atmosphere full circle computer generated 3d model.
3d_export
$5
full office
...full office
3dexport
this is full office cgi model created with maya -detailed -textured -uv mapped
design_connected
$16

Full Moon
...full moon
designconnected
roche bobois full moon computer generated 3d model. designed by ragot, cedric.
turbosquid
$100
FULL KITCHEN
...squid
royalty free 3d model full kitchen for download as skp on turbosquid: 3d models for games, architecture, videos. (1345817)
turbosquid
$15

Full Bedroomset
...id
royalty free 3d model full bedroomset for download as max on turbosquid: 3d models for games, architecture, videos. (1540649)
3d_export
$10
full human body
...full human body
3dexport
it is a full human sculpt