Thingiverse
Proteus LED Light Panel - DIY and Expandable by ProteanMan
by Thingiverse
Last crawled date: 3 years, 1 month ago
Proteus LED Panel - Expandable
Leave a comment if something does/doesn't work, I want to fix it right away
This is an exciting design for me and something that I have wanted to do for a while.
Technically expandable to an infinite size, but would suggest infinity-1
My suggestion is to start with the standard size and follow the instructions to see if you want and/or need a larger size.
IMPORTANT TIP
Do not buy the cheapest LED strips you can find. These burn out quickly, have low contrast value, poor detail of illumination, and tend to strain your eyes with regular use. Look for LED lights with a CRI score of around 90. If the CRI score is not listed then assume it is a very low score. You will thank me later since you'll probably end up replacing cheap LEDs from annoyance with quality of the light they give off.https://www.youtube.com/watch?v=_tISsunRpf0
Heat Warning
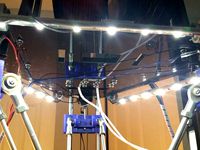
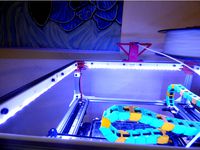
Just be aware that the larger you make this panel the more heat it will create. If anyone has issues with heat I will add a fan attachment to cool the LEDs down. This shouldn't be a problem with the Standard Size construction I have listed below or even the Larger Panel construction (Image).
LED Strips not sticking?
If this happens to you then just put some CA Glue (Super Glue) on a few spots along the panels and your LEDs will stick like burnt rice in a pot.
Cost
This is dependent on how big you want to make it.
A standard size panel with quality LED strips, and Option Two with wiring should cost around $30-40 USD. This includes plastic and power costs.
Parts Required
5Meter LED light strip (usually sold in 5Meter lengths), White is recommended (RGB also great but adds complication for wiring), 5050 LED size for strong lighting, Warm or Cool is up to you - for video/photo lighting you should use Cool to get the most detail. Add wax paper in front of lights for diffusion. For quality LED lights you should look for a CRI of around 90, the higher the better. A low CRI score makes the light hard to use on a regular basis due to it's strain on your eyes. Low CRI LEDs tend to have a blue hue to them, which makes the objects it illuminates show in less detail.
M3 and M4 Bolts (Imperial Equivalent: M3 = 1/8 Bolt, M4 = 11/64 Bolt) - Just buy metric from amazon or ebay to make it easier.
M3 and M4 Nuts
M6 Nut if you want to attach to a tripod (5/8 inch is the U.S. equivalent).
Wire (red, black) to wire LED strips together
On/Off switch (or any other equivalent you would like to use)
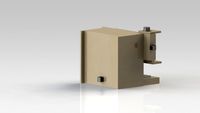
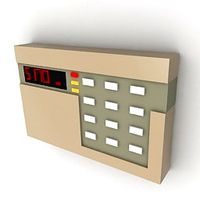
Panel Mount Female DC Socket 2.1mm (look at power box in image), this is to plug your DC power supply into the light panel.
1K Pot (optional for dimming lights)
12Volt DC Power Supply, 1amp or 2amp recommended.
Soldering Iron/Solder (USE VENTILATION WHEN SOLDERING - save your lungs)
Printing
Adjust STL files to print on their flat surfaces. Each has been designed for printers.
Use any material, I used PETG
Each part is numbered to make printing easier.
Follow the image instruction I have provided to know which parts you need to print.
You won't need to print every part listed.
Print with a .5 nozzle size or smaller to get precise quality. I tried a .8 nozzle with issues of precision on some parts. My preference for this project is a .4 nozzle.
Part # List
#1-9 Light Strip Base Panels - Used to attache LED strip to. Main and End panels. Main are the center panels. See images for panel numbers.#10-12 Vertical Struts - Connecting 3, 2, or a single Panel. Think of different Lego piece sizes.#13-16 Horizontal Struts - They have labels for what they connect to. (Main-End, End-Main-End, Main-Main)#17-18 Tipod/Other mounting bracket. More to come later upon request. M6 is equivalent to a 5/8 inch bolt/nut.#19-23 Leg Bracket and Parts. Two sizes of legs. Bolt hand (M4 size) makes it easy to adjust.#24-25 Power Supply Box. This will be adjusted once more testing has been done.#26-40 LED Covers. These can be used to help protect the LEDs. You can also glue wax paper or other things to the inside to add light diffusion. M4 longer bolts will be needed, they will screw into vertical struts. Wiring LEDs first is preferred.#41-42 Bottom Flat Legs. Regular and Double Sided. Look at Images for info.#43 Spacer for Horizontal Struts. When creating a larger version you will need a spacer for some struts. See image of strut design for Larger Option.#44 COMING SOON - Battery Powered Power Supply Box - 1X 18650 Lithium Battery+Charger+12v Step Up needed.#45-59 LED Covers EXTRA THICK (if you find the standard covers (#26-40) to be too thin.#60-61 Vertical Struts for 4 & 5 panels. This lets you connect up to 5 panels in height without issues.
Standard Panel Size
Print Panels #1-9
Print #10 X3
Print #13 X2
Print #19, 20, 21, and 22 (or 23 for longer leg)
Print #17 or 18 if you want to mount this to something.
Print #19-22 for the back leg. #23 is the longer leg. Double this for two legs.
Print # 24, 25 for the power box.
Print #26-40 (Optional) for LED covers. M4 Longer bolts needed.
You may not need to use the M3 holes that run between each panel. This is just for extra support. The back struts should be more than strong enough to hold it all together firmly.
Wiring
There are many options for wiring.
Option 1: On/Off, no dimming of lights
Parts - DC Panel Mount Input Jack (image) - and a - DC On/Off Switch
Solder the LED + to one of the two end sockets of the DC switch.
Solder the LED - to the DC Panel Mount Jack negative(ground)
Solder the DC Panel Mount + (positive) to the center socket of the DC Switch
Option 2: Dimming of lights (easier than option 1).
Parts - DC Panel Mount Input Jack (image) - and a - PWM Dimmer (image).
DC Panel Jack + and - go to the PWM Dimmer + and -.
LED + and - go to PWM dimmer + and -.
PWM Dimmer search: https://www.ebay.com/sch/i.html?_from=R40&_trksid=p4712.m570.l1313.TR6.TRC2.A0.H0.Xpwm+dimmer.TRS0&_nkw=pwm+dimmer&_sacat=0
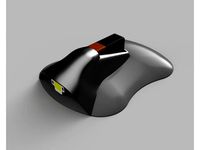
Front Covers
Front covers (#26-40) can be used to protect wiring and LEDs. The Lips are printed separately (purposely so your printer won't have troubles) and then glued onto their adjacent Cover (Image shows this). 16mm M4 bolts will be needed to run from Covers to the back Vertical Struts.
For light diffusion you can add wax paper or anything else that will soften the light. This is common when using lights for photos and video. Try gluing the wax paper to the inside of the covers to make it look way better. I may add another top cover to clamp onto diffusion paper if enough requests come in.
Design Your Own Attachments
The back has M4 attachment holes. You can design your own parts to hook into an M4 nut. The distance between these holes is 35.2mm from center to center.
The power box attaches to one of these holes, as well as the back leg if you use it.
Creating a larger sized version would give you more attachment holes.
Any other options will change this wiring schematic. Please be careful when wiring and soldering. The switch is best used on the + side of the power source to reduce possible sparking when switching on and off.
If you have any ideas please let me know. I will be updating this design for the next few weeks as I work through it myself.
Disclaimer: I am letting anyone use this design for free. Selling this design or any version of this product is not allowed under Creative Commons licensing. You are allowed to print, share, give away your prints for free, or use this design in any way that does not earn you monetary value.
If you do wish to sell these products please let me know and we can come an agreement.
Leave a comment if something does/doesn't work, I want to fix it right away
This is an exciting design for me and something that I have wanted to do for a while.
Technically expandable to an infinite size, but would suggest infinity-1
My suggestion is to start with the standard size and follow the instructions to see if you want and/or need a larger size.
IMPORTANT TIP
Do not buy the cheapest LED strips you can find. These burn out quickly, have low contrast value, poor detail of illumination, and tend to strain your eyes with regular use. Look for LED lights with a CRI score of around 90. If the CRI score is not listed then assume it is a very low score. You will thank me later since you'll probably end up replacing cheap LEDs from annoyance with quality of the light they give off.https://www.youtube.com/watch?v=_tISsunRpf0
Heat Warning
Just be aware that the larger you make this panel the more heat it will create. If anyone has issues with heat I will add a fan attachment to cool the LEDs down. This shouldn't be a problem with the Standard Size construction I have listed below or even the Larger Panel construction (Image).
LED Strips not sticking?
If this happens to you then just put some CA Glue (Super Glue) on a few spots along the panels and your LEDs will stick like burnt rice in a pot.
Cost
This is dependent on how big you want to make it.
A standard size panel with quality LED strips, and Option Two with wiring should cost around $30-40 USD. This includes plastic and power costs.
Parts Required
5Meter LED light strip (usually sold in 5Meter lengths), White is recommended (RGB also great but adds complication for wiring), 5050 LED size for strong lighting, Warm or Cool is up to you - for video/photo lighting you should use Cool to get the most detail. Add wax paper in front of lights for diffusion. For quality LED lights you should look for a CRI of around 90, the higher the better. A low CRI score makes the light hard to use on a regular basis due to it's strain on your eyes. Low CRI LEDs tend to have a blue hue to them, which makes the objects it illuminates show in less detail.
M3 and M4 Bolts (Imperial Equivalent: M3 = 1/8 Bolt, M4 = 11/64 Bolt) - Just buy metric from amazon or ebay to make it easier.
M3 and M4 Nuts
M6 Nut if you want to attach to a tripod (5/8 inch is the U.S. equivalent).
Wire (red, black) to wire LED strips together
On/Off switch (or any other equivalent you would like to use)
Panel Mount Female DC Socket 2.1mm (look at power box in image), this is to plug your DC power supply into the light panel.
1K Pot (optional for dimming lights)
12Volt DC Power Supply, 1amp or 2amp recommended.
Soldering Iron/Solder (USE VENTILATION WHEN SOLDERING - save your lungs)
Printing
Adjust STL files to print on their flat surfaces. Each has been designed for printers.
Use any material, I used PETG
Each part is numbered to make printing easier.
Follow the image instruction I have provided to know which parts you need to print.
You won't need to print every part listed.
Print with a .5 nozzle size or smaller to get precise quality. I tried a .8 nozzle with issues of precision on some parts. My preference for this project is a .4 nozzle.
Part # List
#1-9 Light Strip Base Panels - Used to attache LED strip to. Main and End panels. Main are the center panels. See images for panel numbers.#10-12 Vertical Struts - Connecting 3, 2, or a single Panel. Think of different Lego piece sizes.#13-16 Horizontal Struts - They have labels for what they connect to. (Main-End, End-Main-End, Main-Main)#17-18 Tipod/Other mounting bracket. More to come later upon request. M6 is equivalent to a 5/8 inch bolt/nut.#19-23 Leg Bracket and Parts. Two sizes of legs. Bolt hand (M4 size) makes it easy to adjust.#24-25 Power Supply Box. This will be adjusted once more testing has been done.#26-40 LED Covers. These can be used to help protect the LEDs. You can also glue wax paper or other things to the inside to add light diffusion. M4 longer bolts will be needed, they will screw into vertical struts. Wiring LEDs first is preferred.#41-42 Bottom Flat Legs. Regular and Double Sided. Look at Images for info.#43 Spacer for Horizontal Struts. When creating a larger version you will need a spacer for some struts. See image of strut design for Larger Option.#44 COMING SOON - Battery Powered Power Supply Box - 1X 18650 Lithium Battery+Charger+12v Step Up needed.#45-59 LED Covers EXTRA THICK (if you find the standard covers (#26-40) to be too thin.#60-61 Vertical Struts for 4 & 5 panels. This lets you connect up to 5 panels in height without issues.
Standard Panel Size
Print Panels #1-9
Print #10 X3
Print #13 X2
Print #19, 20, 21, and 22 (or 23 for longer leg)
Print #17 or 18 if you want to mount this to something.
Print #19-22 for the back leg. #23 is the longer leg. Double this for two legs.
Print # 24, 25 for the power box.
Print #26-40 (Optional) for LED covers. M4 Longer bolts needed.
You may not need to use the M3 holes that run between each panel. This is just for extra support. The back struts should be more than strong enough to hold it all together firmly.
Wiring
There are many options for wiring.
Option 1: On/Off, no dimming of lights
Parts - DC Panel Mount Input Jack (image) - and a - DC On/Off Switch
Solder the LED + to one of the two end sockets of the DC switch.
Solder the LED - to the DC Panel Mount Jack negative(ground)
Solder the DC Panel Mount + (positive) to the center socket of the DC Switch
Option 2: Dimming of lights (easier than option 1).
Parts - DC Panel Mount Input Jack (image) - and a - PWM Dimmer (image).
DC Panel Jack + and - go to the PWM Dimmer + and -.
LED + and - go to PWM dimmer + and -.
PWM Dimmer search: https://www.ebay.com/sch/i.html?_from=R40&_trksid=p4712.m570.l1313.TR6.TRC2.A0.H0.Xpwm+dimmer.TRS0&_nkw=pwm+dimmer&_sacat=0
Front Covers
Front covers (#26-40) can be used to protect wiring and LEDs. The Lips are printed separately (purposely so your printer won't have troubles) and then glued onto their adjacent Cover (Image shows this). 16mm M4 bolts will be needed to run from Covers to the back Vertical Struts.
For light diffusion you can add wax paper or anything else that will soften the light. This is common when using lights for photos and video. Try gluing the wax paper to the inside of the covers to make it look way better. I may add another top cover to clamp onto diffusion paper if enough requests come in.
Design Your Own Attachments
The back has M4 attachment holes. You can design your own parts to hook into an M4 nut. The distance between these holes is 35.2mm from center to center.
The power box attaches to one of these holes, as well as the back leg if you use it.
Creating a larger sized version would give you more attachment holes.
Any other options will change this wiring schematic. Please be careful when wiring and soldering. The switch is best used on the + side of the power source to reduce possible sparking when switching on and off.
If you have any ideas please let me know. I will be updating this design for the next few weeks as I work through it myself.
Disclaimer: I am letting anyone use this design for free. Selling this design or any version of this product is not allowed under Creative Commons licensing. You are allowed to print, share, give away your prints for free, or use this design in any way that does not earn you monetary value.
If you do wish to sell these products please let me know and we can come an agreement.
Similar models
thingiverse
free
LED Strip Mount for Geeetech G2S by cmore11
...ights combined with a 3528 5050 led strip dimmer and external power supply. solder some connections and you have disco lighting.
thingiverse
free
Teal 9V, 10W power LED cover by toymulders
...ta scheet to make sure you attach the wires the the wright side)
test the light
does it work?
then you are ready to start flying
thingiverse
free

Atx power supply cover with xt60 by Dcdesigns
...gle switch. uses an xt60 plug for connecting your printers power. the second round hole is sized for a led power indicator light.
thingiverse
free

Earth Jupiter and base by jasomarr
...terproof
the plug search amazon...... inshareplus 12v led strip power supply 2a 24w, wall mounted 12v switching power supply
thingiverse
free

E3D V6 Led light fan mount. SMD STRIP LED by BerniApple
...led light mount attached to the default e3d fan.
just print, glue 5cm of a smd led strip and solder some wires.
hope you like it!
thingiverse
free

Light bar by wintersd
...r. i powered mine off of the 24v printer power supply using a dc-dc voltage converter. i'll publish another thing for that.
thingiverse
free

LED strip stands for aluminium extrusion by nodashi
...strip or directly to the power supply. make sure to find out if your power supply is 12v. cr-10 and tevo tarantula's are 12v.
cg_trader
$5

Wire with power button dimmer light switch
... the wire button inclusion shutdown dimmer switch light electricity technology miscellaneous cable energy power electronics other
thingiverse
free

night light by Nikolaev
...-speed-control-switch-led-dimmer-dc-5a/32784942205.html?spm=2114.13010308.0.0.r7ld5r
nuts and 3pcs m6 stud m6 + 12v power supply
thingiverse
free
LED Strip Lighting Mount by chaoren
...clear+rtv+silicone
led dimmer switch:https://www.amazon.com/gp/product/b003l4kkf2/ref=oh_aui_detailpage_o02_s00?ie=utf8&psc=1
Proteanman
thingiverse
free

GoPro Tripod Mount (Targus) by ProteanMan
...erent brands of tripod. there is a clip at the back of the tripod attaches to this insert.
this was designed for a targus tripod.
thingiverse
free

Ukulele Wall Mount by ProteanMan
... tear.
check out my vlog and 3d printing videos on youtube - protean manhttps://www.youtube.com/channel/ucz64raasrj9v66rt3bdeo2w
thingiverse
free

Instrument Mustaches by ProteanMan
...n for some of them since the clips may break with pla. i haven't tried pla so let me know if they are strong enough with pla?
thingiverse
free

Dreadnought Fidget Spinner by ProteanMan
... of the spinner. be careful not to get glue on the bearing.
7-clamp the handles together to that they are straight, then let dry.
thingiverse
free

Whiteboard Pen Holder X5 by ProteanMan
...that if your printer prints with a larger tolerance around tight fitting parts then you will need to drill or sand out the holes.
thingiverse
free

Proteus Headphone Stand by ProteanMan
...back face. if you have amazing bridging capabilities on your printer then you can print it on the bottom face.
print, use, enjoy!
thingiverse
free

Proteus Cable Roller by ProteanMan
...way that does not earn you monetary value.
if you do wish to sell these products please let me know and we can come an agreement.
thingiverse
free
Box Making Parts by ProteanMan
...way that does not earn you monetary value.
if you do wish to sell these products please let me know and we can come an agreement.
thingiverse
free
Proteus Key Holder by ProteanMan
...d. this should work perfectly for any printer.
try using high infill - 50% or above when printing.
any ideas let me know. enjoy!
thingiverse
free

Custom Speaker Cover Plates by ProteanMan
...e option and type in 0.796. this resizes the file to the right size for my speaker.
now you have a perfectly sized speaker cover!
Proteus
3d_export
$199

Proteus 3D Model
...proteus 3d model
3dexport
sci-fi spaceship warship cruiser destroyer
proteus 3d model psicore 4922 3dexport
turbosquid
$25
Proteus PEC 2025
...d
royalty free 3d model proteus pec 2025 for download as c4d on turbosquid: 3d models for games, architecture, videos. (1275757)
thingiverse
free
Proteus Proxy Detailed
...proteus proxy detailed
thingiverse
this is a version of the proteus proxy with a detailed interior.
unity_asset_store
$36

PROTEUS Frigate
...te your workflow with the proteus frigate asset from cgpitbull. find this & other space options on the unity asset store.
3dcadbrowser
free
Proteus
...software.this 3d object can be downloaded in .max, .obj, .3ds, .fbx, .dxf, .lwo, .stl, .wrl, .ma, .dae, .x and .asc file formats.
unity_asset_store
$7

Proteus Mech Robot
...r workflow with the proteus mech robot asset from polyanarchy. find this & other robots options on the unity asset store.
thingiverse
free

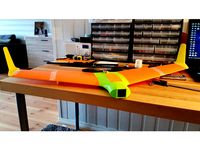
Proteus Concept Boat by omega
...is is my grabcad entry for the
makerbot replicator 2 desktop 3d printer challenge
http://grabcad.com/library/proteus-boat-concept
thingiverse
free
Proteus with Fuse Rear Motor mount by MADRobotNO
...tor cables.
this is 200 version of proteus: https://www.thingiverse.com/thing:2086413
2 last parts er designet for gopro session.
thingiverse
free
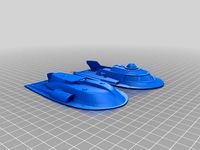
Proteus (halved) by guydebored
...e made a few changes on this version. the rear fins should be better conected now and you won't need rafts or support.
enjoy!
thingiverse
free
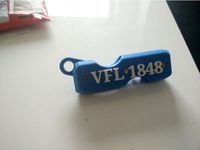
VFL Bochum 1848 - Proteus Key Holder by MacNite
...e
i made this quick mod of the proteus key holder by proteanman for my grand-father-in-law.
i hope, it may help someone as well.
Expandable
turbosquid
$5

Expander
... available on turbo squid, the world's leading provider of digital 3d models for visualization, films, television, and games.
turbosquid
$100

Expanding Table
... available on turbo squid, the world's leading provider of digital 3d models for visualization, films, television, and games.
turbosquid
$29

Chest Expander
... available on turbo squid, the world's leading provider of digital 3d models for visualization, films, television, and games.
turbosquid
$10
Expanding Holes Animation
...model expanding holes animation for download as obj and blend on turbosquid: 3d models for games, architecture, videos. (1511713)
turbosquid
$2

Expander sports plastic
...ander sports plastic for download as max, ige, dwg, and sldpr on turbosquid: 3d models for games, architecture, videos. (1392633)
turbosquid
$20

Rhodes Chroma Expander
...es chroma expander 3d model for download as c4d, obj, and 3ds on turbosquid: 3d models for games, architecture, videos. (1529913)
turbosquid
$15

expander game ready
... available on turbo squid, the world's leading provider of digital 3d models for visualization, films, television, and games.
3d_export
$5

turbo expander
...acceptable for supply to the gas pipeline, since pipeline heating leads to deformation of the gas pipeline and local destruction.
turbosquid
$15

Expandable Kitchen Table S016
... available on turbo squid, the world's leading provider of digital 3d models for visualization, films, television, and games.
3d_export
$15

special equipment for expanding stainless steel tube
...special equipment for expanding stainless steel tube
3dexport
special equipment for expanding stainless steel tube
Diy
3d_export
free
DIY 3D Printer
...diy 3d printer
3dexport
diy 3d printer model
turbosquid
$10
Diy tiered
...l diy tiered for download as max, max, max, max, fbx, and obj on turbosquid: 3d models for games, architecture, videos. (1603709)
turbosquid
$3
Diy Desk to Bench
...odel diy desk to bench for download as 3ds, max, obj, and fbx on turbosquid: 3d models for games, architecture, videos. (1506589)
turbosquid
$2

DIY Moon Light
...model diy moon light for download as obj, fbx, blend, and dae on turbosquid: 3d models for games, architecture, videos. (1501170)
3d_export
$8
DIY CNC Router 3D Model
...diy cnc router 3d model
3dexport
cnc; router; diy; homemade
diy cnc router 3d model maikeru86 58463 3dexport
turbosquid
$5
Diy Kitchen Cabinets
...itchen cabinets for download as 3ds, obj, fbx, blend, and dae on turbosquid: 3d models for games, architecture, videos. (1197373)
3d_export
free

Download free Diying Plant 3D Model
...download free diying plant 3d model
3dexport
diying plant blender
diying plant 3d model visitorsama 98607 3dexport
3ddd
$1
DIY coffee table + decor
... рамка для фото
кофейный столик diy 400х350х600(h) мм. моделился по фото. внимание: материалы - corona.
turbosquid
$3
Diy Wire Lamp Shade
...free 3d model diy wire lamp shade for download as 3ds and fbx on turbosquid: 3d models for games, architecture, videos. (1347605)
cg_studio
$12
DIY MONGOLIAN LAMB STOOLS3d model
... hair soft pile white
.max - diy mongolian lamb stools 3d model, royalty free license available, instant download after purchase.
Led
3d_export
$5

led
...led
3dexport
the led is cut with all the parts.
3ddd
$1

Monacor / PARL56DMX / LED-320RGBW / LED-345RGBW / LED-300RGB
... прожектор
http://www.monacor.dk/
parl56dmx
led-320rgbw
led-345rgbw
led-300rgb
turbosquid
$10

LED
...led
turbosquid
free 3d model led for download as blend on turbosquid: 3d models for games, architecture, videos. (1691856)
3d_export
$5

led lamp
...led lamp
3dexport
led lamp, brightness animation
3ddd
free

leds-c4
...leds-c4
3ddd
leds-c4
современный торшер
3ddd
free

leds-c4
...leds-c4
3ddd
leds-c4
настольный лампа
turbosquid
$19

LED
... available on turbo squid, the world's leading provider of digital 3d models for visualization, films, television, and games.
turbosquid
$12

Led
... available on turbo squid, the world's leading provider of digital 3d models for visualization, films, television, and games.
turbosquid
free

LED
... available on turbo squid, the world's leading provider of digital 3d models for visualization, films, television, and games.
turbosquid
free

LED
... available on turbo squid, the world's leading provider of digital 3d models for visualization, films, television, and games.
Panel
3d_export
$15

panel
...panel
3dexport
panel
archibase_planet
free
Panel
...panel
archibase planet
panel
panel - 3d model for interior 3d visualization.
3d_export
$5

panel
...panel
3dexport
panel with cones
3ddd
$1
Panels
...panels
3ddd
панель
panels
3d_export
$5

panel
...panel
3dexport
panels grapes with birds
archibase_planet
free
Panel
...panel
archibase planet
panel wainscot dado
play panel n050707 - 3d model for interior 3d visualization.
archibase_planet
free
Panel
...panel
archibase planet
lining panel facing material
panel 2 - 3d model (*.3ds) for interior 3d visualization.
archibase_planet
free

Panel
...panel
archibase planet
lining panel facing material
panel 1 - 3d model (*.gsm+*.3ds) for interior 3d visualization.
archibase_planet
free
Panel
...panel
archibase planet
keyboard patchboard finger-board
security panel - 3d model for interior 3d visualization.
turbosquid
$10

Panel
...l
turbosquid
royalty free 3d model panel for download as stl on turbosquid: 3d models for games, architecture, videos. (1387163)
Light
archibase_planet
free

Light
...light
archibase planet
lamp lighting light
light - s2 - 3d model for interior 3d visualization.
archibase_planet
free

Light
...light
archibase planet
light luminaire lighting
light l0465 - 3d model (*.gsm+*.3ds) for interior 3d visualization.
3d_export
$5

lighting
...lighting
3dexport
lighting
3d_export
$5

lighting
...lighting
3dexport
lighting in livingroom
turbosquid
$3

Lighting Tree with Lights
...d model lighting tree with lights for download as max and 3ds on turbosquid: 3d models for games, architecture, videos. (1585507)
archibase_planet
free

Light
...light
archibase planet
luster lighting solution
light - s - 3d model for interior 3d visualization.
archibase_planet
free

Light
...light
archibase planet
luster lamp lighting
light 1 - 3d model for interior 3d visualization.
archibase_planet
free

Lights
...lights
archibase planet
surgical lights surgical lamp
surgical lights (floor) - 3d model for interior 3d visualization.
archibase_planet
free

Light
...light
archibase planet
lighting luminaire candlelight
light l0463 - 3d model (*.gsm+*.3ds) for interior 3d visualization.
3d_export
$18

street light-lighting-light-xia bing
...
3dexport
street light-lighting-light-xia bing<br>max 2015 v-ray 3 max 2015<br>textures<br>all files in zip...