Thingiverse
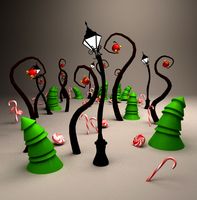
Programmable Christmas Tree Lights by slumou
by Thingiverse
Last crawled date: 3 years, 3 months ago
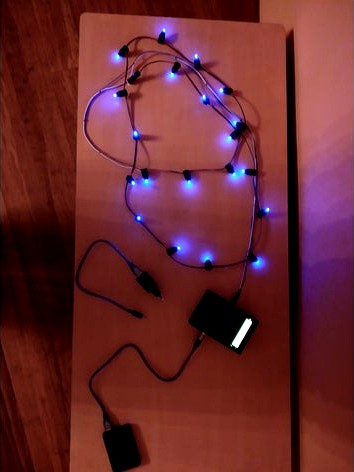
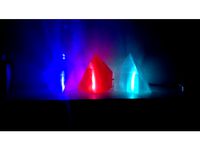
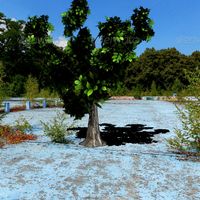
Christmas tree lights based on an Arduino and addressable RGB LEDs with embedded WS2811s. This allows you to program virtually any pattern you can think of, and the LEDs can be replaced if any fail. Unlike traditional fairy lights, the failure of any single LED will not cause the others to get a higher voltage and fail as well - it may cause a break in the circuit but you will know exactly where it is and you can repair it.
2 pieces are 3D printed:
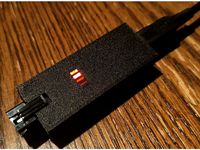
the box+lid for the controller
the individual LED holders+covers - one for each LED
Electronic parts needed:
some addressable LEDs (I used 40) https://www.pololu.com/product/2535
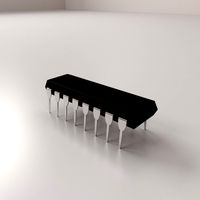
Arduino Uno
220 ohm resistor
390 ohm resistor
2.8k resistor
10k resistor
10 mF capacitor
some stripboard (or any other means of building a circuit) and connecting wire
3-core flexible AWG22 or similar cable (number of LEDs x distance between LEDs + lead from controller to first light)
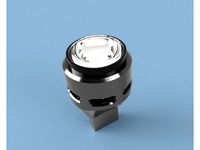
any pushbutton
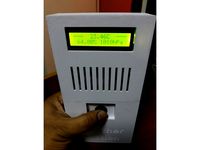
16x2 LCD screen (can leave this out if you do not want to see what pattern/mode is running)
5V USB charger
Some plugs and sockets (I used audio plugs/sockets I had lying around, and split my LEDs into 2 strings that are daisy chainable)
The circuit diagram is included. The LEDs are simply daisy chained (data in, power in for first LED; then each LED after has its data in connected to the data out of the previous one and power connected to previous one) - this is why you only need a 3-core cable.
The Arduino code I used allows for multiple patterns and a random or sequence mode.
For a power supply, I used a 5V USB quick-charger. It needs to push out enough amps for all your LEDs - 170mA for arduino + 50mA per LED at full brightness. I went with 3A to allow for a little expansion. To prevent the quick charger from increasing the voltage to higher than 5V, I had to connect the 2 data pins together - this is critical! If you opt to use a USB quick charger, make sure you test this before blowing up your arduino and/or LEDs.
2 pieces are 3D printed:
the box+lid for the controller
the individual LED holders+covers - one for each LED
Electronic parts needed:
some addressable LEDs (I used 40) https://www.pololu.com/product/2535
Arduino Uno
220 ohm resistor
390 ohm resistor
2.8k resistor
10k resistor
10 mF capacitor
some stripboard (or any other means of building a circuit) and connecting wire
3-core flexible AWG22 or similar cable (number of LEDs x distance between LEDs + lead from controller to first light)
any pushbutton
16x2 LCD screen (can leave this out if you do not want to see what pattern/mode is running)
5V USB charger
Some plugs and sockets (I used audio plugs/sockets I had lying around, and split my LEDs into 2 strings that are daisy chainable)
The circuit diagram is included. The LEDs are simply daisy chained (data in, power in for first LED; then each LED after has its data in connected to the data out of the previous one and power connected to previous one) - this is why you only need a 3-core cable.
The Arduino code I used allows for multiple patterns and a random or sequence mode.
For a power supply, I used a 5V USB quick-charger. It needs to push out enough amps for all your LEDs - 170mA for arduino + 50mA per LED at full brightness. I went with 3A to allow for a little expansion. To prevent the quick charger from increasing the voltage to higher than 5V, I had to connect the 2 data pins together - this is critical! If you opt to use a USB quick charger, make sure you test this before blowing up your arduino and/or LEDs.
Similar models
thingiverse
free
Arduino Nano Addressable LED Case by MVstudios
...able leds can be powered directly and the jst sm connector can back feed power to the arduino eliminating the need for usb power.
thingiverse
free

Underbed Motion Activated Light by TexWorkshop
...
protoboard
l7805 voltage regulator (to power arduino)
the code and schematics is in "thing" files .
and that's it!
thingiverse
free

Moon support USB by internest
...ds. you can connect to any mobile charger.
important! remember to add at least 100ohm resistor between the leds and power source.
thingiverse
free

led-lit snowflake by stellarinnovation
...picture (soldered to the cathode of the led). other similar values will also work for +5v (usb) and a...
grabcad
free

Blue THT Resistors
... come in large range of sizes commonly from 100 ohm to 1 mega ohm.
pinout:
it has none, orientate it as you wish.
how to use:
thingiverse
free
USB charging station by james_III
... for more convenient use.
what you need:
2x car tobacco lighter usb chargers
1x 13x20 rocker switch
1x led and 1k ohm resistor
thingiverse
free
RGB Lighting for Kolink Rocket Push Power Button with Asus Aura
...is used for the power switch cable,
the three drillings off-center for the leds.
if you have further questions, feel free to ask.
thingiverse
free

Arduino LED Box by Maker00
...333162
arduino servomotor box : https://www.thingiverse.com/thing:2365306
last update : i add a model for make a fade with a led.
thingiverse
free
USB flashing Iceberg Night light by Unordung
...er to check it's operation in an old phone charger or a battery bank before plugging it into your expensive laptop or pc!!!!!
thingiverse
free
1W power led usb case by tcbilge
...led,
led pcb,
4.7 ohm 1w resistor,
led lens and black holder,
usb a connector.
the resistor is soldered between led(+) and usb(+)
Programmable
3d_export
$5

vitsoe 620 programme
...vitsoe 620 programme
3dexport
vitsoe 620 programme lounge chair
turbosquid
$20
Yamaha RX11 Digital Rhythm Programmer
...1 digital rhythm programmer for download as fbx, dae, and obj on turbosquid: 3d models for games, architecture, videos. (1690517)
3d_export
$39

astronaut suit nasa artemis programme
...ax 2017 and exported as fbx so you can use it in any software the model is made on real scale and also placed in the world center
3d_export
$25
2000pcs 2d jali cutting files for artcam and aspire programmes
...will be able to see attached stl or pdf file with for downloading the model. if there is no access to the file please contact me.
3d_export
$15
Microchip 3D Model
...electronic component silicon chip micro microprocessor monolithic ic semiconductor programmable computer programmer multi microchip 3d model download .c4d .max...
3d_export
$60

Griffon 3D Model
...l
3dexport
griffon decorative element model for tool with numeric programme management
griffon 3d model stameska62 30305 3dexport
3d_export
$5

Mcafee activate 25 digit code
...it code
3dexport
your pc will receive continuous and continuing protection from internet threats thanks to the mcafee programme.
3d_export
$30

Rosette 3D Model
...corative element model for tool with numeric programme management rosette architectral
rosette 3d model stameska62 30226 3dexport
3ddd
$1

Диван Альба
... ангстрем
диван "альба"
фабрика мебели ангстремhttp://www.angstrem-mebel.ru/catalog/programms/divaldi/
3d_export
$120

Frame for mirror 3D Model
...orative element model for tool with numeric programme management frame mirror
frame for mirror 3d model stameska62 30228 3dexport
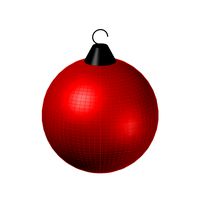
Christmas
3d_ocean
$3

Christmas bauble
...christmas bauble
3docean
christmas bauble christmas tree merry christmas
christmas bauble
turbosquid
$2

Christmas Ornament Christmas Ornament
... available on turbo squid, the world's leading provider of digital 3d models for visualization, films, television, and games.
3d_ocean
$5
Christmas
...de in 3ds max 2013 3dsmax with vray render included material and light obj file fbx file hope you like it please don’...
3d_export
free
christmas sphere
...christmas sphere
3dexport
christmas sphere to decorate your christmas pine in 3d
3d_export
free
christmas sphere
...christmas sphere
3dexport
christmas sphere to decorate your christmas pine in 3d
3d_export
$5
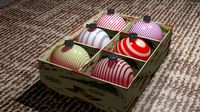
christmas balls
...christmas balls
3dexport
christmas balls, great decorations for your 3d christmas tree.
3d_ocean
$5
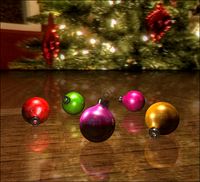
Christmas Ornaments
... ornaments in cinema 4d. it’s very basic, but extremely nice, especially for christmas. this is perfect for your holiday scene...
3d_ocean
$19

Christmas wreath
...christmas wreath
3docean
christmas decoration wreath
high quality christmas wreath with animated lights
turbosquid
$1

christmas
...rbosquid
royalty free 3d model christmas for download as max on turbosquid: 3d models for games, architecture, videos. (1357407)
3d_export
$5

christmas lollipop
...christmas lollipop
3dexport
christmas lollipop.
Tree
3d_ocean
$9
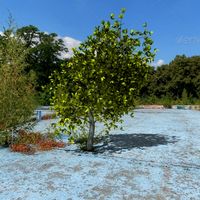
tree
...tree
3docean
textured tree
textured tree
3d_ocean
$9

tree
...tree
3docean
textured tree
textured tree made with cinema4d
3d_ocean
$9
tree
...tree
3docean
cinema4d textured tree
textured tree made with cinema4d
3d_export
$10

tree
...tree
3dexport
this is a tree.
3d_export
$7

Tree
...tree
3dexport
tree
3d_export
$5
tree
...tree
3dexport
tree
3d_export
$5
Tree
...tree
3dexport
tree
3d_export
$5
Tree
...tree
3dexport
tree
3d_export
$5

Tree
...tree
3dexport
tree
3d_export
free

tree
...tree
3dexport
tree.
Lights
archibase_planet
free

Light
...light
archibase planet
lamp lighting light
light - s2 - 3d model for interior 3d visualization.
archibase_planet
free

Light
...light
archibase planet
light luminaire lighting
light l0465 - 3d model (*.gsm+*.3ds) for interior 3d visualization.
3d_export
$5

lighting
...lighting
3dexport
lighting
3d_export
$5

lighting
...lighting
3dexport
lighting in livingroom
turbosquid
$3

Lighting Tree with Lights
...d model lighting tree with lights for download as max and 3ds on turbosquid: 3d models for games, architecture, videos. (1585507)
archibase_planet
free

Light
...light
archibase planet
luster lighting solution
light - s - 3d model for interior 3d visualization.
archibase_planet
free

Light
...light
archibase planet
luster lamp lighting
light 1 - 3d model for interior 3d visualization.
archibase_planet
free

Lights
...lights
archibase planet
surgical lights surgical lamp
surgical lights (floor) - 3d model for interior 3d visualization.
archibase_planet
free

Light
...light
archibase planet
lighting luminaire candlelight
light l0463 - 3d model (*.gsm+*.3ds) for interior 3d visualization.
3d_export
$18

street light-lighting-light-xia bing
...
3dexport
street light-lighting-light-xia bing<br>max 2015 v-ray 3 max 2015<br>textures<br>all files in zip...