Thingiverse
Precision Prusa, w/Modular Hemera X-Axis
by Thingiverse
Last crawled date: 6 years, 2 months ago
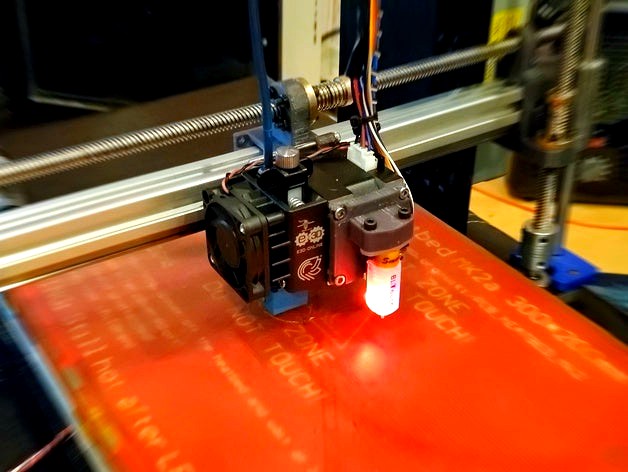
Precision Prusa with linear rails, lead screws, and modular Hemera-based X-Carriage!
NO MORE BELTS!!!
Upgrade your Prusa (or other printer) to linear rails and lead screws for EXTREME ACCURACY!!
Can't decide what hot-end to use? Neither can I!
Use 1 OR 2 Hemera's (native support), direct drive, bowden, Bed level sensor, or mix and match! Its only a few bolts away with this simple modular X-Carriage. The two-sided x-carriage is designed to bolt directly to the Hemera extruder, but it will accept anything you can think up... Bolt pattern is 34 mm x 34 mm, M3 10 mm. Plate face is 40 mm x 40 mm. (See drawing)
My mount plate designs (shown) can be found here --> https://www.thingiverse.com/thing:4064655
My build uses Sensor-less homing, but if you use end-stops, this features an easy adjustment of X and Z end-stops with just a turn of a screw (designed for regular sub-micro switches or the red boards found on amazon(pictured). Just use the files marked "Z-MotorMount_LeftwZsensor"and End-Stop-Mounts. Otherwise, the Z Motor mount and Gantry Mounts are the same for both sides.
Parts used in this build (Est ~$200 for mechanical parts -- Electronics not listed):
4x LM8UU linear bearings
4x 400 mm 2020 aluminum extrusion (Pick whatever size you want! 400 mm allows for a 200 mm wide bed)
2x 400 mm linear rail/bearings (MGN12H)
4x 400 mm x 8 mm diameter lead screws
4x lead screw nut thingies with optional backlash springy thingies
Nuts-n-Bolts:
I recommend just buying a pack of M3, M4, and M5 nuts and bolts. They're around $10 on amazon. Also, get a pack of M3, M4 and M5 T-Slot nuts.
Optional end-stops
2x M3 40-60 mm screws (if you use X and Z end-stops)
4x M3 10mm Screws
Optional X-Axis reinforcement:
M5 bolts and T-slot nuts to fasten the sides to the aluminum extrusion. Simply press-fitting them seems to work okay too.
UPDATE:
I've got it all tuned up and it's running amazing. Max speed of 200 MM/S and still passable accuracy for a draft (picture shown). Incredibly, ghosting/ringing is at a minimum even at those speeds. That said, I probably won't be printing at 200 mm/s very often. Only for rough drafts.
Final build runs TMC2209 drivers on an SKR 1.3, and 2.1A X and Y steppers at 24V. Results may vary with lesser specs. Be sure to keep it lubed! I used Superlube, but would recommend some kind of oil instead.