Thingiverse
Prank Box/Glitter Bomb
by Thingiverse
Last crawled date: 5 years, 7 months ago
Prank your friends! Strike when they least expect it! Reign terror on your sworn enemies! Vanquish your foes! Make them pay!
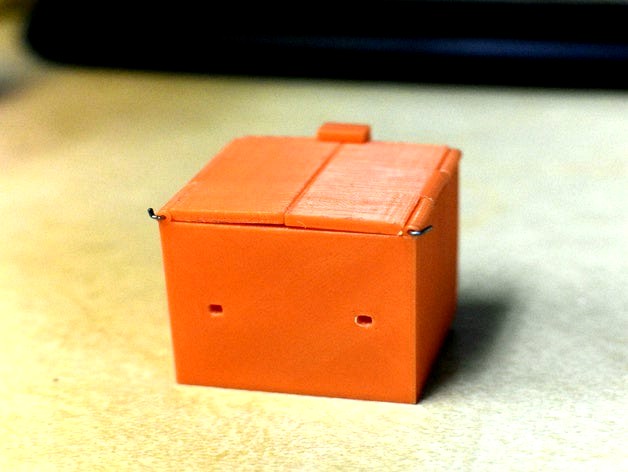
This box should be printable with just the automatically generated supports in your choice slicer. To ensure the holes for the joint print properly, the flaps should be printed upright along with a skirt to maintain adhesion to print surface. The main box part should be printed on it's side so that the holes where paper clips will be inserted are perpendicular to the print surface. To remove the large overhang in this orientation, the box can be sliced right at the portion where the overhang begins and can be printed somewhere else directly on the tray (see photos for reference)
The flaps can be connected to the body of the box with just paper clips and having them bent over. The holes MAY be too small so either some elbow grease or enlarged holes will be necessary.
The box can be loaded by pushing down middle part and inserting paper clips through each hole on one side and out of the hole directly across from each respective one. From here you can safely add whatever projectiles (glitter for a twist of the knife). Once loaded you can close down the flaps and apply the binding part to hold both flap down. The closing of the flaps should remove tension on the paperclips initially holding it down and can now be removed.
WARNING: BAND THAT KEEPS TWO FLAPS DOWN WILL FLY OFF WHEN TRIGGERED. DO NOT AIM AT PEOPLE OR ANIMALS! USE ADHESIVE TO JOIN THE PARTS WITHIN BOX.
Unfortunately PLA does not have the right physical properties to be printed into a strong enough spring so these springs can be used instead: https://www.amazon.com/gp/product/B00VDRF25C/ref=ppx_yo_dt_b_asin_title_o08_s00?ie=UTF8&psc=1
Happy pranking!