Thingiverse
Power Supply (PSU) Bracket Customizations by dewhisna
by Thingiverse
Last crawled date: 2 years, 12 months ago
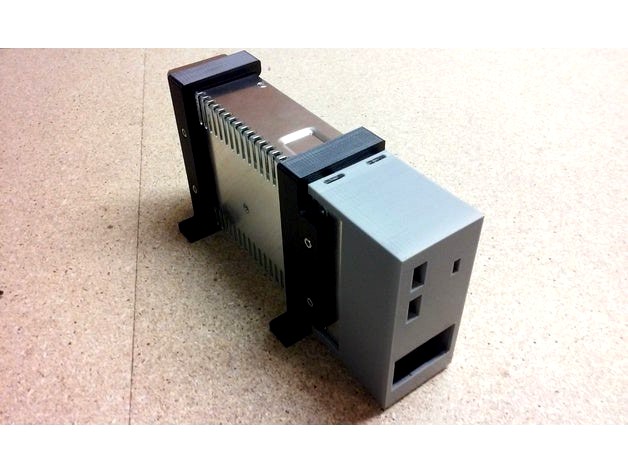
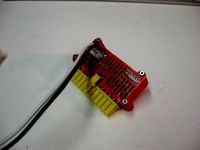
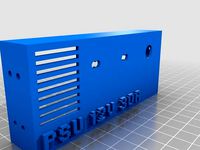
This project started off with my work on rebuilding my MaxNC-15 CNC Milling Machine. I gutted the old electronics and am installing a Protoneer RPi-CNC and Raspberry Pi to drive it, along with new stepper motors and a bigger power supply. These, I'm mounting to a 1x8 piece of plywood that I am going to bolt to the back of the CNC machine in place of where the original electronics box was located. I needed a way to mount the 36V power supply to the plywood and that began my work with these brackets.
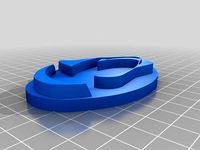
I found this original power supply bracket, but it was about 1mm too narrow to fit my power supply without bowing the clips significantly. Also, I thought to make use of the M4 screw holes on the bottom of the power supply to bolt it to the bracket instead of relying on the friction and springiness of the clips to hold it in place.
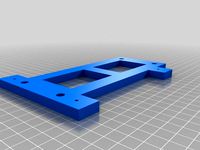
So, I wanted to remix it a bit and add 1mm extra distance on the inside and add screw holes that I could bolt the power supply to the bracket. And I also needed the ability to offset those mounting holes to accommodate the terminal cover I had already printed for the power supply. For doing this, I created an OpenSCAD project that imported the original STL and added customizations to easily tweak and add features for things I wanted modified.
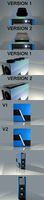
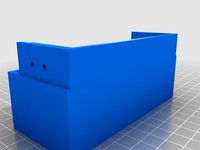
Then after printing that, which worked really well, I decided that space-wise on my wood panel, it would be better to rotate the power supply to its side instead. So I added some more customizations to the OpenSCAD code to rotate the base to be one of the clips and move the mounting holes accordingly.
As-is, there's about half-a-dozen different directly renderable configurations in the OpenSCAD code. Simply change the 'RenderType' variable to 0, 1, 2, or 3 (as commented in the code). You can also change the 'RemoveClips' boolean variable to completely remove the clips on the normal base configuration if you want to use only the bottom screw holes to hold it to the power supply (since the clips aren't actually needed in that configuration). And you can change the offset side to be either the inside or the outside by setting the 'OffsetInside' boolean variable, which is useful for the side-mount configuration.
You can easily add/remove extra distance between the clips by the 'ExtraClipDist' variable and you can change the base thickness via the 'ExtraThickness' variable to accommodate counter-boring of the mounting holes. And you can easily set the screw hole diameter and counter bore depth and diameter for both the outside bracket mounting holes and the bottom mounting holes.
I have not, however, added any customizations for the clip height nor for using countersunk screws instead of counter-bored. But, you can easily tweak the OpenSCAD code to add those.
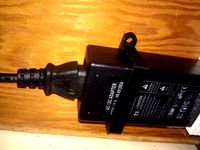
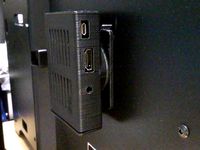
Also, if you are wondering what cover I'm using in the pictures, it's an unmodified print of https://www.thingiverse.com/thing:526278 which fits this power supply very nicely (my make). And the 36V 10A (360W) power supply, I got from stepperonline on eBay.
For printing these, I printed them in ABS at 35% infill (there actually isn't much difference between, 25%, 30%, and 35% on these). I did use supports inside the holes to make them come out a little better, which you can pop out by pushing a screw through them after printing. But, it will print OK without any supports.
Note: I did not enable the online 'Customizer' app for this because that online app doesn't work correctly with importing and modifying an existing STL file in OpenSCAD code, as you can see in the "preview" image of the OpenSCAD file there in the posted file thumbnails. So to customize this, you'll have to download the files and run it on a locally installed copy of OpenSCAD.
UPDATE (13 Nov 2017) : I added V2 of PSU Bracket OpenSCAD that allows for the clip length to be easily altered via new 'ExtraClipLength' variable. See the discussion in the comments tab.
I found this original power supply bracket, but it was about 1mm too narrow to fit my power supply without bowing the clips significantly. Also, I thought to make use of the M4 screw holes on the bottom of the power supply to bolt it to the bracket instead of relying on the friction and springiness of the clips to hold it in place.
So, I wanted to remix it a bit and add 1mm extra distance on the inside and add screw holes that I could bolt the power supply to the bracket. And I also needed the ability to offset those mounting holes to accommodate the terminal cover I had already printed for the power supply. For doing this, I created an OpenSCAD project that imported the original STL and added customizations to easily tweak and add features for things I wanted modified.
Then after printing that, which worked really well, I decided that space-wise on my wood panel, it would be better to rotate the power supply to its side instead. So I added some more customizations to the OpenSCAD code to rotate the base to be one of the clips and move the mounting holes accordingly.
As-is, there's about half-a-dozen different directly renderable configurations in the OpenSCAD code. Simply change the 'RenderType' variable to 0, 1, 2, or 3 (as commented in the code). You can also change the 'RemoveClips' boolean variable to completely remove the clips on the normal base configuration if you want to use only the bottom screw holes to hold it to the power supply (since the clips aren't actually needed in that configuration). And you can change the offset side to be either the inside or the outside by setting the 'OffsetInside' boolean variable, which is useful for the side-mount configuration.
You can easily add/remove extra distance between the clips by the 'ExtraClipDist' variable and you can change the base thickness via the 'ExtraThickness' variable to accommodate counter-boring of the mounting holes. And you can easily set the screw hole diameter and counter bore depth and diameter for both the outside bracket mounting holes and the bottom mounting holes.
I have not, however, added any customizations for the clip height nor for using countersunk screws instead of counter-bored. But, you can easily tweak the OpenSCAD code to add those.
Also, if you are wondering what cover I'm using in the pictures, it's an unmodified print of https://www.thingiverse.com/thing:526278 which fits this power supply very nicely (my make). And the 36V 10A (360W) power supply, I got from stepperonline on eBay.
For printing these, I printed them in ABS at 35% infill (there actually isn't much difference between, 25%, 30%, and 35% on these). I did use supports inside the holes to make them come out a little better, which you can pop out by pushing a screw through them after printing. But, it will print OK without any supports.
Note: I did not enable the online 'Customizer' app for this because that online app doesn't work correctly with importing and modifying an existing STL file in OpenSCAD code, as you can see in the "preview" image of the OpenSCAD file there in the posted file thumbnails. So to customize this, you'll have to download the files and run it on a locally installed copy of OpenSCAD.
UPDATE (13 Nov 2017) : I added V2 of PSU Bracket OpenSCAD that allows for the clip length to be easily altered via new 'ExtraClipLength' variable. See the discussion in the comments tab.
Similar models
thingiverse
free
Anet A8 Mounting Bracket for a MeanWell NES-350-12 Power Supply by mskressin
...bracket to the power supply. then you can simply put the m3 screws through the existing holes in the frame to attach the bracket.
thingiverse
free

Parametric Prusa PSU Mounting brackets by devzero
...of the psu. i made this parametric in openscad so that you can easily accomodate any sized psu. it mounts below the y carriage.
thingiverse
free

V4 microswitch mount by robmlr
...here are more variables in the openscad code to tweak - and it is certainly possible to find configurations which are not useful.
thingiverse
free

Ultimaker Power Supply Bracket by jwags55
...eated bed to my ultimaker, so one of the first steps is upgrading to a power supply that can handle the added load of the heater.
thingiverse
free
Case for PicoPSU with OpenSCAD code by xunker
....stl and side_b_[size].stl, where "size" is the size of the screw holes you want.
openscad code is available on github.
thingiverse
free

Power Supply Mounting Brackets by ctheroux
...m4 screws. it is recommended that you use washers. the hole used to screw the power supply to the surface are 5 mm in diameter.
thingiverse
free

Anet A8 SFX Corsair SF450 Power Supply Mount by caminiti45
... project designed in cad, but i am quite happy with how it turned out. just fyi, this mount took 9 hours to print at 100% infill.
thingiverse
free

WINEGARD G2+ Power Supply Mounting Bracket by Reneb3
...e bin vs flopping around. the large hole version is for up to a #12 screw. the smaller hole is 3mm for a smaller screw or nail.
thingiverse
free
Power supply brick mounting bracket by PoorImpulseControl
... the bottom of a cabinet.
it was a bit of a learning process for openscad so you may want to verify that it works for your needs.
thingiverse
free

Power Supply Mounting Bracket by mvieau
...ly required when printing in this configuration. if you have a larger printer and can lay it flat, supports should not be needed.
Dewhisna
thingiverse
free

K40 Laser calibration tool 2 by dewhisna
...i'm sharing it here in case anyone wants the openscad file to do further customizations without having to start from scratch.
thingiverse
free
Extended Archimedean Spiral Module by dewhisna
...pdate (9-18-2018) : changed the polygon start and end position by $fa so polygon always starts on the correct $fa angle boundary.
thingiverse
free

ArduCam Mount with Bracket by dewhisna
...ell, as is visible in the last picture below. use double-sided tape to hold the cable to the back of the printer out of the way.
thingiverse
free
OctoPi Sleeve Case for FFCP as Spool Holder Mount by dewhisna
...for additional details.
for camera mounts, this octopi case works well with this mount: https://www.thingiverse.com/thing:1763679
thingiverse
free

The Anti-Gravitator Thru-Hole Version by dewhisna
...check yours with a volt meter before attaching the leads to the board, since reversing the power supply polarity could damage it.
thingiverse
free

LED Strip Mount for FFCP Cable Tie Screws or Standalone by dewhisna
...d to the ffcp nor to 3d printers at all. with a little customization, it can be used for mounting led strips on nearly anything.
thingiverse
free

TB6600/HY-DIV268N-5A Stepper Driver Case with 40mm Fan by dewhisna
... https://github.com/dewhisna/tb6600stepperdriver and boards can be ordered from https://www.oshpark.com/shared_projects/tkn4x7al.
thingiverse
free

FlashForge 2016 LCD/SDCard/Keypad Interface Board Redesign by dewhisna
...roughly six times out of every ten card insertions. i believe i can safely claim they have completely resolved my sdcard issues.
thingiverse
free

Arducam Hanger for Qidi Tech 1/FFCP by malakid
...length for the arducam 5 megapixels ov5647 camera. from dewhisna i borrowed the arducam casing which was also heavily...
Psu
3d_ocean
$17
Computer Case
...3docean atx case computer corsair full game gaming pc psu full tower-like computer case model with 113946...
cg_studio
$9

Power Supply Unit PSU3d model
...d .fbx .lwo .ma .max .obj .xsi - power supply unit psu 3d model, royalty free license available, instant download after purchase.
thingiverse
free
PSU cover for 12v 30A PSU by Salti
...
cover for the "dangerous" end of a standard led psu
230v input, 2 x 12v outputs
supports psu width 11cm and height 5cm
thingiverse
free

psu holder by sta8atos
...psu holder by sta8atos
thingiverse
psu holder
thingiverse
free
psu stamp by astorck
...psu stamp by astorck
thingiverse
psu stamp
thingiverse
free
PSU Cover by Shojo
...psu cover by shojo
thingiverse
psu cover
thingiverse
free
PSU cover by chroja
...psu cover by chroja
thingiverse
psu cover
thingiverse
free

PSU Cover for 9,9 cm PSU Anet A8 by Wolverine_DH
...a8 by wolverine_dh
thingiverse
psu cover for 9.9sm psu optimal high for anet a8 screw holes, more side holes for diffrend psus.
thingiverse
free

Anet A8 PSU Fan (2017 PSU)
...coarse threaded fan screws. additionally 2 x m3x8mm machine screws needed to attach fan mount to psu. do not use long than 8mm.
thingiverse
free

SFX PSU to ATX PSU adapter by Kanashii
... atx format adapter so i made my own adapter. better use hard plastic to stick psu to pc's case without breaking the adapter.
Supply
3d_export
$5

black supply
...black supply
3dexport
black supply size: 57.9 x 29.2 x 34 sm
3d_export
free
office supplies
...office supplies
3dexport
turbosquid
$75

Supply Helicopter
... available on turbo squid, the world's leading provider of digital 3d models for visualization, films, television, and games.
turbosquid
$65
Supply Ship
... available on turbo squid, the world's leading provider of digital 3d models for visualization, films, television, and games.
turbosquid
$19

Power Supply
... available on turbo squid, the world's leading provider of digital 3d models for visualization, films, television, and games.
turbosquid
$5

school supplies
... available on turbo squid, the world's leading provider of digital 3d models for visualization, films, television, and games.
3d_export
$10
Supply air duct
...supply air duct
3dexport
supply air duct with two axial fans and hangers
3d_ocean
$15
Office Supplies Pack
...e dispenser eraser markers office paper pencils pens scissors stapler supplies tape tools work
pack of different office supplies.
3d_export
$18

dance supplies-workshop
...dance supplies-workshop
3dexport
dance supplies-workshop<br>3ds max 2015
3ddd
$1
Art Supplies
...art supplies
3ddd
мольберт , краски
318 793 poly count
Bracket
archibase_planet
free

Bracket
...bracket
archibase planet
bracket corbel holder
bracket 1 - 3d model (*.gsm+*.3ds) for interior 3d visualization.
archibase_planet
free

Bracket
...bracket
archibase planet
bracket corbel console
bracket 5 - 3d model (*.gsm+*.3ds) for interior 3d visualization.
archibase_planet
free

Bracket
...bracket
archibase planet
corbel holder bracket
bracket 6 - 3d model (*.gsm+*.3ds) for interior 3d visualization.
archibase_planet
free

Bracket
...bracket
archibase planet
bracket corbel console
bracket 8 - 3d model (*.gsm+*.3ds) for interior 3d visualization.
archibase_planet
free

Bracket
...bracket
archibase planet
bracket corbel holder
bracket n280911 - 3d model (*.gsm+*.3ds) for interior 3d visualization.
archibase_planet
free

Bracket
...bracket
archibase planet
holder corbel bracket
bracket 9 - 3d model (*.gsm+*.3ds) for interior 3d visualization.
archibase_planet
free

Bracket
...bracket
archibase planet
corbel holder bracket
bracket 10 - 3d model (*.gsm+*.3ds) for interior 3d visualization.
archibase_planet
free

Bracket
...bracket
archibase planet
corbel console bracket
bracket 11 - 3d model (*.gsm+*.3ds) for interior 3d visualization.
archibase_planet
free

Bracket
...bracket
archibase planet
holder console bracket
bracket 12 - 3d model (*.gsm+*.3ds) for interior 3d visualization.
archibase_planet
free

Bracket
...bracket
archibase planet
bracket corbel holder
bracket 13 - 3d model (*.gsm+*.3ds) for interior 3d visualization.
Power
turbosquid
$100

power
...ower
turbosquid
royalty free 3d model power for download as on turbosquid: 3d models for games, architecture, videos. (1421990)
3d_export
$5

Power
...power
3dexport
3d_export
$5

power outlets
...power outlets
3dexport
power outlets
3ddd
$1

lion power
...lion power
3ddd
лев , статуя
lion power gold sculpture
3ddd
$1

Sea Power
...
компас , море , часы
часы с компасом sea power
3ddd
free

Meridiani / Power
...power
3ddd
meridiani , круглый
стол power производитель meridiani, диаметр 120,высота 67
3d_export
$5

Power Surge
...power surge
3dexport
the power surge is a all mesh carnival ride to lower in game part count and lag
turbosquid
$8

Airport Ground Power Unit (AXA Power )
... available on turbo squid, the world's leading provider of digital 3d models for visualization, films, television, and games.
turbosquid
$50

Power Houser
...rbosquid
royalty free 3d model power houser for download as on turbosquid: 3d models for games, architecture, videos. (1333800)
3d_export
$5

power outlet
...power outlet
3dexport
power outlet<br>format file maya 2018, 3d max 2017, obj, fbx
Customizations
3ddd
free
Customized
...customized
3ddd
комод
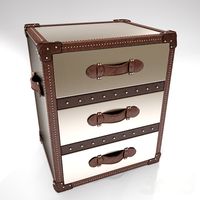
customized, chest, cabinet
3d_export
$50
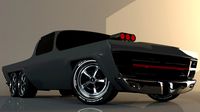
Custom motorcycle
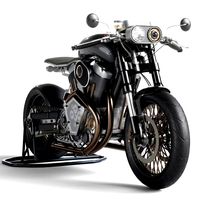
...custom motorcycle
3dexport
custom motorcycle
3d_export
$21
Funko custom
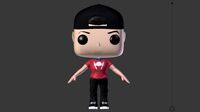
...funko custom
3dexport
funko custom
turbosquid
$2

Customs
... available on turbo squid, the world's leading provider of digital 3d models for visualization, films, television, and games.
turbosquid
$2
Customs
... available on turbo squid, the world's leading provider of digital 3d models for visualization, films, television, and games.
turbosquid
$10

Custom Car
...turbosquid
royalty free 3d model custom car for download as on turbosquid: 3d models for games, architecture, videos. (1584212)
3d_export
$7
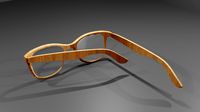
Custom glasses
...custom glasses
3dexport
3d custom glasses;<br>textured with non overlapping<br>rigged: yes
turbosquid
$80

Custom sportbike
...d
royalty free 3d model custom sportbike for download as fbx on turbosquid: 3d models for games, architecture, videos. (1313435)
turbosquid
$30
custom truck
...squid
royalty free 3d model custom truck for download as max on turbosquid: 3d models for games, architecture, videos. (1329357)
turbosquid
$10
custom alien
...squid
royalty free 3d model custom alien for download as fbx on turbosquid: 3d models for games, architecture, videos. (1244065)