Thingiverse
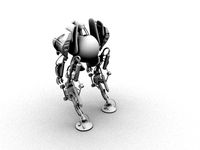
Power Rangers Zeo Pyramidas Figure by Imamakeathing
by Thingiverse
Last crawled date: 2 years, 10 months ago
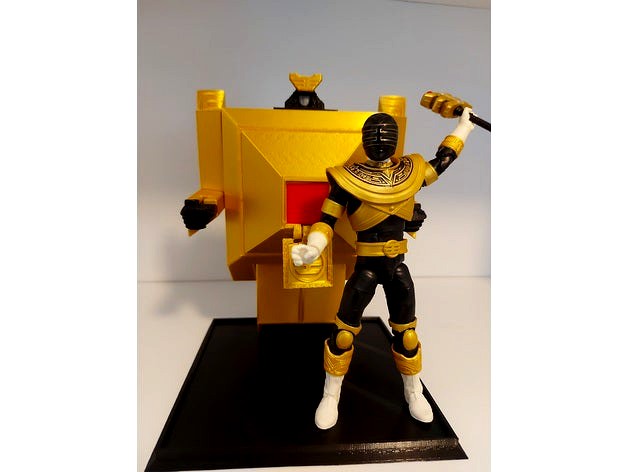
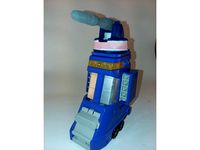
Finally got around to revamping and improving my Pyramidas Figure. The deluxe toy from the 90s is too huge for a regular shelf, and there's a 6 inch figure, but it's rare and expensive for what it is. My figure is scaled to be around 7-8 inches tall, and can transform as well! If you have any minipla models or any of the 6" zord action figures from back in the day in your power ranger collection, it is about 2 inches or so taller than those, which is fitting for the original zord's scale.
Random aside, did anyone else ever notice that the name of this zord is a combination of Pyramid, and Midas, the king with the golden touch? 20 years and I just realized that. Bonus points that the gold ranger in the Japanese version of the show (Ohranger) was called the Kingranger.
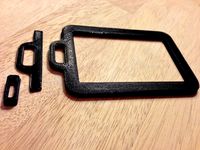
If you've seen the original verison of this, you know it was more of a proof of concept than a finished design. It's still a partsformer (you have to take it apart to transform it), but the feet are much better and actually support the figure without needing to be glued in to one position. I've also included a baseplate that is more or less optional, but is helpful for being able to pick it up without leaving the arms/hands/leg portions on the shelf. I've also tweaked the flip-down peak, which was very fragile originally.
Parts are labelled with my recommended colors, but feel free to experiment as you see fit. The Gold I used in the pictures is CC3d Silk Gold, beautiful stuff that looks better in person than it does in pictures.
Assembly Instructions: You will need to glue some parts together
-- LEGS: Using the main legs part (GLD 08) and legs backplate (GLD 09). Just a dab of superglue on the backplate pegs to hold them onto the main portion. I recommend putting the feet in while gluing to make sure there is proper room for them (if the glue dries and the opening is too small, you're stuck).
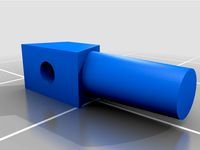
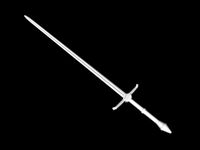
-- PEAK: Peak Pin (GLD 11), Pin Holders (GLD 12 and GLD 13), Peak (GLD 14), and Top Half (GLD 02). Glue the two pin holders to the top half (the missing edge). Put a small dab of superglue in the captive pin holder (the one that doesn't have an opening to the outside edge). Put the peak in place, then put the pin through all three rings. The drop of superglue in the captive peak holder should hold the pin still, while the peak can rotate around the pin. Don't forget to insert the peak crest into the peak
-- HEAD: Head Base(BLK 05), Head Top (BLK 06), Face (svr 01), Head Crest (GLD 15). I included an optional all-in-one part if you don't want to do this (19), but it will require painting the face. To assemble this part, put a drop of glue in the head base, insert the face, put a drop of glue on top of that and on the head base rim around the back of the face, then put the head top on. Then, on the backside bottom edge of the head crest, put a bit of glue and squeeze it onto the protrusions above the face. Be careful of the angle, it should be vertical
--MAIN BODY: Main Body (01) and Top Half (02), and Chest Gem (23). Easy. Glue the top half onto the main body, and the gem onto the recessed square on the top half. Be mindful of the spacing around each part so it is symmetrical:
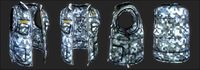
ASSEMBLING/FORMING THE PYRAMID:
-- Head: Make sure the head is upside the body and not sticking out. Take the "backpack" (I never came up with a good name for this part) and insert the two pegs into the locating sockets so that it covers up the head assembly, and the edge continues from the main body. CAUTION: With my print, these pegs were tight, and I worried about breaking them off when transforming. They should be a bit snug, but if you feel they are too snug then file, shave or sand them down slightly so they do not have too much friction. I used a nail file and then a pocket knife.
--Insert the feet block into the legs assembly, so that the feet are flush with the outside edge. The locating pegs on either side should be at the top, while the feet are at the bottom. Align the locating pegs on the legs with the farthest in slots on the bottom side of the main body. The feet/legs assembly will be flush with the bottom edge of the body. The head will be "captive" between the legs backplate and the body cavity- if you did not flip the head already, you will need to remove the legs to make it fit.
-- Attach the upper arms by their locating pegs to either side of the body. Attach the lower arms to the upper arms by the appropriate slots and locating pegs so that the arms are in the same orientation as the upper arms. The side with two locating grooves is the elbow, the side with one groove is the wrist. Make sure the fists are properly aligned as well.
-- Attach everything to the baseplate, the four pegs will line up with sockets on the underside of the legs. Flip the peak so it is standing up and you're done!
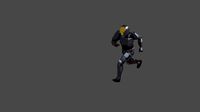
TRANSFORMING TO ROBOT:
-- Remove the legs, arms, backpack, and head assemblies.
-- Use one of the arms to punch out the feet if they do not slide out of the leg assembly easily. Flip the feet and insert the pegs on their back side into the front of the backplate, so they stick out from the leg assembly. Attach the leg assembly to the inside of the main body at the lowest locating sockets.
-- Take the lower arms off the upper arms and rotate them so they stick forward at 90 degree angles. You can swap lower arms between sides depending on what you think looks better. Re-attach to shoulder sockets
-- Flip the head and insert it back into its grooves so that it is visible. Attach the "backpack:" behind the head.
-- Align THE feet with the locating pegs on the baseplate, it will only use two and the other two will go behind the heels to stabilize the model. It should only attach to the baseplate in one way, so that its back is to the edge nearest the pegs. Flip the peak down so you can see the gem and you're done!
Random aside, did anyone else ever notice that the name of this zord is a combination of Pyramid, and Midas, the king with the golden touch? 20 years and I just realized that. Bonus points that the gold ranger in the Japanese version of the show (Ohranger) was called the Kingranger.
If you've seen the original verison of this, you know it was more of a proof of concept than a finished design. It's still a partsformer (you have to take it apart to transform it), but the feet are much better and actually support the figure without needing to be glued in to one position. I've also included a baseplate that is more or less optional, but is helpful for being able to pick it up without leaving the arms/hands/leg portions on the shelf. I've also tweaked the flip-down peak, which was very fragile originally.
Parts are labelled with my recommended colors, but feel free to experiment as you see fit. The Gold I used in the pictures is CC3d Silk Gold, beautiful stuff that looks better in person than it does in pictures.
Assembly Instructions: You will need to glue some parts together
-- LEGS: Using the main legs part (GLD 08) and legs backplate (GLD 09). Just a dab of superglue on the backplate pegs to hold them onto the main portion. I recommend putting the feet in while gluing to make sure there is proper room for them (if the glue dries and the opening is too small, you're stuck).
-- PEAK: Peak Pin (GLD 11), Pin Holders (GLD 12 and GLD 13), Peak (GLD 14), and Top Half (GLD 02). Glue the two pin holders to the top half (the missing edge). Put a small dab of superglue in the captive pin holder (the one that doesn't have an opening to the outside edge). Put the peak in place, then put the pin through all three rings. The drop of superglue in the captive peak holder should hold the pin still, while the peak can rotate around the pin. Don't forget to insert the peak crest into the peak
-- HEAD: Head Base(BLK 05), Head Top (BLK 06), Face (svr 01), Head Crest (GLD 15). I included an optional all-in-one part if you don't want to do this (19), but it will require painting the face. To assemble this part, put a drop of glue in the head base, insert the face, put a drop of glue on top of that and on the head base rim around the back of the face, then put the head top on. Then, on the backside bottom edge of the head crest, put a bit of glue and squeeze it onto the protrusions above the face. Be careful of the angle, it should be vertical
--MAIN BODY: Main Body (01) and Top Half (02), and Chest Gem (23). Easy. Glue the top half onto the main body, and the gem onto the recessed square on the top half. Be mindful of the spacing around each part so it is symmetrical:
ASSEMBLING/FORMING THE PYRAMID:
-- Head: Make sure the head is upside the body and not sticking out. Take the "backpack" (I never came up with a good name for this part) and insert the two pegs into the locating sockets so that it covers up the head assembly, and the edge continues from the main body. CAUTION: With my print, these pegs were tight, and I worried about breaking them off when transforming. They should be a bit snug, but if you feel they are too snug then file, shave or sand them down slightly so they do not have too much friction. I used a nail file and then a pocket knife.
--Insert the feet block into the legs assembly, so that the feet are flush with the outside edge. The locating pegs on either side should be at the top, while the feet are at the bottom. Align the locating pegs on the legs with the farthest in slots on the bottom side of the main body. The feet/legs assembly will be flush with the bottom edge of the body. The head will be "captive" between the legs backplate and the body cavity- if you did not flip the head already, you will need to remove the legs to make it fit.
-- Attach the upper arms by their locating pegs to either side of the body. Attach the lower arms to the upper arms by the appropriate slots and locating pegs so that the arms are in the same orientation as the upper arms. The side with two locating grooves is the elbow, the side with one groove is the wrist. Make sure the fists are properly aligned as well.
-- Attach everything to the baseplate, the four pegs will line up with sockets on the underside of the legs. Flip the peak so it is standing up and you're done!
TRANSFORMING TO ROBOT:
-- Remove the legs, arms, backpack, and head assemblies.
-- Use one of the arms to punch out the feet if they do not slide out of the leg assembly easily. Flip the feet and insert the pegs on their back side into the front of the backplate, so they stick out from the leg assembly. Attach the leg assembly to the inside of the main body at the lowest locating sockets.
-- Take the lower arms off the upper arms and rotate them so they stick forward at 90 degree angles. You can swap lower arms between sides depending on what you think looks better. Re-attach to shoulder sockets
-- Flip the head and insert it back into its grooves so that it is visible. Attach the "backpack:" behind the head.
-- Align THE feet with the locating pegs on the baseplate, it will only use two and the other two will go behind the heels to stabilize the model. It should only attach to the baseplate in one way, so that its back is to the edge nearest the pegs. Flip the peak down so you can see the gem and you're done!
Similar models
thingiverse
free

Airsoft Shotgun (Gas) by linkkoz1
... body. slide it in or out, to lock or unlock the barrel.
congratulations! your airsoft shotgun is complete! have fun and be safe!
thingiverse
free
Medicmaster by autobot00
...an be used as a defibrillator when his patients are flatlining. fold him up however you like and leave his feet out as the pads.
3dwarehouse
free
Dinosaur
...dinosaur
3dwarehouse
teeth feet legs tail head body arms #dino
thingiverse
free
piano bench feet by bripulliam
...ench can fit into. add some hot glue to the bottom as you put the legs in to keep them on tight. or drill a hole and add a screw.
thingiverse
free
ID Holder for Retractable Lanyards by Nickcolonna
... aligned well first). this will keep your cards secure. you can then remove the pin and filler piece to remove/replace the cards.
thingiverse
free

Iron Giant by mckinneyj
...y:
do a dry fit. alignment is crucial if you want it to stand on it's own two feet. then glue them up.
you are done! enjoy
thingiverse
free

CEO Jameson by CEOjameson2501
...nter and material, you may still need to adjust the size of the holes or use glue/additional material to keep the limbs in place.
3dwarehouse
free

Human Body Physics (incomplete)
...ketchy physics 2.0b1) #arms #body #dummy #feet #fingers #head #human #incomplete #legs #physics #sketch #sketchy #sketchy_physics
thingiverse
free

Mickey/Minnie Echo Dot (3rd Gen) Stand (Multicolour print) by rkxone
...u enjoy my prints please consider donating, even a dollar helps :) it's always appreciated :) https://www.paypal.me/rychardk
thingiverse
free
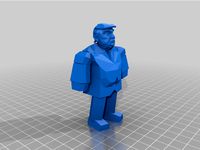
Trump low poly action figure by rayofdoom
...y have pegs.
print arms horizintal with supports on the pegs.
print pegs horizontal flat.
print the rest vertically no supports.

Pyramidas
3ddd
$1
PYRAMIDA
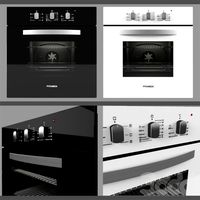
... духовка
духовой шкаф электрический pyramida f 60 tmr white\black
текстуры для чёрной и белой модели в комплекте
3ddd
$1

Вытяжка Pyramida
...вытяжка pyramida
3ddd
pyramida , вытяжка
вытяжка pyramida rustica
3ddd
$1

Варочная поверхность Pyramida
...ость pyramida
3ddd
варочная поверхность , pyramida
варочная поверхность
pyramida rustico
3ddd
free

PYRAMIDA PFE 641 BLACK RUSTICO
...o
3ddd
варочная панель , pyramida
варочная панель газовая pyramida pfe 641 black rustico
3ddd
$1

Вытяжка PYRAMIDA T-900
...ытяжка pyramida t-900
3ddd
вытяжка , pyramida
вытяжка шириной 900мм
модель в max2011+fbx
3ddd
free

PYRAMIDA PFG 604 STX
... pyramida
размеры ниши для встраивания (вхшхг): 5х47х55,2 см
габариты (вхшхг): 5х51х60 см
3dsmax 2015 + fbx
3ddd
$1

Варочна панель PYRAMIDA PFK 604 STX
...
размеры ниши для встраивания (вхшхг): 4,7х55х47 см.
габариты (вхшхг): 11х60х51 см.
polys: 91 354
3dsmax 2010, fbx + textures
3ddd
$1
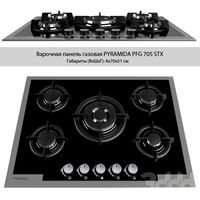
Варочная панель PYRAMIDA PFG 705 STX
... pyramida
размеры ниши для встраивания (вхшхг): 5х47х55,2 см
габариты (вхшхг): 5х51х70 см
3ddd
$1

Варочная панель PYRAMIDA PFX 641 INOX
... pyramida
размеры ниши для встраивания (вхшхг): 5х47х55,2 см
габариты (вхшхг): 5х51х58 см
цвет изделия: нержавеющая сталь
3ddd
$1

Духовой шкаф Pyramida f 64 ivory Rustico
...mnye/f64erblack_rustico.html http://www.pyramida.ua/catalog/duhovie-shkafi/6-rezhimnye/f64erivory_rustico.html
Zeo
thingiverse
free
Zeo buckle
...giverse
buckle for the zeo rangers or the ohrangers.
i'm bad at 3d modelling so its a little bit crap but should print fine!
3d_sky
free
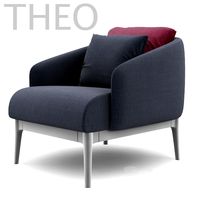
chair with ottoman THEO (zeo)
...chair with ottoman theo (zeo)
3dsky
chair with ottoman theo (zeo), do not forget about thanks
thingiverse
free
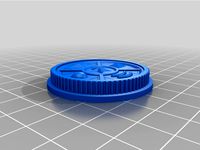
tommy zeo coin by kingbro2
...tommy zeo coin by kingbro2
thingiverse
this just a fan version of tommy's zeo five coin made for power rangers 25th
thingiverse
free
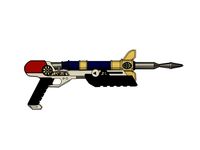
Advanced Zeo Blaster by iodanem
...onster, the pollenator which was only done when an "oxygen field" was equipped given pure oxygen was his only weakness.
thingiverse
free
Zeo zord 1 helmet
...he cannon halfs and glue those together as well. go zeo!
for more of my designs check out my page www.facebook.com/morphinmaster
thingiverse
free
Zeo Trobe by XvaD
...zeo trobe by xvad
thingiverse
this is a quick and easy project to do teaches kids about early animation
thingiverse
free
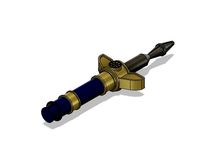
Zeo Sword closed 1:12 scale by iodanem
...zeo sword closed 1:12 scale by iodanem
thingiverse
a closed version of the zeo sword for the lightning collection rangers.
thingiverse
free
zeo master morpher coin by 3d_printing_teen
...e from: https://www.thingiverse.com/thing:4026367
and the blank alien ranger coin from :https://www.thingiverse.com/thing:3361353
thingiverse
free

Blue Zeo Tonfa 1:12 by iodanem
...ways used simultaneously, but only one can be attached to the top of the advanced zeo laser pistol for the zeo blaster formation.
thingiverse
free

Power Rangers ZEO Cosplay Blaster by Crazykajo
... used the great model from iodanem (https://www.thingiverse.com/thing:4441076) to create this cosplay version of the zeo blaster.
Rangers
turbosquid
$59

Ranger
... available on turbo squid, the world's leading provider of digital 3d models for visualization, films, television, and games.
turbosquid
$29

Ranger
... available on turbo squid, the world's leading provider of digital 3d models for visualization, films, television, and games.
3d_export
$155

polaris ranger
...polaris ranger
3dexport
polaris ranger, high detail model<br>real world dimensions
3d_export
$5

ranger human male
...ranger human male
3dexport
ranger human male
turbosquid
$80
RANGER Jacket
...rbosquid
royalty free 3d model ranger jacket for download as on turbosquid: 3d models for games, architecture, videos. (713388)
turbosquid
$1
space ranger
...uid
royalty free 3d model space ranger for download as blend on turbosquid: 3d models for games, architecture, videos. (1604785)
turbosquid
$12

Knife Ranger
... free 3d model knife ranger for download as obj, c4d, and fbx on turbosquid: 3d models for games, architecture, videos. (1476902)
3ddd
$1

Снегоход Ranger Alpine
...снегоход ranger alpine
3ddd
снегоход
снегоход brp lynx 69 ranger alpine
turbosquid
$80
Ranger jacket
... available on turbo squid, the world's leading provider of digital 3d models for visualization, films, television, and games.
turbosquid
$30
Ranger sword.c4d
... available on turbo squid, the world's leading provider of digital 3d models for visualization, films, television, and games.
Figure
turbosquid
$5

Figure
...
turbosquid
royalty free 3d model figure for download as obj on turbosquid: 3d models for games, architecture, videos. (1335402)
3ddd
$1
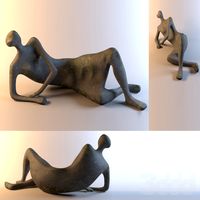
Reclining Figure
...reclining figure
3ddd
skulptura-reclining figure
3ddd
$1

Innerspace Figures
...innerspace figures
3ddd
innerspace
светильники innerspace figures.
пользуйтесь!
3ddd
$1
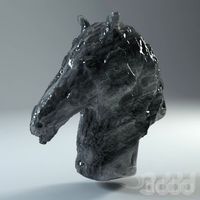
horse figures
...horse figures
3ddd
конь
high poly horse figures
3ddd
free
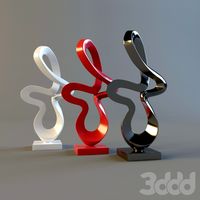
Statue figure
...statue figure
3ddd
статуэтка
modern table statue figure
3d_ocean
$9

Business Figures
...r female figures human male man people tie woman
set of 8 posed business figures made in cinema 4d files included: .c4d .3ds .obj
design_connected
free
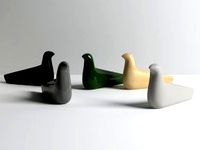
L'Oiseau Figure
...l'oiseau figure
designconnected
free 3d model of l'oiseau figure by vitra designed by bouroullec, erwan.
3d_export
free
alphabet english figures
...alphabet english figures
3dexport
alphabet english figures
3d_export
free
cat figure
...cat figure
3dexport
simple cat figure made out of mechanical parts. you can find more files and options here:
turbosquid
$15

Mini Figure
...osquid
royalty free 3d model mini figure for download as obj on turbosquid: 3d models for games, architecture, videos. (1343926)
Power
turbosquid
$100

power
...ower
turbosquid
royalty free 3d model power for download as on turbosquid: 3d models for games, architecture, videos. (1421990)
3d_export
$5

Power
...power
3dexport
3d_export
$5

power outlets
...power outlets
3dexport
power outlets
3ddd
$1

lion power
...lion power
3ddd
лев , статуя
lion power gold sculpture
3ddd
$1

Sea Power
...
компас , море , часы
часы с компасом sea power
3ddd
free

Meridiani / Power
...power
3ddd
meridiani , круглый
стол power производитель meridiani, диаметр 120,высота 67
3d_export
$5

Power Surge
...power surge
3dexport
the power surge is a all mesh carnival ride to lower in game part count and lag
turbosquid
$8

Airport Ground Power Unit (AXA Power )
... available on turbo squid, the world's leading provider of digital 3d models for visualization, films, television, and games.
turbosquid
$50

Power Houser
...rbosquid
royalty free 3d model power houser for download as on turbosquid: 3d models for games, architecture, videos. (1333800)
3d_export
$5

power outlet
...power outlet
3dexport
power outlet<br>format file maya 2018, 3d max 2017, obj, fbx