Thingiverse
Portable Led Light by NirDobovizki
by Thingiverse
Last crawled date: 3 years ago
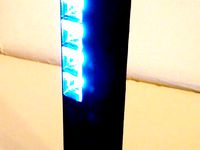
This is a portable led light that can be attached to anything I have and can work on batteries or an external power adaptor.
This model works very well but require a bit more sanding and gluing than I'd like.
This is a very bright, lightweight and versatile light fixture.
On one side there's a 1/4" thread you can connect to any standard photo/video tripod and a flash-leg-like connector that will fit any photo lightstand with a cold-shoe and can even be mounted on a camera.
On the other side there's a 10mm hole that can fit a worklight tripod and a convenient carrying handle you can hold or hang on any hook.
It can be powered from a set of 4 AA batteries (I recommend rechargeable because very bright leds can consume quite a bit of power) or a 5v power supply with a 5mm plug.
You can add a DC-DC converter (or a cable with inline DC-DC converter) to run off a power supply that isn't 5v.
Designed with SketchUp, STL cleaned up with Microsoft 3D Builder, the copy in the photos was sliced using Cura and printed on my Robo3D R1+
Required non printable parts:
The leds - 5 Round SMD "beads" leds, 7.5mm in diameter, as bright as you can get, I used those 1w leds from AliExpress
Resistors, I trust you to know how to match the resistors to the leds (or at least to look up an on-line led calculator)
A 4xAA battery holder - 5.7cm x 6.2cm x 1.5cm size AliExpress
A switch, 3 pin SPDT toggle switch, internal part size 13mm x 8.5mm, 6mm holeAliExpress
A 5.5mm socket, note that there's only 10mm space behind the hole AliExpress
(Optional) 1/4 inch hex nut
One or two short 2mm diameter screws
Some electrical wires
Printing instructions
I printed everything (except the dome) in PLA, 3 shells (1.2mm walls) and 1.2mm top/bottom.
The base part requires support, but the supported part is internal and we don't care it will come out nice, you can make the support sparser than normal.
Also, the base needs some infill to make the handle stronger, I used 10%.
Except for the base the parts don't need support or infill.
The plate part should be printed in black or white, to avoid any color cast (or, you can use yellow or orange to warm up the light or blue to cool it down), white is best because it will reflect more light out, I used black because that's what I had when I printed it.
The dome needs to be white (unless you want colored light) and almost transparent, not fully transparent because the leds are painful to look at directly - you can get this with very thin opaque filament.
I printed it in ABS (because that's what I had) with two shells, couldn't get the center of the dome to print with just one shell, even with two shells there's an areas that isn't quite solid in the center, I guess I could make it print better with 3 shells but it's a tradeoff between light efficiency and perfectness (is that a word?) of the dome.
Assembly
Start with the plate, attach the leds to the plate (hot glue works really well here) and solder the leds to the resistors and wires, there are 2 small holes in the plate for the two wires.
Test everything lights up before continuing.
Attach the dome to the plate, it should pressure-fit around the plate edge.
Glue the plate to the underside of the base, pass the wires to the other side of the base using the small rectangular hole.
Place the battery holder into it's position in the base, pass the wires into the small window so you can access them later, use short 2mm screws to secure the battery box.
Make sure the back fits into the base, you may need to sand the edges of the little flaps that goes into the base, there are two sets of holes, the holes that is open in one side is one of the holes for the back, the other set of holes are for the battery cover
Connect the socket to the back and the switch to the switch cover.
Solder the - wire from the leds together with the - wire from the socket and the - wire from the batteries.
Stick all the + wires into the small rectangular hole in the back and solder the + wire from the batteries to one side of the switch, the + from the socket to the other side and the + from the leds to the middle
Glue the back into it's position on the base.
Glue the switch cover into the back, make sure the switch direction matches the arrows on the back.
Insert the hex nut into the hole in the flash hot-shoe like side, lock it into place using the screw cover, this should pressure-fit and is very tight, you may need to hummer it in a little.
That's it, enjoy your light.
Similar models
thingiverse
free
Desk Lamp by Salalammas
...led
on-off switch
i glued the switch to the bottom plate
cause the battery is 9volts and the led is 3.5volts i needed a resistor.
thingiverse
free

LED snowman by Passavopercaso
...on batteries and used the hole for a switch but you can also use it to pass a power cord if you like better a long lasting light.
thingiverse
free
Flashlight by Mato
...parallel)
1x18650 lithium ion battery (from old laptop battery)
1xtp4056 lithium ion battery charger
1x switch
hope you like it.
thingiverse
free

Power supply switch and socket plate 50A by jesse
...power supply is about 120mm.
you can find the plug socket, fuse, and switch on ebay or aliexpress. the standard size should fit.
thingiverse
free

Cute Cthulhu LED by Passavopercaso
...on batteries and used the hole for a switch but you can also use it to pass a power cord if you like better a long lasting light.
thingiverse
free
Targa Pylon by FlynnD273
...fits onto the base from above, then you glue the pylon on top in the indent. the bottom of the base slots in and twists to close.
thingiverse
free

Thru-PCB LED light for Proxxon MB140/S drill stand by hlavaatch
...lled a hole in the side of the stand and put a standard dc power connector there for my 12v dc workbench supply to power the led.
thingiverse
free

LED Christmas Tree by Passavopercaso
...u can also use it to pass a power cord if you like better a long lasting light.
the lid that closes the bottom can be a bit loose
thingiverse
free

Fibonacci Spiral Night Light by elwood127
...s upside down. it is correct now. thanks.
i would change the 68 ohm resistor for a 470 ohm. led's started to dim over time .
grabcad
free

Inline Switch - On/Off Toggle Switch for LED Lights - AC or DC - For Larson Electronics LED Lights
...connector. the input wiring whip is offer with a female twp pin deutsch connector, battery clamps, or ring terminals termination.
Nirdobovizki
thingiverse
free
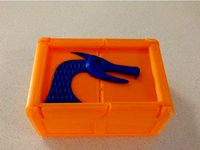
Dragon Box by NirDobovizki
...dragon box by nirdobovizki
thingiverse
my oldest son is into dungeons and dragons, so i made him a box to store his dice set.
thingiverse
free

Fish by NirDobovizki
...asy to print, it can be scaled up or down to just about any size and it looks very fishy.
i hope someone here will find it useful
thingiverse
free

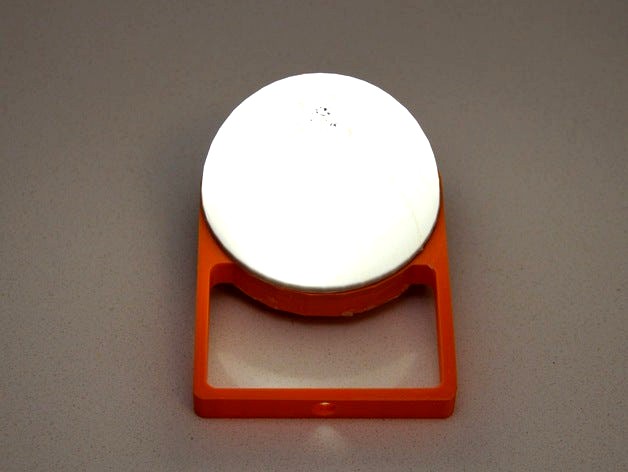
Knob by NirDobovizki
...er infill percentage you want because the important parts are all walls.
designed with autodesk fusion 360, printed on robo3d r1+
thingiverse
free

Code Monkey by NirDobovizki
...res some post processing work with a knife to get right, if i have the time i'll redo the lower part of the head to fix this.
thingiverse
free

Lion Box by NirDobovizki
...and printed on my robo 3d r1+, if you print this model please upload a "make" with a photo i really enjoy seeing those.
thingiverse
free

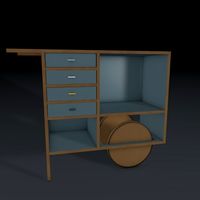
Tracktor robot with place for electrnics by NirDobovizki
...f the parts don't need any infill, print 4 wheels and 1 each of the other stl files (i recommend high infill for the wheels).
thingiverse
free

Fume extractor by NirDobovizki
...ingiverse.com/thing:193647
designed with sketchup, fixed with microsoft 3d builder, sliced with cura and printed on a robo 3d r1+
thingiverse
free
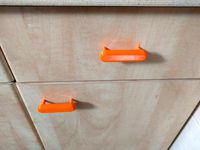
Simple cabinet door handle by NirDobovizki
...ions for the parts above it.
design with onshape, cleaned with microsoft 3d builder, sliced with cura and printed on a robo3d r1+
thingiverse
free

ESP 01 Connector by NirDobovizki
...in your own designs.
designed with sketchup, stl cleaned with microsoft 3d builder, sliced with cura and printed on my robo3d r1+
thingiverse
free
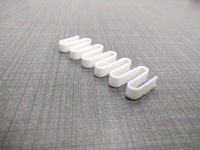
Durable Fully Printable Customizable Spring by NirDobovizki
...akes it work.
i tested it in abs and petg and it worked really well (petg seems to be more durable), didn't try with pla yet.
Portable
3d_ocean
$4
Portable Shelves
...portable shelves
3docean
drawer furniture portable shelves wheel
portable shelves with wheels
3d_export
$5

portable generator
...portable generator
3dexport
3d model portable generator. videogames.
3d_export
$16
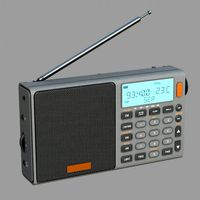
Portable Radio
...portable radio
3dexport
turbosquid
$30

Portable Generator
...
royalty free 3d model portable generator for download as obj on turbosquid: 3d models for games, architecture, videos. (1579389)
turbosquid
$5

Portable Radio
...uid
royalty free 3d model portable radio for download as fbx on turbosquid: 3d models for games, architecture, videos. (1402570)
turbosquid
$3

Portable Keyboard
...royalty free 3d model portable keyboard for download as blend on turbosquid: 3d models for games, architecture, videos. (1281917)
turbosquid
$49

Portable Office
...3d model portable office for download as max and unitypackage on turbosquid: 3d models for games, architecture, videos. (1470540)
turbosquid
$15

PORTABLE LIGHTS
...lty free 3d model portable lights for download as max and obj on turbosquid: 3d models for games, architecture, videos. (1679464)
3d_ocean
$12
Portable Sofa
...r table 2. minimalis sofa 3. sofa and mini sofa (can for foot) 4. mini sofa and table tertured with v-ray, and no material needed
turbosquid
$11
Safe portable
...free 3d model safe portable for download as max, obj, and fbx on turbosquid: 3d models for games, architecture, videos. (1410826)
Led
3d_export
$5

led
...led
3dexport
the led is cut with all the parts.
3ddd
$1

Monacor / PARL56DMX / LED-320RGBW / LED-345RGBW / LED-300RGB
... прожектор
http://www.monacor.dk/
parl56dmx
led-320rgbw
led-345rgbw
led-300rgb
turbosquid
$10

LED
...led
turbosquid
free 3d model led for download as blend on turbosquid: 3d models for games, architecture, videos. (1691856)
3d_export
$5

led lamp
...led lamp
3dexport
led lamp, brightness animation
3ddd
free

leds-c4
...leds-c4
3ddd
leds-c4
современный торшер
3ddd
free

leds-c4
...leds-c4
3ddd
leds-c4
настольный лампа
turbosquid
$19

LED
... available on turbo squid, the world's leading provider of digital 3d models for visualization, films, television, and games.
turbosquid
$12

Led
... available on turbo squid, the world's leading provider of digital 3d models for visualization, films, television, and games.
turbosquid
free

LED
... available on turbo squid, the world's leading provider of digital 3d models for visualization, films, television, and games.
turbosquid
free

LED
... available on turbo squid, the world's leading provider of digital 3d models for visualization, films, television, and games.
Light
archibase_planet
free

Light
...light
archibase planet
lamp lighting light
light - s2 - 3d model for interior 3d visualization.
archibase_planet
free

Light
...light
archibase planet
light luminaire lighting
light l0465 - 3d model (*.gsm+*.3ds) for interior 3d visualization.
3d_export
$5

lighting
...lighting
3dexport
lighting
3d_export
$5

lighting
...lighting
3dexport
lighting in livingroom
turbosquid
$3

Lighting Tree with Lights
...d model lighting tree with lights for download as max and 3ds on turbosquid: 3d models for games, architecture, videos. (1585507)
archibase_planet
free

Light
...light
archibase planet
luster lighting solution
light - s - 3d model for interior 3d visualization.
archibase_planet
free

Light
...light
archibase planet
luster lamp lighting
light 1 - 3d model for interior 3d visualization.
archibase_planet
free

Lights
...lights
archibase planet
surgical lights surgical lamp
surgical lights (floor) - 3d model for interior 3d visualization.
archibase_planet
free

Light
...light
archibase planet
lighting luminaire candlelight
light l0463 - 3d model (*.gsm+*.3ds) for interior 3d visualization.
3d_export
$18

street light-lighting-light-xia bing
...
3dexport
street light-lighting-light-xia bing<br>max 2015 v-ray 3 max 2015<br>textures<br>all files in zip...