Thingiverse
PLAirplane glider/rubberband flier by Rockthill
by Thingiverse
Last crawled date: 3 years ago
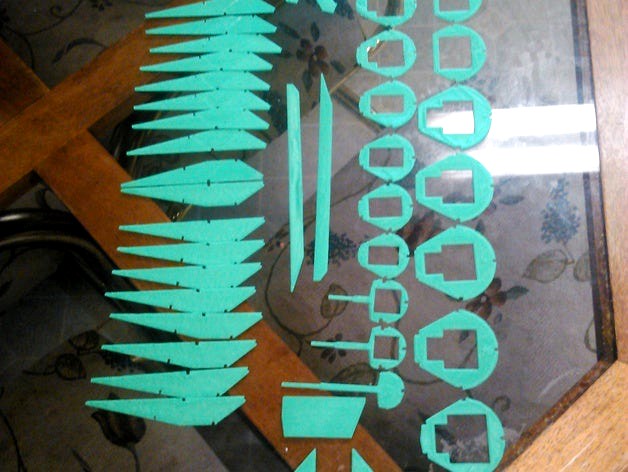
This is a simple plane to build and cover and easy project for age 8+
VERY CURRENT, WORK IN PROGRESS!! MORE PICS COMING SOON, VIDEO OF MY SECOND BUILD AFTER THAT ON MY YOUTUBE CHANNEL, anyone who builds one before end of march may have it featured in my video if you send pics/videos!!!
Updates: 2/26/16 updated right & left wing rib files to fix build tightness on top rear notches, thinned them by one layer and updated helping hands accordingly. 2/27/16 made gear more realistic size.
WHAT YOU NEED
Need to outsource balsa wood 1/8" rods, glue, and covering then print:
17 total body ribs, 24 total wing ribs and tailfin builds a glider
add gear parts and Styrofoam floats for float glider, or
add nose cone, a few paper clips, rubber band and a prop for a band glider.
R/Cers there are included ailerons for micro setups!
Notes: On my printer (which isn't working so great right now) this works out to 3 and 4-layer parts (mostly) so the whole thing took about 1/8 spool of filament and all of it prints in about 4 hours for the basic model. I used 80% infill for little more strength and had to turn the infill to 0 degrees from 45 for the control&gear2 file only. I'd love to see how pretty it could be from a properly working printer...
Assembly:
Step 1: if using landing gear glue gear to front & back of fuse part 4, if using floats glue gear to front of fuse part 3 and rear of part 5.
Step 2: All the fuselage parts are numbered on back, or check DIAGRAM.stl and start by sliding them in order into the helping hands parts, press the balsa rods into the notches starting with side notches, assemble entire length with all rods in place and remove helping hands pieces BEFORE gluing rods to ribs (a rubber band every other rib section helps hold loose spots in until ready to glue)
Step 3: Use helping hands pieces to assemble wing sections similarly to fuselage, or see DIAGRAM.stl, BUILD BOTH 12 Piece halves separately and flat!
Step 4: glue wing halves together by placing one wing half on flat surface then sandwiching a balsa rod longer than the wings (this for mounting later) in between wing halves, and supporting one side until the tops touch and can be glued together, the ends of the raised side should be level and about 1 1/4" or 3cm off of the surface
Step 5:slide fins onto rear of fuselage and glue in place.
Step 6: hand sand any rough corners or edges smooth, then cover with any heat shrink material, and use hairdryer to shrink tight to frame. tape rudder fin behind last upright on fuse with one vertical piece of tape on each side, so it can be bent for maneuvering later.
Step 7: if using rubber band flier install propeller with shaped clip in nose part and install band and clip in back rib of fuselage. If not glue oval washer to front of fuselage.
Step 8: use rubber bands to secure wings in place and tape pieces to balance plane so that it balances side to side at the center of the fuselage, and front to back at about the middle of the wings.
Step 9: GIVE IT A TOSS! you're done except for fine tuning, which will be part of a soon to come video on my youtube channel
ADDENDUM: if you are an R/Cer there are control surfaces as part of this print secure them where needed with tape similar to the rudder, add your Rx, micro servos and motor and send me some video!! There should be enough play in the tailfin that's whole if there isn't cut it on its groove and use tape as with the other control surfaces
Similar models
thingiverse
free

Glider project - printed rib & stencil by filmoscope
...as tip to glue into 3mmx15mm balsa stick.
either use spar 12mm carbon tube or balsa square pieces between ribs to make it rigid.
3dwarehouse
free

model plane ULF-1 glider
...plane ulf-1, glider version. designed by david riha. #balsa #balsa_model #fuselage #glider #model #model_plane #scale_model #wing
thingiverse
free

El Sidio - RC glider 150cm - optional motor - 3d/balsa/poly construction by atlaware
...se only some parts: the fuselage, the wing or the motor mount system.
more photos: [https://photos.app.goo.gl/9dhje7mkbgbcdvne6]
grabcad
free

Balsa Wood Glider
... the final output will be a real life model and its intention is to glide.
note: in video, the glider travelled 2.8m, not 2.28m*
thingiverse
free

USS Nimoy Fuselage by smythe
...uss nimoy fuselage by smythe
thingiverse
rubber band powered aircraft based on balsa model.
grabcad
free

indoor Rc plane
...r the wings. that said, all the parts made out of balsa wood and polystyrene could probably be 3d printed with some modifications
thingiverse
free

Glider re-mix with launcher by galiettd
....(.6 mm)
made fuselage thinner...(1.2 mm)
support middle of wing
re-fab launcher.
add rubber band slide wing into body and fly!
thingiverse
free

3D Printed Miniature Glider - Balsa Glider Style!!! by 3DFlight
...3dflight thingiverse awesome miniature 3d printed glider that is similar to the balsa wood gliders so many of us...
3dwarehouse
free

model plane Univerzal
...model plane univerzal
3dwarehouse
rubber powered balsa model plane. #balsa_model #fuselage #model #model_plane #propeller #wing
3dwarehouse
free

Foam Glider Traditional
...foam glider traditional
3dwarehouse
wings paper covered 20mm finnfoam, fuselage fishing rod
Rockthill
thingiverse
free
Undergravel aquarium system amphibians paridise shelf tube by Rockthill
...se
so my kids found tadpoles this spring, i made these so we could keep them longer and they could see them grow. they loved it!
thingiverse
free

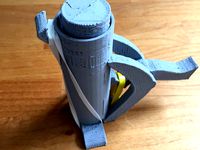
Belt Bottle holder by Rockthill
...or others it needs +/- 4% to fit properly, water bottles usually + 6%.
they work great as bb carriers on my airsoft vest as well.
thingiverse
free

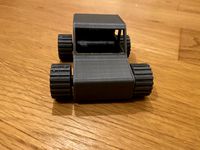
Airsoft AK-M4 adapter by Rockthill
...lar options!!
photos tomorrow, video maybe next week (maybe)
like, share, and follow here and on my youtube channel @ rocket hill
thingiverse
free

Wind Reduction Frame for studio mike by Rockthill
...version 2 will have hooks for the mesh, so it can be replaceable as opposed to the glue n trim method ill use for this prototype.
thingiverse
free
aquarium undergravel filtration system by Rockthill
...w my clams survive, isn't that grand? boifiltering here i come again!
soon to come: tube topper for activated charcoal filter
thingiverse
free
One Hour 40mm Fan Shroud for MK8 by Rockthill
...est.
this one can be made to fit, but i broke my first one (did i mention thin?) the second one scaled to 102% worked flawlessly.
thingiverse
free

BB Band Mine by Rockthill
...e sensitivity and triggerable range.
like and follow here and my soon to be fully up and running youtube channel: rock't hill
Flier
3d_export
$7

star flier
...to the most dangerous, and deepest points of space, where andventures and new curiosities will waiting for enthusiastic explorer.
3d_export
$7
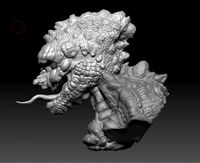
reptil monster
...client projects such as scale models, commercials, free games, flier, ...
3d_export
$5
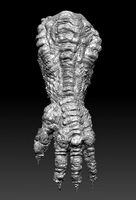
reptil monster hand
...client projects such as scale models, commercials, free games, flier, ...
3d_export
$30
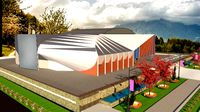
sport building
...or personal projects such as mockups, commercials, free games, flier, ...
3d_export
$175
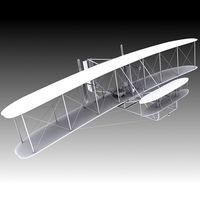
1903 Wright Flyer 3D Model
...flight aviation kitty hawk history plane historic biplane airplane flier 1903 wright flyer 3d model plutonius 36104...
3d_export
$10

sheffield utd
...or personal projects such as mockups, commercials, free games, flier, artwork.<br>file download include :<br>- obj<br>- fbx<br>- 3ds max 2013<br>-...
thingiverse
free

TRAMPA FLIER dual ESC mount by iminsub
...erse
important!!!!
top/bottom thickness : 5mm
infill: 20%
m313mm screw 2 needed
for 12s 150a*2 flier esc , trampa mountain board
thingiverse
free

Micro Drone (Extreme Fliers) Replacement Body by moebrowne
... drone from extreme fliers.
it doesn't have an in built battery holder as the intention is to use velcro to hold the battery.
thingiverse
free

GASLANDS: Freeway Flier Weapons Pack by Ellie_Valkyrie
... all of my 3d printable releases are printed before release to insure that they print well even on a simple, starter fdm printer.
thingiverse
free

Carrier by MakerBot
...carrier by makerbot thingiverse famous flier bonus -...
Rubberband
thingiverse
free
Rubberband Car
...his is a rubberband powered car. it tooke me 12 hours to print.
you have to print every part one time but the wheeles four times.
thingiverse
free
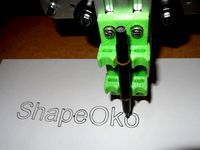
ShapeOko rubberband Penholder by nischi
...shapeoko rubberband penholder by nischi
thingiverse
shapeoko rubberband penholder
thingiverse
free

loomboard set for rubberband by john3d
...loomboard set for rubberband by john3d
thingiverse
loom board set for rubberband
thingiverse
free
A Rubberband Motor by shadowplayz34
...4
thingiverse
i made this to try and make a working rubberband motor for a plane with a length of 4 inches not including the tip
thingiverse
free

Rubberband mask holder by MaxPotter
...rubberband mask holder by maxpotter
thingiverse
simply knot both sides with 22cm rubberband.
thingiverse
free

Rubberband Gun Wheel Redux by mceisel
...rubberband gun wheel redux by mceisel
thingiverse
redux to avoid rubberband binding
thingiverse
free

Rubberband Run! by cmault123
...nd racer! they will design and build a racer, experiment with wheel and drum diameters to balence tork and rotations under power.
thingiverse
free
Rubberband push by squiqui
...sh. i tried to make a rubber gun with a trigger in one part. shooting worked fine with my first version.
still work in progress.
thingiverse
free

18650 3S Rubberband Holder by ramall
...8650 3s (12v), its a fast replacement just strap it under the rubberband. you need to glue the holder to the item as the picture.
thingiverse
free

Rubberband Gun by LloydNebulon
...tinuously pull the trigger to release the rubberbands. its a semi-automatic. it holds six rubberbands.
any questions please ask!
Glider
3d_ocean
$2

Glider
...sailplane
3d model of glider.object are grouped.rendering scene with texture,materials are included and detailed, with all files.
turbosquid
free

glider
... available on turbo squid, the world's leading provider of digital 3d models for visualization, films, television, and games.
3d_export
$50

glider aircraft
...
glider design the glider has a long wingspan of 1.5 m motor to increase thrust contains 3 fans frame material balsawood or fiber
3d_export
$7

Remote control glider
...remote control glider
3dexport
remote control glider
3d_export
$5

loveseat glider
...loveseat glider
3dexport
turbosquid
$8

Glider Robot
...ree 3d model glider robot for download as obj, fbx, and blend on turbosquid: 3d models for games, architecture, videos. (1505954)
3d_export
$5
white glider
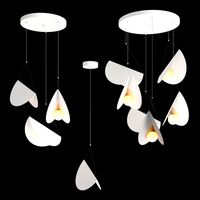
...9in<br>drop: 150cm / 59in<br>https://www.tudoandco.com/collections/all/products/white-glider-pendant-light-chandelier
turbosquid
$39

Jet Glider
... available on turbo squid, the world's leading provider of digital 3d models for visualization, films, television, and games.
turbosquid
$31

glider mesh.max
... available on turbo squid, the world's leading provider of digital 3d models for visualization, films, television, and games.
turbosquid
$20

Glider model
... available on turbo squid, the world's leading provider of digital 3d models for visualization, films, television, and games.