Thingiverse
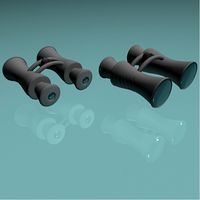
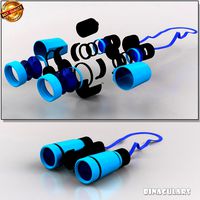
Pinoc Video/Photo Capture Binoculars by buildchimp
by Thingiverse
Last crawled date: 3 years ago
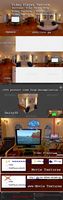
Pinoc Picture / Video Capture System for Binoculars / Telescopes
The full project is here: https://github.com/jdcasey/pinoc
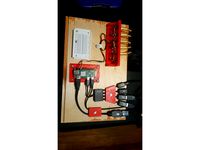
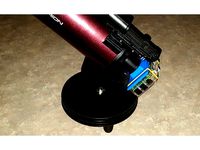
This application is designed to allow Raspberry Pi single-board computers to be mounted on binoculars (or, really anything like that...telescopes for instance). It uses the RPi GPIO interface to read input signals
from momentary buttons (wired to GPIO/BCM 22 & 27), and output status to two LEDs (GPIO/BCM 17 & 24).
Pinoc relies on the use of a Raspberry Pi camera module, which wires directly into the board via ribbon cable. It uses the picamera Python 2 module to interface with the hardware.
Associated Hardware
Raspberry Pis
The large binocular system I came up with uses a Raspberry Pi B+ (or probably, 2 / 3), mainly because I had one laying around. The small binocular system uses a Raspberry Pi Zero / Zero W, mainly because it works well with the compact size (also, they're cheap).
Battery Packs
The battery pack these models are design for is the PNY T2600. It's easy to use and is a convenient way to supply 5V input for the RPi (where other batteries of similar size / capacity are often 3.7V and require extra circuitry to boost the voltage).
Solar Filter Film
If you're gearing up for solar viewing, you'll need film to protect your optics (and your EYES!). You can get that on Amazon. It goes under a heading like Solar Filter Sheet for Telescopes, Binoculars, and Cameras, and usually costs around $20-$30.
Miscellaneous Non-Printed Hardware
Hot glue is very useful to keep wires out of trouble (avoid short circuits).
Ventilator tubing is useful to line the visor part of the eclipse goggles, where they make contact with your face.
Felt is useful to pad the nose piece for the eclipse goggles. You can usually find remnants at fabric stores.
M3 screws, or similar.
In the end, I had a bunch of old leftover PC case screws (from PCI slots, etc.) that worked well for putting the different printed parts together, where press-fit wasn't an option. They're about M3, and about 3-3.5mm long. The screws can be used to cut threads directly into the printed parts, which holds together well enough.
Tools
When working with mechanical / precise printed parts, I've found that acetone polishing doesn't really work well. Instead, I use sandpaper and a set of small files (round, half-round, and flat are useful shapes) to get rid of burrs and printer axis chatter that shows up sometimes. It's also useful to soften up the edges a bit, which is important when you consider rigid, sharp plastic edges can cut you...not a great feature for kids!
You may find that the RPi mounting holes are a little too small for M3 screws. To handle this, I used a hand reamer to open them up a little bit. For button plates, I used a push drill with a ~1mm small bit. I've found that hand tools are much easier to control when doing things like this, since they produce results a little bit at a time (and are easier to stop).
CAD Files
The CAD files for this project use two tools: OpenSCAD and FreeCAD. I've used OpenSCAD where the geometries are relatively simple, or where high precision is important. For example, I used OpenSCAD to achieve tolerances required for press-fit parts, while still allowing the model to be parameterized.
I used FreeCAD wherever I had to consume STL files that I didn't create for this project, or when eyeballing worked well enough and having an interactive way to position
parts was more attractive.
The following CAD files are provided:
eclipse-goggles.scad - These are not strictly required for using Pinoc, but can be useful if you're gearing up for an eclipse (my original use case for Pinoc)
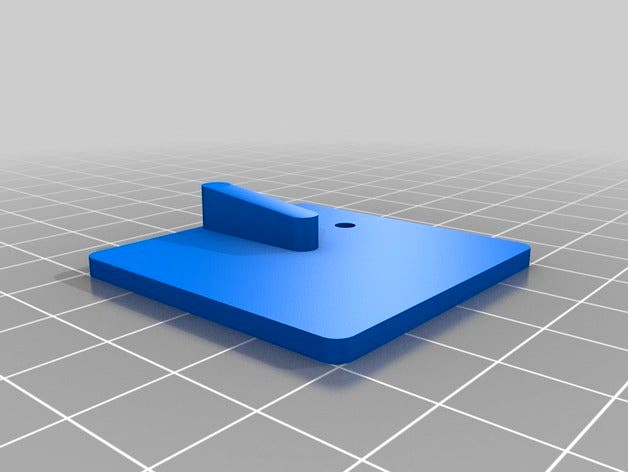
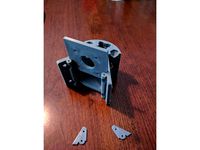
large-pinocs.scad - These are used to mount things to large binoculars, where the barrel has a taper and aren't a strict conical shape but rather a sort of doubled/overlapped cone shape. It includes a button panel you can drill out and use to mount LEDs / buttons for interacting with the RPi.
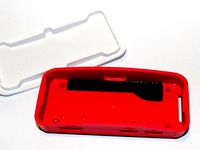
picam-case.scad - This contains the models for mounting the RPi camera board to the eyepiece of the binoculars. It also contains models of solar filter film caps used to fit on the ends of the binocular optics.
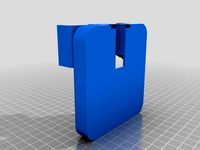
pinocs-piB.fcstd - This is a FreeCAD file that contains the plate and battery sleeve to mount a RPi B+ / 2B / 3, along with a battery pack, onto a large binocular cuff (from large-pinocs.scad).
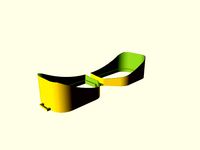
pinocs.FCStd - Another FreeCAD file, this contains the models necessary to mount a RPi Zero and battery pack to a small, folding binocular system.
In the OpenSCAD files above (*.scad), I've commented the individual modules and parameter sets to make them easier to adjust.
The full project is here: https://github.com/jdcasey/pinoc
This application is designed to allow Raspberry Pi single-board computers to be mounted on binoculars (or, really anything like that...telescopes for instance). It uses the RPi GPIO interface to read input signals
from momentary buttons (wired to GPIO/BCM 22 & 27), and output status to two LEDs (GPIO/BCM 17 & 24).
Pinoc relies on the use of a Raspberry Pi camera module, which wires directly into the board via ribbon cable. It uses the picamera Python 2 module to interface with the hardware.
Associated Hardware
Raspberry Pis
The large binocular system I came up with uses a Raspberry Pi B+ (or probably, 2 / 3), mainly because I had one laying around. The small binocular system uses a Raspberry Pi Zero / Zero W, mainly because it works well with the compact size (also, they're cheap).
Battery Packs
The battery pack these models are design for is the PNY T2600. It's easy to use and is a convenient way to supply 5V input for the RPi (where other batteries of similar size / capacity are often 3.7V and require extra circuitry to boost the voltage).
Solar Filter Film
If you're gearing up for solar viewing, you'll need film to protect your optics (and your EYES!). You can get that on Amazon. It goes under a heading like Solar Filter Sheet for Telescopes, Binoculars, and Cameras, and usually costs around $20-$30.
Miscellaneous Non-Printed Hardware
Hot glue is very useful to keep wires out of trouble (avoid short circuits).
Ventilator tubing is useful to line the visor part of the eclipse goggles, where they make contact with your face.
Felt is useful to pad the nose piece for the eclipse goggles. You can usually find remnants at fabric stores.
M3 screws, or similar.
In the end, I had a bunch of old leftover PC case screws (from PCI slots, etc.) that worked well for putting the different printed parts together, where press-fit wasn't an option. They're about M3, and about 3-3.5mm long. The screws can be used to cut threads directly into the printed parts, which holds together well enough.
Tools
When working with mechanical / precise printed parts, I've found that acetone polishing doesn't really work well. Instead, I use sandpaper and a set of small files (round, half-round, and flat are useful shapes) to get rid of burrs and printer axis chatter that shows up sometimes. It's also useful to soften up the edges a bit, which is important when you consider rigid, sharp plastic edges can cut you...not a great feature for kids!
You may find that the RPi mounting holes are a little too small for M3 screws. To handle this, I used a hand reamer to open them up a little bit. For button plates, I used a push drill with a ~1mm small bit. I've found that hand tools are much easier to control when doing things like this, since they produce results a little bit at a time (and are easier to stop).
CAD Files
The CAD files for this project use two tools: OpenSCAD and FreeCAD. I've used OpenSCAD where the geometries are relatively simple, or where high precision is important. For example, I used OpenSCAD to achieve tolerances required for press-fit parts, while still allowing the model to be parameterized.
I used FreeCAD wherever I had to consume STL files that I didn't create for this project, or when eyeballing worked well enough and having an interactive way to position
parts was more attractive.
The following CAD files are provided:
eclipse-goggles.scad - These are not strictly required for using Pinoc, but can be useful if you're gearing up for an eclipse (my original use case for Pinoc)
large-pinocs.scad - These are used to mount things to large binoculars, where the barrel has a taper and aren't a strict conical shape but rather a sort of doubled/overlapped cone shape. It includes a button panel you can drill out and use to mount LEDs / buttons for interacting with the RPi.
picam-case.scad - This contains the models for mounting the RPi camera board to the eyepiece of the binoculars. It also contains models of solar filter film caps used to fit on the ends of the binocular optics.
pinocs-piB.fcstd - This is a FreeCAD file that contains the plate and battery sleeve to mount a RPi B+ / 2B / 3, along with a battery pack, onto a large binocular cuff (from large-pinocs.scad).
pinocs.FCStd - Another FreeCAD file, this contains the models necessary to mount a RPi Zero and battery pack to a small, folding binocular system.
In the OpenSCAD files above (*.scad), I've commented the individual modules and parameter sets to make them easier to adjust.
Similar models
thingiverse
free

Raspberry Pi Mount (side or top) by Lesismore89
...our raspberry pi. (good for accessing gpios easier)
original design: https://www.youmagine.com/designs/raspberry-pi-side-mount.
thingiverse
free
Raspberry Pi Zero GPIO Pin Solder Jig
...ero gpio pin solder jig
thingiverse
i use this to hold the rpi zero on the bench when prototyping as well as soldering the pins.
thingiverse
free

30mm Fan Mount for Raspberry Pi 4 by therealbatman420
...e the fan to the mount and 2.5mm standoffs and screws to secure it to the rpi. this design is recessed to allow for gpio plugins.
thingiverse
free

Raspberry pi rack for raspberry pi B+ by mbh16
... pi rack for rpi b+ clusters or just for storage. rpi's need to mounted onto the rpi tray which is what i have also designed.
thingiverse
free
GPIO Cover (For official Pi Zero case) by DrJekyll
...ith a recess so it can be used if you fit a gpio header. space is tight so i had to use a soldering iron to melt a small lead in.
thingiverse
free
Telescope Pi by ewsandor
...a work in progress and my first published thing. if you find any flaws or have suggestions for improvements, please let me know.
thingiverse
free

Raspberry Pi and Screen Mount/Stand by GroupGets
...as well. (requires two bolts and wing nuts, as well as 4 small bolts to attach the screen to the mount).
featured on hackaday.io
thingiverse
free

Raspberry Pi Bumper Button Holder by techyg
...ton that i am using with this design:https://www.amazon.com/gp/product/b01dz8cowk/ref=oh_aui_detailpage_o01_s01?ie=utf8&psc=1
thingiverse
free

GPIO & Camera Hole Cover for Raspberry Pi 3 Ender 3 Case by MrNellow
...useful if you don't need any gpio pins or raspberry pi camera. if you need any gpio pin, you can shrink gpio cover by x axis.
thingiverse
free
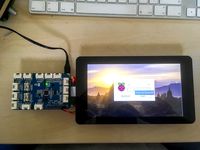
Frame to mount a Raspberry Pi and a 7 inch touch display side by side.
...rsion.
you can download my fusion 360 files (perhaps even some other formats) through the following link.
https://a360.co/2plsqum

Buildchimp
thingiverse
free
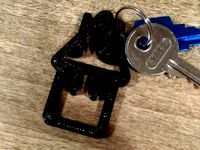
Mushroom House Keychain by buildchimp
...ickly as i left for a dog walk. i added a bit of mario personality to it because i think that look is kind of fun. nothing fancy.
thingiverse
free
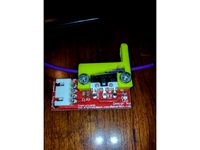
Runout Switch Bracket by buildchimp
...en from the limit switch itself. differences in hardware used on the boards may mean you have to modify the openscad file to fit!
thingiverse
free

Cup for Shaving Soap by buildchimp
... soap. the bottom is also a bit thin, but would be easy enough to remedy in openscad.
it does hold water though, i verified that.
thingiverse
free
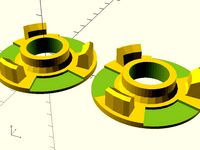
Parametric Filament Hub by buildchimp
...erything to fit, using a hatchbox spool and some skate bearings i happened to have. things fit pretty snugly, which is good imo.
thingiverse
free

Parameterized Medium Duty Hinge by buildchimp
...is parameterized (via openscad), so you should be able to adjust the hinge, fastener, and pin sizing to your heart's content.
thingiverse
free

Simple Soap Dishes by buildchimp
...es to fit nicely, and these are embedded in the modules themselves...so look for them there if you have problems resizing things.
thingiverse
free
Eclipse Goggles by buildchimp
...#39; sized goggles are built from the same openscad file, but you may have to render a different set of modules to recreate them.
thingiverse
free
Qi Charge Base for Motorola Nexus 6 by buildchimp
...-sided / foam tape. there will be a bit of clearance between the phone and the charger, so there's room to customize it some.
thingiverse
free

Qi Wireless Phone Charger (Prius V Compatible) by buildchimp
...everything aligned pretty well. i'm using mine with a motorola nexus 6 phone, which is a little narrower than the charge pad.
thingiverse
free
Kossel 2020 Frame with Detachable Motors by buildchimp
...oks like it's going to take me about 5 hours to print the frame base, then another hour or so for two caps and a motor mount.
Binoculars
3d_export
$5

binoculars
...binoculars
3dexport
binoculars
archibase_planet
free

Binoculars
...ars
archibase planet
binoculars glasses look-see
binoculars tasco n240314 - 3d model (*.gsm+*.3ds) for interior 3d visualization.
3d_ocean
$5
Binocular
...iniculars binocular glass magnify monocular naval optic optical spy viewer vision
nice model of binocular. thank you for looking.
3d_export
$30

of binoculars
...of binoculars
3dexport
low poly 3d model of binoculars no materials or textures included.
3d_export
$5

binocular
...binocular
3dexport
vintage, a little stained binocular. every file have a zip folder in with textures.
turbosquid
$5

binocular
...
turbosquid
royalty free 3d model binocular for download as on turbosquid: 3d models for games, architecture, videos. (1365965)
turbosquid
$10

Binoculars
...bosquid
royalty free 3d model binoculars for download as 3ds on turbosquid: 3d models for games, architecture, videos. (1395979)
turbosquid
$3

binocular
...urbosquid
royalty free 3d model binocular for download as ma on turbosquid: 3d models for games, architecture, videos. (1426026)
turbosquid
$30

Binoculars
...ty free 3d model binoculars for download as 3ds, max, and obj on turbosquid: 3d models for games, architecture, videos. (1306657)
turbosquid
$29
binoculars
...lty free 3d model binoculars for download as ma, obj, and fbx on turbosquid: 3d models for games, architecture, videos. (1168145)
Capture
turbosquid
$3

Captured Crystal Garden
...y free 3d model captured crystal garden for download as blend on turbosquid: 3d models for games, architecture, videos. (1343342)
3d_ocean
$89
Renault Captur 2014
...y, in real units of measurement, qualitatively and maximally close to the original. model formats: - *.max (3ds max 2008 scanl...
3d_export
$10
Mnb Capture 21 3D Model
...mnb capture 21 3d model
3dexport
mnb capture 21 3d model mnb 78412 3dexport
turbosquid
$1299
Motion Capture Anatomy Combo
...free 3d model motion capture anatomy combo for download as ma on turbosquid: 3d models for games, architecture, videos. (1452707)
turbosquid
$999

Motion Capture Male Anatomy
... free 3d model motion capture male anatomy for download as ma on turbosquid: 3d models for games, architecture, videos. (1452363)
turbosquid
$999
Motion Capture Female Anatomy
...ree 3d model motion capture female anatomy for download as ma on turbosquid: 3d models for games, architecture, videos. (1449677)
cg_studio
$99

Renault Captur concept3d model
...renault captur concept3d model cgstudio renault capture suv jeep concept france french car vehicle sport luxury...
3d_export
$99

Renault Captur 2014 3D Model
... 2016 crossover hatchback france french van minivan renault 2017 captur minisuv
renault captur 2014 3d model squir 66277 3dexport
cg_studio
$99

Renault Captur 20143d model
...o
.3ds .c4d .fbx .lwo .max .obj - renault captur 2014 3d model, royalty free license available, instant download after purchase.
turbosquid
$2

USB Capture Card SDI
... model usb capture card sdi for download as c4d, fbx, and obj on turbosquid: 3d models for games, architecture, videos. (1532257)
Photo
3ddd
$1

photo frame
...photo frame
3ddd
photo frame
3ddd
$1

Photo Frame
...photo frame
3ddd
рисунок
photo frame
3d_export
$5

photo frame
...or photos, pictures. you can put shes anywhere. in the kitchen, on the table in the bedroom, on the shelf in the hall, and so on.
archive3d
free
Photos 3D Model
...tos photo photos set
set photos n160216 - 3d model (*.gsm+*.3ds) for interior 3d visualization.
3d_export
$5
Photo 3D Model
...photo 3d model
3dexport
photo
photo 3d model max140588 62242 3dexport
3d_export
$14

photo printer
...g projects, and was originally modeled in 3ds max 2012 and rendered with v-ray. renders have no postprocessing. hope you like it!
turbosquid
$10

photo frame
...osquid
royalty free 3d model photo frame for download as obj on turbosquid: 3d models for games, architecture, videos. (1404417)
turbosquid
$9

Photo studio
...uid
royalty free 3d model photo studio for download as blend on turbosquid: 3d models for games, architecture, videos. (1498830)
turbosquid
$5

Photo Frame
...royalty free 3d model photo frame for download as fbx and upk on turbosquid: 3d models for games, architecture, videos. (1163533)
turbosquid
$2

Photo Frame
...royalty free 3d model photo frame for download as max and fbx on turbosquid: 3d models for games, architecture, videos. (1352878)
Video
3d_export
$10

video room
...video room
3dexport
video room
turbosquid
$8
video camera
...squid
royalty free 3d model video camera for download as c4d on turbosquid: 3d models for games, architecture, videos. (1212530)
turbosquid
$2

Video Card
...bosquid
royalty free 3d model video card for download as max on turbosquid: 3d models for games, architecture, videos. (1690247)
turbosquid
$10

Video Game
...ty free 3d model video game for download as max, obj, and fbx on turbosquid: 3d models for games, architecture, videos. (1365498)
3d_ocean
$5
Video Player Texture
...entalcenter.com/0/0/0/0/0/video/index.html video player texture … buttons: play, pause, stop video texture – “folder”...
3d_ocean
$5
VHS Video Cassette
...vhs video cassette
3docean
media vhs video
vhs video cassette. labels included.
turbosquid
$99

Video Camea
... available on turbo squid, the world's leading provider of digital 3d models for visualization, films, television, and games.
turbosquid
$15
Pillet-video
... available on turbo squid, the world's leading provider of digital 3d models for visualization, films, television, and games.
turbosquid
$10

video cam
... available on turbo squid, the world's leading provider of digital 3d models for visualization, films, television, and games.
turbosquid
$5

Video Card
... available on turbo squid, the world's leading provider of digital 3d models for visualization, films, television, and games.