Thingiverse
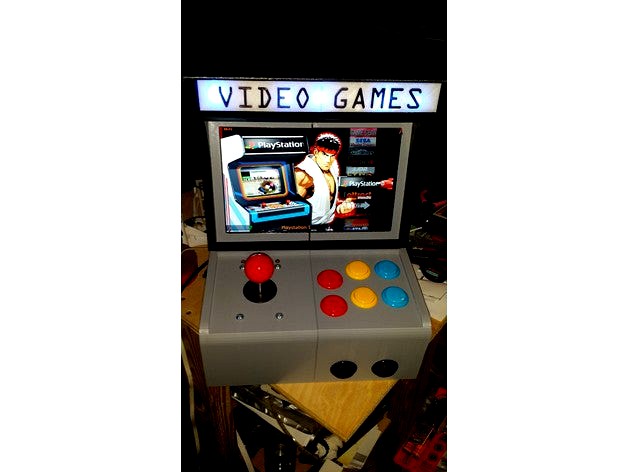
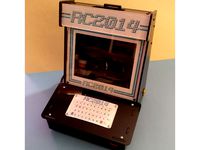
PiCade-HAT Based 10" HD Mini Bartop (Re-design) by Zurkeyon
by Thingiverse
Last crawled date: 3 years ago
https://www.youtube.com/watch?v=hTGTHzLN20g
*Now Battery Powered! 5+ Hour Battery life!
Use Boost converter:https://www.amazon.com/Yeeco-Converter-Regulator-Stabilizer-Adjustable/dp/B011EBSKK0/ref=sr_1_3?s=wireless&ie=UTF8&qid=1526397789&sr=1-3&keywords=5+to+12V+boost+converter&dpID=51xw5k2jkoL&preST=_SX300_QL70_&dpSrc=srch
Amazon - $7.76
And a RAVPOWER RP-PB41 Battery:https://www.amazon.com/Portable-Charger-RAVPower-Battery-26800mAh/dp/B012NIQG5E/ref=sr_1_1?ie=UTF8&qid=1526397747&sr=8-1&keywords=RP-PB41
More Battery Info:https://www.youtube.com/watch?v=aVNQKss2Bwk
Re-Designed 6- Button Layout!
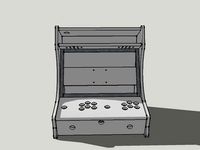
This is a ground-up Remix of malopezn's Arcade Cabinet.
Found Here: http://www.thingiverse.com/thing:768663
Big Thanks to malopezn for the initial Design, as it saved me a TON of time.
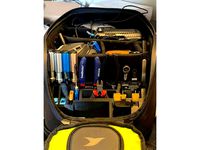
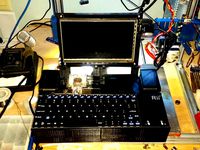
For this build I decided to use a Raspberry Pi3, High Def 10" Screen, 6 button Layout, NeoPixel lighting, an Arduino Nano, and a Pimoroni Picade parts kit.
This still prints on any 200x200x160+ Prusa or better, and for the most part does not need any support. The Light Frames do need support for the parts touching the Bed plate.
So Far I have added the Following to the design:
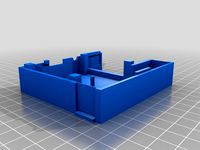
Refit Location for the Raspberry PI 2/3 (Removed B Model Mounting)
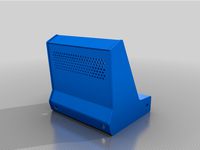
Added Mounting for the HDMI Screen Controller Board
Added Mounting Area for the HDMI Screen Control Board and IR LED
New ATX Molex Power Supply Cut Out
Added a Cut out to Wire LED Strip into the Cabinet Marquis
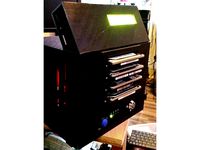
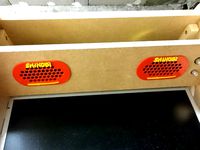
Inserts for the Cabinet Marquis (White or Clear, Painted Letters, Accented by LED Strips)
Added Glue-On Printable Decals (Pac-Style)http://www.thingiverse.com/thing:681851
Refitted to use a Pimoroni Picade KIT (Exact Fit)
Speaker mounting added (For Picade Kit Speaker - Exact Fit)
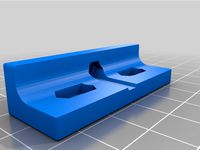
Slotted mounting where possible to make fitment more flexible
Holes added to Left Upright, to allow LCD driver board screws to be reached easily.
10" Screen frame added. allows you to make the 10" LCD into a more hearty assembly.
Switched to Magnetic Mounting for screen, for easy service and card swaps.
Possible Upgrades Still to Be Implemented:
Nanopixel Illuminated Buttons
Sound Reactive Buttons and Marquee
On/Off switch for Marquee
Portable Lithium Battery Power and Charging (Implemented, See Above!)
Coin Slot
Trackball or Ergo Trackpad
Water or Peltier Cooling for Overclocking the PI.
Illuminated Side Panel Decals
And So much room for more in this little guy :-)
Customize to your hearts desire, All Design Files Included!
Build Parts List:
x2 Rolls of PLA or ABS Plastic, Plus a little bit of CLEAR for the Marquee.
EDIT: Some items are missing now in Amazon, I will Re-link what I can. I have not bought and verified each of these, its just what I could find at the request of someone in the comments. Please do your homework on reviews and make sure you are buying from good sellers.
10" HDMI Screen 1280 x 800 (Non-Touch) 100$https://www.amazon.com/10-1-inch-Diagonal-Especially-Raspberry/dp/B01JJ60LZE
Molex 5 AMP Power Supply - $20.00 + Shipping (Comes with a SATA to USB Kit)https://www.amazon.com/110v-Power-Supply-Molex-5000mA/dp/B002TJNDU4/ref=sr_1_4?s=electronics&ie=UTF8&qid=1526395875&sr=1-4&keywords=molex+Power+Supply&dpID=51sSk3Xx17L&preST=_SX300_QL70_&dpSrc=srch
MUST be 2.5a/2.5a (5 Total Amps) or it will NOT be powerful enough to run the PI AND the screen! These are hard to source. One of the above unit should do the trick!
Neopixel Type Lights (Any WS2812 Addressable LED works)- ($16.00 - 20$)https://www.amazon.com/Addressable-Sealed-WS2812-30-LED-Strip/dp/B01GYDLJ24/ref=sr_1_10?s=electronics&ie=UTF8&qid=1526396135&sr=1-10&keywords=WS2812+LEd
ORhttps://www.amazon.com/TOOGOO-WS2812-8-5050-Driver-Development/dp/B0757C6X5C/ref=sr_1_13?s=electronics&ie=UTF8&qid=1526396135&sr=1-13&keywords=WS2812+LEd
An Arduino Nano v3 Type, or Clone, to Control them with: (3$ - 10$)
All Over the Webhttps://www.amazon.com/s/ref=nb_sb_noss_2?url=search-alias%3Delectronics&field-keywords=Arduino+Nano&rh=n%3A172282%2Ck%3AArduino+Nano
Raspberry PI3 ($35.00)
All over the Web
64gb Class10 Micro SD Card (20-25$)https://www.amazon.com/s/ref=nb_sb_noss_2?url=search-alias%3Delectronics&field-keywords=Micro+SD+64GB+Class+10&rh=n%3A172282%2Ck%3AMicro+SD+64GB+Class+10
Pimironi Picade HAT Kit - $54.00 Shipped.https://shop.pimoroni.com/products/picade-hat
Short HDMI Cable - $10 Average (I had one laying around)
Hardware Fasteners! Mix of 1/4" Nuts and Bolts should get you done. (Approx $15)
I used x2 hobby bolt packs from the hardware store.
Uses x4 Neodymium Magnets to hold the halves together. (Approx $10.00)
Magnets are 6.35mm x.6.35mm x 25.42mm N42 Strength. (37 lbs of Pull Force)
1/4" x 1/4" x 1"https://www.kjmagnetics.com/proddetail.asp?prod=B44X0
Glue. I use Loctite go2 Glue. As it Dries Perfectly Clear and is relatively strong. $5.00http://www.midlandhardware.com/164309.html?gclid=Cj0KEQiAw_DEBRChnYiQ_562gsEBEiQA4LcsssCUvJgLsK9W-IvjbX9tngGxEL68p-Ndi5wT9aKHTpMaAjlc8P8HAQ
Also helpful to have:
https://www.amazon.com/s/ref=nb_sb_noss?url=search-alias%3Delectronics&field-keywords=Prototype+Green+Board&rh=n%3A172282%2Ck%3APrototype+Green+Board
Circuit Project Plates
Andhttps://www.amazon.com/s/ref=nb_sb_noss?url=search-alias%3Daps&field-keywords=Jumper+Wire+bread+board&rh=i%3Aaps%2Ck%3AJumper+Wire+bread+board
Jumper Sets...
As they make the build WAY easier!
Approximate Kit Build Cost = $250-350 If you shop around, you can do even better...
This is a LONG build, and printing time is measured in days to weeks, depending on your machine... But its Worth it :-)
Basic Build Steps:
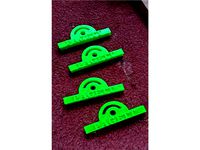
Print out all parts. Including x4 Magnet Blocks, and the Marquee in CLEAR or White.
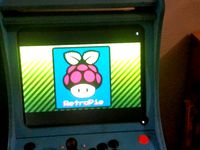
Wire Up the Kit and Test all Parts, Using the guides Below to get your image working and controls set up.
Start Cleaning up wire. Zip Ties and Twisting are what worked best for me.
Start bonding all parts together.
Mount all boards.
Mount Screen into Frame.(After Cleaning the Supports VERY Well.
(File the inside of the frame down if needed, if it presses in on the edges too hard it creates white distortions at the edge of the screen that will eventually cause damage)
Glue in Magnet Blocks and Neodymium Magnets, Clamping them to Set 100% before any test fitting of the top and Bottom. Or it WILL pull the blocks out...
Wire up the Arduino and Neopixel Lights. Wire their power up to the aaccessory 5v on the top of the picade, and the grounds to the right of that, also on the picade hat accessory area. (5-6 holes that are labeled for use on the face of the board itself)
Program the Neopixels and test them.
Do a full power up and down test once fully assembled. Check components for heat.
Close up the unit and make sure ALL controls work by re-setting up the emulationstation controls.
Set up a Mouse or Trackball for Missile command and the like...
(Guides on the Web for this)
Then its.... GAME ON!
Light Controller How To:
https://create.arduino.cc/projecthub/whimsy-makerspace/arduino-compatible-nano-neopixel-controller-6f0c4b
How to Wire Up The PiCade HAT:
https://learn.pimoroni.com/tutorial/sandyj/getting-started-with-picade-hat
Detailed Adding Roms and DIY Attract Mode Setup and Config.
--->https://www.youtube.com/watch?v=eYCPFO4lclA<---
Deans Attract Mode ShortCut Setup...
--->https://www.youtube.com/watch?v=WtRsMrUWgu4&t=582s<---
Retropie Dean's Attract mode, Plus Picade HAT setup.http://retromaniacus.com/gaming-front-ends/retropie/deans-gamestation-32gb/
MUST Signup through Facebook, All other signups are AUTO REJECTED!
Download Dean's Attract mode Image.
Flash to a 32GB+GB card using win32DiskImager
Edit the Config.txt file onthe boot partition before removing the key.
Change:
--> #framebuffer_width=1280
--> #framebuffer_height=720
to
framebuffer_width=1280
framebuffer_height=800
And Change:
dtparam=audio=on
to
--> #dtparam=audio=on
Then Save the File and remove the key.
Insert it into your PI3 and boot up.
Exit Attract mode with a keyboard using the escape key, as your buttons will not work yet.
At the Command Prompt type the following:
sudo dpkg-reconfigure keyboard-configuration
Setup a 101, English US, Defaults on the altgr and no compose key... (Make sure it all Says US and hit enter after that till its done and back at the command bar at the bottom. Basically)
Type: sudo reboot
Hit enter and wait for reboot
Exit Attract mode. (May have to force exit with CTRL-C at this point.)
(Plug in an Ethernet cable to the PI and to some internet for the next part)
At a command line type the following:
curl -sS https://get.pimoroni.com/picadehat | bash
Saying yes to the first option, so it runs (takes a little bit to run), and yes to the use speaker on the picade hat option.
You can say yes or no to the rom option. It has no bearing on sound or function.
Type: sudo reboot
Hit enter and wait for reboot.
You should hear sound.
Buttons and keys need to be setup.
ISSUE: MAME coin (Acting as keyboard Button "C" and is on the Front Left of the unit) is not working correctly in lr-mame2010 (Which is what Dean's Image uses)
Easy SOLUTION: Make changes to the picade hat default button profile to map C and S to NUM5 and NUM1
At a command line, type the following:
cd Pimoroni/picade/picade-hat/gamepads/
cp picadehat-default picadehat-backup
sudo vi picadehat-default
edit the following....
Under "Keys :{"
Change COIN to 5
and START to 1
:wq and exit
./configload picadehat-default
Say yes to Reboot.
Now go into Emulationstation, Retropie, and Retroarch.
Reset the Keys in the order of... Retroarch First, then Emulationstation, then Attract mode and Emulators.
If you go in that order you will have a less difficult time of it.
But no matter how you slice it, setting up Picade Buttons Sucks
_____
Master Tip: When setting up buttons and testing key configurations, the command line in retropie, allows you to simply type "showkey" and it will briefly start showing you the results of joystick moves and button presses.
It stops on its own after about a minute. Re-Run it as many times as you like to make sure all your connections are working.
_____
*Now Battery Powered! 5+ Hour Battery life!
Use Boost converter:https://www.amazon.com/Yeeco-Converter-Regulator-Stabilizer-Adjustable/dp/B011EBSKK0/ref=sr_1_3?s=wireless&ie=UTF8&qid=1526397789&sr=1-3&keywords=5+to+12V+boost+converter&dpID=51xw5k2jkoL&preST=_SX300_QL70_&dpSrc=srch
Amazon - $7.76
And a RAVPOWER RP-PB41 Battery:https://www.amazon.com/Portable-Charger-RAVPower-Battery-26800mAh/dp/B012NIQG5E/ref=sr_1_1?ie=UTF8&qid=1526397747&sr=8-1&keywords=RP-PB41
More Battery Info:https://www.youtube.com/watch?v=aVNQKss2Bwk
Re-Designed 6- Button Layout!
This is a ground-up Remix of malopezn's Arcade Cabinet.
Found Here: http://www.thingiverse.com/thing:768663
Big Thanks to malopezn for the initial Design, as it saved me a TON of time.
For this build I decided to use a Raspberry Pi3, High Def 10" Screen, 6 button Layout, NeoPixel lighting, an Arduino Nano, and a Pimoroni Picade parts kit.
This still prints on any 200x200x160+ Prusa or better, and for the most part does not need any support. The Light Frames do need support for the parts touching the Bed plate.
So Far I have added the Following to the design:
Refit Location for the Raspberry PI 2/3 (Removed B Model Mounting)
Added Mounting for the HDMI Screen Controller Board
Added Mounting Area for the HDMI Screen Control Board and IR LED
New ATX Molex Power Supply Cut Out
Added a Cut out to Wire LED Strip into the Cabinet Marquis
Inserts for the Cabinet Marquis (White or Clear, Painted Letters, Accented by LED Strips)
Added Glue-On Printable Decals (Pac-Style)http://www.thingiverse.com/thing:681851
Refitted to use a Pimoroni Picade KIT (Exact Fit)
Speaker mounting added (For Picade Kit Speaker - Exact Fit)
Slotted mounting where possible to make fitment more flexible
Holes added to Left Upright, to allow LCD driver board screws to be reached easily.
10" Screen frame added. allows you to make the 10" LCD into a more hearty assembly.
Switched to Magnetic Mounting for screen, for easy service and card swaps.
Possible Upgrades Still to Be Implemented:
Nanopixel Illuminated Buttons
Sound Reactive Buttons and Marquee
On/Off switch for Marquee
Portable Lithium Battery Power and Charging (Implemented, See Above!)
Coin Slot
Trackball or Ergo Trackpad
Water or Peltier Cooling for Overclocking the PI.
Illuminated Side Panel Decals
And So much room for more in this little guy :-)
Customize to your hearts desire, All Design Files Included!
Build Parts List:
x2 Rolls of PLA or ABS Plastic, Plus a little bit of CLEAR for the Marquee.
EDIT: Some items are missing now in Amazon, I will Re-link what I can. I have not bought and verified each of these, its just what I could find at the request of someone in the comments. Please do your homework on reviews and make sure you are buying from good sellers.
10" HDMI Screen 1280 x 800 (Non-Touch) 100$https://www.amazon.com/10-1-inch-Diagonal-Especially-Raspberry/dp/B01JJ60LZE
Molex 5 AMP Power Supply - $20.00 + Shipping (Comes with a SATA to USB Kit)https://www.amazon.com/110v-Power-Supply-Molex-5000mA/dp/B002TJNDU4/ref=sr_1_4?s=electronics&ie=UTF8&qid=1526395875&sr=1-4&keywords=molex+Power+Supply&dpID=51sSk3Xx17L&preST=_SX300_QL70_&dpSrc=srch
MUST be 2.5a/2.5a (5 Total Amps) or it will NOT be powerful enough to run the PI AND the screen! These are hard to source. One of the above unit should do the trick!
Neopixel Type Lights (Any WS2812 Addressable LED works)- ($16.00 - 20$)https://www.amazon.com/Addressable-Sealed-WS2812-30-LED-Strip/dp/B01GYDLJ24/ref=sr_1_10?s=electronics&ie=UTF8&qid=1526396135&sr=1-10&keywords=WS2812+LEd
ORhttps://www.amazon.com/TOOGOO-WS2812-8-5050-Driver-Development/dp/B0757C6X5C/ref=sr_1_13?s=electronics&ie=UTF8&qid=1526396135&sr=1-13&keywords=WS2812+LEd
An Arduino Nano v3 Type, or Clone, to Control them with: (3$ - 10$)
All Over the Webhttps://www.amazon.com/s/ref=nb_sb_noss_2?url=search-alias%3Delectronics&field-keywords=Arduino+Nano&rh=n%3A172282%2Ck%3AArduino+Nano
Raspberry PI3 ($35.00)
All over the Web
64gb Class10 Micro SD Card (20-25$)https://www.amazon.com/s/ref=nb_sb_noss_2?url=search-alias%3Delectronics&field-keywords=Micro+SD+64GB+Class+10&rh=n%3A172282%2Ck%3AMicro+SD+64GB+Class+10
Pimironi Picade HAT Kit - $54.00 Shipped.https://shop.pimoroni.com/products/picade-hat
Short HDMI Cable - $10 Average (I had one laying around)
Hardware Fasteners! Mix of 1/4" Nuts and Bolts should get you done. (Approx $15)
I used x2 hobby bolt packs from the hardware store.
Uses x4 Neodymium Magnets to hold the halves together. (Approx $10.00)
Magnets are 6.35mm x.6.35mm x 25.42mm N42 Strength. (37 lbs of Pull Force)
1/4" x 1/4" x 1"https://www.kjmagnetics.com/proddetail.asp?prod=B44X0
Glue. I use Loctite go2 Glue. As it Dries Perfectly Clear and is relatively strong. $5.00http://www.midlandhardware.com/164309.html?gclid=Cj0KEQiAw_DEBRChnYiQ_562gsEBEiQA4LcsssCUvJgLsK9W-IvjbX9tngGxEL68p-Ndi5wT9aKHTpMaAjlc8P8HAQ
Also helpful to have:
https://www.amazon.com/s/ref=nb_sb_noss?url=search-alias%3Delectronics&field-keywords=Prototype+Green+Board&rh=n%3A172282%2Ck%3APrototype+Green+Board
Circuit Project Plates
Andhttps://www.amazon.com/s/ref=nb_sb_noss?url=search-alias%3Daps&field-keywords=Jumper+Wire+bread+board&rh=i%3Aaps%2Ck%3AJumper+Wire+bread+board
Jumper Sets...
As they make the build WAY easier!
Approximate Kit Build Cost = $250-350 If you shop around, you can do even better...
This is a LONG build, and printing time is measured in days to weeks, depending on your machine... But its Worth it :-)
Basic Build Steps:
Print out all parts. Including x4 Magnet Blocks, and the Marquee in CLEAR or White.
Wire Up the Kit and Test all Parts, Using the guides Below to get your image working and controls set up.
Start Cleaning up wire. Zip Ties and Twisting are what worked best for me.
Start bonding all parts together.
Mount all boards.
Mount Screen into Frame.(After Cleaning the Supports VERY Well.
(File the inside of the frame down if needed, if it presses in on the edges too hard it creates white distortions at the edge of the screen that will eventually cause damage)
Glue in Magnet Blocks and Neodymium Magnets, Clamping them to Set 100% before any test fitting of the top and Bottom. Or it WILL pull the blocks out...
Wire up the Arduino and Neopixel Lights. Wire their power up to the aaccessory 5v on the top of the picade, and the grounds to the right of that, also on the picade hat accessory area. (5-6 holes that are labeled for use on the face of the board itself)
Program the Neopixels and test them.
Do a full power up and down test once fully assembled. Check components for heat.
Close up the unit and make sure ALL controls work by re-setting up the emulationstation controls.
Set up a Mouse or Trackball for Missile command and the like...
(Guides on the Web for this)
Then its.... GAME ON!
Light Controller How To:
https://create.arduino.cc/projecthub/whimsy-makerspace/arduino-compatible-nano-neopixel-controller-6f0c4b
How to Wire Up The PiCade HAT:
https://learn.pimoroni.com/tutorial/sandyj/getting-started-with-picade-hat
Detailed Adding Roms and DIY Attract Mode Setup and Config.
--->https://www.youtube.com/watch?v=eYCPFO4lclA<---
Deans Attract Mode ShortCut Setup...
--->https://www.youtube.com/watch?v=WtRsMrUWgu4&t=582s<---
Retropie Dean's Attract mode, Plus Picade HAT setup.http://retromaniacus.com/gaming-front-ends/retropie/deans-gamestation-32gb/
MUST Signup through Facebook, All other signups are AUTO REJECTED!
Download Dean's Attract mode Image.
Flash to a 32GB+GB card using win32DiskImager
Edit the Config.txt file onthe boot partition before removing the key.
Change:
--> #framebuffer_width=1280
--> #framebuffer_height=720
to
framebuffer_width=1280
framebuffer_height=800
And Change:
dtparam=audio=on
to
--> #dtparam=audio=on
Then Save the File and remove the key.
Insert it into your PI3 and boot up.
Exit Attract mode with a keyboard using the escape key, as your buttons will not work yet.
At the Command Prompt type the following:
sudo dpkg-reconfigure keyboard-configuration
Setup a 101, English US, Defaults on the altgr and no compose key... (Make sure it all Says US and hit enter after that till its done and back at the command bar at the bottom. Basically)
Type: sudo reboot
Hit enter and wait for reboot
Exit Attract mode. (May have to force exit with CTRL-C at this point.)
(Plug in an Ethernet cable to the PI and to some internet for the next part)
At a command line type the following:
curl -sS https://get.pimoroni.com/picadehat | bash
Saying yes to the first option, so it runs (takes a little bit to run), and yes to the use speaker on the picade hat option.
You can say yes or no to the rom option. It has no bearing on sound or function.
Type: sudo reboot
Hit enter and wait for reboot.
You should hear sound.
Buttons and keys need to be setup.
ISSUE: MAME coin (Acting as keyboard Button "C" and is on the Front Left of the unit) is not working correctly in lr-mame2010 (Which is what Dean's Image uses)
Easy SOLUTION: Make changes to the picade hat default button profile to map C and S to NUM5 and NUM1
At a command line, type the following:
cd Pimoroni/picade/picade-hat/gamepads/
cp picadehat-default picadehat-backup
sudo vi picadehat-default
edit the following....
Under "Keys :{"
Change COIN to 5
and START to 1
:wq and exit
./configload picadehat-default
Say yes to Reboot.
Now go into Emulationstation, Retropie, and Retroarch.
Reset the Keys in the order of... Retroarch First, then Emulationstation, then Attract mode and Emulators.
If you go in that order you will have a less difficult time of it.
But no matter how you slice it, setting up Picade Buttons Sucks
_____
Master Tip: When setting up buttons and testing key configurations, the command line in retropie, allows you to simply type "showkey" and it will briefly start showing you the results of joystick moves and button presses.
It stops on its own after about a minute. Re-Run it as many times as you like to make sure all your connections are working.
_____
Similar models
grabcad
free

Adafruit NeoPixel Stick for Arduino- 8 x WS2812 5050 Addressable RGB LED
...t-neopixel-arduino-integrated-drivers/dp/b00iedh26k/ref=sr_1_1?dchild=1&keywords=neopixel+stick&qid=1611128895&sr=8-1
3d_sky
free

Shower set "Blood Bath"
...bm7kq6/ref=pd_sim_hg_3
in archive more textures for curtains and the texture of the stickers.(bonus)
tub not included.
3ddd
free

Набор для душа "Blood Bath"
...ef=pd_sim_hg_3
в архиве дополнительные текстуры для шторы и текстура наклеек.(папка bonus)
ванна в комплект не входит.
thingiverse
free
Infinity Mirror by mikeybme
...ow+film&qid=1620461637&sr=8-15
filament - https://www.amazon.com/dp/b00zauqzta?psc=1&ref=ppx_yo2_dt_b_product_details
thingiverse
free

3D Printable 3D Printer by TheJadeRabbit
...r_1_4?ie=utf8&qid=1530916900&sr=8-4&keywords=3d+printer+hotend
code(marlin): https://github.com/marlinfirmware/marlin
thingiverse
free

Light Up Emergency Power Button/Switch by Coopster
...s anywhere in series with your circuit and be sure to test continuity before you clip if closed.
that's it, you're done!
thingiverse
free
Illuminated Football-Stand by froetz
...swq/ref=sr_1_10?__mk_de_de=%c3%85m%c3%85%c5%bd%c3%95%c3%91&dchild=1&keywords=wemos+mini+d1&qid=1614665976&sr=8-10
thingiverse
free
Speaker box by Ratakis
...-4ft/dp/b01kstsv76/ref=sr_1_1_sspa?s=electronics&ie=utf8&qid=1521518432&sr=1-1-spons&keywords=aux+cable&psc=1
thingiverse
free
Torvol tool organizer by Collinhasasthma
...ver-electronic-short-circuit-available/dp/b088tvvnvm/ref=sr_1_4?dchild=1&keywords=smoke+stopper&qid=1623510410&sr=8-4
grabcad
free

Anjunabeats LED Sign
...el-modular-breakout/)
for the code, i just ran one of the default neopixel example sketches. fast led also has some good ones.
Zurkeyon
thingiverse
free
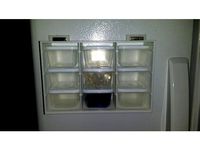
Magnetic Container Rack by Zurkeyon
...gth.
1/4" x 1/4" x 1"https://www.kjmagnetics.com/proddetail.asp?prod=b44x0
can hold about 4-5 lbs. (approx)
enjoy!
thingiverse
free
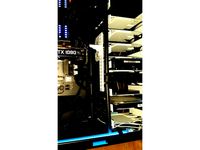
Graphics Card Brace by Zurkeyon
...odify to your liking.
i have included the sketchup files for tweaking and adjustments.
make whatever use of it you can.
enjoy!
thingiverse
free

PC504XS Camera Mount (Supercircuits) by Zurkeyon
...4.6 as the enclosure walls are very thin.
but i'm sure someone will be a bit more perfectionist and correct this :-)
enjoy!
thingiverse
free

140MM Dia Blower Fan Wheel by Zurkeyon
... the apparatus to perform the balancing.
http://whiteglovefans.com/blog/2013/9/22/static-balancing-blades
balancing info (manual)
thingiverse
free

Odroid-VU7 and VU7+ Screen Frame by Zurkeyon
...ught i would include.
enjoy!
(current version should hide the screen edges better than in the pics, if not its easy to modify.)
thingiverse
free
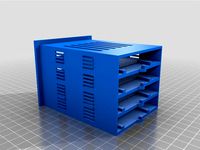
Laptop HDD Hot Swap Cage by Zurkeyon
...of screw holes on the end of the drive for mounting a handle to.
glue them together for unlimited sata storage upgrades!
enjoy!
thingiverse
free
SoC ExoSkeleton DevTop by Zurkeyon
...most a necessity. with enough flexibility to make it truly useful!
a place for everything, everything in its place!
:-p
enjoy!
z
thingiverse
free
NanoDrives Time Machine by Zurkeyon
...g your customers 3000$! :-d
enjoy!
-z-
full instructable available also.http://www.instructables.com/id/nanodrives-time-machine
thingiverse
free

PiCade Light Frames - RetroPi - Pac Man by ChrisMayhew
...some alternative light frames for the picade designed by zurkeyon retropi text with pacman logo. for the transparent part,...
thingiverse
free

SoC ExoSkeleton DevTop 2.0 by Zurkeyon
...ost a necessity. with enough flexibility to make it truly useful!
a place for everything, everything in its place!
:-p
enjoy!
-z-
Picade
thingiverse
free
Picade by jaimecuevas290
...picade by jaimecuevas290
thingiverse
this a 3d print for rassberry pi
thingiverse
free

picade 1 by jaimecuevas290
...picade 1 by jaimecuevas290
thingiverse
for rasberry pi
thingiverse
free

picade 2 by jaimecuevas290
...picade 2 by jaimecuevas290
thingiverse
for rasabbery pi
thingiverse
free

picade 3 by jaimecuevas290
...picade 3 by jaimecuevas290
thingiverse
for raspberry pi
thingiverse
free

picade 4 by jaimecuevas290
...picade 4 by jaimecuevas290
thingiverse
for raspberry pi
thingiverse
free

Picade Backplate
...ll designed, but because i don't like a few methods they used.
read more here: http://wiki.port23.de/wiki/picade_improvements
thingiverse
free
Improved Picade bracket by Authenticaco
...xagonal holes for holding the nuts in place when fastening the parts together. use a machine screw to pull the nuts in the holes.
thingiverse
free
PiCade Light Frames - RetroPi - Pac Man by ChrisMayhew
...yon. retropi text with pacman logo.
for the transparent part, i used clear petg and did a filament swap for the text back to pla.
thingiverse
free
RCade - Laser cut files for RC2014 modifications to Pimoroni Picade by semachthemonkey
... of the rc2014 see https://rc2014.co.uk/
the picade cabinet can be bought from pimoroni https://shop.pimoroni.com/products/picade
thingiverse
free

Remix for PiCade-KickerPanel by mrpottermw
... mix it up a little.
i used the bracket from http://www.thingiverse.com/thing:922740 and fused it with the existing kicker panel.
Bartop
thingiverse
free
Bartop Arcade by mattsplat
...bartop arcade by mattsplat
thingiverse
mini bartop arcade made of mdf using raspberry pi.
thingiverse
free
BARTOP 2 players by wayzoken
...bartop 2 players by wayzoken
thingiverse
bartop 2 players
thingiverse
free
Bartop Arcades by Marksworld
...bartop arcades by marksworld
thingiverse
2 arcade bartop machines. basic shape designed ready for you do build or edit.
blendswap
free

Galaxian Bartop
...-0 cc0 cco creative commons libre open source 3d art
my new galaxian bartop design to become real with wood and stickers.
thingiverse
free
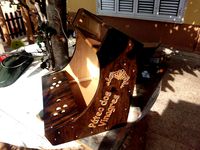
Shinobi handle and speaker enclosure for bartop by ian57
...shinobi handle and speaker enclosure for bartop by ian57
thingiverse
made these models for my bartop shinobi
blendswap
free
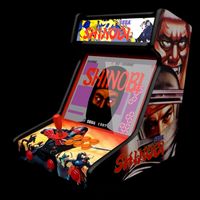
Shinobi Bartop
...re open source 3d art
here is my single bartop player modelisation on the theme shinobi. it helps me to build the real one ;)
thingiverse
free

Bartop Arcade toggle switch slot by eternityoffate
...e switch slot by eternityoffate
thingiverse
this is to fit a switch button the slot of a gameroomsolutions bartop arcade cabinet
thingiverse
free

Piedino Bartop by MiguelBi
...ltrini da 20mm di diametro. h20mm.
base 43mm, perfetti per feltrini da 24mm di diametro. h20mm.
usare viti m5 in entrambi i casi.
thingiverse
free
Arcade BarTop by LisBonMeKat
...
videohttps://youtu.be/ruxvy5cawcw
added a v2.2 dxf file with 6 buttons and pinball, also readdy for a 120mm fan.. good games..
thingiverse
free
Arcade Bartop Monitor Backplate Adjustable Mount by dpagett
...or in your bartop or arcade machine if you need to adjust the angle of the display to sit flush or parallel with the bezel glass.
Hat
archibase_planet
free

Hat
...at
archibase planet
hat stovepipe hat tall hat plug-hat
hat n281213 - 3d model (*.gsm+*.3ds+*.max) for interior 3d visualization.
archibase_planet
free
Hats
...hats
archibase planet
hat hats top hat bowler
hats n080411 - 3d model (*.gsm+*.3ds) for interior 3d visualization.
3d_ocean
$1

Hat
...hat
3docean
3d hat hat . 3d model
hi
archibase_planet
free
Hat
...hat
archibase planet
hat straw hat
hat n240308 - 3d model (*.gsm+*.3ds) for interior 3d visualization.
3d_export
$5

hat
...hat
3dexport
nice hat
archibase_planet
free

Hat
...hat
archibase planet
hat overcoat clothing
hat 2 - 3d model for interior 3d visualization.
archibase_planet
free

Hat
...hat
archibase planet
hat
hat n171107 - 3d model (*.gsm+*.3ds) for interior 3d visualization.
3d_export
$5

Hat
...hat
3dexport
black hat with a red bow
archibase_planet
free

Hat
...hat
archibase planet
hat clothing
hat n161107 - 3d model (*.gsm+*.3ds) for interior 3d visualization.
archibase_planet
free

Hat
...hat
archibase planet
hat broad-brim
hat s n210612 - 3d model (*.3ds) for 3d visualization.
Hd
3d_export
$7

Bread hd
...bread hd
3dexport
hd for you
3ddd
$1
Cintiq24 HD
...cintiq24 hd
3ddd
cintiq24 hd
design_connected
$16
Nova HD
...nova hd
designconnected
instashade nova hd computer generated 3d model.
turbosquid
$20

Neptune HD (Suport Full HD Render)
... available on turbo squid, the world's leading provider of digital 3d models for visualization, films, television, and games.
turbosquid
$4
HD skull
...l
turbosquid
royalty free 3d model hd skull for download as on turbosquid: 3d models for games, architecture, videos. (1207058)
3d_ocean
$2
Grass HD
... the time! grass hd with 4k textures want to make grass field? of course you can! tileable support! have any problem? contact me!
3d_export
$13

angel hd
...angel hd
3dexport
beautifuul!
turbosquid
$40

EAGLE HD
...urbosquid
royalty free 3d model eagle hd for download as obj on turbosquid: 3d models for games, architecture, videos. (1172720)
turbosquid
$2
HD Tree
...id
royalty free 3d model hd tree for download as fbx and obj on turbosquid: 3d models for games, architecture, videos. (1670118)
3ddd
$1

Microsoft / Zune HD
...microsoft / zune hd
3ddd
microsoft , плеер
zune hd, fully textured.
Mini
turbosquid
$10

Mini Mini Luceplan
...
royalty free 3d model mini mini luceplan for download as max on turbosquid: 3d models for games, architecture, videos. (1227359)
3d_ocean
$39

Mini Cooper
...mini cooper
3docean
cabrioler cooper mini
mini cooper cabrioler
3d_export
$30

Mini lathe
...mini lathe
3dexport
mini lathe
3d_export
$5

mini mouse
...mini mouse
3dexport
mini mouse
3d_export
$5

mini house
...mini house
3dexport
mini house
3d_export
free

Mini Mecha
...mini mecha
3dexport
concept of mini mecha
3d_ocean
$20

Mini Gun
...mini gun
3docean
gatling gun gun machine gun mini gun weapon
model of a mini gatling gun.
3ddd
free

Herve mini
... кофейный , herve
http://www.mobiliavenanti.it/ru/products/hervè-mini
3d_export
$5

mini wall
...mini wall
3dexport
mini wall for living room
3d_export
$5

mini bank
...mini bank
3dexport
mini bank 3d model
Re
3ddd
$1
RES 10_8
...res 10_8
3ddd
res , дверь
производитель res модель 10.8
turbosquid
$7

Re
... available on turbo squid, the world's leading provider of digital 3d models for visualization, films, television, and games.
design_connected
$18
Re-trouvé
...re-trouvé
designconnected
emu group re-trouvé chairs computer generated 3d model. designed by patricia urquiola.
design_connected
$16

Re-turned
...
photo-realistic 3d models of the re-turned table accessories from beller for 3d architectural and interior design presentations.
3ddd
free
дверь RES WAVE
... дверь , карим рашид
производитель res италия модель wave
turbosquid
$1

Table Re
...ree 3d model table re for download as ma, obj, fbx, and blend on turbosquid: 3d models for games, architecture, videos. (1233574)
3ddd
$1

Do-lo-Res
... угловой
диван фабрика do-lo-res компонуется из отдельных боксов, разнообразных размеров и тканей.
design_connected
$16
Re-trouvé Tables
...re-trouvé tables
designconnected
emu group re-trouvé tables computer generated 3d model. designed by urquiola, patricia.
design_connected
$11

Re-flect pendant
...re-flect pendant
designconnected
steng licht re-flect pendant computer generated 3d model. designed by e27 berlin.
design_connected
$11
Re-flect wall
...re-flect wall
designconnected
steng licht re-flect wall computer generated 3d model. designed by e27 berlin.
10
turbosquid
$25

10
... available on turbo squid, the world's leading provider of digital 3d models for visualization, films, television, and games.
turbosquid
$10

a-10
... available on turbo squid, the world's leading provider of digital 3d models for visualization, films, television, and games.
3ddd
$1

EX 10
...ex 10
3ddd
samsung , фотоаппарат
ex 10
3ddd
$1

Bed 10
...bed 10
3ddd
постельное белье
bed 10
evermotion
$25

Scene 10 Archinteriors vol. 10
...dering design interior
take a look at textured and shadered visualization scene ready to be rendered.. evermotion 3d models shop.
3ddd
$1

Curtains 10
...curtains 10
3ddd
curtains 10
3ds max 2011,fbx + textures
polys: 100355
3ddd
free

PLANTS 10
...plants 10
3ddd
цветок , горшок
plants 10,, with 3 different color planter boxes
design_connected
$29

Nuvola 10
...nuvola 10
designconnected
gervasoni nuvola 10 computer generated 3d model. designed by navone, paola.
design_connected
$22

Kilt 10
...kilt 10
designconnected
zanotta kilt 10 computer generated 3d model. designed by progetti, emaf.
design_connected
$11

Domino 10
...domino 10
designconnected
zanotta domino 10 computer generated 3d model. designed by progetti, emaf.
Based
archibase_planet
free
Base
...base
archibase planet
base column column base
base 1 - 3d model (*.gsm+*.3ds) for interior 3d visualization.
archibase_planet
free
Base
...base
archibase planet
base column base column
base 5 - 3d model (*.gsm+*.3ds) for interior 3d visualization.
archibase_planet
free
Base
...base
archibase planet
base column column base
base 7 - 3d model (*.gsm+*.3ds) for interior 3d visualization.
archibase_planet
free
Base
...base
archibase planet
base column column base
base 2 - 3d model (*.gsm+*.3ds) for interior 3d visualization.
archibase_planet
free

Base
...base
archibase planet
base column column base
base 3 - 3d model (*.gsm+*.3ds) for interior 3d visualization.
archibase_planet
free
Base
...base
archibase planet
base column column base
base 4 - 3d model (*.gsm+*.3ds) for interior 3d visualization.
archibase_planet
free
Base
...base
archibase planet
base column base column
base 6 - 3d model (*.gsm+*.3ds) for interior 3d visualization.
archibase_planet
free
Base
...base
archibase planet
foundation base
column base ionic - 3d model (*.gsm+*.3ds) for interior 3d visualization.
archibase_planet
free
Base
...base
archibase planet
foundation base
column base tuscan - 3d model (*.gsm+*.3ds) for interior 3d visualization.
design_connected
$18
Base
...base
designconnected
tom dixon base computer generated 3d model. designed by dixon, tom.
Design
3ddd
$1
LINE DESIGN (Doors Design)
...line design (doors design)
3ddd
дверь
modern doors design - line design concept
3ddd
$1
VER DESIGN
...ver design
3ddd
ver design
кресло ver design
3ddd
$1
VER DESIGN
...ver design
3ddd
ver design
диван ver design
3ddd
$1
Bagno design
...bagno design
3ddd
bagno design , унитаз
санитария bagno design
3ddd
free
VER DESIGN
...ver design
3ddd
ver design , стеллаж
полка ver design
3ddd
$1
VER DESIGN
...ver design , лежак , шезлонг
шезлонг ver design
3d_export
free

designer
..., trees and much more. the model has 3 types of parts: - 4 cells - 6 cells - 8 cells the *.max file contains 5 colored materials.
3d_export
$19

level design
...level design
3dexport
you can use this design (level design) in your own game.
3d_export
$7
Crusher design
...crusher design
3dexport
crusher design
3d_export
$4
interior design
...interior design
3dexport
interior design