Thingiverse

PiBoy DMG Bumpers+ (REAL Shoulder Buttons) by Reavo_End
by Thingiverse
Last crawled date: 3 years, 1 month ago
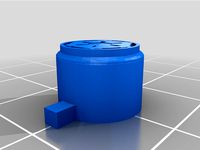
Bumpers+ is a set of full-fledged shoulder buttons for ExperimentalPi's popular Raspberry Pi-powered DIY handheld, the PiBoy DMG.
Mission: Replace the PiBoy's original L and R buttons—which are discrete but painful—with real bumpers that feel clicky, responsive, and comfortable to use. You can decide for yourself if that mission was accomplished -- check it out! After three days of brainstorming and designing, then a cycle of prototyping, tweaking, and testing, a satisfactory bumper button was finally created.
Special thanks to ExperimentalPi for providing the original button STL. Without it, the design process would easily have taken many more days!
Bumpers+ are easy to install with minimal post-processing:
SETUP
Print the parts (in the proper orientation) and ensure all parts' surfaces are flat and smooth
Unscrew and remove the PiBoy DMG back shell
Unscrew and remove the stock bumper buttons, and keep the screws handy. You'll need them
INSTALL
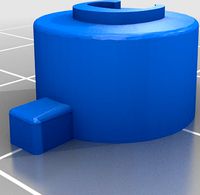
Take the back shell and grab a bumper. From the outside of the shell, properly orient the bumper over its corresponding bumper gap in the shell. Note: The bumper has two ends, a narrower end and a wider end. The narrower end should always be the one closest to the left or right edge of the back shell.
With the bumper's backside facing in, shift the back of the bumper into its bumper gap by a few millimeters. The bumper's back slot should align with the upper edge of the bumper gap.
Apply firm upward force on the bumper piece to snap it into place. It should hang somewhat loosely from the shell's edge
Repeat INSTALL steps 1 - 3 for the other bumper
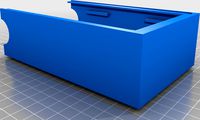
Install the printed security bracket into the back shell, just behind the two bumpers. The screw holes should line up with the OG bumpers' screw posts, with the bracket's two rectangular "lock tabs" protruding from the top edge.
Secure both ends of the security bracket with the two bracket screws from SETUP step 3.
Reassemble the back shell as normal~
YOU GET: BUMPERS+ !!
Mission: Replace the PiBoy's original L and R buttons—which are discrete but painful—with real bumpers that feel clicky, responsive, and comfortable to use. You can decide for yourself if that mission was accomplished -- check it out! After three days of brainstorming and designing, then a cycle of prototyping, tweaking, and testing, a satisfactory bumper button was finally created.
Special thanks to ExperimentalPi for providing the original button STL. Without it, the design process would easily have taken many more days!
Bumpers+ are easy to install with minimal post-processing:
SETUP
Print the parts (in the proper orientation) and ensure all parts' surfaces are flat and smooth
Unscrew and remove the PiBoy DMG back shell
Unscrew and remove the stock bumper buttons, and keep the screws handy. You'll need them
INSTALL
Take the back shell and grab a bumper. From the outside of the shell, properly orient the bumper over its corresponding bumper gap in the shell. Note: The bumper has two ends, a narrower end and a wider end. The narrower end should always be the one closest to the left or right edge of the back shell.
With the bumper's backside facing in, shift the back of the bumper into its bumper gap by a few millimeters. The bumper's back slot should align with the upper edge of the bumper gap.
Apply firm upward force on the bumper piece to snap it into place. It should hang somewhat loosely from the shell's edge
Repeat INSTALL steps 1 - 3 for the other bumper
Install the printed security bracket into the back shell, just behind the two bumpers. The screw holes should line up with the OG bumpers' screw posts, with the bracket's two rectangular "lock tabs" protruding from the top edge.
Secure both ends of the security bracket with the two bracket screws from SETUP step 3.
Reassemble the back shell as normal~
YOU GET: BUMPERS+ !!
Similar models
thingiverse
free

PiBoy DMG Bumpers+ (Real shoulder buttons - REDIRECT) by Reavo_End
...showing up in searches or on my profile, so i created this entry to redirect to it.
please continue
here
to the real design page!
thingiverse
free
PiBoy Dmg Buttons & Trigger by rkwallace
...verse
i edited the stl for the piboy dmg buttons and triggers to add letters. i also extended the triggers to include a button.
thingiverse
free

DMG103 DMG NDS Lite Screen Bracket
...ace by keeper tab and friction.
if screen is loose, add some glue or tape.
if screen is tight, file the corners and inside edges.
thingiverse
free

Game Boy DMG-01 Button Well and Screw Bracket by The_BeardBot
... position and orientation (consult the photos). once the glue hardens, unscrew it, separate the case shells, and apply more glue.
thingiverse
free

PiBoy DMG Shoulder Buttons Extended by AbandonedPlayer
...uttons will be triggered by the weight of the piboy.
v1 (pictured above)= 0.2 inch (5.08mm) buttons
v2= 0.1 inch (2.54mm) buttons
thingiverse
free
Piboy dmg protective cover by Diablo944
...piboy dmg protective cover by diablo944
thingiverse
protective cover for experimental pi piboy dmg.
thingiverse
free

PiBoy Advance by Treespirit
...rry pi gameboy by adafruit.
added:
speaker
amplifier
volume control
mute switch
two shoulder buttons
two extra buttons
esc button
thingiverse
free

Long Doorstop by wompa
...he wall. the bumper sits pretty securely at the end of the body with or without adhesive.
attached the f3d if you want to modify.
thingiverse
free

Atari 2600 Paddle Button Bracket by justindarc
...ell and wrap around the base of the button (see photo) to provide the necessary support and restore functionality as good as new.
thingiverse
free

Gameboy Zero Quad Rear Button Bracket
...buttons out from the tactile switches.
drill guide included, use small drill bit for pilot hole and a step bit for button holes.
Piboy
thingiverse
free

Stand for PiBoy Advance by Treespirit
... piboy when you plug in the hdmi cable.
also nice for display.
compatible with the original diy raspberry pi gameboy by adafruit.
thingiverse
free
Piboy dmg protective cover by Diablo944
...piboy dmg protective cover by diablo944
thingiverse
protective cover for experimental pi piboy dmg.
thingiverse
free

PiBoy DMG styled storage box/container by Diablo944
...piboy dmg styled storage box/container by diablo944
thingiverse
piboy styled storage container
thingiverse
free

Experimental pi piboy Controller accessory by Diablo944
...ntroller accessory by diablo944
thingiverse
experimental pi piboy controller addon. read the notes for frame difference details.
thingiverse
free
PiBoy Dmg Buttons & Trigger by rkwallace
...verse
i edited the stl for the piboy dmg buttons and triggers to add letters. i also extended the triggers to include a button.
thingiverse
free

Experimental pi Piboy cover by Diablo944
.../sleeve for the experimental pi piboy. not designed for throwing in a bag and carrying around, more a keep it safe at home thing.
thingiverse
free

Case for PiBoy Micro by jit06
...ore on my blog post: http://www.bluemind.org/piboy-micro-raspberry-pi-based-mini-portable-retrogaming
i print it with 100% infill
thingiverse
free

PiBoy Case, cut to fit Trinus by ingmaniac
...us.
works well with pla facing up with supports and rft to fight warping.
was a pain to get it going, but now it works very well.
thingiverse
free
PiBoy Advance by Treespirit
...rry pi gameboy by adafruit.
added:
speaker
amplifier
volume control
mute switch
two shoulder buttons
two extra buttons
esc button
thingiverse
free

Experimental Pi Piboy DMG stand by Diablo944
...of the piboy tipping to the right when placed off centre. it wouldn't fall over, it just wouldn't look right at an angle.
Dmg
turbosquid
$16

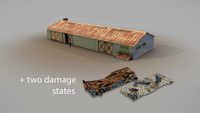
Old Garage 01 white with damage DMG
...ge 01 white with damage dmg for download as obj, xsi, and fbx on turbosquid: 3d models for games, architecture, videos. (1513100)
turbosquid
$16
Old Garage 01 blue with damage DMG
...age 01 blue with damage dmg for download as obj, xsi, and fbx on turbosquid: 3d models for games, architecture, videos. (1513056)
turbosquid
$12
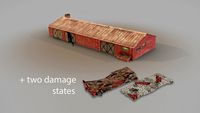
Old Garage 01 red with damage DMG
...rage 01 red with damage dmg for download as obj, xsi, and fbx on turbosquid: 3d models for games, architecture, videos. (1513088)
thingiverse
free
Piboy dmg protective cover by Diablo944
...piboy dmg protective cover by diablo944
thingiverse
protective cover for experimental pi piboy dmg.
thingiverse
free

DMG IPS Spacer
...ut from acrylic.
kits are available from our store: https://www.retromodding.com/products/game-boy-ips-lcd?variant=31403772903488
thingiverse
free
DMG Empire and Rebellion buttons by gingerbreadnerd
...beskar button set for custom builds, feel free to use or alter however you like! these are based on a dmg button set by ty2600 :)
thingiverse
free

Gameboy DMG Stand by zoolman88
...g stand by zoolman88
thingiverse
this is a gameboy dmg stand i made. i didn't like how the other stands had 3 parts to them.
thingiverse
free

Blank Dmg Cart by LilJosh
...blank dmg cart by liljosh
thingiverse
text removed for easy customization
thingiverse
free

Gameboy DMG Display Holder by ketchupmonki
...display a gameboy dmg at a 20 degree angle, held and centered by 2 rods going into the screw cavities on the back of the gameboy.
thingiverse
free
PiBoy Dmg Buttons & Trigger by rkwallace
...verse
i edited the stl for the piboy dmg buttons and triggers to add letters. i also extended the triggers to include a button.
Shoulder
archibase_planet
free

Shoulder
...shoulder
archibase planet
peg rack stand
shoulder - 3d model (*.gsm+*.3ds) for interior 3d visualization.
archibase_planet
free

Shoulder
...shoulder
archibase planet
peg rack for clothes stand
shoulder - 3d model (*.3ds) for interior 3d visualization.
archibase_planet
free

Shoulder
...shoulder
archibase planet
peg rack stand
shoulder 5 - 3d model (*.gsm+*.3ds) for interior 3d visualization.
archibase_planet
free

Shoulder
...shoulder
archibase planet
peg stand rack
shoulder 3 - 3d model (*.gsm+*.3ds) for interior 3d visualization.
3ddd
$1

Head And Shoulders Shampoo
...ers shampoo
3ddd
шампунь , head&shoulders
3d model of head and shoulders shampoo
archive3d
free

Shoulder 3D Model
...del
archive3d
shoulder
shoulder n161209 - 3d model (*.gsm+*.3ds) for interior 3d visualization.
archive3d
free

Shoulder 3D Model
...l
archive3d
peg shoulder stand
shoulder - 3d model (*.gsm+*.3ds) for interior 3d visualization.
archive3d
free
Shoulder 3D Model
...l
archive3d
ledge jut shoulder
shoulder - 3d model (*.gsm+*.3ds) for interior 3d visualization.
archive3d
free
Shoulder 3D Model
...rchive3d
shoulder rack stand
shoulder 2 - 3d model (*.gsm+*.3ds) for interior 3d visualization.
archive3d
free
Shoulder 3D Model
...archive3d
peg stand shoulder
shoulder 4 - 3d model (*.gsm+*.3ds) for interior 3d visualization.
Bumpers
turbosquid
free
Bumper
... available on turbo squid, the world's leading provider of digital 3d models for visualization, films, television, and games.
turbosquid
$10
Bumper Front
...squid
royalty free 3d model bumper front for download as obj on turbosquid: 3d models for games, architecture, videos. (1550133)
turbosquid
$15

bumper car.br3
... available on turbo squid, the world's leading provider of digital 3d models for visualization, films, television, and games.
3d_export
$5
bumper arb toyota fortuner
...bumper arb toyota fortuner
3dexport
bumper arb toyota fortuner
3d_export
$7

front bumper
... it to use in other car, here it is for you. also if you need some help, tell us, and we will be happy to give you want you need.
turbosquid
$28
bumper chair by HermanMiller
...ree 3d model bumper chair by hermanmiller for download as max on turbosquid: 3d models for games, architecture, videos. (1642341)
turbosquid
$15

Dodgem Bumper car
...
royalty free 3d model dodgem bumper car for download as obj on turbosquid: 3d models for games, architecture, videos. (1418034)
turbosquid
$95

Bumper Pool Table
... 3d model bumper pool table for download as 3ds, max, and obj on turbosquid: 3d models for games, architecture, videos. (1298512)
turbosquid
$20

Red Bumper Car
...model red bumper car for download as 3ds, obj, fbx, and blend on turbosquid: 3d models for games, architecture, videos. (1322171)
turbosquid
$70

Bumper WAC rocket
... available on turbo squid, the world's leading provider of digital 3d models for visualization, films, television, and games.
Buttons
archibase_planet
free
Buttons
...buttons
archibase planet
lift elevator call buttons
elevator call buttons - 3d model for interior 3d visualization.
3ddd
$1
Button
... button , john reeves
набор мебели button от дизайнера john reeves
3d_export
$5
Button
...button
3dexport
smd button<br>verts 2.180<br>faces 3.848
turbosquid
$4

Button
...
turbosquid
royalty free 3d model button for download as fbx on turbosquid: 3d models for games, architecture, videos. (1297941)
turbosquid
$1

Button
...
turbosquid
royalty free 3d model button for download as fbx on turbosquid: 3d models for games, architecture, videos. (1392935)
turbosquid
$9
buttons
...id
royalty free 3d model buttons for download as max and fbx on turbosquid: 3d models for games, architecture, videos. (1404875)
turbosquid
$6

button
...uid
royalty free 3d model button for download as 3dm and max on turbosquid: 3d models for games, architecture, videos. (1669204)
turbosquid
$5

Button
...uid
royalty free 3d model button for download as max and fbx on turbosquid: 3d models for games, architecture, videos. (1710868)
turbosquid
$3

Button
...quid
royalty free 3d model button for download as ma and obj on turbosquid: 3d models for games, architecture, videos. (1510524)
turbosquid
$3
Button
...quid
royalty free 3d model button for download as ma and obj on turbosquid: 3d models for games, architecture, videos. (1509961)
End
archibase_planet
free

Cigarettes end
...d
archibase planet
cigarettes end cigarette stub cigar-butt
cigarette-end - 3d model (*.gsm+*.3ds) for interior 3d visualization.
3d_export
$5
end table
...end table
3dexport
end table 3d model dimensions:(w)60cm×(d)60cm×(h)56cm
3d_export
$5
end table
...end table
3dexport
end table 3d model dimensions:(w)60cm×(d)60cm×(h)56cm
turbosquid
$10
End Table
...rbosquid
royalty free 3d model end table for download as max on turbosquid: 3d models for games, architecture, videos. (1570610)
turbosquid
$5
End Table
...urbosquid
royalty free 3d model end table for download as ma on turbosquid: 3d models for games, architecture, videos. (1622809)
turbosquid
$3
End Table
...rbosquid
royalty free 3d model end table for download as fbx on turbosquid: 3d models for games, architecture, videos. (1315115)
3d_export
$5

rope end ring
...rope end ring
3dexport
rope end ring
turbosquid
$2

End Tables
...
royalty free 3d model end tables for download as max and obj on turbosquid: 3d models for games, architecture, videos. (1706896)
turbosquid
$14
End Table
...lty free 3d model end table for download as max, obj, and fbx on turbosquid: 3d models for games, architecture, videos. (1403051)
turbosquid
$12

End Table
...lty free 3d model end table for download as max, obj, and fbx on turbosquid: 3d models for games, architecture, videos. (1574707)
Real
design_connected
$11
Reale
...reale
designconnected
zanotta reale computer generated 3d model. designed by mollino, carlo.
vizpark
$117

Real Boulders
...rs is a 3d model library of 15 photoscanned real-world boulders for architectural visualization, available in various 3d formats.
3ddd
$1

Софа REAL
... , iwc
софа real салона iwc- двухместная
в архиве есть файл, сохраненный в 3ds max 2011
design_connected
$16

Pavo Real
...pavo real
designconnected
driade pavo real armchairs computer generated 3d model. designed by patricia urquiola.
3ddd
$1
Eglo REALE
...
два подвеса eglo
reale 92076
высота: 1100 mm Ø: 160 mm
reale 92077
длина: 840 mm высота: 1100 mm
Ø: 160 mm
3ddd
$1

Real clothes
... ткань
real clothes models
2 options
polys: 414112
verts: 207052
support: info@bysstudio.com
turbosquid
$30

heart real
...lty free 3d model heart real for download as ma, fbx, and ztl on turbosquid: 3d models for games, architecture, videos. (1423798)
3ddd
$1
IVA REAL LEATHER
...iva real leather
3ddd
iva , real
iva real leather dining chair
vizpark
$101

Real Shrubs
...ubs is a highly realistic 3d shrub model library for 3ds max, cinema 4d, sketchup, blender, rhino or fbx compatible applications.
vizpark
$101

Real Trees
...y realistic tree model library for architectural visualization in 3ds max, cinema 4d, sketchup, modo, or blender with fbx or obj.