Thingiverse
PhatStats PC Stats Desktop Widget by dalgibbard
by Thingiverse
Last crawled date: 3 years ago
Overview
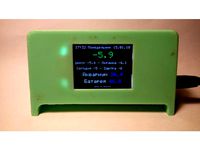
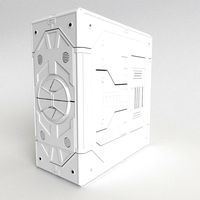
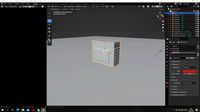
This is a 3D printed enclosure for a PhatStats TFT setup, for showing your PC stats in style!
Information on PhatStats can be found here:
Hackaday: https://hackaday.io/project/19018-gnat-stats-phat-stats-pc-performance-display
Tallman Labs Blog: https://runawaybrainz.blogspot.com/
Github Project(s):
Hardware Serial Monitor: https://github.com/koogar/HardwareSerialMonitor
PhatStats Code: https://github.com/koogar/Gnat-Stats/tree/master/TFT_PhatStats/TFT_ATSAMD21/PhatStats_TFT_ATSAMD_QT-PY_V1.6.3
Notes
Print needs supports (my design was a bit lazy in that regard!)
Need:
2.8" ILI9341 TFT (https://www.banggood.com/2_8-Inch-ILI9341-240x320-SPI-TFT-LCD-Display-Touch-Panel-SPI-Serial-Port-Module-p-1206782.html)
Seeduino Xiao (https://www.banggood.com/Seeeduino-XIAO-Microcontroller-SAMD21-Cortex-M0+-Compatible-with-Arduino-IDE-Development-Board-p-1715861.html)
4x 7mm M3 bolts
4x M3 square nuts
1x right-angle tactile switch (~7.6 x 6.4mm on the face iirc - anything close is fine, as it's largely hot glued in place)
Hot glue or similar
Small silicone wires (28awg or similar)
Soldering iron + solder
Only supports red-PCB ILI9341 TFT + Seeduino Xiao.
Does not include neopixel or encoder support into the design. Amend the code to remove these features as needed.
Installation
Cut/de-solder any pin-headers from the TFT module.
Solder wires between the Xiao and the TFT as per hookup diagrams found here: https://runawaybrainz.blogspot.com/2021/03/phat-stats-ili9341-tft-display-hook-up.html
Use short cables (maybe 3cm max?) + wire in the tactile switch too (maybe a little longer for this, so it can reach the side of the back casing) -- tactile switch goes between RESET (tiny pad near the USB-C connector) and GND (either the other tiny pad, or the main GND pad if that's easier)
See pictures for mine, note that shorter wiring than I used would have made it easier to assemble!
The Xiao should press-fit into the slot in the back of the case, make sure it's as far into the slot as possible, else it will clash with the back of the TFT. Apply a little hot glue to secure if wanted (but really it should be held in by the back of the screen).
Make sure cables run in a way that they won't end up between the back of the Xiao, and the TFT; else they'll get crushed.
Pop the tactile switch into place, and hot glue to secure it.
With the Xiao in place, sit the TFT onto the back case, ensuring no cabling gets trapped
Add the front case into place, and secure with M3 nuts and bolts.
Optionally add the screw plugs for a cleaner look (note that they may need scaling/sanding etc depending on your printer's tolerances)
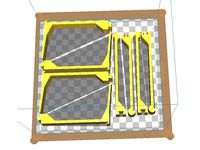
Print Files / Orientation Notes
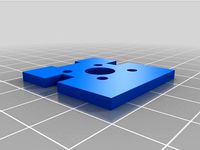
ps-front.stl
This is the front-most piece which covers the display.
Print it face-side (flat side) down, and add supports-on-buildplate-only, for the screwholes. Though I actually forgot the supports and it still came out OK.
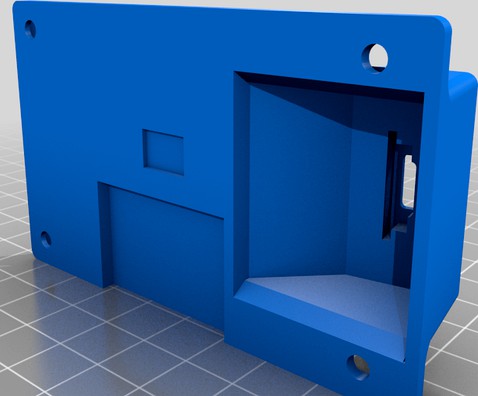
ps-back.stl
This is the back piece, which houses the Xiao/wiring/tactile switch on the back of the display.
Recommended to print it with the USB-C slot facing up, with supports inside. This keeps all the rougher edges out of view on the final piece.
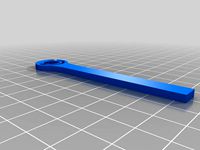
ps-plug.stl
These are just screw covers for the front panel. They're optional if you don't mind the screws showing. Tolerances might be fiddly on these parts, so consider sanding/cutting/scaling this part to fit as needed.
phatstats.step / phatstats.f3d
Raw project files in STEP and Fusion360 format for you to adjust as desired :)
This is a 3D printed enclosure for a PhatStats TFT setup, for showing your PC stats in style!
Information on PhatStats can be found here:
Hackaday: https://hackaday.io/project/19018-gnat-stats-phat-stats-pc-performance-display
Tallman Labs Blog: https://runawaybrainz.blogspot.com/
Github Project(s):
Hardware Serial Monitor: https://github.com/koogar/HardwareSerialMonitor
PhatStats Code: https://github.com/koogar/Gnat-Stats/tree/master/TFT_PhatStats/TFT_ATSAMD21/PhatStats_TFT_ATSAMD_QT-PY_V1.6.3
Notes
Print needs supports (my design was a bit lazy in that regard!)
Need:
2.8" ILI9341 TFT (https://www.banggood.com/2_8-Inch-ILI9341-240x320-SPI-TFT-LCD-Display-Touch-Panel-SPI-Serial-Port-Module-p-1206782.html)
Seeduino Xiao (https://www.banggood.com/Seeeduino-XIAO-Microcontroller-SAMD21-Cortex-M0+-Compatible-with-Arduino-IDE-Development-Board-p-1715861.html)
4x 7mm M3 bolts
4x M3 square nuts
1x right-angle tactile switch (~7.6 x 6.4mm on the face iirc - anything close is fine, as it's largely hot glued in place)
Hot glue or similar
Small silicone wires (28awg or similar)
Soldering iron + solder
Only supports red-PCB ILI9341 TFT + Seeduino Xiao.
Does not include neopixel or encoder support into the design. Amend the code to remove these features as needed.
Installation
Cut/de-solder any pin-headers from the TFT module.
Solder wires between the Xiao and the TFT as per hookup diagrams found here: https://runawaybrainz.blogspot.com/2021/03/phat-stats-ili9341-tft-display-hook-up.html
Use short cables (maybe 3cm max?) + wire in the tactile switch too (maybe a little longer for this, so it can reach the side of the back casing) -- tactile switch goes between RESET (tiny pad near the USB-C connector) and GND (either the other tiny pad, or the main GND pad if that's easier)
See pictures for mine, note that shorter wiring than I used would have made it easier to assemble!
The Xiao should press-fit into the slot in the back of the case, make sure it's as far into the slot as possible, else it will clash with the back of the TFT. Apply a little hot glue to secure if wanted (but really it should be held in by the back of the screen).
Make sure cables run in a way that they won't end up between the back of the Xiao, and the TFT; else they'll get crushed.
Pop the tactile switch into place, and hot glue to secure it.
With the Xiao in place, sit the TFT onto the back case, ensuring no cabling gets trapped
Add the front case into place, and secure with M3 nuts and bolts.
Optionally add the screw plugs for a cleaner look (note that they may need scaling/sanding etc depending on your printer's tolerances)
Print Files / Orientation Notes
ps-front.stl
This is the front-most piece which covers the display.
Print it face-side (flat side) down, and add supports-on-buildplate-only, for the screwholes. Though I actually forgot the supports and it still came out OK.
ps-back.stl
This is the back piece, which houses the Xiao/wiring/tactile switch on the back of the display.
Recommended to print it with the USB-C slot facing up, with supports inside. This keeps all the rougher edges out of view on the final piece.
ps-plug.stl
These are just screw covers for the front panel. They're optional if you don't mind the screws showing. Tolerances might be fiddly on these parts, so consider sanding/cutting/scaling this part to fit as needed.
phatstats.step / phatstats.f3d
Raw project files in STEP and Fusion360 format for you to adjust as desired :)
Similar models
thingiverse
free

Case 2.8" TFT Display by Dualvim
... display (touchscreen display with the ili9341 chip). it has some holes in the laterals to pass the wires and change the sd card.
thingiverse
free
Case for ILI9341 display and nodemcu ESP8266 by zi3d
...or my meteo lcd display.
remixed from 2.4" tft case for tjctm24024 spi display 320x240. fit to ili9341, added nodemcu mount.
grabcad
free

2.2" TFT display
...grabcad 2.2" tft display, ili9341, spi like https://aliexpress.ru/item/1005003152078101.html or similar ...
3dwarehouse
free

ILI9341 TFT 2,8 ' SPI
...ili9341 tft 2,8 ' spi
3dwarehouse
#arduino #ili9341
thingiverse
free

2.4" TFT CASE FOR TJCTM24024 SPI DISPLAY 320x240 by abelbluelight
...he lateral. inside i have an arduino leonardo, a battery and one ieee 802.15.4 module to receive data packets. ready for sd hole.
3dwarehouse
free

ILI9341 2.2' QVGA TFT 240*320
...ili9341 2.2' qvga tft 240*320
3dwarehouse
#22 #arduino #ili9341 #qvga #spi #tft
3dwarehouse
free

Copy of ILI9341 TFT 2,8 " SPI
...1 tft 2,8 " spi
3dwarehouse
my copy of alexander k.'s model "ili9341 tft 2,8 " spi".
grabcad
free

2.2" SPI TFT ILI9341 Display Frame
...2.2" spi tft ili9341 display frame
grabcad
source file included!
you can edit and change.
grabcad
free

ILI9341 2.8" SPI TOUCH SD
...ili9341 2.8" spi touch sd
grabcad
tft ili9341 spi 2.8" touch panel and sd card reader.
thingiverse
free

2.2" SPI TFT ILI9341 Display Frame by ruswarrior
...2.2" spi tft ili9341 display frame by ruswarrior
thingiverse
source file included!
you can edit and change.
Dalgibbard
thingiverse
free
Filment Eye / Guide by dalgibbard
...esign, to be hot glued etc to wherever you want. created in tinkercad: https://www.tinkercad.com/things/eurq2eus8w5-filament-eye
thingiverse
free

Reptile X4R Mount by dalgibbard
...@ 0.2. 1.2mm walls and floor; seems pretty rigid.
note: need to fit longer screws than the original ones provided with the frame.
thingiverse
free

Martian III GoPro Session Mount 30deg by dalgibbard
...ion to make for easier printing (otherwise the screw holes protrude from the width of the design.
print in flex/tpu, 40+% infill.
thingiverse
free

QX90 Ducted Frame by dalgibbard
...ible to remove.
secure the flight controller/receiver with tape or zipties etc.
note: see the original item for the camera mount.
thingiverse
free

Universal Horizontal Spool Holder - Large by dalgibbard
...made into the tower section to reduce print time (nearly 30% reduction) - hoping it doesn't affect print strength too much :)
thingiverse
free
57mm Anki Banked Turn- Split Pieces by dalgibbard
...ur simultaneously!)
also added a small traingulation piece on the leg join to reduce flexing under weight with low infill values.
thingiverse
free

Single Piece Stackable Brio Riser by dalgibbard
...rints as a single piece with no assmebly required. it doesn't have the cool top arch anymore, but it's still practical :)
thingiverse
free

XHover MXP200B 30degree Camera Mount by dalgibbard
...edited files; one with recessed screw holes; one with recessed screw holes, and antenna mounts (designed for 3mm antenna straws).
thingiverse
free

HobbyKing Prime Jet Pro 1806 Motor Mount by dalgibbard
...osts down, so measured up the original and created this.
see my other things for a 2204 (compatible with 2205/6 etc) version too.
thingiverse
free
HobbyKing Prime Jet Pro 2204 Motor Mount by dalgibbard
...the original and created this. (should fit any 220x motor with 16x19mm screw layout)
see my other things for an 1806 version too.
Widget
3d_ocean
$10

Coffee widgets
...they can be used on any occasion. production in metric centimeter,detail and material is very close to the original look,and f...
turbosquid
$11
Spinner Fidget Widget - Pack 03
...ner fidget widget - pack 03 for download as max, obj, and fbx on turbosquid: 3d models for games, architecture, videos. (1213516)
turbosquid
$11
Spinner Fidget Widget - Pack 02
...ner fidget widget - pack 02 for download as max, obj, and fbx on turbosquid: 3d models for games, architecture, videos. (1213514)
turbosquid
$8

Spinner Fidget Widget - Pack 01
...ner fidget widget - pack 01 for download as max, obj, and fbx on turbosquid: 3d models for games, architecture, videos. (1213511)
3d_export
$15

Nokia N97 3D Model
...3d model 3dexport nokia nokian97 phone mobile smartphone n97 widget qwerty keyboard nokia n97 3d model bodya 12090...
3d_export
$5

Dream room
...picture<br>• with render cycles you can clearly see these widget they have very little for you in work and...
3d_export
$59

cartoon rat
...using a particle system.<br>rigged body and face. also added widget for easy control of the rig.<br>clean topology based on...
3d_export
$49

cartoon business girl
...using a particle system.<br>rigged body and face. also added widget for easy control of the rig.<br>clean topology based on...
3d_export
$5

Kingston 2gb flash drive 3D Model
...entrepot reposition warehousing depot board gimmick twist spin construction widget doodad doohickey gismo thingummy thingmajig whatsis whirl kink eddy...
3d_export
$40
rigged grandfather clock
...native<br>.fbx (baked animation)<br>.obj<br>grandfatherclock (model collection) -clock_rig -animation -pose -armature -gradfatherclock<br>widget (custom rig shapes collection) -wgt-hour_hand -wgt-minute_hand -wgt-pendulum -wgt-root -wgt-weight<br>grandfatherclock...
Stats
turbosquid
$49
stats.3ds
... available on turbo squid, the world's leading provider of digital 3d models for visualization, films, television, and games.
3ddd
free

кухня ИКЕА СТОТ ФАКТУМ (IKEA STAT FAKTUM)
...(мельница для специй),секин (миска), финторп (fintorp) настенные модули для хранения на кухне, лимоны, разделочная доска, тарелки
3ddd
$1
LEGO SW Naboo Starfighter
...ego , stat wars
lego star wars special edition naboo starfighter №10026
render - corona
3d_export
$6

vintage cupboard drawer
...and .fbx formats.<br>a high poly version is also included, stats for low poly are: 3149 quads.<br>suitable for games and...
3d_export
$8

Isometric mining terrain
...are scaled down and positioned on colour pallette. blender stats verticies: 1434 tris:...
3d_export
$8

Isometric cliffs terrain
...are scaled down and positioned on colour pallette. blender stats verticies: 1285 tris:...
3d_export
$10

Isometric Canyon walkthrough
...are scaled down and positioned on colour pallette. blender stats verticies: 1841 tris:...
3d_export
free

Learn Data Science New Concepts In 2022
...portion of my time thus far understanding data science (stats linear algebra, python, etc.). source...
3d_export
$8

Mushroom ornament
...palette)<br>note:<br>-uvs are scaled down and positioned on colour pallette.<br>blender statslt;br>verticies: 1157<br>tris:...
3d_export
$8

Low Poly Modern House
...renders.<br>-uvs are scaled down and positioned on colour palette.<br>blender statslt;br>verticies: 1008<br>tris:...
Desktop
3d_export
$5

desktop
...desktop
3dexport
full desktop
3d_export
$15

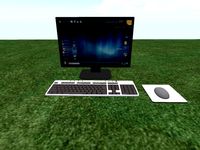
Desktop
...desktop
3dexport
desktop, monitor, system unit, backlit keyboard.
3d_export
$5

desktop
...desktop
3dexport
desktop with shelving. very convenient and practical find.
turbosquid
$5
Desktop
...turbosquid
royalty free 3d model desktop for download as jpg on turbosquid: 3d models for games, architecture, videos. (1329464)
turbosquid
$1

Desktop
...turbosquid
royalty free 3d model desktop for download as fbx on turbosquid: 3d models for games, architecture, videos. (1661325)
3d_export
$10
110x60 desktop
...110x60 desktop
3dexport
110x60 desktop
turbosquid
$20
Desktop
...lty free 3d model desktop for download as blend, fbx, and obj on turbosquid: 3d models for games, architecture, videos. (1624648)
turbosquid
$20
Desktop
...oyalty free 3d model desktop for download as ma, obj, and fbx on turbosquid: 3d models for games, architecture, videos. (1309418)
turbosquid
$15

Desktop
...yalty free 3d model desktop for download as 3ds, obj, and c4d on turbosquid: 3d models for games, architecture, videos. (1445073)
3d_export
$5
desktop
...desktop
3dexport
a desk will fit into the room
Pc
archibase_planet
free
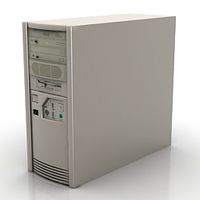
PC
...pc
archibase planet
pc case pc tower pc equipment system unit
pc - 3d model (*.gsm+*.3ds) for interior 3d visualization.
3d_export
free
Pc
...pc
3dexport
pc
archibase_planet
free

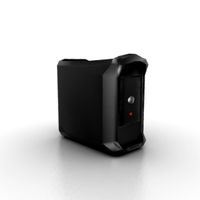
PC
...pc
archibase planet
notebook pc computer equipment
pc - 3d model (*.gsm+*.3ds) for interior 3d visualization.
archibase_planet
free
PC
...pc
archibase planet
system unit pc equipment
pc - 3d model (*.gsm+*.3ds) for interior 3d visualization.
archibase_planet
free

PC
...pc
archibase planet
pc equipment cabinet system unit
pc 70 - 3d model (*.gsm+*.3ds) for interior 3d visualization.
3d_export
$5
pc
...pc
3dexport
computer
archibase_planet
free
PC
...pc
archibase planet
cabinet chassis system unit
pc case n241107 - 3d model (*.gsm+*.3ds) for interior 3d visualization.
turbosquid
$3

PC
...id
royalty free 3d model pc for download as ma, obj, and fbx on turbosquid: 3d models for games, architecture, videos. (1159175)
turbosquid
$7
lap top ,pc portable, PC
...ty free 3d model lap top ,pc portable, pc for download as c4d on turbosquid: 3d models for games, architecture, videos. (1352084)
turbosquid
$100
PC
... available on turbo squid, the world's leading provider of digital 3d models for visualization, films, television, and games.