Thingiverse

Peristaltic pump by Kardis
by Thingiverse
Last crawled date: 3 years, 2 months ago
Edit 22 Sep 2020:
Added a schematic here and GitHub( I'm not responsible for any damage caused by this schematic, please let me know if there is any mistake).
Edit 02 Sep 2019:
code for Arduino driverhttps://github.com/KarimLakra/OSP2_Open-Source-Peristaltic-Pump_3D-printed-peristaltic-pump-Arduino-program-controller
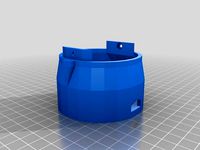
I needed for many things a water pump(liquid pump), I found the peristaltic pump the best for a precision dosing, can be used also for continuous pumping, the liquid is separated by the tubing from other parts, it can be used for food and many applications safely, offers easy maintenance.
After I watched many designs, as always, I like to design my own to see how far I can make it, so feel free to suggest any useful tips!
The capacity of this pump as you can see in the video is about 160ml per minute, you can push this value a little bit it upper, but I didn't want to destroy the tubing.
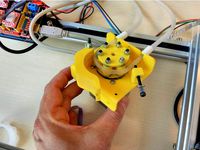
The pump is easy to assemble, but I attached pictures step by step.
I started last year the project from a user interface using arduinoMega2560 with a TFT screen, the code get complicated when I added many options to control the pump(maybe I continue writing that code when I have time), but I will soon add the schematics to test this pump, with just some basic electronics( no arduino).
Parts needed:
4 * M3 nuts
3 * M1,85x10 screw
3 * M3x3 screw
4 * M3x8 screw
4 * M3x11 screw
3 * Bearings 624ZZ ball 4x13x5 mm(I attached also a printable bearing if you want to try it)
Tubing PharMed BPT (information in the picture)
Questions also are welcome.
The files for 3D printing also here:https://grabcad.com/library/peristaltic-pump-13
more information and updates are posted on my web pages:http://karim.lakras.eu/
Note: I made holes for the M3 nut that are not used all of them, but they can be useful if you need to lock the parts very well. I made also deep holes for the M3 screws, so if you want to use a longer screws, they have place already.
There is attached file for the rollers if you decide to print them, make sure you make their edges smooth, so you will not cut the tubing.
Also the triangles that holds the bearings, are marked by a line as in the pictures, that sides must be in the same vertical line, that sides are locking the triangle to prevent it from turning.
Edit:
I posted a second video to show more information about the pump see bellow.
Visit my pages to see a simple schematic on how to drive the stepper and more information:
http://karim.lakras.eu/index.php?page=hobbies&lang=en&cat_hob=peristaltic
Added a schematic here and GitHub( I'm not responsible for any damage caused by this schematic, please let me know if there is any mistake).
Edit 02 Sep 2019:
code for Arduino driverhttps://github.com/KarimLakra/OSP2_Open-Source-Peristaltic-Pump_3D-printed-peristaltic-pump-Arduino-program-controller
I needed for many things a water pump(liquid pump), I found the peristaltic pump the best for a precision dosing, can be used also for continuous pumping, the liquid is separated by the tubing from other parts, it can be used for food and many applications safely, offers easy maintenance.
After I watched many designs, as always, I like to design my own to see how far I can make it, so feel free to suggest any useful tips!
The capacity of this pump as you can see in the video is about 160ml per minute, you can push this value a little bit it upper, but I didn't want to destroy the tubing.
The pump is easy to assemble, but I attached pictures step by step.
I started last year the project from a user interface using arduinoMega2560 with a TFT screen, the code get complicated when I added many options to control the pump(maybe I continue writing that code when I have time), but I will soon add the schematics to test this pump, with just some basic electronics( no arduino).
Parts needed:
4 * M3 nuts
3 * M1,85x10 screw
3 * M3x3 screw
4 * M3x8 screw
4 * M3x11 screw
3 * Bearings 624ZZ ball 4x13x5 mm(I attached also a printable bearing if you want to try it)
Tubing PharMed BPT (information in the picture)
Questions also are welcome.
The files for 3D printing also here:https://grabcad.com/library/peristaltic-pump-13
more information and updates are posted on my web pages:http://karim.lakras.eu/
Note: I made holes for the M3 nut that are not used all of them, but they can be useful if you need to lock the parts very well. I made also deep holes for the M3 screws, so if you want to use a longer screws, they have place already.
There is attached file for the rollers if you decide to print them, make sure you make their edges smooth, so you will not cut the tubing.
Also the triangles that holds the bearings, are marked by a line as in the pictures, that sides must be in the same vertical line, that sides are locking the triangle to prevent it from turning.
Edit:
I posted a second video to show more information about the pump see bellow.
Visit my pages to see a simple schematic on how to drive the stepper and more information:
http://karim.lakras.eu/index.php?page=hobbies&lang=en&cat_hob=peristaltic
Similar models
grabcad
free

Peristaltic pump
...how to drive the stepper and more information:
http://karim.lakras.eu/index.php?page=hobbies&lang=en&cat_hob=peristaltic
thingiverse
free

Peristaltic pump by zmaker
...ber tube with a diameter of 10mm.
sorce code for arduino: https://github.com/zmaker/arduino_cookbook/tree/master/332-peristaltica
thingiverse
free

Peristaltic pump by MarcoKl
...silicon tube your favourite stepper driver arduino, esp or similar features: depends on your code. for example: i use...
grabcad
free

Peristaltic Pump
... to be due to it. in the picture above the model of the base is backwards so download it to see it from the other side. thank you
thingiverse
free

Micro Peristaltic Pump by neoaikon
...the best choice.
included is also a 2.25" version for use with 1/4" tubing. this version is suitable for .4mm nozzles.
thingiverse
free
An ESP8266-12E Compatible Peristaltic Pump base by coogle
...thingiverse.com/thing:803035
the code is also available to power the esp8266 here:
https://github.com/thissmarthouse/coogle-doser
thingiverse
free

Peristaltic pump for NEMA 17 motors by babrooks1
...hreaded brass inserts (i used the more expensive variety designed for heat setting, with one end smaller diameter than the other)
thingiverse
free

Yet another peristaltic dosing pump by ppet36
...e of diameter 4/6 mm (int/ext); servo has enough torgue to handle it.
pump in action: https://www.youtube.com/watch?v=piet5409c1g
grabcad
free

NEMA-17 peristaltic pump low volume tube 4x2
...altic pump
properties:
- bearing: 623zz (id 3mm, od 10mm, thinkess: 4mm)
- silicone tube (id 2mm, od 4mm)
- m3 countersunk bolts
thingiverse
free

Small peristaltic pump for 28BYJ-48 stepper motor. by jsvorc
...
i was looking for some peristaltic pump with larger diameter. i check thingyverse and found only small pumps so i designed mine.
Kardis
thingiverse
free

Fork & knife by Kardis
...fork & knife by kardis
thingiverse
fork and knife for fun!
thingiverse
free

Ruler by Kardis
...kardis
thingiverse
a simple ruler derived from other tools made before.
tinker this:https://www.tinkercad.com/things/hf6mgnpmxi2
thingiverse
free

Compass - for fun - by Kardis
...compass - for fun - by kardis
thingiverse
compass for fun.https://www.tinkercad.com/things/btm0f7z5sxo-compass/editv2
thingiverse
free

Incense holder by Kardis
...incense holder by kardis
thingiverse
incense holder.https://www.tinkercad.com/things/ku5tfgsu84k-incense-holder/editv2
thingiverse
free

Ruler angle by Kardis
...ruler angle by kardis
thingiverse
a ruler angle made for fun.
link to tinkercad:https://www.tinkercad.com/things/iwhw9zt5icw
thingiverse
free
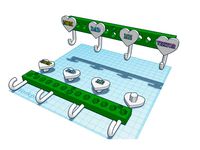
Towel hook by Kardis
...wel hook by kardis
thingiverse
a towel hook with reusable names.
tinker it yourself:https://www.tinkercad.com/things/0henojhhci7
thingiverse
free

Bow saw by Kardis
...bow saw by kardis
thingiverse
bow saw for fun.
https://www.tinkercad.com/things/7hj2hcttt9l-bow-saw/editv2
thingiverse
free
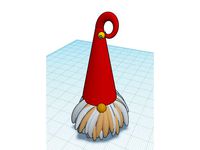
Scandinavian elf by Kardis
...giverse
a scandinavian elf, just for fun.
find it also here:https://www.tinkercad.com/things/fguvxhpv0qb-scandinavian-elf/editv2
thingiverse
free

Soap holder by Kardis
...simple soap holder, with a 3mm holes for a possible support.
tinker this holder here:https://www.tinkercad.com/things/8dpai64xtpy
thingiverse
free

Sundial by Kardis
... didn't print this, so optimization for printing may be required.
https://www.tinkercad.com/things/h8okze5tvk1-sundial/editv2
Peristaltic
thingiverse
free

Peristaltic pump by Daniele_Dondi
...peristaltic pump by daniele_dondi
thingiverse
precise peristaltic pump
thingiverse
free

Peristaltic Pump by Muzeem
...peristaltic pump by muzeem
thingiverse
a peristaltic pump with minimum components
thingiverse
free

Peristaltic pump by JKUgalde
...ingiverse
instructions at my github https://github.com/jkugalde/3d-printed-peristaltic-pump
tested with glycerine.
for a nema17.
thingiverse
free

Peristaltic pump by JKUgalde
...de
thingiverse
a 3d printed peristaltic pump, more info at the project repository
i use it to pump glycerine, works really well.
thingiverse
free

Peristaltic Pump parametric by avoronin
...ump parametric by avoronin
thingiverse
this open scad paramentric peristaltic pump.
https://www.youtube.com/watch?v=sm2wdyk5xfi
thingiverse
free

Peristaltic Pump by piuLAB
...r "hydroponic l.i.s.a." (http://www.thingiverse.com/thing:414271) but it is possible to adapt it for any other machine.
thingiverse
free

Peristaltic pump by astrobiologist
...peristaltic pump by astrobiologist
thingiverse
edited .scad offline
thingiverse
free
High precision peristaltic pump by carlesoriol
...high precision peristaltic pump by carlesoriol
thingiverse
high precision peristaltic pump. can be used with some cnc structure
thingiverse
free

Parametric Peristaltic Pump by zignig
...tp://www.thingiverse.com/thing:8652http://www.thingiverse.com/thing:8914
the motor mounting still needs some work but its a start
thingiverse
free
Micro Peristaltic Pump by neoaikon
...the best choice.
included is also a 2.25" version for use with 1/4" tubing. this version is suitable for .4mm nozzles.
Pump
3d_export
$5
pump
...pump
3dexport
pump
archibase_planet
free

Pump
...pump
archibase planet
petrol pump petrol station gas station
pump - 3d model (*.gsm+*.3ds) for interior 3d visualization.
3d_ocean
$8

Pumps
...ps
3docean
girls heels high kicks pumps shoes stilettos womens
womens high heels, pumps or stilettos. polygon model – no textures
3ddd
free

Pump
...ump
3ddd
pump , versus
производитель: versus
модель: pumphttp://www.versus.as/
turbosquid
$3

Pumps
...s
turbosquid
royalty free 3d model pumps for download as skp on turbosquid: 3d models for games, architecture, videos. (1275250)
3d_export
$5

pump
...pump
3dexport
turbosquid
$39
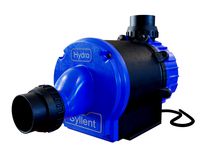
Realistic Water pump SYLLENT PUMP
...realistic water pump syllent pump for download as max and obj on turbosquid: 3d models for games, architecture, videos. (1312864)
turbosquid
$150

Pumpe
...yalty free 3d model pumpe for download as ige, blend, and stl on turbosquid: 3d models for games, architecture, videos. (1284318)
3d_export
$10
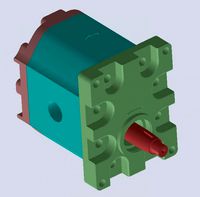
gear pump
...gear pump
3dexport
it is a gear pump in iges format
turbosquid
$19

Old Water Pumps Gas Pumps
...pumps gas pumps for download as 3ds, obj, fbx, blend, and dae on turbosquid: 3d models for games, architecture, videos. (1207997)