Thingiverse

Peopoly Moai Build Platform Leveling System by Insaisissable
by Thingiverse
Last crawled date: 3 years, 1 month ago
This is a leveling system for the Peopoly Moai 3D printer build platform that can be adapted very easily to the stock build platform that comes with the printer (or a second one bought directly from Peopoly). It doesn't change the actual height of the build platform and the leveling process is done mainly from the printing chamber (not from the electronics chamber as it is actually the case). Nevertheless, you may need first to level the vat's platform from the electronics chamber in order to obtain a vat plane that is perfectly perpendicular to the z axis. After that you can install this flexible leveling system and may never need to go back to screw/unscrew the nuts in the electronics chamber.
13.07.2018 Update
A third version is here (the first version in three points is not published as I don't find it ideal to calibrate a build platform with four corners). I left the first published version components (07.07.2018) on site. One may choose between the two solutions. They are a bit different in dimensions and number of components. I will update soon the images as well.
All the files that are named V3 fit together (the same goes with V2). This version allows to be adjusted on X and Y in order to have the build platform perfectly aligned with the virtual one and print all over the 130x130 mm surface without worrying that the print may be off platform. The calibration for the first layer works like a charm. Once you get the idea how to do it, it takes 2 or max 3 rounds of test prints. During the printing process the platform is sturdy and doesn't allow any lateral or vertical movements if everything is thoroughly fit in place and tighten. The prints that I've done got out nice, without issues. I've printed a few objects using only Peopoly resin.
07.07.2018 first publication
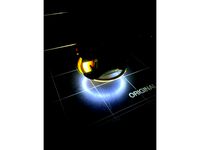
After trying a first system with three points for leveling I decided to create this one with four points, a solution more adapted to the leveling process needed for the Moai printer. In the image you may find the very first test after leveling the build platform once for the first time with this system. It wasn't yet perfect but it was very promising for the next steps of fiddling. The fiddling is so easy to do in order to get every time the perfect first layer (check the last three photos)…
The leveling system has (so far) 4 plastic parts:
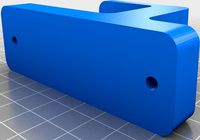
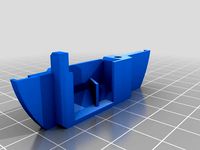
the spider - the aluminum hook slides in the spider and has to be screwed with the 4 back screws to keep the two pieces together. Before, you may need to clean the four back screw holes of the spider part in order to slide and screw the hook in.
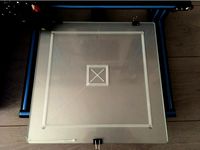
the square - it needs to be mounted on the platform instead of the 3 mm aluminum existing plate
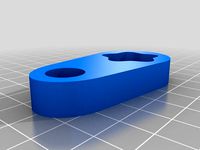
the leveling knobs - 8 of them are needed
a key to tighten the knobs (you may not need to print it if you have enough force to tighten the knobs by hand)
The black parts were printed in PLA at 0.2 mm resolution. The yellow knobs were printed in PLA at 0.1 mm resolution. No supports are needed for the prints. The spider has integrated supports at the hook entrance that has to be removed when the print is done.
In order to mount the printed plastic parts you need: the stock Peopoly Moai build platform (of course), 4xM3 screws of minimum 50 mm length and 12xM3 nuts.
The assembling process:
In order to mount the system, all you need is to unscrew the 12 black screws and disassemble the three pieces that compose the stock build platform. You don't need any more the 3 mm aluminum plate that is between the actual building plate and the hook.
Once the build platform is disassembled, first of all you need to slide the aluminum hook in the spider and lock it in with the four back screws. The screw holes are elongated in order to allow the future alignment of the platform on X axis. When you mount it for the first time you need to put the screws in the middle at equal distance from the sides. After printing a first test you can see if the platform is centered within the virtual 130x130mm printing area or if it is off on X axis and come back to change the position of the hook in order to adjust it as needed. For the moment the platform is horizontally adjustable only on X axis. A further development I have to make will give it the ability to adjust it on the Y axis as well.
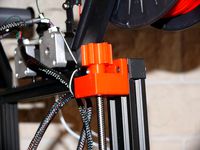
On the flat side of the knobs you may mount the M3 nuts. You need to mount then the first set of 4 yellow knobs on the 50 mm screws with the spherical side opposed to the head of the screw. After that, the screws with the four yellow knobs have to be mounted in the holes of the arms of the spider from the flat side. You may mount now the second set of 4 yellow knobs on the screws (already mounted in the spider) with the spherical side oriented against the spider. The arms of the spider must be now between the two knobs. For the first time you need to tighten all the way the 8 knobs two by two against each other. This will help the nuts to migrate at their place in the knobs. You may use the printed key to do this as it helps a lot. After that you can untighten the knobs and screw them almost all the way to the top of the screws leaving about 10 mm on top. On the screws you need to put the last set of nuts. They will serve to lock the long screws to the platform.
On the platform you need to mount the square using four of the stock small black screws. You may screw them only in the holes that are in the middle of the platform's four sides leaving the corner holes without screws. The long screws (along with the knobs and spider) may be screwed now, all the way in, in the four corner of the build platform. The nuts on the long screws that are near the platform may be screwed against the platform to lock it in (there's a detail image where you may see how it is mounted).
By now all the parts should be in place and the system completely mounted.
In order to make it work easily, you have to unscrew the knobs to the ends of the 50 mm screw leaving the spider to move freely in between. Take the platform in one hand and the spider in the other and slide them along the screws in and out against each other for a few minutes till the spider moves without issues on the screws. If you take the spider with one hand and rise it, the platform has to slide down freely till the knobs stop it.
The leveling process:
The flat side of the spider and the top sides of the square’s handgrips have to be perfectly aligned. In order to do this you have to put the platform on a flat surface. Lower the knobs til the spider’s flat side aligns perfectly with the top side of the handgrips. You may tighten now all the 4 top knobs to lock in the platform. This locking position has exactly the same position of the hook on this flexible platform as the stock platform. You may use now the build platform to make a first leveling of the vat platform from the electronics chamber as indicated by Peopoly. Note that this may not guarantee a perfectly perpendicular vat platform to the Z axis as the printed parts may have errors and the alignment may not be perfect. Better, probably is to use first an unchanged build platform as this solution may guarantee a square angle between the Z axis and the vat platform.
Once the vat platform is perpendicular to the Z axis you can use the flexible platform to be able to fiddle further the leveling to the vat surface. How to do it?
Mount the platform on the printer and unscrew the yellow knobs to keep them apart in order to let the spider move freely in between. Start the process of leveling as prescribed by Peopoly, lowering the platform on an empty vat. As it moves down the build platform will perfectly sit on the vat. The top knobs have to be screwed first in order to touch the surface of the spider. You may feel when they touch the spider and stop to screw. Next you have to screw the bottom knobs on a X pattern till you feel that all the knobs are locked in and the platform doesn’t move any more. Using this solution, as there is no pressure against the PDMS, in the settings you have to change only one unit from 1880 to 1879 (and not 1877) as it is enough to move the platform 0.1 mm up and leave the necessary gap for the first layer to be printed. The platform may be lowered or mounted as one wish by unscrewing / screwing the two knobs on each corner. Note that the knobs have 10 sides (like a gradation) and one 360 rotation moves the platform up/down with the pitch of the screw’s thread (about 0.3 mm). Therefore one gradation rotation moves the platform 0.03 mm up/down.
I included a test file among the files uploaded that prints in about 12 minutes. It’s enough to see how’s the thickness of the first layer printed in each corner of the build platform and it may be used to fiddle further the levels to get the first layer perfectly dialed in. One more thing, in order to raise the platform you have turn the knobs as if you lowered them (and, on the other direction, to lower the platform you turn them as if you raised them higher).
Happy printing to all!
13.07.2018 Update
A third version is here (the first version in three points is not published as I don't find it ideal to calibrate a build platform with four corners). I left the first published version components (07.07.2018) on site. One may choose between the two solutions. They are a bit different in dimensions and number of components. I will update soon the images as well.
All the files that are named V3 fit together (the same goes with V2). This version allows to be adjusted on X and Y in order to have the build platform perfectly aligned with the virtual one and print all over the 130x130 mm surface without worrying that the print may be off platform. The calibration for the first layer works like a charm. Once you get the idea how to do it, it takes 2 or max 3 rounds of test prints. During the printing process the platform is sturdy and doesn't allow any lateral or vertical movements if everything is thoroughly fit in place and tighten. The prints that I've done got out nice, without issues. I've printed a few objects using only Peopoly resin.
07.07.2018 first publication
After trying a first system with three points for leveling I decided to create this one with four points, a solution more adapted to the leveling process needed for the Moai printer. In the image you may find the very first test after leveling the build platform once for the first time with this system. It wasn't yet perfect but it was very promising for the next steps of fiddling. The fiddling is so easy to do in order to get every time the perfect first layer (check the last three photos)…
The leveling system has (so far) 4 plastic parts:
the spider - the aluminum hook slides in the spider and has to be screwed with the 4 back screws to keep the two pieces together. Before, you may need to clean the four back screw holes of the spider part in order to slide and screw the hook in.
the square - it needs to be mounted on the platform instead of the 3 mm aluminum existing plate
the leveling knobs - 8 of them are needed
a key to tighten the knobs (you may not need to print it if you have enough force to tighten the knobs by hand)
The black parts were printed in PLA at 0.2 mm resolution. The yellow knobs were printed in PLA at 0.1 mm resolution. No supports are needed for the prints. The spider has integrated supports at the hook entrance that has to be removed when the print is done.
In order to mount the printed plastic parts you need: the stock Peopoly Moai build platform (of course), 4xM3 screws of minimum 50 mm length and 12xM3 nuts.
The assembling process:
In order to mount the system, all you need is to unscrew the 12 black screws and disassemble the three pieces that compose the stock build platform. You don't need any more the 3 mm aluminum plate that is between the actual building plate and the hook.
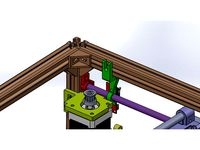
Once the build platform is disassembled, first of all you need to slide the aluminum hook in the spider and lock it in with the four back screws. The screw holes are elongated in order to allow the future alignment of the platform on X axis. When you mount it for the first time you need to put the screws in the middle at equal distance from the sides. After printing a first test you can see if the platform is centered within the virtual 130x130mm printing area or if it is off on X axis and come back to change the position of the hook in order to adjust it as needed. For the moment the platform is horizontally adjustable only on X axis. A further development I have to make will give it the ability to adjust it on the Y axis as well.
On the flat side of the knobs you may mount the M3 nuts. You need to mount then the first set of 4 yellow knobs on the 50 mm screws with the spherical side opposed to the head of the screw. After that, the screws with the four yellow knobs have to be mounted in the holes of the arms of the spider from the flat side. You may mount now the second set of 4 yellow knobs on the screws (already mounted in the spider) with the spherical side oriented against the spider. The arms of the spider must be now between the two knobs. For the first time you need to tighten all the way the 8 knobs two by two against each other. This will help the nuts to migrate at their place in the knobs. You may use the printed key to do this as it helps a lot. After that you can untighten the knobs and screw them almost all the way to the top of the screws leaving about 10 mm on top. On the screws you need to put the last set of nuts. They will serve to lock the long screws to the platform.
On the platform you need to mount the square using four of the stock small black screws. You may screw them only in the holes that are in the middle of the platform's four sides leaving the corner holes without screws. The long screws (along with the knobs and spider) may be screwed now, all the way in, in the four corner of the build platform. The nuts on the long screws that are near the platform may be screwed against the platform to lock it in (there's a detail image where you may see how it is mounted).
By now all the parts should be in place and the system completely mounted.
In order to make it work easily, you have to unscrew the knobs to the ends of the 50 mm screw leaving the spider to move freely in between. Take the platform in one hand and the spider in the other and slide them along the screws in and out against each other for a few minutes till the spider moves without issues on the screws. If you take the spider with one hand and rise it, the platform has to slide down freely till the knobs stop it.
The leveling process:
The flat side of the spider and the top sides of the square’s handgrips have to be perfectly aligned. In order to do this you have to put the platform on a flat surface. Lower the knobs til the spider’s flat side aligns perfectly with the top side of the handgrips. You may tighten now all the 4 top knobs to lock in the platform. This locking position has exactly the same position of the hook on this flexible platform as the stock platform. You may use now the build platform to make a first leveling of the vat platform from the electronics chamber as indicated by Peopoly. Note that this may not guarantee a perfectly perpendicular vat platform to the Z axis as the printed parts may have errors and the alignment may not be perfect. Better, probably is to use first an unchanged build platform as this solution may guarantee a square angle between the Z axis and the vat platform.
Once the vat platform is perpendicular to the Z axis you can use the flexible platform to be able to fiddle further the leveling to the vat surface. How to do it?
Mount the platform on the printer and unscrew the yellow knobs to keep them apart in order to let the spider move freely in between. Start the process of leveling as prescribed by Peopoly, lowering the platform on an empty vat. As it moves down the build platform will perfectly sit on the vat. The top knobs have to be screwed first in order to touch the surface of the spider. You may feel when they touch the spider and stop to screw. Next you have to screw the bottom knobs on a X pattern till you feel that all the knobs are locked in and the platform doesn’t move any more. Using this solution, as there is no pressure against the PDMS, in the settings you have to change only one unit from 1880 to 1879 (and not 1877) as it is enough to move the platform 0.1 mm up and leave the necessary gap for the first layer to be printed. The platform may be lowered or mounted as one wish by unscrewing / screwing the two knobs on each corner. Note that the knobs have 10 sides (like a gradation) and one 360 rotation moves the platform up/down with the pitch of the screw’s thread (about 0.3 mm). Therefore one gradation rotation moves the platform 0.03 mm up/down.
I included a test file among the files uploaded that prints in about 12 minutes. It’s enough to see how’s the thickness of the first layer printed in each corner of the build platform and it may be used to fiddle further the levels to get the first layer perfectly dialed in. One more thing, in order to raise the platform you have turn the knobs as if you lowered them (and, on the other direction, to lower the platform you turn them as if you raised them higher).
Happy printing to all!
Similar models
thingiverse
free

Build Platform Holder for peopoly MOAI vat by johnniewhiskey
...al inside air tight container.
.
official peopoly support forum
official facebook group >> moai laser sla 3d printer owners
thingiverse
free

Platform holder for Peopoly Moai SLA printer by GJDtechnics
...f the vat to nicely fit the platform above the vat. after this i put it all in a sealed plastic bag to store it in a dark closet.
thingiverse
free

ENDER-3 BED HANDLE by LarnOm
...nd screw the knobs on it...
there is a camera mount made by moclub and availlable here :https://www.thingiverse.com/thing:2987358
thingiverse
free

CR-10 Leveling knob plug by dinoding
...loose away during previous printing.https://www.thingiverse.com/thing:2508323
this is the leveling knob that work with this plug.
thingiverse
free
Cord Wrap Hook by Dierks48
...pports may be needed for the holes, but you might be good to just print the hooks on their sides.
2x #8 screws per hook to mount.
thingiverse
free

Z rod knob for p3steel by ksevin
... turn the z-rod easily while adjusting the level. this knob is for 5 mm z-axis rod. you also need four nuts to tighten the knobs.
thingiverse
free
Z rod knob for geeetech A20M
...r and the knob itself.
you will need :
one 2.5mm socket screw and it's nut
two 3mm countersink socket screws and their nuts.
thingiverse
free
Y-Axis Endstop Mounting Bracket for Hypercube 3D Printer by dirtybeetle
...stop switch on 8 mm y-axis shaft. it also does not rotate on shaft because of the fixing bolt on upper side.
i hope you enjoy it.
thingiverse
free

Creality LD-002R Resin Tray Vat Cover (Designed by Fulament)
...esigned to be printed on an fdm machine, not a resin machine. if you have any comments or suggestions leave them in the comments!
thingiverse
free

Voxelab Aquila Z Knob by bdts
...printing:
print as-is, it doesn't need any supports, and there should be enough surface area to negate the need for brim/raft
Insaisissable
thingiverse
free
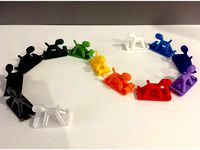
Rainbow Dog by Insaisissable
...rainbow dog by insaisissable
thingiverse
small dog on it's sledge.
thingiverse
free

3D Art for Emma by Insaisissable
...sed black, white and two shades of grey. using other colors may bring a completely different perspective.
happy printing to all!
thingiverse
free
Bed Leveling check on CR-10 by Insaisissable
... is printed in order to adjust all four corners of the bed. the idea is to obtain a constant width of the lines all over the bed.
thingiverse
free
LED ring on Prusa Mk2s by Insaisissable
...yer the light should be turned off as its heat may influence the reading of the height calibration senzor.
happy printing to all!
thingiverse
free
Prusa MK2s nozzle mounted 7mm led ring by BeardPlusRazor
...still room for improvement by adding hooks like on insaisissable#39;s mount. ! hot ! is no more. the original...
Peopoly
thingiverse
free

Peopoly Door Lock by 3D-IN
...peopoly door lock by 3d-in
thingiverse
peopoly door lock
thingiverse
free

Peopoly moai label by customizer1
...se
hi guys this is a label for the peopoly moai printer. it was created large so that you can scale it down and keep the detail.
thingiverse
free

Peopoly Moai faceplate by sylus
...peopoly moai faceplate by sylus
thingiverse
to identiy your printer in multi color
thingiverse
free
Peopoly Moai Spanner by Bitshift
...ai spanner by bitshift
thingiverse
remix of pelmoggian's design to save a bit of filament and make it slightly more shapely.
thingiverse
free

Peopoly Moai VAT by mharter
...peopoly moai vat by mharter
thingiverse
just tweaked a few dimensions so the vat better fits the moai sla resin printer.
thingiverse
free
Build Platform Holder for peopoly MOAI vat by johnniewhiskey
...al inside air tight container.
.
official peopoly support forum
official facebook group >> moai laser sla 3d printer owners
thingiverse
free

Peopoly Moai Spanner by Pelmoggian
...undo it afterwards.
so here it is - perhaps the most sophisticated model you'll see on the site. over 2 million moving parts.
thingiverse
free

Peopoly Moai Vat Comb by kstanley250
...peopoly moai vat comb by kstanley250
thingiverse
print in pla
ver 2 has rounded edges on comb
thingiverse
free

vat dripping bracket for peopoly MOAI by johnniewhiskey
...oaivatbracket_mharterfdm.stl
.
.
official peopoly support forum
official facebook group >> moai laser sla 3d printer owners
thingiverse
free

Peopoly Moai Door Latch 0.3" magnets by Londonbrig0
...t shut without needing to use the key lock.
remixed from 3d-in's design to work with .3in x .11in magnets sold by home depot.
Moai
turbosquid
$75

Moai
... available on turbo squid, the world's leading provider of digital 3d models for visualization, films, television, and games.
3ddd
$1

Scarabeo Moai 8603
... 8603
3ddd
scarabeo , moai
раковина scarabeo moai 8603 напольная 500 х 430 мм цвет белый
turbosquid
$5

Neo Moai
...urbosquid
royalty free 3d model neo moai for download as obj on turbosquid: 3d models for games, architecture, videos. (1635315)
turbosquid
$2

Moai sculpt
...osquid
royalty free 3d model moai sculpt for download as max on turbosquid: 3d models for games, architecture, videos. (1332686)
turbosquid
$15

Moai statue
...y free 3d model moai statue for download as obj, c4d, and fbx on turbosquid: 3d models for games, architecture, videos. (1415607)
turbosquid
$1

Moai Statue
...e 3d model moai statue for download as 3ds, max, obj, and fbx on turbosquid: 3d models for games, architecture, videos. (1489983)
turbosquid
$45

Moai Statue
... available on turbo squid, the world's leading provider of digital 3d models for visualization, films, television, and games.
turbosquid
$39

Moai Statue
... available on turbo squid, the world's leading provider of digital 3d models for visualization, films, television, and games.
turbosquid
$20

Moai Statue
... available on turbo squid, the world's leading provider of digital 3d models for visualization, films, television, and games.
turbosquid
$19

Moai Statues
... available on turbo squid, the world's leading provider of digital 3d models for visualization, films, television, and games.
Platform
archibase_planet
free
Platform
...rm
archibase planet
platform
platform stefano galli savio cerrato n040413 - 3d model (*.gsm+*.3ds) for exterior 3d visualization.
turbosquid
$4
Platform
...d
royalty free 3d model platform for download as max and fbx on turbosquid: 3d models for games, architecture, videos. (1363559)
3d_export
$5
WORKING PLATFORM
...working platform
3dexport
working platform 4000x3000x1500mm
turbosquid
$20
Platform
... available on turbo squid, the world's leading provider of digital 3d models for visualization, films, television, and games.
turbosquid
$9
Platform
... available on turbo squid, the world's leading provider of digital 3d models for visualization, films, television, and games.
turbosquid
$1
Platform
... available on turbo squid, the world's leading provider of digital 3d models for visualization, films, television, and games.
turbosquid
$1

Platform
... available on turbo squid, the world's leading provider of digital 3d models for visualization, films, television, and games.
turbosquid
$1

Platform
... available on turbo squid, the world's leading provider of digital 3d models for visualization, films, television, and games.
3d_ocean
$19

Drilling Platform
...rm for coastal areas. designed to perform drilling operations. include standart materials scene and v-ray scene with environment.
3d_export
$15
steel grill platform
...steel grill platform
3dexport
steel grill platform
Leveling
design_connected
$11

Levels
...levels
designconnected
one nordic levels computer generated 3d model. designed by form us with love.
design_connected
$7
Level
...level
designconnected
zanotta level shelves and storage computer generated 3d model. designed by arik levy.
turbosquid
$29
level
...ty free 3d model level for download as 3ds, obj, c4d, and fbx on turbosquid: 3d models for games, architecture, videos. (1272856)
turbosquid
$1
level
... available on turbo squid, the world's leading provider of digital 3d models for visualization, films, television, and games.
3d_export
$5
Mario level
...mario level
3dexport
mario level low quality for fun videos
3ddd
$1
LEVELS OF DISCOVERY
...етская мебель "levels of discovery". rab10003 princess mini rocker
кресло-качалка (мини) "принцесса навсегда"
3d_export
$19

level design
...level design
3dexport
you can use this design (level design) in your own game.
turbosquid
$60
Desert level
...squid
royalty free 3d model desert level for download as fbx on turbosquid: 3d models for games, architecture, videos. (1208131)
turbosquid
$15
Transit Level
...quid
royalty free 3d model transit level for download as max on turbosquid: 3d models for games, architecture, videos. (1158112)
turbosquid
$14

Districts Level
...id
royalty free 3d model districts level for download as max on turbosquid: 3d models for games, architecture, videos. (1408410)
System
archibase_planet
free

System
...m
archibase planet
fire alarm system fire alarm box
security light system - 3d model (*.gsm+*.3ds) for interior 3d visualization.
archibase_planet
free

Spider system
...stem spider glass system
spider system to fix glass stefano galli n050912 - 3d model (*.gsm+*.3ds) for interior 3d visualization.
3ddd
$1

Euforia System
...euforia system
3ddd
euforia
euforia system
3d_export
$50

Roof system Truss system 3D Model
...oof system truss system 3d model
3dexport
roof system truss truss stage
roof system truss system 3d model aleksbel 38970 3dexport
3ddd
$1

DVD System
...dvd system
3ddd
dvd , schneider
dvd system
design_connected
free

Seating system
...seating system
designconnected
free 3d model of seating system
3d_export
$5

solar system
...solar system
3dexport
solar system in c4d, with 8k nasa textures
3ddd
$1

Quanta System
...quanta system
3ddd
медицина
quanta system.
лазерное оборудование для медицинских центров
3d_export
$15

solar system
...nd the other the sun, the earth and the moon, the latter has an animation with camera movement included, the files are in spanish
3d_export
$14

missile system
...missile system
3dexport
Build
archibase_planet
free
Building
...building high-rise building office building construction
building n050115 - 3d model (*.gsm+*.3ds) for exterior 3d visualization.
3d_export
$5
building
...building
3dexport
clasic building
3ddd
$1
building
...building
3ddd
здание
building
archibase_planet
free

Building
...lanet
building office office building construction
building n090914 - 3d model (*.gsm+*.3ds+*.max) for exterior 3d visualization.
archibase_planet
free

Building
...net
building tower construction high-rise building
building n100214 - 3d model (*.gsm+*.3ds+*.max) for exterior 3d visualization.
3d_export
free
Building
...building
3dexport
low poly building;
3d_export
free
Building
...building
3dexport
low poly building;
3d_export
free
Building
...building
3dexport
low poly building;
3d_export
free
Building
...building
3dexport
low poly building;
3d_export
free
Building
...building
3dexport
low poly building;