Thingiverse
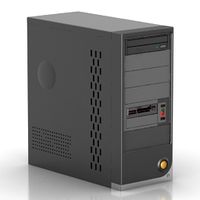
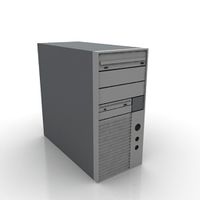
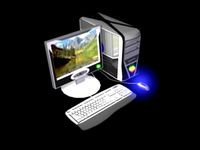
PC Case Modification (Homemade) by KnockOutTR
by Thingiverse
Last crawled date: 3 years ago
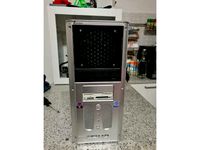
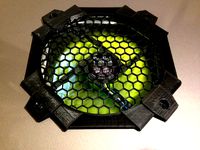
1-Kasanın kapağı istenilen boyutlara göre ölçütlenir ve kesilir.
2-Aynı ölçülerde pvc,cam,mika vs. kesilir.
3-Sıcak silikon tarafından kesilen malzeme bilgisayar kasasının yan kapağına tutturulur.
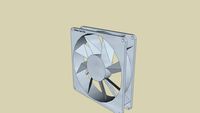
4-Kasanızda 120mm fan yuvası yoksa , kasanızın ön ve yan taraflarına satın aldığınız fanın ölçülerine göre delik açılır.
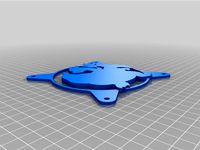
5-Fanlar monte edilmiş ve upload ettiğim STL'ler baskıdan alınır ve fanların korunması için koruyucular montelenir.
6-RGB set satın alınır (benimki https://urun.n11.com/sogutucu-ve-fan/dark-ultra-bright-rgb-multi-led-fan-ve-serit-kit-2x120mm-fan-ve-P227470155?gclid=Cj0KCQjwpvzZBRCbARIsACe8vyKMrMpoahn5ro5aptFZtVwu76TNtXKkcI2UQ9Nlf_pLv8XvatOt5UcaAvZJEALw_wcB) ve montelenir.
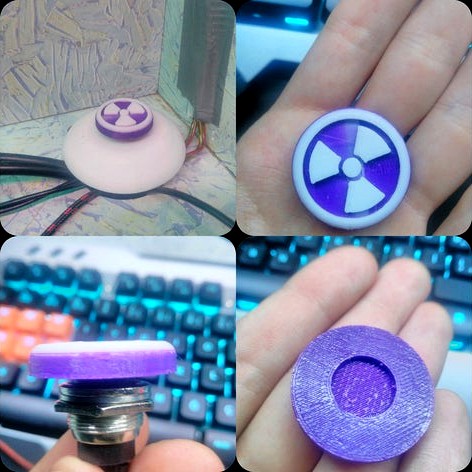
7-Pc'nin açma butonunu değiştirmek için linkdeki (https://www.direnc.net/dc180-siyah-buton) butonu satın alındırktan sonra uzunluğunu sizin belirleyeceğiniz kablolar butonun iki ucundan anakartınızdaki POWER SW kısmına takılır(kasanızın on/off butonunu söktüğünüz yerdir)
8-Buton STL'leri baskıdan alındıktan sonra masanıza sabitlenir.
Google Translate -sry-
1- The cover of the frame is measured and cut according to the desired dimensions.
2-Pvc, glass, mica etc. in the same dimensions. cut.
3-The material cut by the hot silicone is attached to the side cover of the computer case.
4-If you do not have a 120mm fan socket on your case, you will drill holes according to the dimensions of the fan you bought on the front and side of your cup.
5-The fans are installed and the STLs I uploaded are taken from the press and the protectors are installed to protect the fans.
6-RGB set is purchased (mine is https://urun.n11.com/sogutucu-ve-fan/dark-ultra-bright-rgb-multi-led-fan-ve-serit-kit-2x120mm-fan-ve- P227470155? Gclid = Cj0KCQjwpvzZBRCbARIsACe8vyKMrMpoahn5ro5aptFZtVwu76TNtXKkcI2UQ9Nlf_pLv8XvatOt5UcaAvZJEALw_wcB) and is mounted.
7-To change the power-on switch on the board, you need to remove the on / off button of your chassis from the two ends of the cords button that you will determine after you purchase the button on the link (https://www.direnc.net/dc180-siyah-buton) place)
After the
8-Button STLs are taken out of print, the your pc table is fixed.
2-Aynı ölçülerde pvc,cam,mika vs. kesilir.
3-Sıcak silikon tarafından kesilen malzeme bilgisayar kasasının yan kapağına tutturulur.
4-Kasanızda 120mm fan yuvası yoksa , kasanızın ön ve yan taraflarına satın aldığınız fanın ölçülerine göre delik açılır.
5-Fanlar monte edilmiş ve upload ettiğim STL'ler baskıdan alınır ve fanların korunması için koruyucular montelenir.
6-RGB set satın alınır (benimki https://urun.n11.com/sogutucu-ve-fan/dark-ultra-bright-rgb-multi-led-fan-ve-serit-kit-2x120mm-fan-ve-P227470155?gclid=Cj0KCQjwpvzZBRCbARIsACe8vyKMrMpoahn5ro5aptFZtVwu76TNtXKkcI2UQ9Nlf_pLv8XvatOt5UcaAvZJEALw_wcB) ve montelenir.
7-Pc'nin açma butonunu değiştirmek için linkdeki (https://www.direnc.net/dc180-siyah-buton) butonu satın alındırktan sonra uzunluğunu sizin belirleyeceğiniz kablolar butonun iki ucundan anakartınızdaki POWER SW kısmına takılır(kasanızın on/off butonunu söktüğünüz yerdir)
8-Buton STL'leri baskıdan alındıktan sonra masanıza sabitlenir.
Google Translate -sry-
1- The cover of the frame is measured and cut according to the desired dimensions.
2-Pvc, glass, mica etc. in the same dimensions. cut.
3-The material cut by the hot silicone is attached to the side cover of the computer case.
4-If you do not have a 120mm fan socket on your case, you will drill holes according to the dimensions of the fan you bought on the front and side of your cup.
5-The fans are installed and the STLs I uploaded are taken from the press and the protectors are installed to protect the fans.
6-RGB set is purchased (mine is https://urun.n11.com/sogutucu-ve-fan/dark-ultra-bright-rgb-multi-led-fan-ve-serit-kit-2x120mm-fan-ve- P227470155? Gclid = Cj0KCQjwpvzZBRCbARIsACe8vyKMrMpoahn5ro5aptFZtVwu76TNtXKkcI2UQ9Nlf_pLv8XvatOt5UcaAvZJEALw_wcB) and is mounted.
7-To change the power-on switch on the board, you need to remove the on / off button of your chassis from the two ends of the cords button that you will determine after you purchase the button on the link (https://www.direnc.net/dc180-siyah-buton) place)
After the
8-Button STLs are taken out of print, the your pc table is fixed.
Similar models
grabcad
free

alm. sogutucu siyah
...alm. sogutucu siyah
grabcad
sogutucu 45as
3dwarehouse
free
120mm Case Fan
...120mm case fan
3dwarehouse
120mm pc case fan #computer #fan #pc
thingiverse
free

Pc Fan 120mm to 100mm adaptor by Bollapapale
...pc fan 120mm to 100mm adaptor by bollapapale
thingiverse
120mm fan to 100mm pvc pipe
thingiverse
free

Charmander Pokemon 120mm Fan Grill by tkovalesky
... 120mm fan grill by tkovalesky
thingiverse
this is a 120mm pc case fan cover showing charmander.
it will fit any 120mm case fan.
thingiverse
free

120mm Fan Grill "Snowflake" by Fotter58
...y fotter58
thingiverse
this is a grill for a 120mm pc fan case. these are going into my pc soon :b . hope you guys/girls enjoy!
thingiverse
free
PC FAN HOLDER 5.25 CENTURION by MrFreddy1986
...prove the airflow. you can print it to do the same for all the old pc case that have at least three 5.25 slots on the front panel
thingiverse
free

Charmeleon Pokemon 120mm Fan Grill by tkovalesky
...charmeleon pokemon 120mm fan grill by tkovalesky
thingiverse
will fit any 120mm pc case fan.
thingiverse
free
Charizard Pokemon 120mm Fan Grill by tkovalesky
...charizard pokemon 120mm fan grill by tkovalesky
thingiverse
will fit any 120mm pc case fan.
thingiverse
free
120mm Fan Cover for PC case by spope
... spope
thingiverse
after cutting a dirty big hole in the top of my old pc case, i needed something to make it look a bit neater.
thingiverse
free

Bladeless fan (for 120mm PC fan) by Nadamas
...ladeless fan for 120mm pc fan
original design by boomzilla1 scaled in x1.5
donate what you want in https://www.paypal.me/nadamas
Knockouttr
thingiverse
free

Bismillahirrahmanirrahim by KnockOutTR
...bismillahirrahmanirrahim by knockouttr
thingiverse
bismillahirrahmanirrahim
thingiverse
free

peugeot keychain by KnockOutTR
...peugeot keychain by knockouttr
thingiverse
keychain
thingiverse
free

Semerkand Keychain by KnockOutTR
...semerkand keychain by knockouttr
thingiverse
semerkand
thingiverse
free

Costomizable Tag by KnockOutTR
...costomizable tag by knockouttr
thingiverse
knockout
thingiverse
free

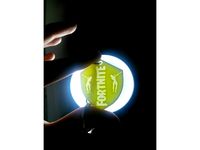
FORTNITE Keychain by KnockOutTR
...fortnite keychain by knockouttr
thingiverse
fortnite keychain
thingiverse
free

FORTNITE Keychain by KnockOutTR
...fortnite keychain by knockouttr
thingiverse
fortnite keychain
thingiverse
free
FORTNITE Keychain by KnockOutTR
...fortnite keychain by knockouttr
thingiverse
fortnite keychain
thingiverse
free

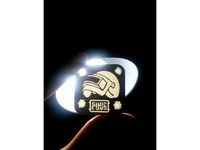
PUBG Keychain by KnockOutTR
...pubg keychain by knockouttr
thingiverse
pubg keychain
thingiverse
free
PUBG Keychain by KnockOutTR
...pubg keychain by knockouttr
thingiverse
pubg keychain
thingiverse
free

Infinity Keychain by KnockOutTR
...infinity keychain by knockouttr
thingiverse
infınıti keychain
Homemade
turbosquid
$12

Homemade Bread
...ree 3d model homemade bread for download as max, obj, and fbx on turbosquid: 3d models for games, architecture, videos. (1593685)
turbosquid
$10
Homemade Based Gun
... available on turbo squid, the world's leading provider of digital 3d models for visualization, films, television, and games.
turbosquid
$15

Homemade Chocolates(8 types)
...e 3d model homemade chocolates(8 types) for download as blend on turbosquid: 3d models for games, architecture, videos. (1214642)
turbosquid
$5
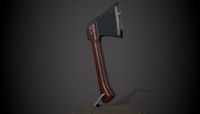
Homemade Axe (High Poly)
...ty free 3d model homemade axe (high poly) for download as obj on turbosquid: 3d models for games, architecture, videos. (1209323)
3d_export
$10

homemade knife
...nife
3dexport
all textures in the png extension (2k, pbr). number of polygons 6980. file formats: fbx, obj, stl, max, mb, blend.
3d_export
$5

Homemade sword
... and substance 3d painter. on the screenshots low-poly version but if you need high poly or you have questions you can write me .
3d_export
free

homemade pistol
...lt;br>polygons:2,910<br>verts:1,543<br>including fbx,blend,obj,unity,unreal format<br>create in blender 2.92
3d_export
$5

spiderman homemade suit - spiderman homecoming
...omecoming
3dexport
excellent for small size 3d printing.<br>simple sketchup modeling.<br>ideal model for papercraft.
3ddd
$1

Homemade Pickles & Sour Cabbage
...kles/соленые огурцы, sour cabbage/квашенная капуста.
сайт: сколько хозяек - столько рецептов, а значит и сайтов изготовителей ;)
3d_export
$16

homemade bread
...d in it.<br>support :<br>if you have any questions, please feel free to contact us.<br>thank you for purchasing
Modification
turbosquid
$12
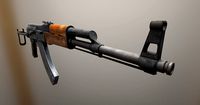
AKMS (AK47 modification)
... available on turbo squid, the world's leading provider of digital 3d models for visualization, films, television, and games.
turbosquid
$79
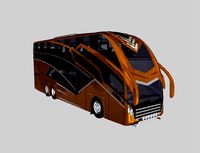
BusTransForm - Modif Bus Thailand
...d model bustransform - modif bus thailand for download as obj on turbosquid: 3d models for games, architecture, videos. (1383303)
3d_export
$25
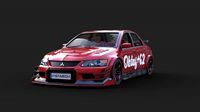
mitsubishi evo 9 modification
...mitsubishi evo 9 modification
3dexport
evo 9 has been modified with a nice and elegant look.
3d_ocean
$25

Dart Vader (modificated helm)
...niforms, as well as anatomical model of the character itself. the model is divided into groups for further editing. primarily ...
turbosquid
$15
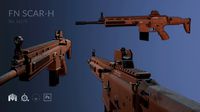
FN SCAR-H modification low-poly game ready
...fication low-poly game ready for download as ma, obj, and fbx on turbosquid: 3d models for games, architecture, videos. (1386384)
3d_export
$5

sphere light
...sphere light
3dexport
the socket and light are modifables
3d_export
$5
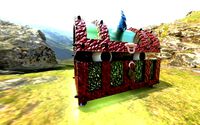
Fabulous chest
...chest 3dexport fabulous chest for your game or further modification ...
3d_export
free
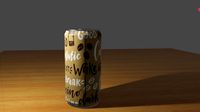
cold coffee
...cold coffee 3dexport cold coffee can. any required modification will be done at...
3d_ocean
$12
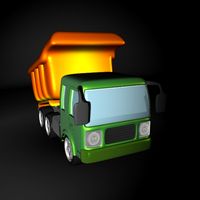
Cartoon Dump or Sand Truck
...already rig low poly modifier still in stack for modification unwrap uvw for material and colour...
3d_ocean
$12

Cartoon Cement Mixer Truck
...already rig low poly modifier still in stack for modification unwrap uvw for material and colour...
Pc
archibase_planet
free
PC
...pc
archibase planet
pc case pc tower pc equipment system unit
pc - 3d model (*.gsm+*.3ds) for interior 3d visualization.
3d_export
free
Pc
...pc
3dexport
pc
archibase_planet
free
PC
...pc
archibase planet
notebook pc computer equipment
pc - 3d model (*.gsm+*.3ds) for interior 3d visualization.
archibase_planet
free
PC
...pc
archibase planet
system unit pc equipment
pc - 3d model (*.gsm+*.3ds) for interior 3d visualization.
archibase_planet
free
PC
...pc
archibase planet
pc equipment cabinet system unit
pc 70 - 3d model (*.gsm+*.3ds) for interior 3d visualization.
3d_export
$5
pc
...pc
3dexport
computer
archibase_planet
free
PC
...pc
archibase planet
cabinet chassis system unit
pc case n241107 - 3d model (*.gsm+*.3ds) for interior 3d visualization.
turbosquid
$3

PC
...id
royalty free 3d model pc for download as ma, obj, and fbx on turbosquid: 3d models for games, architecture, videos. (1159175)
turbosquid
$7
lap top ,pc portable, PC
...ty free 3d model lap top ,pc portable, pc for download as c4d on turbosquid: 3d models for games, architecture, videos. (1352084)
turbosquid
$30
PC
... available on turbo squid, the world's leading provider of digital 3d models for visualization, films, television, and games.
Case
3d_export
$1

case
...case
3dexport
case
archibase_planet
free

Case
...case
archibase planet
showcase show-case glass case
glass-case + cakes - 3d model for interior 3d visualization.
archibase_planet
free

Case
...case
archibase planet
showcase show-case glass case
glass-case for chips - 3d model for interior 3d visualization.
archibase_planet
free

Case
...case
archibase planet
case shelving drawer
case - 3d model for interior 3d visualization.
archibase_planet
free

Case
...case
archibase planet
case rack locker
case - 3d model for interior 3d visualization.
archibase_planet
free

Case
...case
archibase planet
case drawer kitchen furniture
case - 3d model for interior 3d visualization.
archibase_planet
free

Case
...case
archibase planet
case cupboard shelving
glass case - 3d model for interior 3d visualization.
archibase_planet
free

Case
...case
archibase planet
case handbag suitcase
case - 3d model (*.gsm+*.3ds) for interior 3d visualization.
archibase_planet
free

Case
...case
archibase planet
case suitcase
case 5 - 3d model (*.gsm+*.3ds) for interior 3d visualization.
archibase_planet
free

Case
...case
archibase planet
locker case dresser
case - 3d model (*.gsm+*.3ds) for interior 3d visualization.