Thingiverse
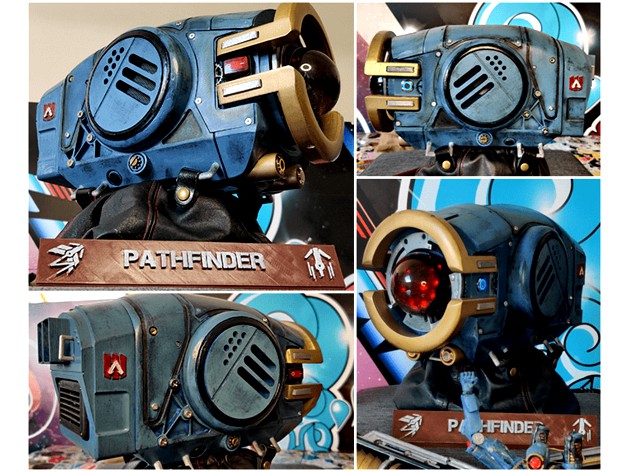
Pathfinder Head - Apex Legends by Xercium
by Thingiverse
Last crawled date: 2 years, 10 months ago
Please check the manual for more details
If you like this project and want to see more like this in the future, consider supporting me.
Post your makes, I want to see the results :)
If anything is unclear or I missed something, just ask. If you would like tutorials on certain things I did to make this, please subscribe to my youtube and add your request to the projects video comments. https://youtu.be/BO9h78Sapko
Infill: 10% - 15%
Supports: Yes, some parts will require some supports
Rafts: No, but you might get a better finish for some of the parts
Resolution: 0.12 – 0.2
Filament Material: PLA
Front
The handle you will need to attach with glue
You can print the HandleInsert at 95% if you have fitting issues.
The completed front is connected to the main part by using the MainConnectorBlocks.
The LedCover is optional, if you don’t have a transparent globe to use here you can use this.
Main
You will need to glue in the handles and the gear, sometimes it is a rough fit.
You can print the MainConnectorBlocks at 95% if you have fitting issues.
Back
You will need to glue in the handles, sometimes it is a rough fit.
If the exhaust don’t fit, you can print them at 95%. In my end result I could not print this very well, so the grid was not present. But I added some of the dust filter and it look good again.
Stand
You can print the CableInserts at 95% if you have fitting issues.
Other Parts (I looked for all the cheapest alternatives here)
Electronics
• LED rings (I bought the 3 smallest, you can also buy neopixels)
• Arduino
• Switch the led won’t work because the voltage is too high, you can get a different one, but this one fits the model
• Buttons (2 yellow, 1 blue) not in the schematic, but if you want to led to light up you will need to attach it to the correct voltage (3-6v)
• Arduino Prototype Shield
• Dupont Cables this is just very handy to have
• DFPlayer for music
• SD card
• SD card extender this just makes it easier to swap out SD cards
• 10k resistor
• 3watt speakers just make sure they fit the holes and that it is 3watt
• For the usb connector internal I just used an old printer cables and cut it shorter and reconnected it, this could be handy to have
• An extender cable to connect it to a power source
• Fan 60mm 3.3v or 5v
• Connectors, any kind will do, I just used it so I could detach the fan.
• SD USB dongle
Finishing touches
• Dust Filter
• Details: SideGear, CoverGear
• Epoxy
• Epoxy Additives
• Leather Clips
• Transparant Balls get the 6cm type
• Paint – woodfill – sanding paper
• Black soft Leather, red thread and needles for the boot
• Bolts and nuts for adding some extra flair and to bolt in the Arduino and the fan
How to get the voicelines?https://wiki.modme.co/wiki/apps/Legion.html
Also I uploaded the startup soundfile here: https://mega.nz/file/o650wAgR#WvgX1t0qdlaABS_cBH8oLKSB8rW2de_7qT_UboBXNm0
When putting the sounds on the SD, make sure the SD is empty, insert the startup sound 001.mp3 first, then copy all the other sounds. You could also add music if you want. Look up DFPlayer for more information.
Additional things you can use to make to project come alive:
A fan (60mm) for cooling, you can use a 3.3v or 5v fan and just adjust the power you take from the Arduino.
I used half a transparent Christmas tree ball and filled it with epoxy glue and color additives (blue, red, black). I inserted cracked of bits of the other half to get a nice effect when you turn the leds on.
I used dust covers to cover all the holes and the fan.
I inserted the screws into the model by just making a small hole with my solder iron, insert the screw and the press the screw with the solder iron, it will heat up and sink into the model. I just used old screws from PCs.
Just so you know I had to do a lot of sanding to get the top smooth as it is now, I also used woodfill to correct printing issues. Because I used TinkerCAD as an editor for this project, a lot of the parts are a bit rough. So don’t give up on sanding it smooth.
For the exhaust I used/edited these things:https://www.thingiverse.com/thing:230726https://www.thingiverse.com/thing:3188891https://www.thingiverse.com/thing:1559232
Similar models
thingiverse
free

Hotend LED Mount X5SA by new_two3D
...table pieces and added a hole and nut insert slot to secure the pieces together. you could also just glue them (super glue/epoxy)
thingiverse
free

E3D V6 Fan + E3D V6 cooling fan by frbed88
...ad only e3d fan in my hand and no 40mm fan.
the cooling is good.
i used glue gun but you can also use epoxy to make it stronger.
thingiverse
free

TinyG V8 Box with 90mm fan mount by TheSteampunkDevil
...ust cover (i just used a speaker screen as mine)
non-optional
4x motherboard standoffs as well as screws to go into the standoffs
thingiverse
free

Kossel fan holder led mount by micolo
... used this white led stripe http://www.banggood.com/diatone-3-4s-led-decoration-board-strip-set-for-250-class-frame-p-961260.html
thingiverse
free

Arduino LED Watch by carjo3000
...ed to take it apart later on.
use a small amount of superglue to attach the buttons to the inside of the watch body. (see image)
thingiverse
free

Walle OLED frame by ZDC
...n-white-iic-i2c-oled-display-module-12864-led-geekcreit-for-arduino-products-that-work-with-official-arduino-boards-p-958196.html
grabcad
free

CNC Dust Shoe
... nuts into the model so you can use a hand-screw setup - since the dust shoe has to be removed whenever you change the drill bit.
thingiverse
free

SD Slot Dust Cover by UncleStreakyy
...good for the sd card slot if it gets inside.
the solution was to create a dust cover that would sit in and over the sd card slot.
thingiverse
free

Corsair 465X Front Dust Cover Replacement by KnexFour
...n the dust filter aspect, i personally like the look without any filter. i think this design really makes this case look amazing!
thingiverse
free

Led holder for 30mm fan by atu
...ole is used to secure the wires in place.
i added a bit of hard glue on the led strip to make sure it doesn't move with time.
Pathfinder
3ddd
$1

KOSS PathFinder
...ки , koss , pathfinder
наушники koss pathfinder
turbosquid
$129

Nissan Pathfinder
... available on turbo squid, the world's leading provider of digital 3d models for visualization, films, television, and games.
turbosquid
$89

Nissan Pathfinder
... available on turbo squid, the world's leading provider of digital 3d models for visualization, films, television, and games.
turbosquid
$30

PATHFINDER RESEARCHER
... available on turbo squid, the world's leading provider of digital 3d models for visualization, films, television, and games.
turbosquid
$10

Pathfinder.3DS
... available on turbo squid, the world's leading provider of digital 3d models for visualization, films, television, and games.
3d_export
$129

nissan pathfinder 2019
...nissan pathfinder 2019
3dexport
3d_ocean
$89
Nissan Pathfinder 2010
...y, in real units of measurement, qualitatively and maximally close to the original. model formats: - *.max (3ds max 2008 scanl...
3d_export
$99

Nissan Pathfinder Armada 3D Model
...xport
nissan armada pathfinder 2005 2006 2007 2008 2009 2010 suv usa japan
nissan pathfinder armada 3d model squir 12658 3dexport
3d_export
$99

Nissan Pathfinder 2013 3D Model
...nder 2012 2013 2014 2015 2016 suv offroad 4x4 crossover allterrain japan car
nissan pathfinder 2013 3d model squir 59070 3dexport
cg_studio
$99

Nissan Pathfinder 20133d model
....3ds .c4d .fbx .lwo .max .obj - nissan pathfinder 2013 3d model, royalty free license available, instant download after purchase.
Apex
3d_export
free

pathfinderv20 apex legends
...rv20 apex legends
3dexport
pathfinder_v20 apex legends ar only<br>animated apex legends model for ar<br>format : glb
3d_export
$5

apex legends- kunai
...apex legends- kunai
3dexport
3d model of the characteristic kunai of the apex legends video game in real size.
3ddd
$1
Торшер Apex Black
...ddd
торшер apex black 2010x1350x400http://ogogo.ru/catalog/svet/svetilniki_napolnye50/svetilnik_apex_black_apex_black1
turbosquid
$29

Apex car black
...uid
royalty free 3d model apex car black for download as fbx on turbosquid: 3d models for games, architecture, videos. (1491493)
turbosquid
$1

Apex sports car
...alty free 3d model car apex for download as 3ds, obj, and md3 on turbosquid: 3d models for games, architecture, videos. (1497810)
3d_export
$10
Apex Arcade Machine 3D Model
...achine 3d model
3dexport
apex arcade machine street fighter game video cabinet
apex arcade machine 3d model buncic 44225 3dexport
3ddd
$1
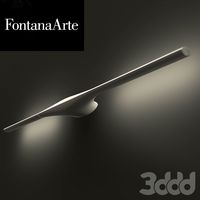
Fontana arte Apex
... the ceiling. apex is available in three different colors white, blue and black.
light source:
led 2x11 w volt 100-230
class a +
3d_export
$159
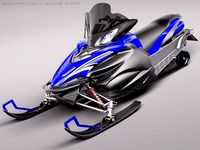
Yamaha Apex Snowmobile 3D Model
...mtx apx snowmobile snowbike snow scooter 2010 2011 2012 fun sport fast japan
yamaha apex snowmobile 3d model squir 30862 3dexport
turbosquid
$30
Marvin Apex Legends Highpoly
...n apex legends highpoly for download as ma, max, fbx, and obj on turbosquid: 3d models for games, architecture, videos. (1689291)
turbosquid
$34

Apex Oval Coffee Table
...oval coffee table for download as max, max, fbx, obj, and max on turbosquid: 3d models for games, architecture, videos. (1627990)
Legends
3ddd
$1

Legend
... roche bobois , полка
полка legend roche bobois
3ddd
free
Legend
... legend , вытяжка
вытяжка elica legend, производство elica evolution
3ddd
$1
Lampgustav Legend
...lampgustav legend
3ddd
lampgustav , legend
lampgustav legend
3ddd
free
Волховец LEGEND
...волховец legend
3ddd
волховец , дверь
волховец legend
3ddd
$1
LAMPGUSTAF LEGEND
...lampgustaf legend
3ddd
lampgustaf legend
b 240 d 700 h 400
3d_export
free
pathfinderv20 apex legends
...rv20 apex legends
3dexport
pathfinder_v20 apex legends ar only<br>animated apex legends model for ar<br>format : glb
turbosquid
$135
Legend Of Zelda
... available on turbo squid, the world's leading provider of digital 3d models for visualization, films, television, and games.
turbosquid
$25

Purse Legend
... available on turbo squid, the world's leading provider of digital 3d models for visualization, films, television, and games.
turbosquid
free

Legend Sword
... available on turbo squid, the world's leading provider of digital 3d models for visualization, films, television, and games.
3d_export
$5
apex legends- kunai
...apex legends- kunai
3dexport
3d model of the characteristic kunai of the apex legends video game in real size.
Head
3d_export
$5

head
...head
3dexport
simulated female head.
3d_ocean
$5
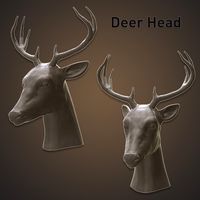
Deer Head
...deer head
3docean
deer head
simple model of deer head with neck.
cg_studio
$25
Marble Head - Head A3d model
... - head a3d model
cgstudio
.ma - marble head - head a 3d model, royalty free license available, instant download after purchase.
turbosquid
$5
Head
...ad
turbosquid
royalty free 3d model head for download as max on turbosquid: 3d models for games, architecture, videos. (1230068)
turbosquid
free

The Head
...urbosquid
royalty free 3d model the head for download as max on turbosquid: 3d models for games, architecture, videos. (1386205)
turbosquid
free

Head
...
turbosquid
royalty free 3d model head for download as blend on turbosquid: 3d models for games, architecture, videos. (1276899)
3d_export
$10

bull head
...bull head
3dexport
bull head
3d_export
$5
girl head
...girl head
3dexport
head girl
3d_export
$5
Tigger-head
...tigger-head
3dexport
tigger-head
3d_export
$5

head on a spear
...head on a spear
3dexport
head on a spear