Thingiverse
PANB+ Nerf Blaster by flemdogmillionaire
by Thingiverse
Last crawled date: 3 years ago
USE THE LATEST VERSION STEP, NOT THE STL.
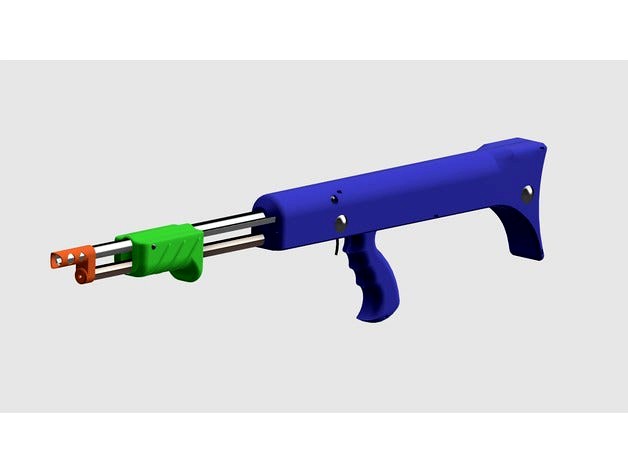
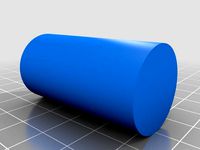
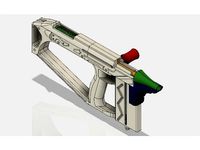
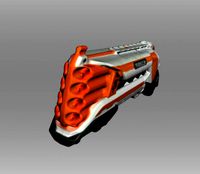
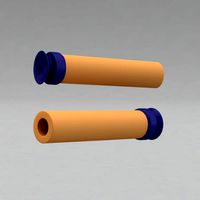
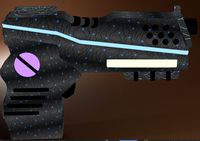
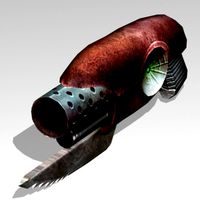
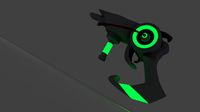
This is a remake of / improvement upon the PANB 870 from Nerfhaven: http://nerfhaven.com/forums/topic/24103-panb-870/ with a larger plunger tube and printable mechanisms and body. v3.5 is shown in the top 2 images.
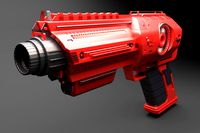
Rendered this on the 4th of July, so that explains the decals in that one render.
Update to v2: Someone asked for screws for easier disassembly. So I went off the deep end on easy disassembly and added 2 carriage bolts and wing nuts (and proper holes for them) as an alternative fastening method for the two shell halves. I also solved the problem of the breech pivot, McMaster parts have been chosen for that. It still needs a little work, but nothing a little electrical tape shimming can't do.
Update to v3: Don't print this at 5% infill with that crappy but really fast infill pattern that usually looks like diamonds, but upon closer inspection, is really just alternating linear layers. I learned the hard way. Also, don't print v2 (i took down the file) because the shell doesn't fit together. Turned the mag follower/pusher into a shelled object so it takes less material, is still plenty strong enough, and leaves more space for compressed spring coils. Also, now the follower prints without supports. Additionally, I changed the design of the shell's priming rod channels to be open on the inside so that the channels aren't filled with supports.
Quick Release version: is held together by two quick-release pins for easy disassembly. Also, the pump grip is made to a lower profile on the top.
Update to v4: Pump grip is a lower profile on the top to reduce filament cost (now about 450g). Pusher head has spikes on it to create vents to prevent vacuum formation on the forward stroke, which would slow the forward stroke, reduce performance if firing in quick succession, and possibly suck the dart into the pusher, causing a major jam. Also, the pusher head now prints in one piece without supports. I finally got the breech pivot design in good working order, it took a while.
Update to v5: DO NOT PRINT SHELL OR BREECH EARLIER THAN THIS VERSION. I fixed some crucial fit issues, after noticing I had left much too small of a gap in some areas.
Update to v5a: Don't be confused, it does have limited compatibility with v5. I noticed while building mine (a v2) that complete disassembly would be impossible or very difficult while keeping reassembly possible, because in order to remove the plunger, you have to take the plunger head off, which in turn requires that you remove the plunger tube assembly, which is impossible if the spring spacer is glued in place. So, I gave the spring spacer's mounting a dovetail of sorts, allowing you to easily get away with not gluing the plunger rod guide/spring spacer in place. Also, I left out the mag tube for some reason, that wasn't supposed to happen. Just use the mag tube from an earlier version, it hasn't changed.
Update to v7: Now can hold a full k25 with precompression, and solved a multitude of issues that arose while building my v2. The breech spring can now be mounted externally to make the build easier. I still recommend putting a flat in that shaft and installing a set screw in the breech.
Update to v8: Breech now uses a torsion spring like it should have in the first place. Optional external breech lever is still included, as I recommend put a vibration motor on its end, hooked up to a second trigger to aid the dart along its curved loading path.
Update to v9: Put the K25 spring into the model, looks like it fits fine with about 2 whole whopping inches of precompression. Rounded off the corners on the PR guide (which isn't much of a spring spacer anymore) to help the spring go smoothly. After more experiments with my build, I found that the torsion spring I chose is just strong enough to get the blaster to work, without requiring too much force on the return stroke.
Update to v10: Tons of minor changes to the shape of the loading mechanism, including shortening the breech. Now feeds much better, but still sensitive to dart length.
Update to v11: Now the3 area around the receiver is chamfered, so that it can handle more offset in the position of the pusher on the bottom side.
This is a remake of / improvement upon the PANB 870 from Nerfhaven: http://nerfhaven.com/forums/topic/24103-panb-870/ with a larger plunger tube and printable mechanisms and body. v3.5 is shown in the top 2 images.
Rendered this on the 4th of July, so that explains the decals in that one render.
Update to v2: Someone asked for screws for easier disassembly. So I went off the deep end on easy disassembly and added 2 carriage bolts and wing nuts (and proper holes for them) as an alternative fastening method for the two shell halves. I also solved the problem of the breech pivot, McMaster parts have been chosen for that. It still needs a little work, but nothing a little electrical tape shimming can't do.
Update to v3: Don't print this at 5% infill with that crappy but really fast infill pattern that usually looks like diamonds, but upon closer inspection, is really just alternating linear layers. I learned the hard way. Also, don't print v2 (i took down the file) because the shell doesn't fit together. Turned the mag follower/pusher into a shelled object so it takes less material, is still plenty strong enough, and leaves more space for compressed spring coils. Also, now the follower prints without supports. Additionally, I changed the design of the shell's priming rod channels to be open on the inside so that the channels aren't filled with supports.
Quick Release version: is held together by two quick-release pins for easy disassembly. Also, the pump grip is made to a lower profile on the top.
Update to v4: Pump grip is a lower profile on the top to reduce filament cost (now about 450g). Pusher head has spikes on it to create vents to prevent vacuum formation on the forward stroke, which would slow the forward stroke, reduce performance if firing in quick succession, and possibly suck the dart into the pusher, causing a major jam. Also, the pusher head now prints in one piece without supports. I finally got the breech pivot design in good working order, it took a while.
Update to v5: DO NOT PRINT SHELL OR BREECH EARLIER THAN THIS VERSION. I fixed some crucial fit issues, after noticing I had left much too small of a gap in some areas.
Update to v5a: Don't be confused, it does have limited compatibility with v5. I noticed while building mine (a v2) that complete disassembly would be impossible or very difficult while keeping reassembly possible, because in order to remove the plunger, you have to take the plunger head off, which in turn requires that you remove the plunger tube assembly, which is impossible if the spring spacer is glued in place. So, I gave the spring spacer's mounting a dovetail of sorts, allowing you to easily get away with not gluing the plunger rod guide/spring spacer in place. Also, I left out the mag tube for some reason, that wasn't supposed to happen. Just use the mag tube from an earlier version, it hasn't changed.
Update to v7: Now can hold a full k25 with precompression, and solved a multitude of issues that arose while building my v2. The breech spring can now be mounted externally to make the build easier. I still recommend putting a flat in that shaft and installing a set screw in the breech.
Update to v8: Breech now uses a torsion spring like it should have in the first place. Optional external breech lever is still included, as I recommend put a vibration motor on its end, hooked up to a second trigger to aid the dart along its curved loading path.
Update to v9: Put the K25 spring into the model, looks like it fits fine with about 2 whole whopping inches of precompression. Rounded off the corners on the PR guide (which isn't much of a spring spacer anymore) to help the spring go smoothly. After more experiments with my build, I found that the torsion spring I chose is just strong enough to get the blaster to work, without requiring too much force on the return stroke.
Update to v10: Tons of minor changes to the shape of the loading mechanism, including shortening the breech. Now feeds much better, but still sensitive to dart length.
Update to v11: Now the3 area around the receiver is chamfered, so that it can handle more offset in the position of the pusher on the bottom side.
Similar models
thingiverse
free
Cherub "curvy" Nerf blaster by flemdogmillionaire
...e with each shot, and doesn't rotate back. i could update this to use a square pr but it's really not worth it right now.
thingiverse
free

Longshot Lipless Pusher Breach for BOOMco darts by Boomtendo
... v1 had issue of hitting second from top dart. added a new version cause old version had the pusher sticking too far into the mag
thingiverse
free

ShellStrike DS-6 Spring Spacer and Reinforcements
...to (theoretically) increase the surface area that engages the priming rod; to reduce the odds of breaking it.
(epoxy recommended)
thingiverse
free
Prophecy lipless pusher by ThatBoyJacob
...hes. uses a lipless xpt instead of the standard expanded plunger tube to have more air volume and removes the slack on the prime.
thingiverse
free

Nerf Rival Takedown K25 Spring Guide / Buffer by haphazardlynamed
...er spring fit to reduce vibration.
-not a performance enhancing part, purely to address auditory annoyance
must be printed in tpu
thingiverse
free

Nerf Deploy Spring Spacer by spen15
...e air restrictor otherwise you won't see much improvement. it should be a tight fit on the plunger tube and the width is 7mm.
thingiverse
free

Worker PMag Half Dart Conversion Kit by Mrheathpants
...k the only part you need to change for any given mag is the guide piece, which will vary in length and curve depending on the mag
thingiverse
free
Nexus Pro Skinny Pusher (Allows unprimed loading!) by WoodstockNerf
...t that's all i have right now. abs or petg would probably work better. print with the two o-ring end down, and use supports.
thingiverse
free
Nerf Retaliator 25N spring spacer by wilblitz
... to make. the part should fit pretty snugly inside the stock attachment block and the spring should not rub (much) on the inside.
thingiverse
free

Nerf Strongarm Spring Spacer by haphazardlynamed
...9;t interfere with slam-fire (old version -deleted- had issues)
note: installs on the rear end of spring, not on the plunger head
Flemdogmillionaire
thingiverse
free

Ban Hammer Token by flemdogmillionaire
...ban hammer token by flemdogmillionaire
thingiverse
just a little something for modmins around the globe.
thingiverse
free

cablecutter H96 Pro accessories by flemdogmillionaire
...cablecutter h96 pro accessories by flemdogmillionaire
thingiverse
for sean mecca
thingiverse
free
Boomco Fury by flemdogmillionaire
...rse.com/flemdogmillionaire/collections/emblems
update: sliced up the shell into 110mm pieces, should now print on nearly any bed.
thingiverse
free

Console Housing for Ultimate Digital Tacticool Project by flemdogmillionaire
...l project. files are in inches.
bitbucket repository for the project: https://bitbucket.org/flemdogmillionaire/ultimate_tacticool
thingiverse
free

202N Tuba Key Extenders by flemdogmillionaire
...key extenders by flemdogmillionaire
thingiverse
valve key extenders to make the st. petersburg model 202n tuba more comfortable.
thingiverse
free
XBZ Valve Hammer by flemdogmillionaire
...r an xbz, upon request. requires one #4 screw and one fender washer, as well as zipties and a rubber band, gluing on is optional.
thingiverse
free

Generic Nerf Angled Foregrip by flemdogmillionaire
...
just a quick doodle, fits on nerf tactical rails, basically any blaster that has a rail in the right spot works with this grip.
thingiverse
free

Leapfrog Toy by flemdogmillionaire
...ce the toy is resting on, then slide your finger backwards off the tab to release. in my tests, it jumps about 3 feet up at most.
thingiverse
free

A basic Venturi by flemdogmillionaire
..., but it is easy to plug one of them. it does require a rather substantial source of compressed air if it is to run continuously.
thingiverse
free

Classic-Style Tuba Finger Pad by flemdogmillionaire
...hingiverse
this is a classic-style version of my tuba finger pad. it is designed to mimic finger pads on other wind instruments.
Nerf
turbosquid
$30

Nerf Soaker
...osquid
royalty free 3d model nerf soaker for download as obj on turbosquid: 3d models for games, architecture, videos. (1255038)
turbosquid
$9

Nerf Gun
...urbosquid
royalty free 3d model nerf gun for download as c4d on turbosquid: 3d models for games, architecture, videos. (1200860)
turbosquid
$1

Nerf Doubledown
... model nerf doubledown for download as jpg, 3ds, max, and fbx on turbosquid: 3d models for games, architecture, videos. (1477201)
turbosquid
$50
Nerf Clip
... available on turbo squid, the world's leading provider of digital 3d models for visualization, films, television, and games.
turbosquid
free

Nerf Dart
... available on turbo squid, the world's leading provider of digital 3d models for visualization, films, television, and games.
turbosquid
$10

Nerf Picatinny Rail
... available on turbo squid, the world's leading provider of digital 3d models for visualization, films, television, and games.
turbosquid
$2

Nerf Gun Low Poly
...royalty free 3d model nerf gun low poly for download as blend on turbosquid: 3d models for games, architecture, videos. (1632641)
3d_export
$19
nerf n-strike elite rough cut - 3d scan
...nerf n-strike elite rough cut - 3d scan
3dexport
free3d
$15
Nerf Darts
...nerf darts
free3d
nerf darts for any nerf gun!
thingiverse
free
Pistola a dardi NERF (Nerf Gun) by ruggeromarzocca
...pistola a dardi nerf (nerf gun) by ruggeromarzocca
thingiverse
nerf gun, pistola nerf...
Blaster
turbosquid
free
Blaster
...id
free 3d model blaster for download as obj, fbx, and blend on turbosquid: 3d models for games, architecture, videos. (1259706)
3d_export
free
Blaster
...blaster
3dexport
turbosquid
$35
blaster
... available on turbo squid, the world's leading provider of digital 3d models for visualization, films, television, and games.
turbosquid
$29
Blaster
...d model blaster for download as 3ds, obj, fbx, blend, and dae on turbosquid: 3d models for games, architecture, videos. (1296833)
turbosquid
$5

Blaster
... available on turbo squid, the world's leading provider of digital 3d models for visualization, films, television, and games.
turbosquid
free

blaster
... available on turbo squid, the world's leading provider of digital 3d models for visualization, films, television, and games.
turbosquid
$10

Blaster Machine
...squid
royalty free 3d model blaster machine for download as on turbosquid: 3d models for games, architecture, videos. (1407293)
3d_export
$5
Blaster 3D Model
...blaster 3d model
3dexport
blaster weapon game gun wars star shoter movie
blaster 3d model daniilbondar 93841 3dexport
3d_ocean
$15

Ghetto Blaster
...o blaster
3docean
audio boombox cassette ghettoblaster music radio stereo
fully modeled ghetto blaster including uvw texture psd.
turbosquid
$1
Alien Blaster
...id
royalty free 3d model alien blaster for download as blend on turbosquid: 3d models for games, architecture, videos. (1258055)