Thingiverse
Ozone generator for cars interior decontamination by Osfald
by Thingiverse
Last crawled date: 3 years, 3 months ago
WARNINGS:
Please be careful due to HIGH VOLTAGE (thousands of volts!) on the plates of ozone generator during operation!!! It could give you an electric shock or bring you to death!
Please be careful due to poison properties of ozone! Turn power off and leave the room immediately if you smell ozone! Do not breath in ozone under any circumstances!!!I decided to prepare a DIY ozone generator to fight viruses, fungus and other smelly things that could live in your cars, a specially in AC pipes.
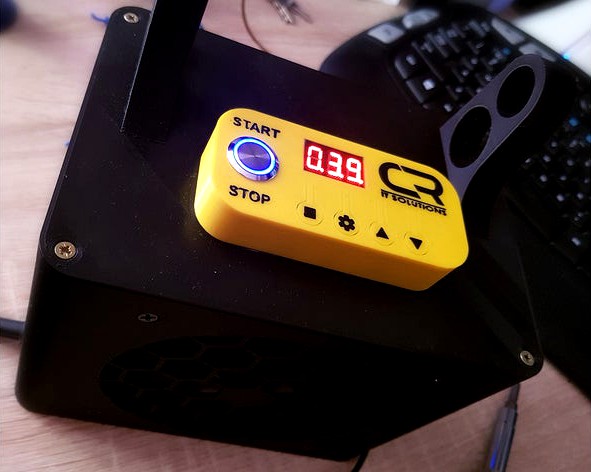
This is quite compact and portable version. It is prepared to work with electronic timer (type JZ-801):
and typical ozone generator (buy 12V/10g version):
available on Ebay, Aliexpress, Banggood, Amazon, Allegro, etc. Generators are built in couple of types of power supply (12V - for cars, 240V/50Hz, 110V/60Hz... etc - for households) and effectiveness (from 1 to 3 ozone generating plates). For car's 12V installation you shouldn't exceed 2 plates (about 70W of power) due to current limitations in car's lighter sockets.
You will also need the 16mm pushbutton:
and 120mmx120mm 12V computer fan:
How to connect everything together?
I tried to show that on the picture:
It's strongly recommended to use soldering iron to connect wires together due to 5-6A current passing through these connections. Please use wires with conductors of at least 1.5mm2 (15 AWG)! 12V lighter plug must be equipped with 10A fuse!
Obligatory modifications of the parts:
Mechanical mods:
I looked at the ozone generator carefully and in my opinion the way of mounting it to the base is not the best. So I removed some parts of plastic case using side cutters and drill 4 holes (with 135mm x 45mm spacing) instead:
Design of the housing base was prepared to fit these holes.
Electrical mods:
The display of timer have to be raised about 16mm. This is necessary to fit the panel window. Original display seats to low, directly on the board. So you have to desolder display from the board, prepare and solder to its pins some thin 20mm long wires (Ethernet cable is good source of that kind of wires), then fit it to the panel window and then fit the board in panel and solder wires to the original pads on the board:
And now... The Printing :)
Base, handle and cover are really simple to print. Just in the case of cover you have to use supports under the outer edge. Use 3-4 perimeters.
Some problems may occur during the panel printing, a specially if you didn't try before to print first layer with different colours. I attached 4 files to allow to print the panel in one of 2 ways:
a) You may use separate STLs, adjust the exact position of them in slicer and generate 3 separate gcodes for icons, main body of panel and window of display.
b) You may also start with complete_panel.stl. Open it in your slicer and divide to separate parts or models. It should ensure that the separated models are accurately positioned on the table. Then delete panel main body as well as window of display. Leave icons only. Generate gcode. Then undo delete. Leave only window and generate gcode. Again undo delete and leave this time main body of panel only. Generate gcode. So you should get 3 gcode files: body of panel, icons and window of display.
As a first print icons (pick your filament colour) and leave them on the table of printer. Then print the window (you should pick some red transparent filament) and then print panel main body. As a result you should get complete panel with icons and window integrated. If it's too difficult you may print panel main body only and colorize icons by hand. In the end you should get something like this:
Assembly:
First build the panel and make all of the electrical connections between timer and push button. My button was backlighted so I took additional power from NO timer output to make it work:
Then superglue panel to the cover:
After that have to make all electrical connections between main parts:
And now you can install everything in the casing:
Gently push the handle into the cover holes (it fits tight but if you want may use superglue):
Screw cover to the base and you are done!
Timer settings
Please set the OP time and program P1.3 on timer panel, according to this manual:
JZ-801 timer manual
To decontaminate your car:
park in the shadow (solar radiation and heat increases ozone decay)
plug the ozone generator to the lighter plug
set the time of ozoning (I advice 40min for sedan/tourer)
turn on car engine and leave it idle
close all windows and doors
set your car AC blower to highest position
set your car AC to internal air circulation
set your car AC temperature to minimum
turn on AC compressor manually (if your car have that option)
push the START/STOP button on panel of ozone generator
leave the cabin immediately and close doors
wait until ozone generator stops
unplug ozone generator
open all doors and windows for 10min to ventilate cabinThat's all!
Good luck! :)
Please be careful due to HIGH VOLTAGE (thousands of volts!) on the plates of ozone generator during operation!!! It could give you an electric shock or bring you to death!
Please be careful due to poison properties of ozone! Turn power off and leave the room immediately if you smell ozone! Do not breath in ozone under any circumstances!!!I decided to prepare a DIY ozone generator to fight viruses, fungus and other smelly things that could live in your cars, a specially in AC pipes.
This is quite compact and portable version. It is prepared to work with electronic timer (type JZ-801):
and typical ozone generator (buy 12V/10g version):
available on Ebay, Aliexpress, Banggood, Amazon, Allegro, etc. Generators are built in couple of types of power supply (12V - for cars, 240V/50Hz, 110V/60Hz... etc - for households) and effectiveness (from 1 to 3 ozone generating plates). For car's 12V installation you shouldn't exceed 2 plates (about 70W of power) due to current limitations in car's lighter sockets.
You will also need the 16mm pushbutton:
and 120mmx120mm 12V computer fan:
How to connect everything together?
I tried to show that on the picture:
It's strongly recommended to use soldering iron to connect wires together due to 5-6A current passing through these connections. Please use wires with conductors of at least 1.5mm2 (15 AWG)! 12V lighter plug must be equipped with 10A fuse!
Obligatory modifications of the parts:
Mechanical mods:
I looked at the ozone generator carefully and in my opinion the way of mounting it to the base is not the best. So I removed some parts of plastic case using side cutters and drill 4 holes (with 135mm x 45mm spacing) instead:
Design of the housing base was prepared to fit these holes.
Electrical mods:
The display of timer have to be raised about 16mm. This is necessary to fit the panel window. Original display seats to low, directly on the board. So you have to desolder display from the board, prepare and solder to its pins some thin 20mm long wires (Ethernet cable is good source of that kind of wires), then fit it to the panel window and then fit the board in panel and solder wires to the original pads on the board:
And now... The Printing :)
Base, handle and cover are really simple to print. Just in the case of cover you have to use supports under the outer edge. Use 3-4 perimeters.
Some problems may occur during the panel printing, a specially if you didn't try before to print first layer with different colours. I attached 4 files to allow to print the panel in one of 2 ways:
a) You may use separate STLs, adjust the exact position of them in slicer and generate 3 separate gcodes for icons, main body of panel and window of display.
b) You may also start with complete_panel.stl. Open it in your slicer and divide to separate parts or models. It should ensure that the separated models are accurately positioned on the table. Then delete panel main body as well as window of display. Leave icons only. Generate gcode. Then undo delete. Leave only window and generate gcode. Again undo delete and leave this time main body of panel only. Generate gcode. So you should get 3 gcode files: body of panel, icons and window of display.
As a first print icons (pick your filament colour) and leave them on the table of printer. Then print the window (you should pick some red transparent filament) and then print panel main body. As a result you should get complete panel with icons and window integrated. If it's too difficult you may print panel main body only and colorize icons by hand. In the end you should get something like this:
Assembly:
First build the panel and make all of the electrical connections between timer and push button. My button was backlighted so I took additional power from NO timer output to make it work:
Then superglue panel to the cover:
After that have to make all electrical connections between main parts:
And now you can install everything in the casing:
Gently push the handle into the cover holes (it fits tight but if you want may use superglue):
Screw cover to the base and you are done!
Timer settings
Please set the OP time and program P1.3 on timer panel, according to this manual:
JZ-801 timer manual
To decontaminate your car:
park in the shadow (solar radiation and heat increases ozone decay)
plug the ozone generator to the lighter plug
set the time of ozoning (I advice 40min for sedan/tourer)
turn on car engine and leave it idle
close all windows and doors
set your car AC blower to highest position
set your car AC to internal air circulation
set your car AC temperature to minimum
turn on AC compressor manually (if your car have that option)
push the START/STOP button on panel of ozone generator
leave the cabin immediately and close doors
wait until ozone generator stops
unplug ozone generator
open all doors and windows for 10min to ventilate cabinThat's all!
Good luck! :)
Similar models
thingiverse
free

CEREC AC "High Voltage" cover
...to sit properly in place. sometimes they are lose from the beginning or get lose while rolling around your system in your office.
grabcad
free

Ozone generator
...12v source, and a timer to turn it off, remember that i do not advise using it without first looking for information about ozone.
thingiverse
free

OZONE GENERATOR TIMER
...ozone generator timer
thingiverse
timer case for my ozone generator using 2x8 lcd, arduino nano and four buttons
thingiverse
free

12V socket cover cap
...er.
2019 12 04
added flex version of body. suitable filament for body is flexfill tpu 92a "traffic black" (fillamentum)
thingiverse
free

Ozonizzatore Ozone Generator
...struction of the casing for an ozonator, equipped with a fan, ceramic plate ozone generator and sonoff to switch it on and timer.
grabcad
free

diymore 1.37 inch LCD Digital Display DC 12V 24V AC 110V-220V Microcomputer Time Controller Timer Relay Control Switch Module
...ad
diymore 1.37 inch lcd digital display dc 12v 24v ac 110v-220v microcomputer time controller timer relay control switch module
thingiverse
free
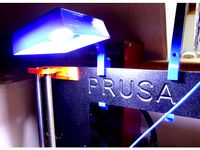
Prusa i3 MK2/S/3 LED Panel Light ClipOn Upgrade by Area51
...r connect two lamps with 12v led panels in series.
please show your great makings of this thing, leave a comment and/or a tip :-)
thingiverse
free

Ultimate PSU Profile Box Cover Enclosure 300W 12v Tevo Tarantula by paul0
... the psu.
hope you like it! happy printing! don't forget to leave a tip beer! :)
youtube: https://www.youtube.com/user/peekpt
thingiverse
free

12V Lighter Socket Bracket by 4Crawler
...his is on contrast to mounting the socket into a panel, where you need access to the back side of the panel to hook up the wires.
thingiverse
free

Ozone generator case with 120mm fan by tyfoza
...k/edit?usp=sharing
download .ino file directly:https://drive.google.com/file/d/1ertqknjtiodwjzky61ghxzn5xqip8lih/view?usp=sharing
Osfald
thingiverse
free

VW Volkswagen wheel screw star cap remover tool by Osfald
... you to fast, reliable and scratchless, remove caps that covers wheel's screws. it is dedicated to caps with star shape hole.
thingiverse
free

HP 150W charger power adapter supply hanger holder by Osfald
...sk top, that it doesn't take up additional space. that is the result, a simple hanger for hp 150w charger (type: l48757-003).
thingiverse
free

Commodore C64 power adapter repair rebrick installation frame jig by Osfald
...is only polish version.
to remove resin from old power adapter you may need this frame: https://www.thingiverse.com/thing:4695424
thingiverse
free

Commodore C64 MicroLUC cartridge housing case by Osfald
...ion to be clearly visible, use one layer with a contrasting colour as its background.
you may also find the pin for reset button.
thingiverse
free
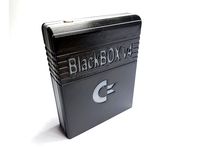
Commodore C64 BlackBOX cartridge housing case by Osfald
...ion to be clearly visible, use one layer with a contrasting colour as its background.
you may also find the pin for reset button.
thingiverse
free

Samsung Gear S battery charging clip holder v1 v2 v3 by Osfald
...cided to add v2 of clip which allows to see the screen of smartwatch through the hexagonal holes and v3 with rectangular windows.
thingiverse
free
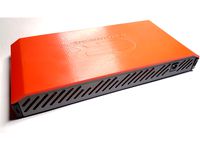
Ubiquiti UBNT ToughSwitch EdgeSwitch 5XP low cover case houseing enclosure by Osfald
...ell. enjoy!
i also added feet and hangers which you can print and superglue to the shell underneath, in specially prepared holes.
thingiverse
free

Commodore C64 power adapter repair rebrick removal frame jig by Osfald
...hen you may need a frame to install new 5v dc buck converter and new 9v ac transformer: https://www.thingiverse.com/thing:4695471
thingiverse
free
Commodore 64 C64 Ultimate II+ Cart Tape Adapter Housing Case by Osfald
...of housing, which has additional (5mm height) support at the rear side. it prevents all connected elements from unwanted bending.
Decontamination
archibase_planet
free

Cabinet
...cabinet archibase planet decontamination cabinet disinfection plant decontamination cabinet - 3d model for...
archive3d
free

Cabinet 3D Model
...cabinet 3d model archive3d decontamination cabinet disinfection plant decontamination cabinet - 3d model for...
3dcadbrowser
free

Decontamination Cabinet
...software.this 3d object can be downloaded in .max, .obj, .3ds, .fbx, .dxf, .lwo, .stl, .wrl, .ma, .dae, .x and .asc file formats.
thingiverse
free
TIOKRAFT by xcopyz
...by xcopyz thingiverse tiokraft the photocatalytic air purification and decontamination ...
thingiverse
free

3m 6200/6500/7500 Water Drinking - Straw Adapter by ClockworkNeko
...mask on. seriously, it's easier to go to a decontamination area instead. however, if that's not possible. this model...
thingiverse
free

Device for contactless door opening, intercom, ATM during covid19 by DALi712
...asily washed)
fits almost all door handles (except round ones)
easy to print
low weight
compact size (fits easily in your pocket)
thingiverse
free

Scabbard / Holster for Coronavirus "Savegrabber"
...holster. the holster is open-ended for easy cleaning / decontamination it's a quick lunch-break design, so can no doubt...
thingiverse
free

3M P100 respirator filter protector
...more appropriate for very rainy weather or guarding from decontamination ...
renderosity
$10

Frontline Heroes For M4
...or hazmat suit (hazardous materials suit), also known as decontamination suit, is a piece of personal protective equipment that...
Ozone
3ddd
$1
Душевой комплекс Ozone
... ozone , душ
душевой комплекс ozone коллекции i-deco. производитель valentin (france).
turbosquid
$5

Ozone Atom
...ee 3d model ozone atom for download as 3ds, obj, c4d, and fbx on turbosquid: 3d models for games, architecture, videos. (1292934)
turbosquid
$2
OZONE RIM.max
... available on turbo squid, the world's leading provider of digital 3d models for visualization, films, television, and games.
turbosquid
free

Ozone Rim
... available on turbo squid, the world's leading provider of digital 3d models for visualization, films, television, and games.
3d_export
$10

headset ozone rage x40
... included in the folder called "diadema"<br>formats: .obj / .fbx / .dae / .ma<br>you can see it in 3d here:
turbosquid
$30

Air Purifier Ozone Anti Covid with Bonus
...one anti covid with bonus for download as blend, fbx, and obj on turbosquid: 3d models for games, architecture, videos. (1643469)
turbosquid
$24

Beverage Can Ozone Energy Drink 250ml 2020
...can ozone energy drink 250ml 2020 for download as max and max on turbosquid: 3d models for games, architecture, videos. (1604354)
3ddd
$1

Paa Bel Canto
...габариты: 1800х855х740(h) polys: 20184 в комплект входит смеситель gessi ozone 24934 (polys: 4217), сифон, перелив и донный клапан. в...
3d_export
$5
Montana Paint Spray Can 3D Model
...hardcore can spray paint graffiti cap model aerosol freon ozone pressure container mtn art montana paint spray can 3d...
3d_export
$5
Air Filter
...and gaseous pollutants such as volatile organic compounds or ozone air filters are used in applications where air quality...
Generator
3d_export
$17
Generator
...generator
3dexport
generator
archibase_planet
free
Generator
...base planet
generator electric generator
generator electric n300715 - 3d model (*.gsm+*.3ds+*.max) for interior 3d visualization.
design_connected
$20

Generation
...generation
designconnected
knoll generation computer generated 3d model. designed by formway design.
3d_export
$8

generator
...generator
3dexport
generator - obj, 3ds, fbx.
3d_export
$7

generator
...generator
3dexport
generator extures 4k resolution, basecolor -normal -metallic -ao-roughness-height tris:3084
turbosquid
free
generator
...rator
turbosquid
free 3d model generator for download as max on turbosquid: 3d models for games, architecture, videos. (1492909)
3ddd
$1

general
...general
3ddd
генерал
turbosquid
$99

generator
...urbosquid
royalty free 3d model generator for download as ma on turbosquid: 3d models for games, architecture, videos. (1514125)
turbosquid
$20

Generator
...rbosquid
royalty free 3d model generator for download as max on turbosquid: 3d models for games, architecture, videos. (1244841)
turbosquid
$2
Generator
...rbosquid
royalty free 3d model generator for download as fbx on turbosquid: 3d models for games, architecture, videos. (1245541)
Cars
3d_export
$5

car
...car
3dexport
luxury car high quality car
3d_export
$5

car
...car
3dexport
luxury car high quality car
3d_export
$5

car
...car
3dexport
luxury car high quality car
3d_export
$5

car
...car
3dexport
luxury car high quality car
3d_export
$5
car
...car
3dexport
luxury car high quality car
archibase_planet
free

Car
...
archibase planet
car sports car motor-car sportster
car nascar#1 n300114 - 3d model (*.gsm+*.3ds) for exterior 3d visualization.
archibase_planet
free

Car
...ibase planet
car motor-car sportster sports car
car gablota xform n190214 - 3d model (*.gsm+*.3ds) for exterior 3d visualization.
archibase_planet
free
Car
...car
archibase planet
car motor car transport
car vaz 2104- 3d model for interior 3d visualization.
3d_export
$15

car
...car
3dexport
car
3d_export
free
car
...car
3dexport
car
Interior
3d_export
$300
interior
...interior
3dexport
collection of different interiors for everyone
turbosquid
$100

interior
...turbosquid
royalty free 3d model interior for download as ma on turbosquid: 3d models for games, architecture, videos. (1412278)
turbosquid
$100
Interior
...turbosquid
royalty free 3d model interior for download as ma on turbosquid: 3d models for games, architecture, videos. (1412272)
turbosquid
$100

Interior
...urbosquid
royalty free 3d model interior for download as max on turbosquid: 3d models for games, architecture, videos. (1622862)
turbosquid
$100

Interior
...urbosquid
royalty free 3d model interior for download as max on turbosquid: 3d models for games, architecture, videos. (1622855)
turbosquid
$100

Interior
...urbosquid
royalty free 3d model interior for download as max on turbosquid: 3d models for games, architecture, videos. (1527698)
turbosquid
$100

Interior
...urbosquid
royalty free 3d model interior for download as max on turbosquid: 3d models for games, architecture, videos. (1415819)
turbosquid
$100

Interior
...urbosquid
royalty free 3d model interior for download as max on turbosquid: 3d models for games, architecture, videos. (1413021)
turbosquid
free

Interior
...urbosquid
royalty free 3d model interior for download as max on turbosquid: 3d models for games, architecture, videos. (1645324)
3d_export
free

interior
...reated. use this interior design for your successful projects.<br>createt in 3ds max 2021! rendered in corona renderer 5.2!