Thingiverse
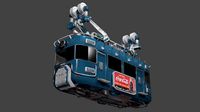
Overlord Pro - E3D V6 hotend mount v1 by bummster
by Thingiverse
Last crawled date: 3 years ago
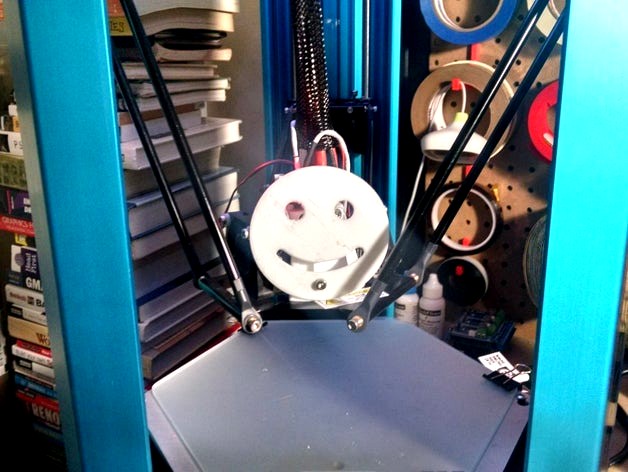
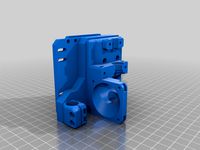
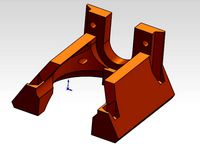
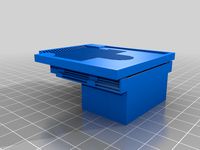
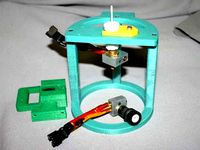
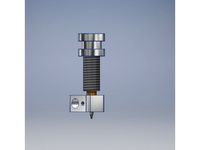
Here's my printed mounting kit for an E3D v6 hotend to an Overlord printer. Should work on the Overlord and Overlord Pro. Unfortunately, you will be required to source
2 3mm x 40mm bolts
2 3mm nylocks
4 3mm washers
All other hardware you can source from the existing hotend cage assembly.
Do take your time. Be sure to ask questions if you have them. Have fun tinkering.
I will probably make changes over time. At the moment, I'm not entirely happy with my layer cooling solution. I'm always messing with things. For the curious, I've printed mine at 1.2mm shells, 10% infill in esun PETG and grid supports. So far so good!
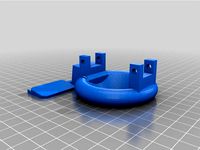
If you don't like my hotend fan shroud adapter, and honestly I kinda don't like it either, take a look at this one. http://www.thingiverse.com/thing:988310 I haven't figured out what variables to use, but its pretty nice!
The brave of you can try to mount the 40mm fan directly to the centering mount itself. I'm not entirely sure it's a good idea anymore. Hence the fan adapter. But it's there if you're willing to risk a clog for science. :)
I would not auto level with this mount. I haven't tried it. Honestly, I don't think you should try it either.
I printed the mount upright. Yeah, its not designed to be easy to print. That's the noob in me shining through. V2 will definitely be easier to print. Here's a timelapse of it being made. https://www.youtube.com/watch?v=2Vx8JcYKlNY
Update 9/17/15
So a friend and I are on google hangouts just chillen, and he's all like "Dude, metrique?!"
And I'm all surly, "Yeah man! boltdepot.com! Tell em Danny sent you, they'll have like no idea who I am."
Next sentence, I swear, "Why so hard to print man, I mean seriously? Seriously."
And I'm all puffy, "Yo, if your printer is setup right, this is a piece of cake."
Silence. Because, we were typing not talking.
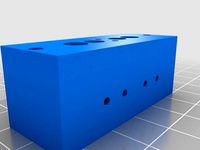
So, I made a modified version. The PCB nubs are removed and replaced with holes. The fan mounting holes are removed since they really aren't necessary. The holes to clamp the two halves together have been significantly enlarged. #6-32 machine screws should work just fine now. 1.75in long is preferred, 2in will work too, just cut off whatever is too exposed for your sensibilities. I enlarged the through holes to 4mm... #4's I think will work with the original mount, not sure though. Now you can print it upside down, and have a lot less, maybe no supports needed. Still printing this one to see how it goes.
Update 11/29/2016:
I used really really nice Shin Etsu based thermal paste on the heatbreak to heatsink threads initially. Worked great but eventually dried out and turned into powder. After some furious chat sessions with a friend, tried copper based anti-seize. Woah, way better. Be liberal but keep things clean. Copper anti-seize (Jet-Lube Kopr-Kote) won't dry out at the temps I'm using (265C), but it sure is messy.
The hear-say thinking goes, CPU based thermal paste over the long haul will dry out because it has a service temp rating that is quite small and maxes out usually around 100-300C. These temps typically aren't published either. Copper anti-seize is typically used on car brakes and has a published service rating of 1800F/980C. They tend to rival the best thermal pastes in terms of W/m-K, but more importantly fill the gaps better of the course threaded parts to promote heat exchange.
It's also $6 for 4oz of Kopr-Kote vs $8 for 3grams for AS-5. Use it on your hotend and your car projects!
2 3mm x 40mm bolts
2 3mm nylocks
4 3mm washers
All other hardware you can source from the existing hotend cage assembly.
Do take your time. Be sure to ask questions if you have them. Have fun tinkering.
I will probably make changes over time. At the moment, I'm not entirely happy with my layer cooling solution. I'm always messing with things. For the curious, I've printed mine at 1.2mm shells, 10% infill in esun PETG and grid supports. So far so good!
If you don't like my hotend fan shroud adapter, and honestly I kinda don't like it either, take a look at this one. http://www.thingiverse.com/thing:988310 I haven't figured out what variables to use, but its pretty nice!
The brave of you can try to mount the 40mm fan directly to the centering mount itself. I'm not entirely sure it's a good idea anymore. Hence the fan adapter. But it's there if you're willing to risk a clog for science. :)
I would not auto level with this mount. I haven't tried it. Honestly, I don't think you should try it either.
I printed the mount upright. Yeah, its not designed to be easy to print. That's the noob in me shining through. V2 will definitely be easier to print. Here's a timelapse of it being made. https://www.youtube.com/watch?v=2Vx8JcYKlNY
Update 9/17/15
So a friend and I are on google hangouts just chillen, and he's all like "Dude, metrique?!"
And I'm all surly, "Yeah man! boltdepot.com! Tell em Danny sent you, they'll have like no idea who I am."
Next sentence, I swear, "Why so hard to print man, I mean seriously? Seriously."
And I'm all puffy, "Yo, if your printer is setup right, this is a piece of cake."
Silence. Because, we were typing not talking.
So, I made a modified version. The PCB nubs are removed and replaced with holes. The fan mounting holes are removed since they really aren't necessary. The holes to clamp the two halves together have been significantly enlarged. #6-32 machine screws should work just fine now. 1.75in long is preferred, 2in will work too, just cut off whatever is too exposed for your sensibilities. I enlarged the through holes to 4mm... #4's I think will work with the original mount, not sure though. Now you can print it upside down, and have a lot less, maybe no supports needed. Still printing this one to see how it goes.
Update 11/29/2016:
I used really really nice Shin Etsu based thermal paste on the heatbreak to heatsink threads initially. Worked great but eventually dried out and turned into powder. After some furious chat sessions with a friend, tried copper based anti-seize. Woah, way better. Be liberal but keep things clean. Copper anti-seize (Jet-Lube Kopr-Kote) won't dry out at the temps I'm using (265C), but it sure is messy.
The hear-say thinking goes, CPU based thermal paste over the long haul will dry out because it has a service temp rating that is quite small and maxes out usually around 100-300C. These temps typically aren't published either. Copper anti-seize is typically used on car brakes and has a published service rating of 1800F/980C. They tend to rival the best thermal pastes in terms of W/m-K, but more importantly fill the gaps better of the course threaded parts to promote heat exchange.
It's also $6 for 4oz of Kopr-Kote vs $8 for 3grams for AS-5. Use it on your hotend and your car projects!
Similar models
thingiverse
free

30x30 fan mount for hydra v6 by gmhowell
...ally depends on the particulars of your fan).
this may prevent using the standard bltouch mount. a new one should be forthcoming.
thingiverse
free

E3D V6 hotend fans kit for Overlord Pro by Ryotsuke
...yer fan with fan mounting holes fixed to match overlord's fans. default distance is 33mm, overlord uses fans with 32mm mounts
thingiverse
free
Sparkcube radial fan mount by PaddyCube
...angle of fan is very flat, so it fits under y-sliders of sparkcube without damage. also it fits on original sparkcube x-carriage.
thingiverse
free

Overlord Pro E3D Chimera/Cyclops Mount by Wismgari
...), original hostboard screws to the top with 2 more m3 8mm.
nozzle fans mount with 8x (or 4x if you just use two per fan) m3 16mm
thingiverse
free

Sovol Sv01 5015 radial part cooling duct by trohn_javolta
...sure the airflow isn't that great but i just printed a bridging test and it turned out quite good.... if that says anything..
thingiverse
free

Heatsink Fan Adapter For CR-10 / Ender Hotend Cover 5015 by Luckyman by 1DPrinter
...w holes.
this is the first thing i have designed for a 3d printer. i'm extremely knew to cad and any feedback is appreciated.
thingiverse
free

Anet A2 40mm Fan Mount by ctyler2621
... angles.
since this is close to the hotend you should probably use either petg or abs, both of which have better heat tolerances.
thingiverse
free

Robo 3D R1 Dual fan mount by lowside
...f you manage to strip the holes out like i did, you can tap for a #6-32 machine screw which seems to be working perfectly for me.
thingiverse
free
Improved Extruder, Hotend and Fan Mount for rp3d Pangu Wooden i3 by sleemanj
... listed a couple listings for hotends only, is they are so cheap you might as well replace just the hotend if you have a problem.
thingiverse
free

Peristaltic Paste Extruder by jonny
...l work but don't know for sure.
i'm designer for shapeways here: https://www.shapeways.com/designer/jonathanmarch/hire-me
Bummster
thingiverse
free
Bridge 4 Glyph challenge ring for PK by bummster
...bridge 4 glyph challenge ring for pk by bummster
thingiverse
for my brother
thingiverse
free

Gladiator geartrack gearwall hook by bummster
...gladiator geartrack gearwall hook by bummster
thingiverse
a simple hook so i can hang up random garage trinkets on the wall.
thingiverse
free
Hobby Lobby Hunter GoPro mount by bummster
...ingiverse
gopro mount that bolts to the roll cage of a hobby lobby hunter.
required hardware:
2x m3 x 10mm bolt
2x m3 nylock nut
thingiverse
free

Overlord Pro - magnet holders by bummster
...gnets can then be used to hold a door closed or hold up frequently used tools. uses a common computer screw to keep it in place.
thingiverse
free

Overlord Pro - microswitch z probe mount by bummster
...ave a note if it works alright for you though.
the switch this is made for is a typical omron 5a 250v ss-5gl2t with a roller arm.
thingiverse
free

M20x1.5 male to 8mm ID barb by bummster
...e with my k40 didn't have the fitting i needed. this will fit a dymax 2000. i scavenged a 21mm od o-ring from somewhere else.
thingiverse
free

Overlord Pro - Belt and pulley cover by bummster
...ng the belt tensioners when at the extremes of the build volume.
friction fit. shouldn't move much at all once its in there.
thingiverse
free

Pokemon Go Plus - Great ball case by bummster
...keball version here: https://www.thingiverse.com/thing:3013470
ultra ball version here: https://www.thingiverse.com/thing:3027704
thingiverse
free

Paracord spool (100ft capacity) by bummster
...ere. the other end escapes the spool through the notch. pass the escaped end through the loop the other end made and pull taught.
thingiverse
free

Overlord Pro - Optical end stop bracket by bummster
...e: these endstops do require a 5v vsc, so you'll need to do some ninja wiring to get it to work on the stock microcontroller.
Overlord
turbosquid
$35

OverLord TANK
... available on turbo squid, the world's leading provider of digital 3d models for visualization, films, television, and games.
turbosquid
$15

Overlord
...d
royalty free 3d model hk416 assault rifle for download as on turbosquid: 3d models for games, architecture, videos. (1508031)
3d_export
free

Download free Marker 3D Model
...free marker 3d model 3dexport marker marker 3d model overlord 81258...
thingiverse
free
The Fourth Overlord - Overlord 2
...the fourth overlord - overlord 2
thingiverse
the main character from the game overlord 2.
sketchfab
$5

Yggdrasil Overlord Coin
...am.com/kotomi_laufeyson
moneda de overlord. - yggdrasil overlord coin - buy royalty free 3d model by kotomi laufeyson (@kotomi)
thingiverse
free
necron overlord crypt
...necron overlord crypt
thingiverse
necron overlord crypt
thingiverse
free

Infinifactory Overlord by zachbarth
...infinifactory overlord by zachbarth
thingiverse
an alien overlord from infinifactory, by zachtronics.
thingiverse
free
overlord tank by calcqui
...overlord tank by calcqui
thingiverse
preview of work. c&c generlas overlord tank.
thingiverse
free

Overlord by DiMarzio
... bit bigger if you would want to. hope you like it!
concept:http://michalivan.deviantart.com/art/overlord-16years-old-162854584
thingiverse
free

OverLord Pararack ready by hugoelec
...overlord pararack ready by hugoelec
thingiverse
overlord pararack ready
Hotend
thingiverse
free
hotend by fablab_lueneburg
...hotend by fablab_lueneburg
thingiverse
hotend model
thingiverse
free
Hotend for Graber
...hotend for graber
thingiverse
hotend complement pastes for graber printerhttps://youtu.be/0koxhnsuhdy
thingiverse
free
Hotend adapter by antaviana
...hotend adapter by antaviana
thingiverse
hotend adapter
thingiverse
free
hotend fan by mming1106
...hotend fan by mming1106
thingiverse
hotend fan
thingiverse
free

Hotend schema by ione
...hotend schema by ione
thingiverse
hotend project schema
thingiverse
free
Fabtotum XY Hotend holder for E3D Hotend
...s with integrated supports.
more for the project you can see here: https://kf-designs.com/2019/09/07/fabtotum-printer-conversion/
thingiverse
free
HotEnd Stand by onepointdiy
...tend, when you make your new hotend or repair your j-head or mg-plus hotend.
the hole of 16mm, please adjust using a reamer, etc.
thingiverse
free

fast magnetic hotend changer for Chimera Hotend by Draman
...chimera hotend !
and new basis (the hole from original is to small)
it is a remix form skimmy's fast magnetic hotend changer
thingiverse
free

Hotend Fan Adapter for MicroSwiss All Metal Hotend by jo_schi_man
...
thingiverse
little change for the hotend fan adapter to hold the microswiss all metal hotend (slightly longer and sharp edges).
thingiverse
free
Merlin Hotend by Alejanson
...merlin hotend by alejanson
thingiverse
this is a 1:1 drawing of the classic merlin hotend.
E3D
turbosquid
$23

E3D - Google Home
... 3d model e3d - google home for download as max, obj, and c4d on turbosquid: 3d models for games, architecture, videos. (1192509)
cg_studio
free

e3d model
...e3d model
cgstudio
- e 3d model, royalty free license available, instant download after purchase.
turbosquid
$2

Syringe C4D (E3D Ready)
...lty free 3d model syringe c4d (e3d ready) for download as c4d on turbosquid: 3d models for games, architecture, videos. (1336720)
turbosquid
$12

Microphone USB E3D and C4D
...ree 3d model microphone usb e3d & c4d for download as c4d on turbosquid: 3d models for games, architecture, videos. (1568216)
turbosquid
$29

E3D - OnePlus 6 Black
...model e3d - oneplus 6 black for download as max, obj, and c4d on turbosquid: 3d models for games, architecture, videos. (1358534)
turbosquid
$29

E3D - Motorola One 2018
...del e3d - motorola one 2018 for download as max, obj, and c4d on turbosquid: 3d models for games, architecture, videos. (1358533)
turbosquid
$29

E3D - Disney MagicBands 2
...l e3d - disney magicbands 2 for download as max, obj, and c4d on turbosquid: 3d models for games, architecture, videos. (1355515)
turbosquid
$29

E3D - Samsung Z4 Smartphone
...e3d - samsung z4 smartphone for download as max, obj, and c4d on turbosquid: 3d models for games, architecture, videos. (1182179)
turbosquid
$23

E3D - Razer Phone model
...del e3d - razer phone model for download as max, obj, and c4d on turbosquid: 3d models for games, architecture, videos. (1231207)
turbosquid
$23

E3D - Alcatel Idol 5
... model e3d - alcatel idol 5 for download as max, obj, and c4d on turbosquid: 3d models for games, architecture, videos. (1212799)
V6
3d_export
$100

v6 engine
...engine
3dexport
complete v6 engine modeled on solidworks 2017 along with .stl, .sldprt and .sldasm of all th parts and assembly.
3d_export
$10

V6 engine
... the first v6 engines were designed and produced independently by marmon motor car company, deutz gasmotoren fabrik and delahaye.
3d_export
$35

v6 engine
...s a complete model of a v6 engine containing over 400 components. you can contact me for a video of all the components assembling
3d_export
$10

v6 engine
...v6 engine
3dexport
turbosquid
$25

Bed1001-v6
... available on turbo squid, the world's leading provider of digital 3d models for visualization, films, television, and games.
turbosquid
$22

Chair2-v6
... available on turbo squid, the world's leading provider of digital 3d models for visualization, films, television, and games.
turbosquid
$20

V6.mb
... available on turbo squid, the world's leading provider of digital 3d models for visualization, films, television, and games.
3d_export
$20

V6 engine
...rovided in this package is all the parts in sldprt format and assembly in sldasm format. i can also convert the format on demand.
3ddd
$1

Стол V6
...6" в стиле дизельпанк изготовлен из блока двигателя, 4х поршней и 4х шатунов.
столешница изготовлена из стекла толщиной 8мм.
cg_studio
$199

V6 VVTi3d model
...v6 vvti3d model
cgstudio
.3ds - v6 vvti 3d model, royalty free license available, instant download after purchase.
V1
turbosquid
$35

v1
... available on turbo squid, the world's leading provider of digital 3d models for visualization, films, television, and games.
3d_export
$10

street tree v1
...street tree v1
3dexport
street tree v1
3d_export
$5
potato v1
...potato v1
3dexport
turbosquid
$20

Kitchen V1
...bosquid
royalty free 3d model kitchen v1 for download as max on turbosquid: 3d models for games, architecture, videos. (1153622)
turbosquid
$12

sofa v1
...turbosquid
royalty free 3d model sofa v1 for download as max on turbosquid: 3d models for games, architecture, videos. (1283267)
turbosquid
$3

Chair V1
...urbosquid
royalty free 3d model chair v1 for download as fbx on turbosquid: 3d models for games, architecture, videos. (1486093)
turbosquid
$15

Cupboard v1
...royalty free 3d model cupboard v1 for download as max and fbx on turbosquid: 3d models for games, architecture, videos. (1444568)
3d_export
$5
tram v1
...tram v1
3dexport
3d_export
$8
lumber car v1
...lumber car v1
3dexport
lumber car v1 printable, low poly model.
turbosquid
$20

DELTALIGHT v1
...free 3d model deltalight v1 for download as max, max, and obj on turbosquid: 3d models for games, architecture, videos. (1630928)
Pro
turbosquid
$29

Pro
...ree 3d model mac pro for download as obj, c4d, fbx, and blend on turbosquid: 3d models for games, architecture, videos. (1505782)
turbosquid
$15

Apple Mac Pro and Pro Display
...ee 3d model apple mac pro and pro display for download as max on turbosquid: 3d models for games, architecture, videos. (1417078)
3d_export
$5

iphone 13 pro max and pro
...3 pro max and 13 pro the model is made in four colors (graphite, gold, silver, and blue), all of which are attached in the files.
3d_export
free

sapphire pro
...sapphire pro
3dexport
sapphire pro 3d printer head mask
3d_export
$4

macbook pro
...macbook pro
3dexport
macbook pro 13" inch 2020 years model
3ddd
free

GentleLase Pro
... syneron , candela
gentlelase pro аппарат для лазерной эпиляции
turbosquid
$25

PRO frame
...rbosquid
royalty free 3d model pro frame for download as max on turbosquid: 3d models for games, architecture, videos. (1148329)
turbosquid
$5

Alien pro
...osquid
royalty free 3d model alien pro for download as blend on turbosquid: 3d models for games, architecture, videos. (1678446)
turbosquid
$5

iphone11 pro
...uid
royalty free 3d model iphone11 pro for download as blend on turbosquid: 3d models for games, architecture, videos. (1562707)
3ddd
$1

Mac Pro (appel)
...mac pro (appel)
3ddd
компьютер , apple
mac pro
Mount
3d_export
free

mounting bracket
...mounting plate is the portion of a hinge that attaches to the wood. mounting plates can be used indoors, cabinetry and furniture.
turbosquid
$2

MOUNTING
... available on turbo squid, the world's leading provider of digital 3d models for visualization, films, television, and games.
turbosquid
free

Mounts
... available on turbo squid, the world's leading provider of digital 3d models for visualization, films, television, and games.
turbosquid
free

Mount Fuji
...fuji
turbosquid
free 3d model mount fuji for download as obj on turbosquid: 3d models for games, architecture, videos. (1579977)
3d_export
$5

Headphone mount LR
...headphone mount lr
3dexport
headphone mount l+r
turbosquid
$39

Mount rainier
...quid
royalty free 3d model mount rainier for download as fbx on turbosquid: 3d models for games, architecture, videos. (1492586)
turbosquid
$5

pipe mounting
...quid
royalty free 3d model pipe mounting for download as obj on turbosquid: 3d models for games, architecture, videos. (1293744)
turbosquid
$3

Mounting Tires
...uid
royalty free 3d model mounting tires for download as fbx on turbosquid: 3d models for games, architecture, videos. (1708511)
3d_export
$5

Magnetic GoPro Mount
...pro mount
3dexport
cool magnetic mount for gopro. allows you to mount the camera on flat metal surfaces and get exclusive shots.
turbosquid
$5

Stone Mount
...ty free 3d model stone mount for download as ma, obj, and fbx on turbosquid: 3d models for games, architecture, videos. (1370306)