Thingiverse

Otto DIY Robot (Modified by Jason Workshop) by jasonleung8866
by Thingiverse
Last crawled date: 3 years, 1 month ago
Who is Otto?
An interactive robot that anyone can make!
Otto walks, dances, makes sounds and avoids obstacles.
Is completely open source, Arduino compatible, 3D printable, and with a social impact mission to create an inclusive environment for all kids.
Otto was inspired by another robot BoB the BiPed and programmed using code from another open source biped robot Zowi.
CC-BY-SA
Otto's differences are in the assembled size (11cm x 7cm x12cm), cleaner integration of components and expressions. Using off the shelf and 3D printed parts, simple electronics connections (almost no welding required), and basic coding skills, you will be able to build your own cute Otto friend in as little as two hours!
Otto is design using Autodesk 123D Design software you can modify it for customization or further improvements!
Gather all the off the shelf parts that you'll need for this assembly.
List of parts:
Arduino Nano, preferable with the pins already weld it
Arduino Nano Shield I/O Extension Board Expansion XD-212
Mini usb cable. (most Arduino dealers provide the cable)
HC-06 Bluetooth Board Module (4-Pin)
HC-SR04 Ultrasound sensor.
Mini servo SG90 9g x6 (each one should come with 2 pointed screws and one small screw).
5V Buzzer.
Female to Female breadboard connectors cable 10cm x 10.
4 AA (6V) Battery case
1.5V AA batteries x4.
Mini cross screwdriver. important magnetized
And then you only need to 3D print 8 parts in total:
3D printed head.
3D printed body.
3D printed left arm.
3D printed right arm.
3D printed left leg.
3D printed right leg.
3D printed left foot.
3D printed right foot.
For the programming:
Download & Install Arduino IDE:https://www.arduino.cc/en/Main/Software
Copy Oscillator libraries to C:\Users\user\Documents\Arduino\libraries (or wherever your library folder is installed):
Finally open & upload OTTO_smooth_criminal.ino code to your Arduino Nano for dancing Otto.
More codes in https://github.com/OttoDIY/
Or follow this instructable http://www.instructables.com/id/Otto-Build-You-Own-Robot-in-Two-Hours/ that focuses on how to build the Otto DIY, more Ottos are coming and you can stay tuned for updates by subscribing on http://www.ottobot.org
Similar models
cults
free

Otto DIY build your own robot
...magnetized)
micro switch 8x8mm
3d printed head.
3d printed body.
3d printed leg x2.
3d printed right foot.
3d printed left foot.
thingiverse
free

Tito biped robot PLUS by s4snow
....
any problems printing or making or programming?
join and create a topic in our group http://www.thingiverse.com/groups/ottodiy/
thingiverse
free

OTTO with Wheels by s4snow
...bluetooth code for use with the zowi app,
https://github.com/jarsoftelectrical/otto-wheeled/blob/master/20170827_200142_mpeg4.avi
thingiverse
free

Otto DIY++ all in one by Phuc_D_Doan
...ottodiy_vbot/tree/master/examples/hc06_bt_config
firmware: github.com/stembotvn/ottodiy_vbot/tree/master/examples/otto_bt_zowiapp
thingiverse
free

OTTO DIY with 48:1 DC Motors by s4snow
...no and i/o shield is included, make sure you print the correct head, you will need to select a suitable motor driver pcb as well.
thingiverse
free

Code Kitty Robot v1.0 by CodeKitty
...library to work.
finally, please connect with us on facebook and twitter and post your makes if you make our kitty!
happy making!
thingiverse
free

HOW TO MAKE A OTTO ROBOT by Sametk
...his " otto robot ", you need 3d printer parts files and arduino codes. you can find all files below link for downloads.
thingiverse
free
Bobwi - Cheap, dancing robot. (with BT and easy to print) by galile0
.....
for the source code (3d parts and arduino code) to make bobwi dance, or be controlled from android.
https://github.com/g4lile0
thingiverse
free
OTTO DIY Extension backpack for ATOM Lite by hohmannorbit
...if you want, power supply cable connect just only atmo lite,
when that, connect 5v pin of atom lite with vin pin of arduino nano.
thingiverse
free

Otto DIY+ Arduino Bluetooth robot easy to 3Dprint by cparrapa
...hers and makers!
welcome to our otto builder community!
share your photos using #ottodiy and mention @ottodiy in any social media
Jasonleung8866
thingiverse
free

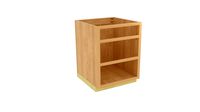
Card Holder (Designed by Jason Workshop) by jasonleung8866
... holder (designed by jason workshop) by jasonleung8866
thingiverse
welcome to www.jasonworkshop.com for more interesting design.
thingiverse
free
Robi Stand (Designed by Jason Workshop) by jasonleung8866
...(designed by jason workshop) by jasonleung8866
thingiverse
this stand was designed to fit the robi.
i hope everybody would like!
thingiverse
free

Crank (Designed by Jason Workshop) by jasonleung8866
...jason workshop) by jasonleung8866
thingiverse
list of parts:
3d printed parts 1 - 3
metal washers x 2
tapping screws m2x15mm x 1
thingiverse
free

Shovel for 3D Printing (Designed by Jason Workshop) by jasonleung8866
...nt removal tool can help you easily get the prints off from the print bed.
this is my first project, i hope everybody would like!
thingiverse
free

Q1 mini Quadruped Robot 2.0 (Designed by Jason Workshop) by jasonleung8866
....com/q1.jasonworkshop
q1 robot
http://www.q1robot.com
jason workshop
http://www.jasonworkshop.com
http://www.fb.com/jasonworkshop
thingiverse
free

Q1 lite Simple Quadruped Robot (Designed by Jason Workshop) by jasonleung8866
....com/q1.jasonworkshop
q1 robot
http://www.q1robot.com
jason workshop
http://www.jasonworkshop.com
http://www.fb.com/jasonworkshop
thingiverse
free

GoodSmile Doll Turret Cover for Probbie by ShinWeiChiou
...- robot fun (facebook page)https://www.facebook.com/miniplanrobot/ linkit 7697 with robot shieldhttps://www.tindie.com/products/jasonleung8866robot-shield-for-linkit-7697/ controler:robot shield + linkit 7697https://docs.labs.mediatek.com/resource/linkit7697-arduino/en/kits-and-shields/robot-shield app : linkit remotehttps://docs.labs.mediatek.com/resource/linkit7697-arduino/en/developer-guide/using-linkit-remote...
thingiverse
free

SMARS modular robot for Robot Shield + LinkIt-7697 by ShinWeiChiou
...controler:robot shield + linkit 7697https://docs.labs.mediatek.com/resource/linkit7697-arduino/en/kits-and-shields/robot-shield linkit 7697 with robot shieldhttps://www.tindie.com/products/jasonleung8866linkit-7697-with-robot-shield/ left motor : p10 p12,right motor : p13 p17...
thingiverse
free

SMARS modular robot + Pixy CMUcam5 by ShinWeiChiou
...controler:robot shield + linkit 7697https://docs.labs.mediatek.com/resource/linkit7697-arduino/en/kits-and-shields/robot-shield linkit 7697 with robot shieldhttps://www.tindie.com/products/jasonleung8866linkit-7697-with-robot-shield/ left motor : p10 p12,right motor : p13 p17...
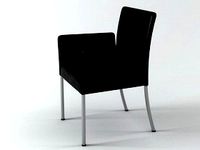
Otto
3ddd
free

OTTO
...otto
3ddd
otto , стол
stol ot otto
3ddd
$1
otto
... otto
вентилятор карло борера,
исходник:http://www.cbindustries.ch/d/otto-gallery
design_connected
$7
Otto
...otto
designconnected
zanotta otto computer generated 3d model. designed by for use.
3ddd
$1
Otto Wagner
... комод , шкаф
otto wagner - cupboard.
obj and fbx inside.
turbosquid
$60

otto
...lty free 3d model otto for download as ztl, ztl, obj, and stl on turbosquid: 3d models for games, architecture, videos. (1674218)
turbosquid
$15

otto
... available on turbo squid, the world's leading provider of digital 3d models for visualization, films, television, and games.
3ddd
free
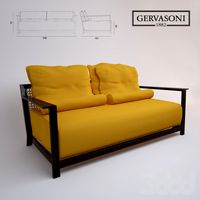
Софа Otto
...софа otto
3ddd
gervasoni
софа otto, фабрика gervasoni. италия. текстуры в архиве
3ddd
$1
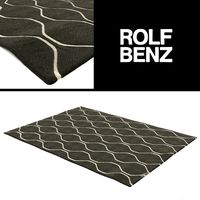
Rolf Benz OTTO
...d
rolf benz , otto , ковер
ковер rolf benz otto
3ddd
$1

809057 OTTO Lightstar
... lightstar
3ddd
otto , lightstar
809057 otto lightstarhttp://www.lightstar.ru/
3ddd
$1

809616 OTTO Lightstar
... lightstar
3ddd
otto , lightstar
809616 otto lightstarhttp://www.lightstar.ru/
Jason
design_connected
$16

Jason 1400
...jason 1400
designconnected
walter knoll jason 1400 chairs computer generated 3d model. designed by eoos.
design_connected
$16
Jason 1410
...jason 1410
designconnected
walter knoll jason 1410 armchairs computer generated 3d model. designed by eoos.
design_connected
$16
Jason 1411
...jason 1411
designconnected
walter knoll jason 1411 chairs computer generated 3d model. designed by eoos.
3d_export
$79

Jason Momoa 3D
...jason momoa 3d
3dexport
3d model of jason momoa. rigged
3ddd
$1

Jason Phillips Quantum Table
...jason phillips quantum table
3ddd
jason phillips , quantum
jason phillips quantum table
turbosquid
$120

Jason statham
... available on turbo squid, the world's leading provider of digital 3d models for visualization, films, television, and games.
cg_studio
$159
Jason Voorhees3d model
...son voorhees3d model
cgstudio
.max - jason voorhees 3d model, royalty free license available, instant download after purchase.
turbosquid
$25

Jason Stathem Head
...oyalty free 3d model jason stathem head for download as blend on turbosquid: 3d models for games, architecture, videos. (1594512)
3d_ocean
$5

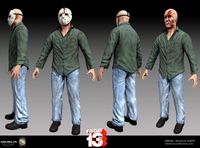
Jason Friday The 13th Kid Model
...jason friday the 13th kid model
3docean
13th friday jason kid lowpoly model the
jason friday the 13th kid model lowpoly
3ddd
$1
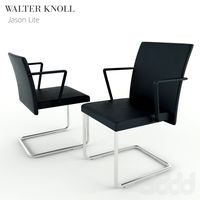
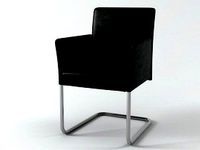
walter knoll Jason Lite
...alter knoll , jasonlite
http://www.walterknoll.de/en/products/jason-lite-chair
Workshop
turbosquid
$49

Workshop
...p
turbosquid
royalty free 3d model workshop for download as on turbosquid: 3d models for games, architecture, videos. (1195541)
3d_export
free
artoon workshop
...artoon workshop
3dexport
сartoon workshop<br>low poly car workshop building model
turbosquid
free
workshop
... available on turbo squid, the world's leading provider of digital 3d models for visualization, films, television, and games.
3d_export
$65
workshop
...workshop
3dexport
simple rendering of the scene file
3d_export
$65
Workshop
...workshop
3dexport
simple rendering of the scene file
3d_export
$25

workshop
...workshop
3dexport
simple rendering of the scene file
3d_export
$15

workshop
...workshop
3dexport
simple rendering of the scene file
3ddd
$1

Nowodvorski WORKSHOP
... workshop
nowodvorski workshop
бра и подвесной светильник.
d 90mm
h 450mm
материалы vray, corona.
design_connected
$16

Workshop Lamp
...workshop lamp
designconnected
hk living workshop lamp computer generated 3d model.
3ddd
$1
Workshop, Browning
...workshop, browning
3ddd
sofa workshop
http://www.sofaworkshop.com/sofas/fabric-sofas/sofa/browning
Diy
3d_export
free
DIY 3D Printer
...diy 3d printer
3dexport
diy 3d printer model
turbosquid
$10

Diy tiered
...l diy tiered for download as max, max, max, max, fbx, and obj on turbosquid: 3d models for games, architecture, videos. (1603709)
turbosquid
$3
Diy Desk to Bench
...odel diy desk to bench for download as 3ds, max, obj, and fbx on turbosquid: 3d models for games, architecture, videos. (1506589)
turbosquid
$2

DIY Moon Light
...model diy moon light for download as obj, fbx, blend, and dae on turbosquid: 3d models for games, architecture, videos. (1501170)
3d_export
$8
DIY CNC Router 3D Model
...diy cnc router 3d model
3dexport
cnc; router; diy; homemade
diy cnc router 3d model maikeru86 58463 3dexport
turbosquid
$5
Diy Kitchen Cabinets
...itchen cabinets for download as 3ds, obj, fbx, blend, and dae on turbosquid: 3d models for games, architecture, videos. (1197373)
3d_export
free

Download free Diying Plant 3D Model
...download free diying plant 3d model
3dexport
diying plant blender
diying plant 3d model visitorsama 98607 3dexport
3ddd
$1
DIY coffee table + decor
... рамка для фото
кофейный столик diy 400х350х600(h) мм. моделился по фото. внимание: материалы - corona.
turbosquid
$3
Diy Wire Lamp Shade
...free 3d model diy wire lamp shade for download as 3ds and fbx on turbosquid: 3d models for games, architecture, videos. (1347605)
cg_studio
$12
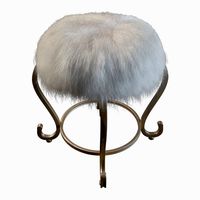
DIY MONGOLIAN LAMB STOOLS3d model
... hair soft pile white
.max - diy mongolian lamb stools 3d model, royalty free license available, instant download after purchase.
Robot
3d_ocean
$20

Robot
...robot
3docean
character metal robot robot robotic white
robot model for 3dsmax 2009 and greater
3d_ocean
$45
Robot
...robot
3docean
fighing machine robot
a fighting robot from the scrapyard.
3d_ocean
$18
Robot
...robot
3docean
machin robot science fiction
high poly robot.
3d_export
$7

Robot
...robot
3dexport
robot
3d_export
$5
robot
...robot
3dexport
robot
3d_export
free

Robot
...robot
3dexport
robot
turbosquid
$10

Robot/ Alien Robot
...
royalty free 3d model robot/ alien robot for download as max on turbosquid: 3d models for games, architecture, videos. (1442828)
3d_export
$5

robot
...robot
3dexport
robot in blender
3ddd
$1
robot
...robot
3ddd
робот
robot
3ddd
$1

Robot
...robot
3ddd
робот
robot
Modified
turbosquid
$5

modify car
...bosquid
royalty free 3d model modify car for download as max on turbosquid: 3d models for games, architecture, videos. (1390511)
turbosquid
$35

Soleste modified
...e 3d model soleste modified for download as 3dm, stl, and jpg on turbosquid: 3d models for games, architecture, videos. (1646606)
turbosquid
$35

Screwdriver-Modified
... available on turbo squid, the world's leading provider of digital 3d models for visualization, films, television, and games.
turbosquid
$20

APS modified
... available on turbo squid, the world's leading provider of digital 3d models for visualization, films, television, and games.
turbosquid
$5

Modified skull
... available on turbo squid, the world's leading provider of digital 3d models for visualization, films, television, and games.
3d_export
$8

Maruti 800 Modified
...obile engineers. this concept will also helpful to modified car enthusiast. this is made in solidworks & rendered in keyshot.
3d_ocean
$5
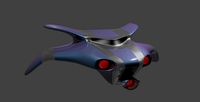
Spacecraft with Subdivision Modifier
...raft with subdivision modifier
3docean
fantasy spacecraft vehicle
the model was created in blender using the subdivision modifier
turbosquid
$10
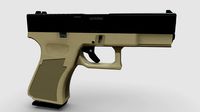
Modified 9mm pistol
...royalty free 3d model modified 9mm pistol for download as fbx on turbosquid: 3d models for games, architecture, videos. (1560956)
3d_export
$10
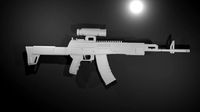
ak-47 modified
...ak-47 modified
3dexport
turbosquid
$10

modified evo x
...ree 3d model modified evo x for download as obj, fbx, and stl on turbosquid: 3d models for games, architecture, videos. (1461606)