Thingiverse
Operant Conditioning Chamber by RogerEsc
by Thingiverse
Last crawled date: 3 years ago
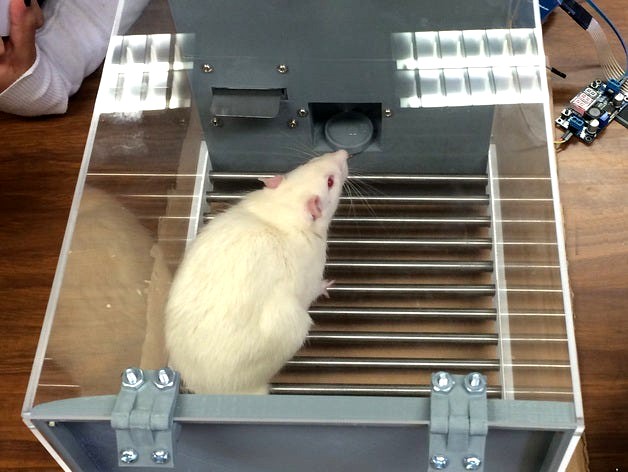
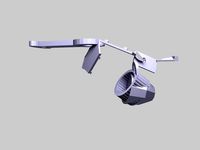
An operant conditioning chamber for rats.
The operant chamber or "Skinner box" was invented by American psychologist B. F. Skinner during the early 1930s. It is used in psychological laboratories to study in a controlled situation the effects of environmental variables on the probability of a relatively simple response known as operant. In a simple arrangement, operant learning can be studied by presenting a reinforcing event (e.g., food or water) every time a rat presses a metal lever. In these particular chambers, rats can also be trained to press the lever only when a stimulus (e.g., a light) is presented. Numerous principles of behavior have been discovered in the operant chamber. Many of these are the basis for behavioral psychotherapy.
These inexpensive 3D-printed operant chambers are used as teaching tools during the undergraduate courses of Learning and Behavior Analysis imparted by Dr. Rogelio Escobar at the National Autonomous University of Mexico (UNAM).
Read more about this project: http://3dprint.com/106669/3d-printed-lab-equipment/http://analisisdelaconducta.net/?page_id=496
All parts are printed in PLA because it is a non-toxic material. A layer height of 0.3 mm and a 20% fill density are recommended for the panels. A 0.2 mm resolution is recommended for the lock mechanism and hinges. No support material is necessary. I like printing the grid-holding parts using white PLA and the rest of the parts using gray PLA, but you could use any color you like.
A file in AutoCAD format (Acrylic_Walls.dwg) includes three walls for the chamber. These must be laser cut in 3-mm clear acrylic. Red lines in the drawing represent cuts.
You will need also the following materials:
15 – Stainless steel rods (8 mm diameter x 210 mm in length) . These can be obtained from any 3D printer-part supplier.
1 – 10 mm LED with holder. This LED is used as houselight. I like Adafruit’s diffused white LEDs (https://www.adafruit.com/products/846). An LED Plastic holder (https://www.adafruit.com/products/2171) fit perfectly in the chamber.
4 – #6-32 x 3/4 in. Machine Flat Phillips Screws with nuts. These are used to attach the parts holding the steel rods to the base of the chamber.
24 – #6-32 x 1/2 in. Machine Round Combo Screws with nuts. These are use to secure the panels and the hinges.
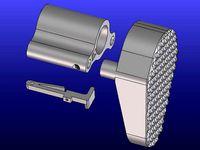
1- LED illuminated pushbutton - 30 mm round (https://www.adafruit.com/products/492). This is not actually used as a button but as a light above the lever. It is useful to present a visual stimulus.
3 - M3 x 10 mm screws. These keep the water/food tray in place.
E6000 glue. The parts holding the steel rods, the lock mechanism, the small flange that keeps the door locked, and the water/food tray parts require glue. The panels can be glued together to make the chamber stronger.
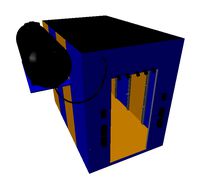
Follow the images to assemble the chamber. Blue parts are 3D printed, gray parts are laser cut acrylic, and white parts are stainless steel. Some 3D printed parts require sanding to facilitate assembly.
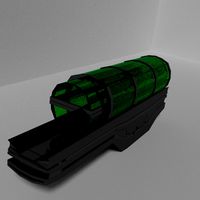
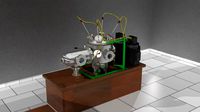
The water pump to deliver liquid reinforcement can be found at http://www.thingiverse.com/thing:1247624
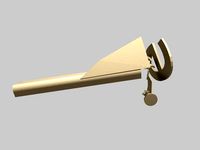
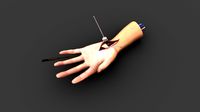
The lever can be found at: http://www.thingiverse.com/thing:1246025
This chamber is compatible with the Arduino-Visual Basic interface designed for operant research. The interface is described at: http://www.ncbi.nlm.nih.gov/pubmed/25649099
This project was funded through a grant from DGAPA UNAM (PAPIIT IN304615)
The operant chamber or "Skinner box" was invented by American psychologist B. F. Skinner during the early 1930s. It is used in psychological laboratories to study in a controlled situation the effects of environmental variables on the probability of a relatively simple response known as operant. In a simple arrangement, operant learning can be studied by presenting a reinforcing event (e.g., food or water) every time a rat presses a metal lever. In these particular chambers, rats can also be trained to press the lever only when a stimulus (e.g., a light) is presented. Numerous principles of behavior have been discovered in the operant chamber. Many of these are the basis for behavioral psychotherapy.
These inexpensive 3D-printed operant chambers are used as teaching tools during the undergraduate courses of Learning and Behavior Analysis imparted by Dr. Rogelio Escobar at the National Autonomous University of Mexico (UNAM).
Read more about this project: http://3dprint.com/106669/3d-printed-lab-equipment/http://analisisdelaconducta.net/?page_id=496
All parts are printed in PLA because it is a non-toxic material. A layer height of 0.3 mm and a 20% fill density are recommended for the panels. A 0.2 mm resolution is recommended for the lock mechanism and hinges. No support material is necessary. I like printing the grid-holding parts using white PLA and the rest of the parts using gray PLA, but you could use any color you like.
A file in AutoCAD format (Acrylic_Walls.dwg) includes three walls for the chamber. These must be laser cut in 3-mm clear acrylic. Red lines in the drawing represent cuts.
You will need also the following materials:
15 – Stainless steel rods (8 mm diameter x 210 mm in length) . These can be obtained from any 3D printer-part supplier.
1 – 10 mm LED with holder. This LED is used as houselight. I like Adafruit’s diffused white LEDs (https://www.adafruit.com/products/846). An LED Plastic holder (https://www.adafruit.com/products/2171) fit perfectly in the chamber.
4 – #6-32 x 3/4 in. Machine Flat Phillips Screws with nuts. These are used to attach the parts holding the steel rods to the base of the chamber.
24 – #6-32 x 1/2 in. Machine Round Combo Screws with nuts. These are use to secure the panels and the hinges.
1- LED illuminated pushbutton - 30 mm round (https://www.adafruit.com/products/492). This is not actually used as a button but as a light above the lever. It is useful to present a visual stimulus.
3 - M3 x 10 mm screws. These keep the water/food tray in place.
E6000 glue. The parts holding the steel rods, the lock mechanism, the small flange that keeps the door locked, and the water/food tray parts require glue. The panels can be glued together to make the chamber stronger.
Follow the images to assemble the chamber. Blue parts are 3D printed, gray parts are laser cut acrylic, and white parts are stainless steel. Some 3D printed parts require sanding to facilitate assembly.
The water pump to deliver liquid reinforcement can be found at http://www.thingiverse.com/thing:1247624
The lever can be found at: http://www.thingiverse.com/thing:1246025
This chamber is compatible with the Arduino-Visual Basic interface designed for operant research. The interface is described at: http://www.ncbi.nlm.nih.gov/pubmed/25649099
This project was funded through a grant from DGAPA UNAM (PAPIIT IN304615)
Similar models
thingiverse
free

Lever for Operant Chamber by RogerEsc
...e lever. 3d printed parts are blue, metal parts (metal plate and stand off) are white, screws are black, and the switch is brown.
thingiverse
free
Airsoft Well MB-06 sliding stock by csakip
...ue it on.
i printed it in pla. i have included the base with inbuilt support. best to print that without other support enabled.
thingiverse
free

Peristaltic Pump Stand for Operant Chambers by RogerEsc
...d to the water tray in the operant chamber. it helps producing a precise drop of water with every operation of the pump dc motor.
thingiverse
free

LED Matrix diffusion panel holder by hnohmi
...matrix connector for 64x32 rgb led matrix - 4mm pitch
https://www.adafruit.com/product/2278
https://www.adafruit.com/product/4749
thingiverse
free

lever for skinner box by iamchagas
...lever for skinner box by iamchagas
thingiverse
this is a lever design for skinner boxes used for rodent behavioural training
thingiverse
free
LED Matrix Buckle by Sraf
.../1904https://www.adafruit.com/products/1317
don't forget to grab the other parts of the buckle from the adafruit led buckle
thingiverse
free

Wire Mesh Decoration by gigl
...rint part and lock with the food can stripes
solder the 4 wires together
proceed with the other steel wires according to the plan
thingiverse
free

Chocolate Pot by gigl
...st to decorate cakes.
one funnel is chocolate, the other is water
make sure you print it pla (or pet) in order to stay food save
thingiverse
free

Parametric universal spool winder
...ds of 4 mm diamter. you can also print rods, but alu is more solid
printed with pla
print parameters can be found in the ini file
thingiverse
free

Astromech Magic Panel by kweddel
...3 - square - yellow
http://www.adafruit.com/products/2044 - square - white
http://www.adafruit.com/products/2052 - round - orange
Rogeresc
thingiverse
free
Photocell Enclosure for Operant Research by RogerEsc
...photocell enclosure for operant research by rogeresc
thingiverse
enclosure described at the 43rd abai conference.
thingiverse
free

Pellet Dispenser for Operant Chambers by RogerEsc
...(support.stl) are glued together. the ring must be glued to the disk support. also the knob must be glued to the lid (cover.stl).
thingiverse
free
Peristaltic Pump Stand for Operant Chambers by RogerEsc
...d to the water tray in the operant chamber. it helps producing a precise drop of water with every operation of the pump dc motor.
thingiverse
free
Lever for Operant Chamber by RogerEsc
...e lever. 3d printed parts are blue, metal parts (metal plate and stand off) are white, screws are black, and the switch is brown.
thingiverse
free
Cheesy along shaped like uck-02f07m uck-02f07m by shivinteger
...[8] thing url : http://www.thingiverse.com/thing:1226076 [8] thing author : rogeresc [8] thing licence : attribution - non-commercial - share...
thingiverse
free
Portaberry with Operant Badge by shivinteger
...[14] thing url : http://www.thingiverse.com/thing:1226076 [14] thing author : rogeresc [14] thing licence : attribution - non-commercial - share...
Chamber
turbosquid
$15
Chamber
...rbosquid
royalty free 3d model chamber for download as blend on turbosquid: 3d models for games, architecture, videos. (1240986)
3d_export
$6

Chamber
...chamber
3dexport
squish dumpling avatars of the valorant agents.
turbosquid
$53
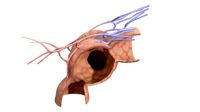
Alveolus Chamber
... available on turbo squid, the world's leading provider of digital 3d models for visualization, films, television, and games.
turbosquid
free

Underground chamber
... available on turbo squid, the world's leading provider of digital 3d models for visualization, films, television, and games.
turbosquid
free
Vacuum chamber
... available on turbo squid, the world's leading provider of digital 3d models for visualization, films, television, and games.
turbosquid
$10
disinfection chamber
...on chamber for download as blend, 3ds, dae, fbx, obj, and stl on turbosquid: 3d models for games, architecture, videos. (1671962)
3d_export
$25
Hypersleep Chamber
..., the users are usually clad in either sleepwear or underwear to prevent clothes and/or armor to become frozen to the users body.
turbosquid
$2

Xenomorph Incubation Chamber
...y free 3d model xenomorph incubation chamber for download as on turbosquid: 3d models for games, architecture, videos. (1705895)
3d_export
$7

chambers bar stools
...chambers bar stools
3dexport
name:
turbosquid
$59

Chamber Pendant Light
...yalty free 3d model chamber pendant light for download as max on turbosquid: 3d models for games, architecture, videos. (1291559)
Conditioning
turbosquid
$49

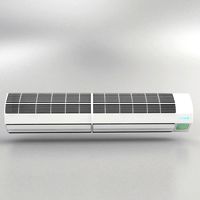
Air conditioning
...d
royalty free 3d model air conditioning for download as max on turbosquid: 3d models for games, architecture, videos. (1499041)
3d_export
$5

air conditioning
...air conditioning
3dexport
turbosquid
$10

Air Conditioning
...e 3d model air conditioning for download as max, fbx, and obj on turbosquid: 3d models for games, architecture, videos. (1651980)
turbosquid
$5

Air Conditioning
...e 3d model air conditioning for download as max, obj, and fbx on turbosquid: 3d models for games, architecture, videos. (1382721)
turbosquid
$2

Air conditioning
...model air conditioning for download as 3ds, obj, c4d, and fbx on turbosquid: 3d models for games, architecture, videos. (1224322)
turbosquid
$99

air conditioning
... available on turbo squid, the world's leading provider of digital 3d models for visualization, films, television, and games.
turbosquid
$59

Air Condition
... available on turbo squid, the world's leading provider of digital 3d models for visualization, films, television, and games.
turbosquid
$19

air condition
... available on turbo squid, the world's leading provider of digital 3d models for visualization, films, television, and games.
turbosquid
$15
Air conditioning
... available on turbo squid, the world's leading provider of digital 3d models for visualization, films, television, and games.
turbosquid
$2

Air condition
... available on turbo squid, the world's leading provider of digital 3d models for visualization, films, television, and games.
Operant
3d_export
$5

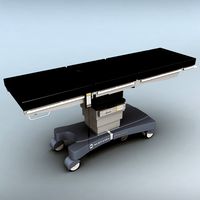
Operating table
...operating table
3dexport
operation table<br>renderen in cycles<br>obj. and fbx files included
turbosquid
$49
Surgical operations:
...free 3d model surgical operations: for download as ma and obj on turbosquid: 3d models for games, architecture, videos. (1261516)
turbosquid
$15

operating chair.max
... available on turbo squid, the world's leading provider of digital 3d models for visualization, films, television, and games.
3d_ocean
$29
Operating table
... all applied materials: - textures formats: tif (x9), psd (x5) - textures size: x1024 (x7), x2048 (x5) - materials types: stan...
3ddd
$1
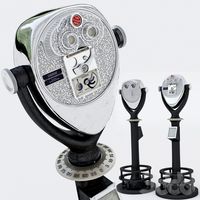
Coin Operated Telescope
...perated telescope
3ddd
бинокль , телескоп
north american classic coin operated telescope
3d_export
$15
operator and
...export to game engines. easy editable models and ready for texturing. rig and animation ready. good retopology. easy file access.
3d_ocean
$20
Operating Lamp
... higher and many others. formats *.max scanline *.max vray *.max mentalray *.c4d advanced render *.c4d cinema 4d vray *.obj *.fbx
3d_ocean
$28
Operating Table
... higher and many others. formats *.max scanline *.max vray *.max mentalray *.c4d advanced render *.c4d cinema 4d vray *.obj *.fbx
cg_studio
$50
Operating room3d model
...perating room3d model
cgstudio
.max - operating room 3d model, royalty free license available, instant download after purchase.
cg_studio
$50

Operating room3d model
...perating room3d model
cgstudio
.max - operating room 3d model, royalty free license available, instant download after purchase.