Thingiverse

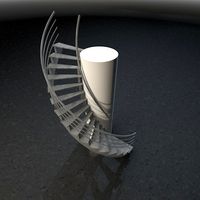
OpenLock 2.0 Spiral Stair Infinite Tread by Start2
by Thingiverse
Last crawled date: 3 years ago
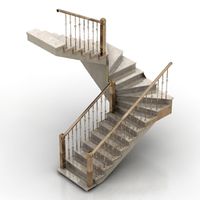
A spiral stair tread, 30deg/8.4mm tall and 38.1R (3in dia/1.75R)
Wanted to set up a spiral stair that could hold figures. Use as many as you need to get as high as required.
Kudos to Printablesceneryhttp://www.printablescenery.com/product-category/rampage-system/
Rampagehttp://www.thingiverse.com/thing:1821631
OpenLock 4.0http://www.thingiverse.com/thing:1833963
DevonJoneshttp://www.thingiverse.com/thing:2034428
Cobble Pattern by Siennahttp://www.thingiverse.com/thing:1921325
Using Devon Jones Curved wall "cut_stone.wall.TA.1.5rx0.5.curved.openlock" which is a wall made to fit the H floor tile (a 2" inside radius) and the .5inch wall has a 2" outside radius. Created the stair to fit within this open 3in diameter (1.5 in radius).
You would need to use OL2 HE to finish a 8"dia tower floor or 9"dia. with walls.
Here: http://www.thingiverse.com/thing:2055430
Design: Started with 38.1 dia tread and peg was to be made to fit the "hole". As I made the initial set of treads, I had to print upside down as to not use supports. After printing, realized I could use filament as the peg through the treads. They individually would spin around and I had to glue together to make the picture.
2nd Gen tread had pattern, and I still printed upside down, but used 3.3 hole. Was tight for a 3mm filament as the filament expanded when I used a heat gun with the filament in the "V" of a metal shelving unit leg. Still had to glue. I have changed the tread to have a "key" to set the 60 degree tread to have a 30 degree overlap. Also set the attachment to the round middle support to the outside dia.for greater strength as I broke a few on the bed at that point. (Use the tread end to remove from the bed, not the peg end) Still had to print upside down.
3rd Gen tread had pattern, and supports to allow printing right side up. Still using 3.3 dia hole as the dia is a snug fit for the filament. If you use 1.75dia filament, you can print a 3mm peg, or resize the hole. Also a nail, wood dowel, or other metal support will suffice.
This method used filament for no real good reason.
4th gen had tread pegs and side risers separate and to glue together. Added tabs to locate side risers and treads properly to each other as you build up the stair. Very fiddly, thus rejected.
5th gen. Finally a good all round solution. Set tread to print peg and side risers UP. This allowed one piece treads again, with good fidelity on the stair pattern. No side riser and a spacer peg needed on first tread may not have the best stability for many very heavy figures, but works quite nicely. Top tread needed to have no peg or riser to fit under second floor. Detail obtained was worth it. Tabs in treads space the 60deg treads to 30deg each step which allows a 1" base to fit well on each tread. If you make a very high staircase, the original tread may provide the most stability, (or scale a plain tread with peg and side riser to 5.4mm in z and use that as the base peg and side riser support you may need to stabilize the staircase.)
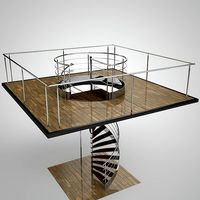
Spiral Stair Base
Provided all bases plain for your own pattern.Spiral Stair F is round 4" dia (=4x OpenLock "F" tiles clipped together) and Spiral Stair "round" is 3in dia to fit within the Devon Jones walls. As the treads are spaced at 8.4 high, they should (at 5 treads) fit just under the 2nd floor if the floor is set at 50.8mm resting upon the walls. To go higher, just add additional treads. I believe you will have to glue the treads to make it work, although you could always use painters tape on the outside edge to keep the treads together.
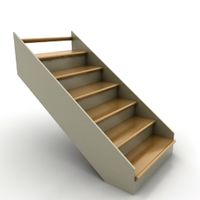
"Base" is just a bottom of the stair with a hole for the treads support peg.
"Down" has a clip to allow a fill piece to be added to make it a ground floor "Base", or left out to allow you to go "down".
01/23/17 Updated bases to correct clip size. Added BASE FROUND and DOWN FROUND which is a 3" halfround married to 4" halfround (2xF Tiles)
01/23/17 Added 4x4 U tiles, both BASE and DOWN styles. Took out concept model as it was large and not needed with as built pictures available.
01/25/17 Corrected "math" and clarified notes.
01/27/17 Corrected Treads to match original design size. New treads have supports to print right side up, and tabs for spacing.
2/2/17 Re-thought, why have supports/tabs etc. Why print upside down? Now treads print right side up. Only issue...need to have a different top tread, and a spacer at the bottom. Spacer, 10 cobble treads, 3 tops + plain/top set (for both plain printing or to add your own pattern) and the same plain/top set with a tab with the correct spacing for 30deg treads as shown in the picture. Bottom of tread Tab hole may need cleaning. Spacer can be resized to the height you need to make up any difference you may have in your floor design. Plain top treads or add your own floor design, are now the same tread.
This should complete this design, but still may tweak for ease of use. Typical wall height is 50.8 and you will need spacer first, then 4 treads + 1 top tread to utilize. Tread heights are 8.4. If you use floor supports, add an additional tread in the 180deg stair, by cutting off the tabs and rotate counter clockwise equally to add in the extra tread.
2/16/17 https://www.flickr.com/photos/nigel_brown/9708771924 Added photo example (by Nigel Brown) similar to the memory that was lingering in my head on the spiral stair design.
Wanted to set up a spiral stair that could hold figures. Use as many as you need to get as high as required.
Kudos to Printablesceneryhttp://www.printablescenery.com/product-category/rampage-system/
Rampagehttp://www.thingiverse.com/thing:1821631
OpenLock 4.0http://www.thingiverse.com/thing:1833963
DevonJoneshttp://www.thingiverse.com/thing:2034428
Cobble Pattern by Siennahttp://www.thingiverse.com/thing:1921325
Using Devon Jones Curved wall "cut_stone.wall.TA.1.5rx0.5.curved.openlock" which is a wall made to fit the H floor tile (a 2" inside radius) and the .5inch wall has a 2" outside radius. Created the stair to fit within this open 3in diameter (1.5 in radius).
You would need to use OL2 HE to finish a 8"dia tower floor or 9"dia. with walls.
Here: http://www.thingiverse.com/thing:2055430
Design: Started with 38.1 dia tread and peg was to be made to fit the "hole". As I made the initial set of treads, I had to print upside down as to not use supports. After printing, realized I could use filament as the peg through the treads. They individually would spin around and I had to glue together to make the picture.
2nd Gen tread had pattern, and I still printed upside down, but used 3.3 hole. Was tight for a 3mm filament as the filament expanded when I used a heat gun with the filament in the "V" of a metal shelving unit leg. Still had to glue. I have changed the tread to have a "key" to set the 60 degree tread to have a 30 degree overlap. Also set the attachment to the round middle support to the outside dia.for greater strength as I broke a few on the bed at that point. (Use the tread end to remove from the bed, not the peg end) Still had to print upside down.
3rd Gen tread had pattern, and supports to allow printing right side up. Still using 3.3 dia hole as the dia is a snug fit for the filament. If you use 1.75dia filament, you can print a 3mm peg, or resize the hole. Also a nail, wood dowel, or other metal support will suffice.
This method used filament for no real good reason.
4th gen had tread pegs and side risers separate and to glue together. Added tabs to locate side risers and treads properly to each other as you build up the stair. Very fiddly, thus rejected.
5th gen. Finally a good all round solution. Set tread to print peg and side risers UP. This allowed one piece treads again, with good fidelity on the stair pattern. No side riser and a spacer peg needed on first tread may not have the best stability for many very heavy figures, but works quite nicely. Top tread needed to have no peg or riser to fit under second floor. Detail obtained was worth it. Tabs in treads space the 60deg treads to 30deg each step which allows a 1" base to fit well on each tread. If you make a very high staircase, the original tread may provide the most stability, (or scale a plain tread with peg and side riser to 5.4mm in z and use that as the base peg and side riser support you may need to stabilize the staircase.)
Spiral Stair Base
Provided all bases plain for your own pattern.Spiral Stair F is round 4" dia (=4x OpenLock "F" tiles clipped together) and Spiral Stair "round" is 3in dia to fit within the Devon Jones walls. As the treads are spaced at 8.4 high, they should (at 5 treads) fit just under the 2nd floor if the floor is set at 50.8mm resting upon the walls. To go higher, just add additional treads. I believe you will have to glue the treads to make it work, although you could always use painters tape on the outside edge to keep the treads together.
"Base" is just a bottom of the stair with a hole for the treads support peg.
"Down" has a clip to allow a fill piece to be added to make it a ground floor "Base", or left out to allow you to go "down".
01/23/17 Updated bases to correct clip size. Added BASE FROUND and DOWN FROUND which is a 3" halfround married to 4" halfround (2xF Tiles)
01/23/17 Added 4x4 U tiles, both BASE and DOWN styles. Took out concept model as it was large and not needed with as built pictures available.
01/25/17 Corrected "math" and clarified notes.
01/27/17 Corrected Treads to match original design size. New treads have supports to print right side up, and tabs for spacing.
2/2/17 Re-thought, why have supports/tabs etc. Why print upside down? Now treads print right side up. Only issue...need to have a different top tread, and a spacer at the bottom. Spacer, 10 cobble treads, 3 tops + plain/top set (for both plain printing or to add your own pattern) and the same plain/top set with a tab with the correct spacing for 30deg treads as shown in the picture. Bottom of tread Tab hole may need cleaning. Spacer can be resized to the height you need to make up any difference you may have in your floor design. Plain top treads or add your own floor design, are now the same tread.
This should complete this design, but still may tweak for ease of use. Typical wall height is 50.8 and you will need spacer first, then 4 treads + 1 top tread to utilize. Tread heights are 8.4. If you use floor supports, add an additional tread in the 180deg stair, by cutting off the tabs and rotate counter clockwise equally to add in the extra tread.
2/16/17 https://www.flickr.com/photos/nigel_brown/9708771924 Added photo example (by Nigel Brown) similar to the memory that was lingering in my head on the spiral stair design.
Similar models
thingiverse
free

OpenForge 2.0 Wood Floor House Up & down Stone Stairwell by Start2
.../www.thingiverse.com/thing:1640999
special note of thanks to xloud - original spiral stairhttp://www.thingiverse.com/thing:995196
3dwarehouse
free

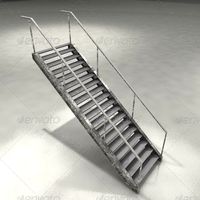
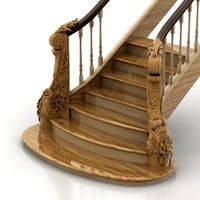
Staircase Treads
... your needs. this component has an oak tread, a concrete riser and steel side supports. #spteps #stair #staircase #stairs #treads
thingiverse
free

OpenForge 2.0 Mag Wood Floor House Stairwell Up Door Down by Start2
.../www.thingiverse.com/thing:1126259
special note of thanks to xloud - original spiral stairhttp://www.thingiverse.com/thing:995196
thingiverse
free

OpenForge 2.0 Mag Stone Floor House Stairwell Up Door Down by Start2
.../www.thingiverse.com/thing:1126259
special note of thanks to xloud - original spiral stairhttp://www.thingiverse.com/thing:995196
3dwarehouse
free

Jens3D Spiral Staircase
...rcase
3dwarehouse
simple spiral stair of metal components. modify one tread/riser and all will update! #spiral #stair #staircase
grabcad
free

Spiral Stair Case
...nnected to a center column. the treads rotate around this central point as you go up or down the stair, creating a spiral design.
3dwarehouse
free

Spiral stair
...ipe railings. begins with riser, does not end with riser. #einar #einsir #metal #pipe #risers #spiral_stairs #stair #stairs #wood
grabcad
free

Spiral Stairs
...spiral stairs
grabcad
use for going to up side or down side, from one floor to another level
grabcad
free

Spiral Staircase
...nnected to a center column. the treads rotate around this central point as you go up or down the stair, creating a spiral design.
grabcad
free

SHEETMETAL STAIR RISER, ANGLE BRACKET SUPPORT, CHEMGRATE TREAD
...this will be tied into my "shrimp line assy" latest rev...http://grabcad.com/library/2nd-floor-assy-shrimp-line-rev-02
Start2
thingiverse
free

OpenLock Adaptors-Wood Catwalk Set by Start2
...ng:1821631
openlock 4.0 http://www.thingiverse.com/thing:1833963
and devonjones openforgehttp://www.thingiverse.com/thing:1640999
thingiverse
free

OpenLock Adapter- Wood Corner by Start2
...ng:1821631
openlock 4.0 http://www.thingiverse.com/thing:1833963
and devonjones openforgehttp://www.thingiverse.com/thing:1640999
thingiverse
free

OpenLock Adapters Plain by Start2
...t-category/rampage-system/
rampage http://www.thingiverse.com/thing:1821631
openlock 4.0 http://www.thingiverse.com/thing:1833963
thingiverse
free

OpenLock Adapters-Wood Set by Start2
...3
and devonjones openforgehttp://www.thingiverse.com/thing:1640999
finishes the set with http://www.thingiverse.com/thing:2155569
thingiverse
free

OpenLock Derivitives by Start2
...rd tiles are based. this will open up for uses in curved roadways, mine track curves and tower options.
tiles are 6mm 25.4 based.
thingiverse
free

OpenLock Adapter-Stone Corner by Start2
...old-school-floor-adaptors/
spartan782 remixed these stone tiles with openlock slots here:http://www.thingiverse.com/thing:2064069
thingiverse
free

OpenForge 2.0 Spiral Stair Up (ORIG) OpenLock Base by Start2
...//www.thingiverse.com/thing:251178
special note of thanks to xloud - original spiral stairhttp://www.thingiverse.com/thing:995196
thingiverse
free

OpenForge 2.0 Spiral Stair Up OpenLock Base by Start2
...nd devonjones
openforge 2.0 http://www.thingiverse.com/thing:1910972
moved discussion to:http://www.thingiverse.com/thing:2055430
thingiverse
free

OpenForge 2.0 Mag + Door Full Spiral Stair by Start2
...//www.thingiverse.com/thing:171315
special note of thanks to xloud - original spiral stairhttp://www.thingiverse.com/thing:995196
thingiverse
free

OpenForge 2.0 Mag House Stone Stairwell by Start2
...//www.thingiverse.com/thing:171315
special note of thanks to xloud - original spiral stairhttp://www.thingiverse.com/thing:995196
Openlock
thingiverse
free

Rampage OpenLOCK Base Pack by Printablescenery
...ock herehttp://www.printablescenery.com/rampage-openlock
note: you need to remove the supports in front of the openlock supports.
thingiverse
free

OpenLock Tudor Door by LaCrosseInventersGuild
...r by lacrosseinventersguild
thingiverse
a quick remix of the door to be usable as an openlock wall ( not attached to the floor )
thingiverse
free

InfinityOpenlock - Openlock to Infinitylock clip by DungeonWorks
...infinityopenlock - openlock to infinitylock clip by dungeonworks
thingiverse
here is the clip for infinitylock to openlock.
thingiverse
free

Spiral Stairs OpenLOCK - N by oa10712
...spiral stairs openlock - n by oa10712
thingiverse
a modification of a spiral staircase changed to fit with the openlock system.
thingiverse
free

OpenLOCK Risers by misalo1
...sers for openlock tiles.
more to come...
i have tested e & s (pictures to follow)
i have not test printed r, sa, sb, u... yet
thingiverse
free

Miniature Sundial with Openlock by melabam
...hingiverse.com/thing:2534898
the bush tiles with and without openlock can be found here.https://www.thingiverse.com/thing:2637591
thingiverse
free
OpenLock Derivitives by Start2
...rd tiles are based. this will open up for uses in curved roadways, mine track curves and tower options.
tiles are 6mm 25.4 based.
thingiverse
free

OpenLock Wood Floor by PropheticFiver
...r
thingiverse
2x2 openlock wood floor using the openforge wood floor pattern.
prints beautifully on my ender 3 without supports
thingiverse
free

OpenLOCK to WarLOCK Adaptor Clip by Deac0n78
...rlock's own adapter clips i fumbled around until i had one that fit perfectly. this is my first but hopefully not last thing.
thingiverse
free

OpenLOCK Tessellation Templates by Printablescenery
...alls.
31 july 2020 (version 8.6) g-wall and oa-floor have had geometry fixes due to them having issues in some software programs.
Tread
3d_export
$5

tank treads
...tank treads
3dexport
turbosquid
$10

Tread-Stopper
... available on turbo squid, the world's leading provider of digital 3d models for visualization, films, television, and games.
turbosquid
$1
Tank Treads
... available on turbo squid, the world's leading provider of digital 3d models for visualization, films, television, and games.
vizpark
$10

Tread Floor
... the set includes fully tileable 8k, 4k and 2k textures with basecolor, height, ao, normal, roughness, and specular level layers.
turbosquid
$39

rubber tread wheel
... available on turbo squid, the world's leading provider of digital 3d models for visualization, films, television, and games.
turbosquid
$39
rim tread sedan
... available on turbo squid, the world's leading provider of digital 3d models for visualization, films, television, and games.
turbosquid
$27

Tire Treads V6
... available on turbo squid, the world's leading provider of digital 3d models for visualization, films, television, and games.
3d_export
$16
medieval tread wheel crane
...medieval tread wheel crane
3dexport
turbosquid
$39

rubber wheel tread tire
... available on turbo squid, the world's leading provider of digital 3d models for visualization, films, television, and games.
turbosquid
$39

sport rim tread wheel
... available on turbo squid, the world's leading provider of digital 3d models for visualization, films, television, and games.
Infinite
turbosquid
$15
Infinite Energy
...id
royalty free 3d model infinite energy for download as c4d on turbosquid: 3d models for games, architecture, videos. (1463932)
3d_ocean
$5
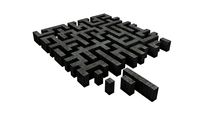
The Infinite Maze
... a maze as big as you want. the single maze section works out to be 30m x 30m x 3m. there are some separate wall sections that...
turbosquid
$4

infinite geometry
...e geometry for download as 3ds, obj, fbx, blend, dae, and stl on turbosquid: 3d models for games, architecture, videos. (1272938)
3d_ocean
$5

infinite studio for cinema 4d
.../seamless/changeable background studio setup for cinema 4d (physical and advanced render).check more images, 3d preview section….
turbosquid
$20

Infinite Splinter Teal Rug
... available on turbo squid, the world's leading provider of digital 3d models for visualization, films, television, and games.
3d_ocean
$5
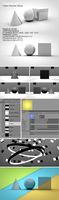
Clean Infinite Studio + HDRI
...nfinite background that can be colorized easily to your liking . features: ready to render generated hdri using objects 5 lock...
3d_ocean
$8

Infinite Backdrop Studio + HDRI image
...up for product visualizations in cinema 4d. it mimics a reflective photographic studio. backdrop and floor is set-up to blend ...
3d_export
$15

xbox controller halo infinite limited edition
...max 2021, obj and fbx files does not include hdri. model, ideal for interior decoration, video game assets and whatever you need.
humster3d
$40

3D model of TAG Heuer Meridiist Infinite
...3d model of tag heuer meridiist infinite in various file formats. all our 3d models were created maximally close to the original.
3d_export
$19

infinite science fiction tunnel interior
...e fiction tunnel interior
3dexport
very long science fiction hallway or gangway tunnel interior. perfect for looping animations.
Spiral
3ddd
$1
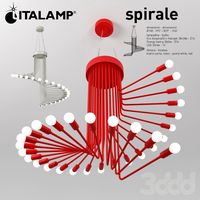
italamp spirale
...italamp spirale
3ddd
italamp , spirale
italamp spirale
3ddd
free
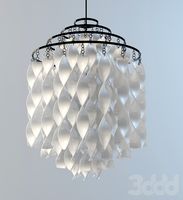
Verpan / Spiral
...verpan / spiral
3ddd
spiral , verpan
verpan люстра spiral
3d_export
free

Spiral staircase
...spiral staircase
3dexport
spiral staircase
turbosquid
$5

Spiral
...quid
royalty free 3d model spiral for download as and sldpr on turbosquid: 3d models for games, architecture, videos. (1214311)
3d_export
$5

Spiral lamp
...spiral lamp
3dexport
spiral lamp in modern style.
turbosquid
$59

Spiralizer
... available on turbo squid, the world's leading provider of digital 3d models for visualization, films, television, and games.
3d_ocean
$4
Spiral stairs
...spiral stairs
3docean
spiral stairs
spiral stairs 270 cm high inner radius 40 cm outer radius 120 cm
3d_export
$5

Spiral stairs
...spiral stairs
3dexport
spiral stairs<br>.blend
3d_export
$9

vdb spiral
...vdb spiral
3dexport
vdb spiral with different resolutions: low, middle and high
3d_ocean
$17
Spiral staircase
...uble handle handrail interior lux luxury metal modern open stairs realistic render spiral stair staircase stairs
spiral staircase
Stair
3d_ocean
$5
stairs
...stairs
3docean
metal stairs
metal stairs
archibase_planet
free
Stair
...stair
archibase planet
stair stairs staircase spiral stairs
stair n040914 - 3d model (*.gsm+*.3ds) for interior 3d visualization.
archibase_planet
free

Stair
...stair
archibase planet
stair pool stairs stairs pool ladders
stair 1 - 3d model (*.gsm+*.3ds) for interior 3d visualization.
archibase_planet
free

Stair
...stair
archibase planet
stair stairs playground
stair - 3d model (*.gsm+*.3ds) for exterior 3d visualization.
archibase_planet
free

Stair
...stair
archibase planet
stair staircase stairs
stair metal - 3d model (*.gsm+*.3ds) for interior 3d visualization.
archibase_planet
free
Stair
...stair
archibase planet
stair staircase flight of stairs
stair n310514 - 3d model (*.gsm+*.3ds) for interior 3d visualization.
archibase_planet
free
Stairs
...stairs
archibase planet
stairs staircase stair
stair step s - 3d model (*.gsm+*.3ds) for interior 3d visualization.
archibase_planet
free

Stair
...stair
archibase planet
stair stairs staircase
stair element n151014 - 3d model (*.gsm+*.3ds+*.max) for interior 3d visualization.
archibase_planet
free
Stair
...air
archibase planet
stair stairs front staircase staircase
stair n111014 - 3d model (*.gsm+*.3ds) for interior 3d visualization.
archibase_planet
free

Stair
...stair
archibase planet
stair staircase glass staircase stairs
stair glass - 3d model (*.gsm+*.3ds) for interior 3d visualization.
0
turbosquid
$12

Calligraphic Digit 0 Number 0
...hic digit 0 number 0 for download as max, obj, fbx, and blend on turbosquid: 3d models for games, architecture, videos. (1389318)
3d_export
$6

set-0
...set-0
3dexport
turbosquid
$6

hedge 0
...yalty free 3d model hedge 0 for download as max, obj, and fbx on turbosquid: 3d models for games, architecture, videos. (1450353)
turbosquid
$5

Nuber 0
...oyalty free 3d model nuber 0 for download as ma, obj, and fbx on turbosquid: 3d models for games, architecture, videos. (1564674)
turbosquid
$22

0.jpg
... available on turbo squid, the world's leading provider of digital 3d models for visualization, films, television, and games.
turbosquid
free

Steam Locomotive Fowler 4F 0-6-0
... available on turbo squid, the world's leading provider of digital 3d models for visualization, films, television, and games.
turbosquid
$10

Liquid Number 0
... model liquid number 0 for download as c4d, 3ds, fbx, and obj on turbosquid: 3d models for games, architecture, videos. (1689919)
turbosquid
$45

Dragon360_perspShape_tmp.0.jpg
... available on turbo squid, the world's leading provider of digital 3d models for visualization, films, television, and games.
turbosquid
$8

Rocks Debris 0
... available on turbo squid, the world's leading provider of digital 3d models for visualization, films, television, and games.
3d_export
$18

wood-guardrail-fence 0
...wood-guardrail-fence 0
3dexport
wood-guardrail-fence 0<br>3ds max 2015
2
design_connected
$11

No 2
...no 2
designconnected
sibast no 2 computer generated 3d model. designed by sibast, helge.
turbosquid
$6

Cliff Rock 2-2
...uid
royalty free 3d model cliff rock 2-2 for download as obj on turbosquid: 3d models for games, architecture, videos. (1619161)
turbosquid
$29

Book variation 2 2
...3d model book variation 2 2 for download as max, obj, and fbx on turbosquid: 3d models for games, architecture, videos. (1366868)
turbosquid
$22

Classic baluster (2) (2)
...assic baluster (2) (2) for download as max, obj, fbx, and stl on turbosquid: 3d models for games, architecture, videos. (1483789)
turbosquid
$99

Smilodon 2 Pose 2
... available on turbo squid, the world's leading provider of digital 3d models for visualization, films, television, and games.
turbosquid
$20

Barrel Barricade 2-2
... available on turbo squid, the world's leading provider of digital 3d models for visualization, films, television, and games.
turbosquid
$6

Wall Trophy (2) (2)
... available on turbo squid, the world's leading provider of digital 3d models for visualization, films, television, and games.
turbosquid
free

Tire label 2 of 2
... available on turbo squid, the world's leading provider of digital 3d models for visualization, films, television, and games.
3ddd
$1

Кровать, 2 тумбочки, 2 светильника
...кровать, 2 тумбочки, 2 светильника
3ddd
кровать, 2 тумбочки, 2 светильника
нормальное качество
формат 3ds max
без текстур
3ddd
free

Кровать, 2 тумбочки, 2 светильника
...кровать, 2 тумбочки, 2 светильника
3ddd
кровать, 2 тумбочки, 2 светильника
нормальное качество
формат 3ds max
без текстур