Thingiverse
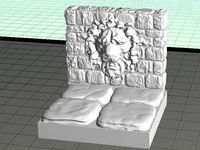
OpenForge Stone Flicker LED Torch Wall - Simplified by darkside501st
by Thingiverse
Last crawled date: 4 years, 1 month ago
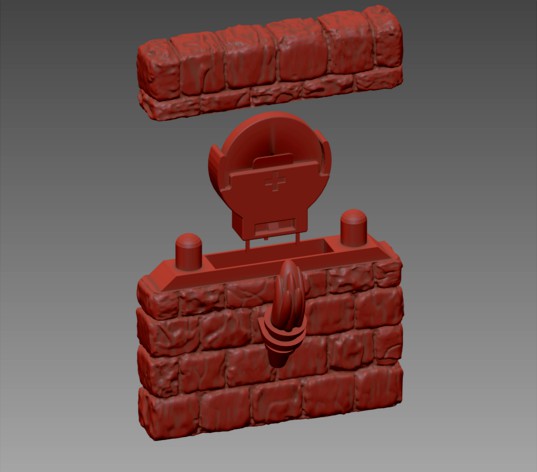
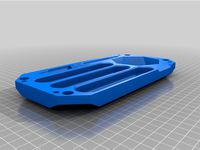
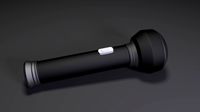
I really liked the flicker LED torch walls but all the ones I found were way more complex than they needed to be. I made this torch wall as a self contained unit with three printable pieces, the 3mm flicker LED, a common CR2032 battery holder, and some tiny wire (30ga I think).
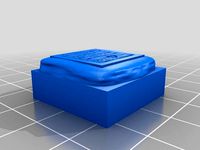
The top of the wall comes off and you can easily remove the battery to turn it off without messing with your layout. You don't have to take the tile out of your layout to get to a switch on the bottom. The switch is unnecessary since it is just as easy to slide the battery in an out. You can use this wall as a separate wall with the separate bases or you can replace the standard wall on the integrated wall/base tiles.
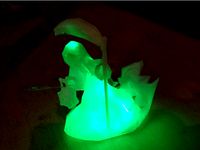
I would suggest printing the pieces with a brim, especially on the top of the wall since there is not a lot of surface area to contact the bed. No supports are needed even on the top of the wall. I did not need a brim when I printed the torch flame with clear PLA. Alternatively, you could use some hot glue to create a flame and dissipate the light from the LED.
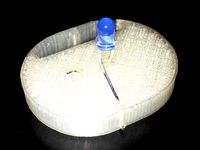
Assembly is easy, the longer wire lead on the LED is the positive and the shorter lead is the negative. Simply take a 3mm flicker LED with the color of your choice and cut the leads down making sure to remember which is which. Now cut two tiny wires about 50-60mm long (28-30ga would work best). With wire this small you will most likely have to melt the plastic coating off the wire with your soldering iron. Then solder the wire on the leads using just a tiny bit of solder. After that, just slide the wire down through the holes in the torch till you can see them enter the battery compartment. Next, grab the wires with some small needle nose pliers or tweezers. Pull on the wires and push the LED down to the torch. Once the LED reaches the torch you can solder the wires to the battery holder. Then you can glue push the battery holder down into the wall.
Use some super glue if needed to hold the battery holder in the wall. Also, you may want to use a dot of glue to hold the LED on the torch. Before glueing the LED to the torch you can add the flame. I used my solder iron on the inside of the flame to get the PLA warm and pliable then pushed the LED inside and squeezed the base of the flame on to the LED. Since the battery is a coin cell there is no need for a resistor because coin cell batteries have a high internal resistance. You only need to use a resistor if you want to dim the LED so it is not as bright.
The top of the wall comes off and you can easily remove the battery to turn it off without messing with your layout. You don't have to take the tile out of your layout to get to a switch on the bottom. The switch is unnecessary since it is just as easy to slide the battery in an out. You can use this wall as a separate wall with the separate bases or you can replace the standard wall on the integrated wall/base tiles.
I would suggest printing the pieces with a brim, especially on the top of the wall since there is not a lot of surface area to contact the bed. No supports are needed even on the top of the wall. I did not need a brim when I printed the torch flame with clear PLA. Alternatively, you could use some hot glue to create a flame and dissipate the light from the LED.
Assembly is easy, the longer wire lead on the LED is the positive and the shorter lead is the negative. Simply take a 3mm flicker LED with the color of your choice and cut the leads down making sure to remember which is which. Now cut two tiny wires about 50-60mm long (28-30ga would work best). With wire this small you will most likely have to melt the plastic coating off the wire with your soldering iron. Then solder the wire on the leads using just a tiny bit of solder. After that, just slide the wire down through the holes in the torch till you can see them enter the battery compartment. Next, grab the wires with some small needle nose pliers or tweezers. Pull on the wires and push the LED down to the torch. Once the LED reaches the torch you can solder the wires to the battery holder. Then you can glue push the battery holder down into the wall.
Use some super glue if needed to hold the battery holder in the wall. Also, you may want to use a dot of glue to hold the LED on the torch. Before glueing the LED to the torch you can add the flame. I used my solder iron on the inside of the flame to get the PLA warm and pliable then pushed the LED inside and squeezed the base of the flame on to the LED. Since the battery is a coin cell there is no need for a resistor because coin cell batteries have a high internal resistance. You only need to use a resistor if you want to dim the LED so it is not as bright.
Similar models
thingiverse
free

Flaming Torch by egmontlodge
...
print the spike and the torch base perpendicular to the bed of the printer. use plenty of brim and you won't have a problem.
thingiverse
free

Minecraft Torch Flickering by choprint
...ne just slides inside of the torch and is loose. something like this might work better. http://www.thingiverse.com/thing:1673084
thingiverse
free

Birthday Cake with Color-Changeing LED Candles by Thinger13
...ile. it is still a bit of a mess, sorry.
caution: this is not a toy for small children. they may bite off a flame and swallow it.
thingiverse
free

Minecraft Torch by choprint
... hold the square led part in place with a bit of hot glue.
i used a 12mm push button switch. like this one https://goo.gl/rzftzz
thingiverse
free

Minecraft Torch - Sliding Battery Door by choprint
...ds for the torch top. your choice on how many leds to use.
i used a 12mm push button switch. like this one https://goo.gl/rzftzz
thingiverse
free
LED light torch by thorgal
...battery - no soldering required.
you can use it as it is in small lantern or intergrate the battery holder into your own design.
thingiverse
free
Desk Lamp by Salalammas
...led
on-off switch
i glued the switch to the bottom plate
cause the battery is 9volts and the led is 3.5volts i needed a resistor.
thingiverse
free
Low Poly Reaper by BensHacks
...ht the lantern is space for an other led. i suggest an flickering one fro an electric candle (witch can also provide the battery)
thingiverse
free

Gen 5 Camaro Side Markers by JEBariffic
...arker with hot glue. cover harness and leads with hot glue. allow to cool.
press in makers into position and hold for ~ a minute.
thingiverse
free

Another Dungeon Tile Set by MartinSykes
...der which can then be glued under the floor
make sure to position the battery holder so there is room to slide the battery in/out
Darkside501St
thingiverse
free

Various Scatter Decorations for Pirate Galleon DnD by darkside501st
...pre-supported for sla prints and regular versions for fdm prints but these are so small they probably will not print well on fdm.
thingiverse
free

Kraken for Table Top DND by darkside501st
...ble to get those to stand up by adding some weights to the bases.
i printed these parts in abs so that i could vapor smooth them.
thingiverse
free
Smaller DnD Dice Case w/Storage by darkside501st
....amazon.com/gp/product/b004ohntvc
pentel fine writing instrument mechanical pencil - https://www.amazon.com/gp/product/b0013nfzui
thingiverse
free

Ruida Controller Mounting Box Laser Cutter Engraver by darkside501st
...orts are minimal since the box is made with 45 degree angles.
i also made a mock-up with the measurements of my ruida controller.
thingiverse
free

Spaceballs - Dark Helmet's Helmet by moesizzlac
...credit for his/her time and effort contributed. thank you darkside501st ...
thingiverse
free
Pirate Ship Galleon for Table Top DnD by darkside501st
...a problem with the remix search tool. so here was the original thing i used as a base: https://www.thingiverse.com/thing:3814743
thingiverse
free

Spaceballs_Dark_Helmets_Helmet by IKantEven
...edit of dark helmet project by moesizzlac based on darkside501st design i split the helmet shell into 8 pieces...
thingiverse
free

Iron Man MK6 MK 6 Glove Hand with repulsor by DaDave
...glove is originaly made by "zabana" and remixed by "darkside501stquot; for papakura. i just took the papakura model and...
thingiverse
free

Iron Man MK6 MK 6 Suit by DaDave
...glove is originaly made by "zabana" and remixed by "darkside501stquot;. below the original link for the glove:http://www.therpf.com/showthread.php?t=139470&highlight=hand+zabana as arc...
Flicker
3d_export
$5

building
...material. defect at the corners, in the form of flickerng ...
3d_export
$10
Animated Flame Texture 3D Model
...3dexport animated animate animation candle lighter match flame ignite flicker smoke explosion fire burn burning texture map collection game...
3d_export
$10

acer predator x34
...to describe or define 2. overclocking may lead to flickerng or other adverse effects that may occur due to...
thingiverse
free

Flickering Birthday Cake by Ticktok
... zip) attached.
here's a video of it flickering.
no supports necessary, each part prints flat.
print the flame in vase mode!
thingiverse
free

Pentacle Flicker Box by bluemanticore
...e the relaxing light and shadows thrown through the front of it. print it upside-down, with the large, square opening facing up.
thingiverse
free

Light Flicker Detecting Top by MechEngineerMike
...: some led's have low flicker rates and will give you a false positive. don't throw away your energy efficient led's!
thingiverse
free

Printable Enclosure for Flicker-Hallucination Visor Electronics by mrule
...er-hallucination goggles ("brain machine") project. it was designed to fit the project shown on treehovse.blogspot.com.
blendswap
free

Flickering Light Setup
...d when i created this.latest change on 2016/02/19, 16:49:51changed description. more specifically, my grammar from two years ago.
thingiverse
free

flicker candle standoff
...nd lanterns. to avoid standoffs, the base is printed separately from the standoffs, then glued together with a bit of super glue.
thingiverse
free

Ghost Minion Flickering LED Tealight
...nstead of using any infill, use at least 4 or more shells for this model.
see this model in action!: https://youtu.be/9mcijjp70yq
Openforge
thingiverse
free

OpenForge base with extra support
...openforge base with extra support
thingiverse
a remixed base for openforge by devonjones
thingiverse
free
Openforge Water Tile
...ombine with the openforge bases to be compatible with dungeon stone items from devonjones at openforge 2 dungeon stone collection
thingiverse
free
OpenForge Lion Wall by doctordavemorgan
...openforge lion wall by doctordavemorgan
thingiverse
openforge dungeon wall tile with a sculpted lion.
thingiverse
free

OpenForge 2.0 doors
...
a few alternative door to use with openforge 2.0 cut stone square door by devon jones
https://www.thingiverse.com/thing:1722459
thingiverse
free

Openforge Sewers by devonjones
...penforge and masterwork tools at our:
online catalog and backer site
website
forums (mostly we use facebook now)
twitter
facebook
thingiverse
free

OpenForge Pillar by DROP_DB
...he openforge pillar by devonjones. it has simply been cut it half and laid on its side so that it can be printed without support.
thingiverse
free
Trapdoor Openforge compatible by PatG
...trapdoor openforge compatible by patg
thingiverse
a very basic 1x1 trapdoor based on the openforge stone and wood tiles.
thingiverse
free

OpenForge Secret Doors by jpacek
... it to the excellent openforge designs. thank you devon jones!
based on openforge walls https://www.thingiverse.com/thing:178621
thingiverse
free
OpenForge Wooden Platform
...orm to fit in the openforge rounded corners. added 3 options, its great for a little change in scenery, i use them al the time :)
thingiverse
free

OpenForge Stairs by doctordavemorgan
... are scaled right, but to make them fit with the other openforge tiles, just scale them so they are 50mm wide. posted by request!
Torch
3d_ocean
$16

Torch
...flashlight high poly model. day high poly torch light mag lite night lamp rays shine new torch torch
high detailed 3d torch model
design_connected
$13

Torch
...torch
designconnected
established & sons torch computer generated 3d model. designed by willenz, sylvain .
3ddd
$1
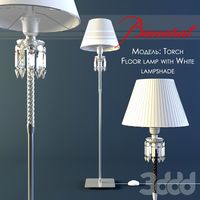
Baccarat - Torch
...- torch
3ddd
baccarat , torch
торшер фирмы baccarat, модель torch, текстуры прилагаются.
turbosquid
$10

Torch
...h
turbosquid
royalty free 3d model torch for download as max on turbosquid: 3d models for games, architecture, videos. (1364794)
turbosquid
$4

Torch
...h
turbosquid
royalty free 3d model torch for download as c4d on turbosquid: 3d models for games, architecture, videos. (1264168)
turbosquid
free

Torch
...urbosquid
free 3d model torch for download as , fbx, and obj on turbosquid: 3d models for games, architecture, videos. (1598202)
turbosquid
$5

torch
...quid
royalty free 3d model torch for download as max and stl on turbosquid: 3d models for games, architecture, videos. (1531004)
turbosquid
$1

Torch
...d
royalty free 3d model torch for download as , fbx, and obj on turbosquid: 3d models for games, architecture, videos. (1622961)
3d_export
free

torch
...torch
3dexport
turbosquid
$10
Torch
...
royalty free 3d model torch for download as ma, obj, and fbx on turbosquid: 3d models for games, architecture, videos. (1194449)
Simplified
turbosquid
$5

Simplified Trumpet
... available on turbo squid, the world's leading provider of digital 3d models for visualization, films, television, and games.
turbosquid
free

Simplified Bike
... available on turbo squid, the world's leading provider of digital 3d models for visualization, films, television, and games.
3d_export
$5

simplified model of a bundle of dollars
...simplified model of a bundle of dollars
3dexport
a simplified model of a bundle of dollars. models for subdiv
turbosquid
$19

The Simplified model of a telescope
... available on turbo squid, the world's leading provider of digital 3d models for visualization, films, television, and games.
turbosquid
$1

Simplified sports car
... available on turbo squid, the world's leading provider of digital 3d models for visualization, films, television, and games.
3d_export
$5

Simplified male-female base mesh
...simplified male-female base mesh
3dexport
simplified male/female character base mesh in .ztl and .fbx
3ddd
$1

Soane - Simplified quiver klismos chair
...
3ddd
капитоне
модель кресла soane - simplified quiver klismos chair.
- лоуполи геометрия
- мультисаб материал
- fbx + obj + 3ds
turbosquid
$24

Coronavirus 2 COVID-19 simplified model
...irus 2 covid-19 simplified model. for download as c4d and obj on turbosquid: 3d models for games, architecture, videos. (1534962)
3d_export
free
g17
...g17 3dexport glock 17 simplified style,little...
3d_export
$10
biblical altar
...biblical altar 3dexport a simplified model of the altar spoken of in the bible,...
Led
3d_export
$5

led
...led
3dexport
the led is cut with all the parts.
3ddd
$1

Monacor / PARL56DMX / LED-320RGBW / LED-345RGBW / LED-300RGB
... прожектор
http://www.monacor.dk/
parl56dmx
led-320rgbw
led-345rgbw
led-300rgb
turbosquid
$10

LED
...led
turbosquid
free 3d model led for download as blend on turbosquid: 3d models for games, architecture, videos. (1691856)
3d_export
$5

led lamp
...led lamp
3dexport
led lamp, brightness animation
3ddd
free

leds-c4
...leds-c4
3ddd
leds-c4
современный торшер
3ddd
free

leds-c4
...leds-c4
3ddd
leds-c4
настольный лампа
turbosquid
$19

LED
... available on turbo squid, the world's leading provider of digital 3d models for visualization, films, television, and games.
turbosquid
$12

Led
... available on turbo squid, the world's leading provider of digital 3d models for visualization, films, television, and games.
turbosquid
free

LED
... available on turbo squid, the world's leading provider of digital 3d models for visualization, films, television, and games.
turbosquid
free

LED
... available on turbo squid, the world's leading provider of digital 3d models for visualization, films, television, and games.
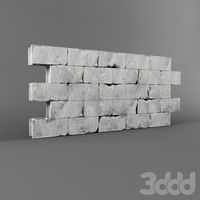
Stone
3ddd
$1
Stone
...stone
3ddd
stone
3d_export
$10
Stone
...stone
3dexport
ordinary stone
3d_ocean
$5
Stone
...stone
3docean
rock stone
stone 2048 texture obj and fbx format high quality
archibase_planet
free
Stone
...stone
archibase planet
stone rock
stone n260108 - 3d model (*.gsm+*.3ds) for interior 3d visualization.
archibase_planet
free
Stone
...stone
archibase planet
stone rock boulder
stone 4 - 3d model (*.gsm+*.3ds) for exterior 3d visualization.
archibase_planet
free
Stone
...stone
archibase planet
stone boulder rock
stone 5 - 3d model (*.gsm+*.3ds) for exterior 3d visualization.
archibase_planet
free
Stone
...stone
archibase planet
stone rock boulder
stone 3 - 3d model (*.gsm+*.3ds) for exterior 3d visualization.
archibase_planet
free
Stone
...stone
archibase planet
stone boulder rock
stone 1 - 3d model (*.gsm+*.3ds) for exterior 3d visualization.
archibase_planet
free
Stone
...stone
archibase planet
stone rock boulder
stone 2 - 3d model (*.gsm+*.3ds) for exterior 3d visualization.
3d_export
free

Stone
...stone
3dexport
realistic stone to create an atmospheric scene
Wall
turbosquid
$5
Wall and UDK Wall
... available on turbo squid, the world's leading provider of digital 3d models for visualization, films, television, and games.
archibase_planet
free
Wall
...wall
archibase planet
batten wall plywood partition
batten wall - 3d model for interior 3d visualization.
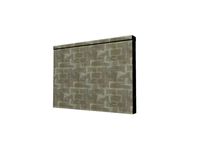
3d_ocean
$5
Wall
...wall
3docean
low polgon wall low stone old wall stone wall
2048*2048 tex obj,fbx,blend format. low polygon. game ready.
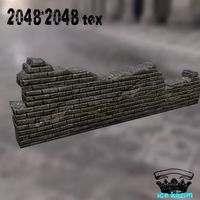
3ddd
$1
wall
...wall
3ddd
камень , кладка
damaged stone wall
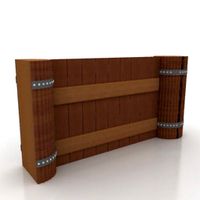
3d_export
$5

wall
...wall
3dexport
room with a wall with doors made of wood and leather
3ddd
$1
WALL FREAMS
...wall freams
3ddd
wall freams
wall freams
3ddd
$1
WALL-E
...wall-e
3ddd
wall-e , робот
wall-e
3ddd
$1
WALL PANNEL
...wall pannel
3ddd
панель
wall pannel for enterance wall.
3d_export
$18
great wall-city wall-dianjiangtai
...great wall-city wall-dianjiangtai
3dexport
great wall-city wall-dianjiangtai<br>3ds max 2015
turbosquid
$5

Wall
...wall
turbosquid
royalty free 3d model wall for download as on turbosquid: 3d models for games, architecture, videos. (1522889)