Thingiverse
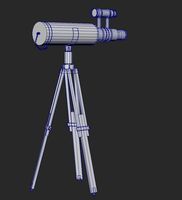
OpenBeam Telescope and Fork Mount by dsguice
by Thingiverse
Last crawled date: 3 years ago
This is a work in progress, most of the optical tube assembly and mount designs are finished. I am currently in the middle of printing and testing these parts. The next steps will be to develop the absolute encoder, the direct drive axial flux motor, and the electronic controls. The idea for the 3D printed direct drive motor came from an axial flux generator which can be found here: https://www.thingiverse.com/thing:687743
The telescope is designed for a 9.75" f/3 parabolic mirror that I've had in storage for a few years now. I'm sure the design could be adapted for a smaller or larger mirror, or even a different optical design like a Schmidt–Cassegrain.
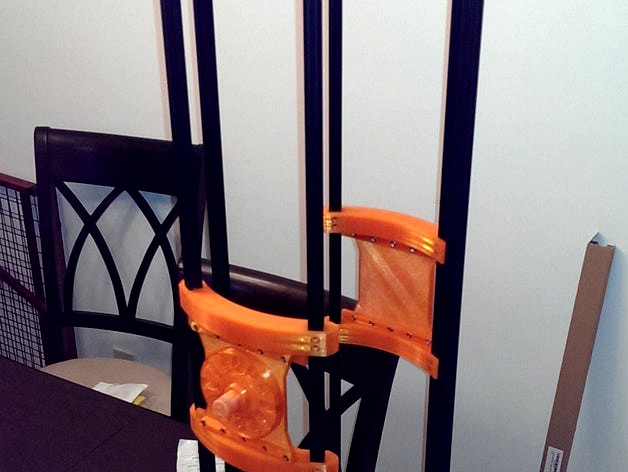
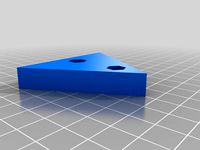
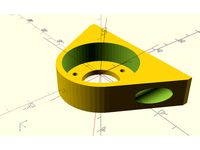
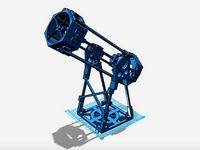
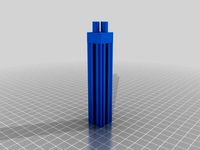
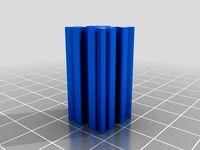
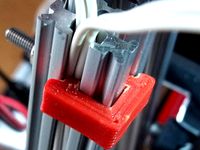
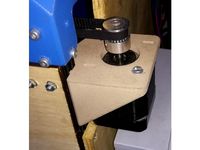
The optical tube assembly (OTA) is made up of 6 OpenBeam aluminum extrusions that should be about 2 feet long depending on the focal length of the mirror. These pieces will be held together by two 3D printed rings; each ring is made up of 6 parts held together by M4 x 20mm socket head cap screws and bolts. The OTA is attached to a fork mount which is also made up of OpenBeam and held together by 3D printed brackets. The mount will be a two-axis alt-azimuth configuration powered by two direct drive axial flux motors. The motors will be controlled by an Arduino Due and use absolute encoders for positioning feedback.
The base or azimuth of the mount is still being designed; due to its larger size and the fact that the motor and encoder must fit compactly together. I hope to have this finished and posted in the next month or two. In the mean time I will be testing different encoder configurations using the Texas Instruments LDC1614.
You can follow along with my testing progress at: www.danielguice.blogspot.com
Parts list:
Amazon:
about 3 spools of 1kg filament (I used mostly Hatchbox 1.75mm PLA transparent orange)
12 x 30mm long OpenBeam
12 x 108mm long OpenBeam
(8 x 300mm long OpenBeam????)
(4 x 400mm long OpenBeam????)
(6 x 609mm long OpenBeam????)
McMaster-Carr:
M4 x 20mm (100 pack)
M4 x 10mm (100 pack)
M3 x 6mm (200 pack from OpenBeam)
M4 nuts (200 pack)
M3 nuts (200 pack from OpenBeam)
47mm OD, 20mm ID steel ball bearing (x2 http://www.mcmaster.com/#5972k45/=zygd14)
Other:
9.75" f/3 parabolic mirror
AstroSystems secondary mirror holder
secondary mirror (2.5"???)
2" Focuser (The focuser board is designed for the Starlight Instruments SIPS focuser)
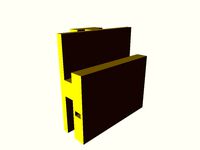
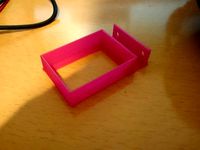
EDIT 1 (11/24/2015) : Added encoder side bearing plate and encoder OTA plate. These plates are designed to attach a PCB encoder to each. The PCB on the OTA will be the target and the PCB attached to the mount will have the coils and LDC1614.
Also, both the encoder side and rotor/stator side plates are designed to be used with a 47mm OD, 20mm ID steel ball bearing. These can be found on Mcmaster-Carr.
EDIT 2 (1/26/2016): 95% of the OTA has been designed and printed. I have added pictures of this build. Note, the holes for the OpenBeam were test fit with an earlier version and I purchased 12 OpenBeam 2.1 beams for the OTA and mount after printing all of these parts. I found that OpenBeam 2.1 did not slip fit in and that I needed to file/sand these holes before I could put together the OTA. Be sure to test fit a few prints and make changes to the design before printing all of your parts. Also, the OTA pictured here is with the full 1 meter OpenBeam before cutting to size; the OTA final length should be about 10-15 inches shorter.
Most of the parts have been printed with ~45% hex fill for extra strength.
If you have any questions please feel free to ask.
The telescope is designed for a 9.75" f/3 parabolic mirror that I've had in storage for a few years now. I'm sure the design could be adapted for a smaller or larger mirror, or even a different optical design like a Schmidt–Cassegrain.
The optical tube assembly (OTA) is made up of 6 OpenBeam aluminum extrusions that should be about 2 feet long depending on the focal length of the mirror. These pieces will be held together by two 3D printed rings; each ring is made up of 6 parts held together by M4 x 20mm socket head cap screws and bolts. The OTA is attached to a fork mount which is also made up of OpenBeam and held together by 3D printed brackets. The mount will be a two-axis alt-azimuth configuration powered by two direct drive axial flux motors. The motors will be controlled by an Arduino Due and use absolute encoders for positioning feedback.
The base or azimuth of the mount is still being designed; due to its larger size and the fact that the motor and encoder must fit compactly together. I hope to have this finished and posted in the next month or two. In the mean time I will be testing different encoder configurations using the Texas Instruments LDC1614.
You can follow along with my testing progress at: www.danielguice.blogspot.com
Parts list:
Amazon:
about 3 spools of 1kg filament (I used mostly Hatchbox 1.75mm PLA transparent orange)
12 x 30mm long OpenBeam
12 x 108mm long OpenBeam
(8 x 300mm long OpenBeam????)
(4 x 400mm long OpenBeam????)
(6 x 609mm long OpenBeam????)
McMaster-Carr:
M4 x 20mm (100 pack)
M4 x 10mm (100 pack)
M3 x 6mm (200 pack from OpenBeam)
M4 nuts (200 pack)
M3 nuts (200 pack from OpenBeam)
47mm OD, 20mm ID steel ball bearing (x2 http://www.mcmaster.com/#5972k45/=zygd14)
Other:
9.75" f/3 parabolic mirror
AstroSystems secondary mirror holder
secondary mirror (2.5"???)
2" Focuser (The focuser board is designed for the Starlight Instruments SIPS focuser)
EDIT 1 (11/24/2015) : Added encoder side bearing plate and encoder OTA plate. These plates are designed to attach a PCB encoder to each. The PCB on the OTA will be the target and the PCB attached to the mount will have the coils and LDC1614.
Also, both the encoder side and rotor/stator side plates are designed to be used with a 47mm OD, 20mm ID steel ball bearing. These can be found on Mcmaster-Carr.
EDIT 2 (1/26/2016): 95% of the OTA has been designed and printed. I have added pictures of this build. Note, the holes for the OpenBeam were test fit with an earlier version and I purchased 12 OpenBeam 2.1 beams for the OTA and mount after printing all of these parts. I found that OpenBeam 2.1 did not slip fit in and that I needed to file/sand these holes before I could put together the OTA. Be sure to test fit a few prints and make changes to the design before printing all of your parts. Also, the OTA pictured here is with the full 1 meter OpenBeam before cutting to size; the OTA final length should be about 10-15 inches shorter.
Most of the parts have been printed with ~45% hex fill for extra strength.
If you have any questions please feel free to ask.
Similar models
thingiverse
free
Axial Flux Motor by aerogeek
...itions and modifications as it develops.
not yet printed or tested still in very early phase.
drawn in freecad, not yet tested.
grabcad
free

Axial Flux Electric Motor
...axial flux electric motor
grabcad
7.5" axial flux motor. still in design phase
grabcad
free

Axial Flux motor
...axial flux motor
grabcad
axial flux motor
grabcad
free

Axial Flux motor
...axial flux motor
grabcad
axial flux motor
thingiverse
free
Rotary Encoder to OpenBeam Mount by plastic
...erse
this part always you to attach a rotary encoder to a 15x15 extrusion such as openbeam or makerbeam. designed with openscad.
grabcad
free

N20 gearbox encoder m4x55mm
... that i found on aliexpress.
n20 motor with gearbox, magnetic encoder and 55mm long m4 threaded rod.
designed with fusion 360.
grabcad
free

Axial flux motor
...axial flux motor
grabcad
3d model of axial flux motor, double rotor, yokeless
thingiverse
free
Hexonian 6 Printable Dobsonian Telescope by chinzynator
...ed and researched by nanyang technological university, school of physical and mathematical sciences, making and tinkering course.
thingiverse
free

Kinematic Mirror Mount for Optics by shusy
...lunger 20mm
2 psc - 0.4 3 x 10 mm stainless steel coil extension spring with a hook
5 psc - m4 x 5mm copper inserts injection nut
thingiverse
free

Customizable Optical Encoder by jwick123
...customizable optical encoder by jwick123
thingiverse
customizable optical encoder for motors and shafts.
Openbeam
thingiverse
free
OpenBeam Extender by akruger
..., or be glued together.
the openbeam was created using the openbeam 1515 extrusion, v2: http://www.thingiverse.com/thing:100960
thingiverse
free
Printable Openbeam by plastic
...printable openbeam by plastic
thingiverse
print openbeam compatible extrusions. 15mmx15mm extrusion with slot for 3mm nut.
thingiverse
free
Openbeam construction clips by Mister_sovereign
...openbeam construction clips by mister_sovereign
thingiverse
openbeam construction clips
thingiverse
free

Right angle for Openbeams by yannrs
...right angle for openbeams by yannrs
thingiverse
a right angle for openbeams.
thingiverse
free

OpenBeam parts in Sketchup by unrepentantgeek
...openbeam parts in sketchup by unrepentantgeek
thingiverse
openbeam parts for sketchup.
thingiverse
free
Openbeam Clip by didierh
...openbeam clip by didierh
thingiverse
small clip to contain cables into the groove.
use on openbeam profile - 15mm wide only.
thingiverse
free

Holder base for OpenBeam by NeFa
...holder base for openbeam by nefa
thingiverse
simple angled arm for use with openbeam.
thingiverse
free
NEMA17 support for openbeam by Fey
...nema17 support for openbeam by fey
thingiverse
support for nema 17 motor openbeam 15x15mm bars
thingiverse
free
Openbeam Breadboard Case by schmiddim
...openbeam breadboard case by schmiddim
thingiverse
attach some wirings on your openbeam constructions with this case.
thingiverse
free

OpenBeam Feet by OpenBeamUSA
...g indentation is also sized correct for a 3m bumpon adhesive feet.
http://blog.openbeamusa.com/2012/05/29/in-depth-openbeam-feet/
Telescope
archibase_planet
free
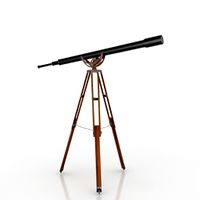
Telescope
...telescope
archibase planet
telescope spyglass
telescope n220408 - 3d model (*.gsm+*.3ds) for interior 3d visualization.
3d_export
free

telescope
...telescope
3dexport
telescope 3d model, more files here:
3d_export
free
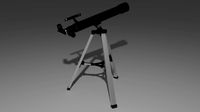
telescope
...telescope
3dexport
telescope refractor on a tripod. can be used as part of the interior.
3d_ocean
$8

Telescope
...antique binocular glass magnify monocular naval optic optical pirate spy spyglass telescope viewer vision
nice model of telescope
turbosquid
free
telescope
...scope
turbosquid
free 3d model telescope for download as obj on turbosquid: 3d models for games, architecture, videos. (1638257)
turbosquid
$35
Telescope
...rbosquid
royalty free 3d model telescope for download as fbx on turbosquid: 3d models for games, architecture, videos. (1515061)
turbosquid
$6

Telescope
...rbosquid
royalty free 3d model telescope for download as max on turbosquid: 3d models for games, architecture, videos. (1665123)
turbosquid
$5
Telescope
...osquid
royalty free 3d model telescope for download as blend on turbosquid: 3d models for games, architecture, videos. (1603403)
turbosquid
$99

Telescope
...y free 3d model telescope for download as blend, fbx, and obj on turbosquid: 3d models for games, architecture, videos. (1609065)
turbosquid
$30

telescope
...lty free 3d model telescope for download as max, obj, and fbx on turbosquid: 3d models for games, architecture, videos. (1325340)
Fork
3d_export
$5
fork
...fork
3dexport
a fork in the kitchen, dining room, or as a murder
3d_export
$5

Fork
...fork
3dexport
a simple fork to use in your project. for decorating purpose, games, etc...
3ddd
$1
Foscarini | FORK
...iesel , fork , foscarini
торшер foscarini fork.
turbosquid
$3

Fork
...fork
turbosquid
royalty free 3d model fork for download as on turbosquid: 3d models for games, architecture, videos. (1401678)
turbosquid
$9

Fork
...rk
turbosquid
royalty free 3d model fork for download as max on turbosquid: 3d models for games, architecture, videos. (1327888)
turbosquid
$1

Fork
...
turbosquid
royalty free 3d model fork for download as blend on turbosquid: 3d models for games, architecture, videos. (1430837)
3d_export
$5
front fork
...front fork
3dexport
front fork
turbosquid
$3

Fork
...uid
royalty free 3d model cutlery fork for download as blend on turbosquid: 3d models for games, architecture, videos. (1369489)
turbosquid
$1

Fork
...squid
royalty free 3d model fork for download as obj and fbx on turbosquid: 3d models for games, architecture, videos. (1376879)
turbosquid
$16

fork
...oyalty free 3d model fork for download as obj, fbx, and blend on turbosquid: 3d models for games, architecture, videos. (1250358)
Mount
3d_export
free

mounting bracket
...mounting plate is the portion of a hinge that attaches to the wood. mounting plates can be used indoors, cabinetry and furniture.
turbosquid
$2

MOUNTING
... available on turbo squid, the world's leading provider of digital 3d models for visualization, films, television, and games.
turbosquid
free

Mounts
... available on turbo squid, the world's leading provider of digital 3d models for visualization, films, television, and games.
turbosquid
free

Mount Fuji
...fuji
turbosquid
free 3d model mount fuji for download as obj on turbosquid: 3d models for games, architecture, videos. (1579977)
3d_export
$5

Headphone mount LR
...headphone mount lr
3dexport
headphone mount l+r
turbosquid
$39

Mount rainier
...quid
royalty free 3d model mount rainier for download as fbx on turbosquid: 3d models for games, architecture, videos. (1492586)
turbosquid
$5

pipe mounting
...quid
royalty free 3d model pipe mounting for download as obj on turbosquid: 3d models for games, architecture, videos. (1293744)
turbosquid
$3

Mounting Tires
...uid
royalty free 3d model mounting tires for download as fbx on turbosquid: 3d models for games, architecture, videos. (1708511)
3d_export
$5

Magnetic GoPro Mount
...pro mount
3dexport
cool magnetic mount for gopro. allows you to mount the camera on flat metal surfaces and get exclusive shots.
turbosquid
$5

Stone Mount
...ty free 3d model stone mount for download as ma, obj, and fbx on turbosquid: 3d models for games, architecture, videos. (1370306)