Thingiverse
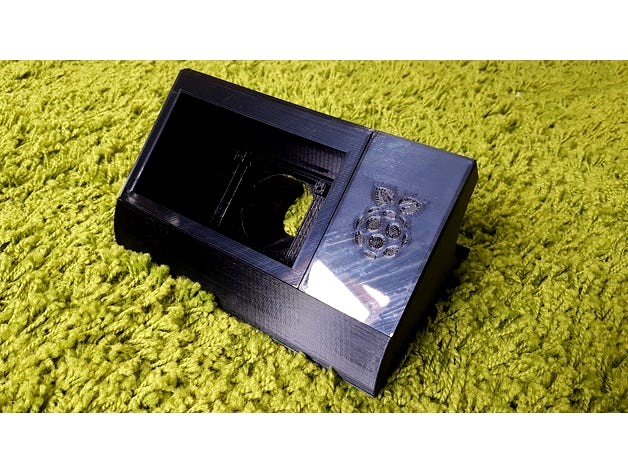
Octoprint Console Raspberry Pi 3 B 5 " inch Elcrow touch screen with fan cooling by monkeypantman
by Thingiverse
Last crawled date: 4 years, 2 months ago
RELEASE VERSION
So here it is, V3.1 of the Pi Case.
I have removed V1, V2, V2.1 and V2.2 due to issues with fitment, polygon count and general faffery and broken stuff. V3.0 was ok, but a tight fit for HDMI, power and screen - so I removed that too.
V3 is super clean to print and has nice straight polys throughout the model.
It is a little larger than the V2.2, but this give WAY more room for cables and routing.
there is also a version with, and without top cooling holes. If you are using passive cooling, then use the one with holes. If you are installing a fan, then use either!
V3.1 has all the fixes from my first test fitment. There are:
Enlarged front lower hole to allow for easier micro USB plug fitting.
New slot gap hole for HDMI (screen) to pass in to the case easily on install.
Screen was absolutely spot on for size, but a tight fit. I have enlarged this by 1mm all round so that you don'tt crack your screen installing.
Now, the entire front panel comes off for access to the USB connectors, and is much easier to fit and fiddle with.
there are 2 versions of the lid, one whole piece lid for a single colour, and a 2-part lid so that you can mix it up a bit - or have a uniform LCD panel gap, or the same colour all the way through. Or you could create something hideous like the Orange Blue and Black combo I have done as an example. :D
I have included part 1 of the lid (USB cover) and part 2 (screen cover).
There is also a Pi logo version of the split, and single piece lids.
MPM
I struggled to find a decent Pi3 box with a 5" screen case, and the only one I did find that I liked - didn't have cooling in it at all and my little Pi just cooked to 80degC!!! then throttled back causing print slowness.
So... I made this with plenty of cooling which should work fine passively without a fan, especially if you use the version with top holes in, but also has a hidden 50mm fan mount that can either draw air in through the bottom rear of the case and expel it out the top, or pull air from the top holes and expel it out the back.If you opt for a fan and the case no holes, the air will either come in through the cable hole and exit out the fan hole, or go the other way. You choose! This just depends on which way round you mount the fan.
Personally, I prefer drawing the air out of the case. :)
If you have a decent 2.5A power supply, this should run fine on a 5v fan so long as it is DIRECTLY soldered to the input 5v line on the board. If you don't fancy soldering, then wire up a red and black wire from a usb connector (5v) and poke that at the fan.
I have tried a 12v fan on a 5v input, but warning, it may draw lots of current, so make sure you are not overloading the USB socket.
If you have a 5v fan, then you are all fine and dandy! Wire it directly to the 5v on the board, or in to a USB cable and plug that in.
On this model, there is room for you to install thePi board and screen, then feed the cables through the little cable management hole and connect them to the board. I have made this channel plenty big and wide enough for GPIO wires, USB plugs and also a Pi camera ribbon cable.
Once the Pi board is in place and secured to the mounting points, - push fit the screen on to the GPIO connector, then connect the HDMI bridge, there is a little hole underneath to fit the bridge connector - so pop that in, push fit the lid(s) power up and off you go. The main micro-USB power plug can also be accessed from the same hole.
There is a little stylus holder on the back left foot so you don't lose the little pokey thing that comes with the resistive touch screen. - Shout if you want this removed, and I will mix up a new thing.
Please send feedback about what you like, or don't like, and I will update you as soon as I have printed this and updated anything - if it needs it.
I am planning on adding in a micro-SD cable/adaptor so that you can access the SD card without having to take the screen off, but I will see how I get on with the current design.
Also, the backlight switch - it will take a fair bit of engineering, but I will be creating an external switch to engage with the micro slider switch on the 5" screen. Again, this may be a while before I update the model.
Things that may have an issue in this thing before I test print.
1 Pi board mounting stands / holes. these may not be the correct size or standoff, but my Pi model fitted in there ok, so let's see.
2 Screen fitment - this is setup for a 5" Elcrow touch screen. If your screen is wildly different and doesn't sit correctly, or is out of alignment from the cover, send me a picture and measurements and I will pop up a new cover.
So, MY SCREEN IS UPSIDE DOWN!!! I hear you shout...
And my touchscreen is all wonky...
Solution:
CALIBRATION - TOUCH LOCATION
Stop TouchUI with sudo service touchui stop
Run curl -sLS https://apt.adafruit.com/add | sudo bash
Run sudo apt-get install -y xinput-calibrator
Run sudo xinit ~/TouchUI-autostart/calibration.xinit*
Follow the calibration steps
After you completed step 6, pay attention to your command line, because it will show a wall of text with at the bottom instructions, copy Section to Endsection
Exit by pressing CTR-C
Run sudo nano /etc/X11/xorg.conf.d/99-calibration.conf and replace the file with the copied Section code from step 6.
Save (CTR-O, Enter, CTR-X)
Reboot
if the file does not exist, update your bootloader!.
CALIBRATION - ROTATE SCREEN
Update your bootloader!.
Read the instructions from https://wiki.ubuntu.com/X/InputCoordinateTransformation
Run sudo apt-get install xinput
To get your device name run FRAMEBUFFER=/dev/fb1 & DISPLAY=:0.0 xinput list
use /dev/fb0 if you're using HDMI or the Official RPI display
Create a new file touch ~/TouchUI-autostart/calibration.sh
Edit the new file nano ~/TouchUI-autostart/calibration.sh
Copy su $TOUCHUI_USER -c "xinput set-prop 'YOUR DEVICE NAME' 'Coordinate Transformation Matrix' 0 1 0 -1 0 1 0 0 1"
Replace 'YOUR DEVICE NAME' and the coordinates with the instructions from the ubuntu wiki.
Save & Exit (CTR-O, ENTER, CTR-X)
Reboot
Whitescreen
This indicates your driver is not working, please consult your touchscreen maker for installation instructions.
Boots to Blackscreen
X11 is using the wrong framebuffer for displaying TouchUI.
Run sudo nano /etc/X11/xorg.conf.d/99-fbdev.conf
if file/path does not exist then create it
Find the following code:
Section "Device"
Identifier "touchscreen"
Driver "fbdev"
Option "fbdev" "/dev/fb1"
EndSection
if not found, paste the code into the file
if found, replace /dev/fb1 into /dev/fb0 or /dev/fb0 into /dev/fb1
Save & Exit (CTR-O, ENTER, CTR-X)
Run sudo chmod +x /etc/X11/xorg.conf.d/99-fbdev.conf
Reboot
INVERTED TOUCH Y/X AXIS
Make sure you followed the Calibration part first!
Edit the calibration file you made sudo nano /etc/X11/xorg.conf.d/99-calibration.conf
Add the following line before the EndSection that you copied from the calibration:
For inverting horizontal axis
Option "InvertX" "true"
For inverting vertical axis
Option "InvertY" "true"
Happy printing amigos!