Thingiverse
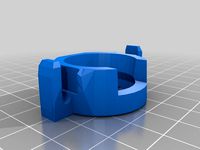
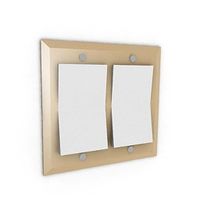
Nintendo Switch Dock Front Panel Retrofit by amazingyen
by Thingiverse
Last crawled date: 3 years ago
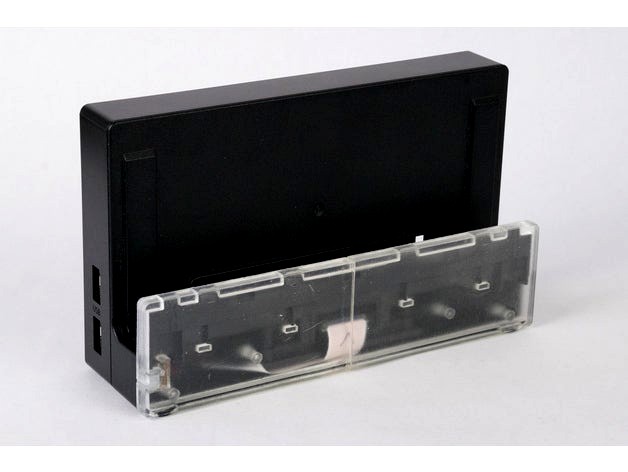
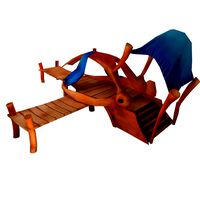
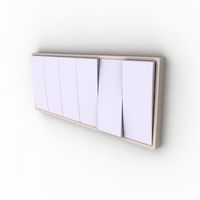
This takes the factory switch dock and applies a replacement front panel that is shorter in height. Its intent is to provide a different look for the dock, make docking easier (lowering required vertical clearance), as well as minimize potential for scratching the screen when docking/undocking (unproven). But mostly it's just for fun. Please read through all the notes, I tried documenting all the nuances and potential issues with this print.
It also does not require any modification of the original dock. The dock needs to be disassembled, but is reassembled with the original hardware, and without the need for cutting/drilling/etc. However because I modeled it with 4 screw posts instead of the original 6, it results in having 2 leftover screws. But I haven't found that it effects it structurally.
It does not alter the behavior of the dock. It's a cosmetic change. When your switch is docked, it will still output to TV and you will not be able to turn on the built-in screen until you undock. This is not to be confused with a charging dock.
NOTES:
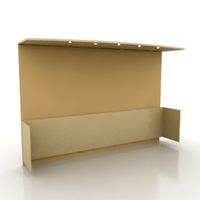
RightSide.stl, LeftSideNoLED.stl, LeftSide.stl
If printed with fairly good precision, these files "should" fit together with minimal sanding. But every 3D printer has its own nuances and you may still need to alter the files or the prints themselves to get the right fit.
CombinedSides.stl
If your printer's workbed is large enough, I recommend printing it as one solid piece.
Screw Posts
I've spoken to a couple people who've tried to print this out, and they said screw posts are prone to shearing. Ensure you're getting good layer adhesion with your printer settings. Using a 1/16" drill bit to ensure the hole is the right size (just hand turn the drill bit in the hole) would help. Slowly threading the hole with one of the screws by screwing it in 1-2mm at a time, backing the screw out, and repeating until the screw is fully threaded also could help. Another solution would be to enlarge the outer diameter of the screw post. Or do both. Once the hole is threaded however, there really isn't any problem. It's just the initial threading of the hole that puts the most amount of stress on it.
SwitchDockRetrofit_Source.123dx
I included the source file so people would have an easier time adapting the faceplate to their 3D printers.
SwitchDockRetrofit_Source_NoBridges.123dx
Another source file where I removed all bridges, which also seems to fit ok so long as the screws are secure.
Enjoy!
It also does not require any modification of the original dock. The dock needs to be disassembled, but is reassembled with the original hardware, and without the need for cutting/drilling/etc. However because I modeled it with 4 screw posts instead of the original 6, it results in having 2 leftover screws. But I haven't found that it effects it structurally.
It does not alter the behavior of the dock. It's a cosmetic change. When your switch is docked, it will still output to TV and you will not be able to turn on the built-in screen until you undock. This is not to be confused with a charging dock.
NOTES:
RightSide.stl, LeftSideNoLED.stl, LeftSide.stl
If printed with fairly good precision, these files "should" fit together with minimal sanding. But every 3D printer has its own nuances and you may still need to alter the files or the prints themselves to get the right fit.
CombinedSides.stl
If your printer's workbed is large enough, I recommend printing it as one solid piece.
Screw Posts
I've spoken to a couple people who've tried to print this out, and they said screw posts are prone to shearing. Ensure you're getting good layer adhesion with your printer settings. Using a 1/16" drill bit to ensure the hole is the right size (just hand turn the drill bit in the hole) would help. Slowly threading the hole with one of the screws by screwing it in 1-2mm at a time, backing the screw out, and repeating until the screw is fully threaded also could help. Another solution would be to enlarge the outer diameter of the screw post. Or do both. Once the hole is threaded however, there really isn't any problem. It's just the initial threading of the hole that puts the most amount of stress on it.
SwitchDockRetrofit_Source.123dx
I included the source file so people would have an easier time adapting the faceplate to their 3D printers.
SwitchDockRetrofit_Source_NoBridges.123dx
Another source file where I removed all bridges, which also seems to fit ok so long as the screws are secure.
Enjoy!
Similar models
thingiverse
free

Replacement Twist Lamp Switch by dustmann
... 2.5mm drill bit would be perfect or a 3/32" bit will work. i used a 3/32" bit and cut the threads with a 2.5mm screw.
thingiverse
free

Switch casing holder by mrgirose
..., and if necessary scale down a couple of % to ensure a nice snug fit!
printed with tpu to ensure it has the required flexibility
thingiverse
free

Greenhouse SPRAY HEAD by panamamikey
...gure that out.
these can make great replacement heads for lawn sprinklers. no more trips to hardware store. make your own.
enjoy.
thingiverse
free
Tricopter Motor Mount by BKNJ
... for shaft and mounting screws.
i've included the scad files if you would like to modify design to fit your "arm"
thingiverse
free

Pixhawk Safety Switch Mount by Fickert
... flat: this is the same design to hide the screw threads, but with a flat bottom. easier to print for most and should do the job.
thingiverse
free

Assembly Cube by TimeFramed
...ush. for that purpose, i drill out the hole larger so that the screw passes through freely, and anchors into the surface behind.
thingiverse
free

Nintendo Switch Dock Face Redesign by yesimnathan
...side & added a third
these two pieces fit together pretty tightly. i had to shave them down just a tad to make them fit well.
thingiverse
free

Drill Bit Holder (Customizable)
...ending on your printer settings you might need to post-process holes with a drill bit (especially when printing without retract).
thingiverse
free

Deck Board Spacer by gbertram
... spacer holes. i used the spacer to mark the drill points. (i used composite lumber and pre-drilled holes for the deck screws.)
thingiverse
free

Nintendo switch wall mount bracket by ChefMutant
... stl. ds mech exports low quality mesh. printed in pla, no supports. screws can be found here https://www.mcmaster.com/91375a438/
Amazingyen
thingiverse
free
OXO 5lb Kitchen Scale Battery Door Cover by amazingyen
...iented downwards with supports enabled yields a good result. a tiny bit of sanding from support removal areas might be required.
thingiverse
free

NES Switch Front Plate by Pounder
...switch front plate by pounder thingiverse thanks to the amazingyen for the front plate desgin, sensimilla for the nes...
thingiverse
free

Large Bins/Trays for Harbor Freight Parts Storage Case by amazingyen
...ues with including bridges in my prints right now. tolerances when using the jig are a little tight which makes it inconvenient.
thingiverse
free

Nintendo Switch Dock Front Panel Remix by Sefirosu
...sefirosu thingiverse little remix of the panel retrofit from amazingyen enlarged the screw holes and added base support for...
Retrofit
3d_export
$60
canadair cl-415
...early 1990s, shortly after the success of the cl-215t retrofit programme had proven a viable demand for a turboprop-powered...
3ddd
free

RH RESTORATION HARDWARE
...race between the united states and russia – and retrofited with edison-style filament bulbs developed even earlier. its slim...
3ddd
$1
Dawson Media Consoles
..., ваза like an antique chest that has been retrofited to function as a media console, these pieces blend...
3d_export
$15

Lockheed Martin F-35
...development and testing led to expensive design changes and retrofit. the f-35b entered service with the u.s. marine corps...
3dfindit
free

Retrofit Air Terminal Units
...retrofit air terminal units
3dfind.it
catalog: metal industries
thingiverse
free

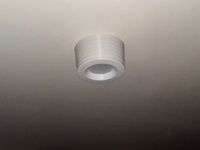
TRS Projector Retrofit Nut Socket by shiannyamin
... (the retrofit source). this makes tightening down the nut significantly easier as you can have leverage instead of using pliers.
thingiverse
free
6 in recessed retrofit light fixture
...affle-trim-recessed-dimmable-etl/323724895080?sspagename=strk%3amebidx%3ait&var=512716375820&_trksid=p2057872.m2749.l2649
thingiverse
free

Human Face Great for Retrofitting A Blank Foam Manikin Head by mikelkunz
... for retrofitting a blank foam manikin head by mikelkunz
thingiverse
human face great for retrofitting a blank foam manikin head
thingiverse
free

Replicator 2 Extruder Fan Blade Retrofit by Doodle_Monkey
...s of the extruder fan... (pause for laughter)... i made this retrofit fan blade design. i'm using it now and it works great.
thingiverse
free
Valeo (PSA, probably others) H7 bulb holder for LED retrofit by tsokorai
...sokorai
thingiverse
h7 bulb holder for psa (peugeot, citroën, probably others that use valeo headlights), to allow led retrofit.
Dock
design_connected
$20
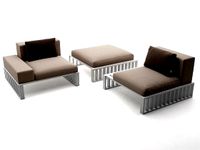
Docks
...docks
designconnected
gandia blasco docks computer generated 3d model. designed by romero vallejo.
turbosquid
$5

Dock
...squid
royalty free 3d model dock for download as 3ds and fbx on turbosquid: 3d models for games, architecture, videos. (1159328)
turbosquid
$20

Dock
... available on turbo squid, the world's leading provider of digital 3d models for visualization, films, television, and games.
turbosquid
$10
Dock
... available on turbo squid, the world's leading provider of digital 3d models for visualization, films, television, and games.
turbosquid
$10
Dock
... available on turbo squid, the world's leading provider of digital 3d models for visualization, films, television, and games.
turbosquid
$2
dock
... available on turbo squid, the world's leading provider of digital 3d models for visualization, films, television, and games.
3d_export
$65

dock
...dock
3dexport
simple rendering of the scene file
design_connected
$16
Dry-Dock
...dry-dock
designconnected
restoration hardware dry-dock computer generated 3d model.
3d_ocean
$6
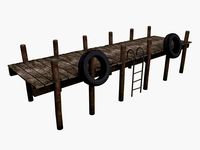
The Boat Dock
...s you see are separate, so you can remove the tyres and ladder and extend out the main section of the dock to make a long section
3ddd
$1
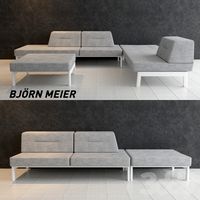
Bjorn Meier docks
... docks , модульный
bjorn meier docks
vray+corona
Nintendo
turbosquid
$25

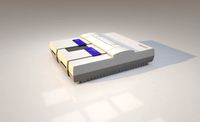
Nintendo
...del super nintendo/ tv for download as 3ds, max, obj, and fbx on turbosquid: 3d models for games, architecture, videos. (1213066)
3d_export
$40

nintendo switch
...nintendo switch
3dexport
3d model of nintendo switch, made in blender.
3d_ocean
$18

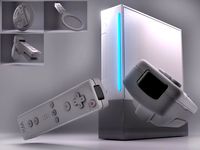
Nintendo Wii
...h quality renders, close ups and animations. the polycount is manualy optimized so it’s not hardware intensive when importing ...
3d_export
$25

The heart of nintendo
...the heart of nintendo
3dexport
do you need to know how nintendo is inside? that's it!
turbosquid
$10
SUPER NINTENDO
...uid
royalty free 3d model super nintendo for download as c4d on turbosquid: 3d models for games, architecture, videos. (1291068)
turbosquid
$19

Nintendo Switch
...ree 3d model nintendo switch for download as ma, obj, and fbx on turbosquid: 3d models for games, architecture, videos. (1169424)
turbosquid
$8

Nintendo Switch
...ee 3d model nintendo switch for download as fbx, dae, and obj on turbosquid: 3d models for games, architecture, videos. (1617647)
turbosquid
$200
Nintendo Wii
... available on turbo squid, the world's leading provider of digital 3d models for visualization, films, television, and games.
turbosquid
$99
Nintendo Wii
... available on turbo squid, the world's leading provider of digital 3d models for visualization, films, television, and games.
turbosquid
$99

Nintendo 3DS
... available on turbo squid, the world's leading provider of digital 3d models for visualization, films, television, and games.
Switch
archibase_planet
free
Switch
...switch
archibase planet
switch cluster switch
light switch 1 - 3d model for interior 3d visualization.
archibase_planet
free
Switch
...switch
archibase planet
switches switch
switch 1 - 3d model (*.gsm+*.3ds) for interior 3d visualization.
archibase_planet
free
Switch
...switch
archibase planet
closer button switch cluster switch
switch - 3d model (*.3ds) for interior 3d visualization.
archibase_planet
free
Switch
...switch
archibase planet
switch closer
light switch 2 - 3d model for interior 3d visualization.
archibase_planet
free
Switch
...switch
archibase planet
closer button switch
switch n300808 - 3d model (*.gsm+*.3ds) for interior 3d visualization
archibase_planet
free
Switch
...switch
archibase planet
closer button switch
switch n141108 - 3d model (*.gsm+*.3ds) for interior 3d visualization.
archibase_planet
free

Switch
...switch
archibase planet
cluster switch closer
switch n260609 - 3d model (*.gsm+*.3ds) for interior 3d visualization.
archibase_planet
free

Switch
...switch
archibase planet
button switch closer
switch 2 - 3d model (*.gsm+*.3ds) for interior 3d visualization.
archibase_planet
free

Switch
...switch
archibase planet
button switch closer
switch n070510 - 3d model (*.gsm+*.3ds) for interior 3d visualization.
3d_export
$5

switch
...switch
3dexport
3d model of a low-poly switch
Panel
3d_export
$15

panel
...panel
3dexport
panel
archibase_planet
free
Panel
...panel
archibase planet
panel
panel - 3d model for interior 3d visualization.
3d_export
$5

panel
...panel
3dexport
panel with cones
3ddd
$1
Panels
...panels
3ddd
панель
panels
3d_export
$5

panel
...panel
3dexport
panels grapes with birds
archibase_planet
free
Panel
...panel
archibase planet
panel wainscot dado
play panel n050707 - 3d model for interior 3d visualization.
archibase_planet
free
Panel
...panel
archibase planet
lining panel facing material
panel 2 - 3d model (*.3ds) for interior 3d visualization.
archibase_planet
free

Panel
...panel
archibase planet
lining panel facing material
panel 1 - 3d model (*.gsm+*.3ds) for interior 3d visualization.
archibase_planet
free
Panel
...panel
archibase planet
keyboard patchboard finger-board
security panel - 3d model for interior 3d visualization.
turbosquid
$10

Panel
...l
turbosquid
royalty free 3d model panel for download as stl on turbosquid: 3d models for games, architecture, videos. (1387163)
Front
archibase_planet
free

Front
...front
archibase planet
facade front bluff
front 3d01a - 3d model (*.gsm+*.3ds) for interior 3d visualization.
3d_export
$5
front fork
...front fork
3dexport
front fork
3d_export
$5

Front Desk
...front desk
3dexport
modern and minimal reception front desk
3d_ocean
$4
Medical Front
...medical front
3docean
horror low medical
medical front
3d_ocean
$5
Front Desk
...front desk
3docean
desk front office reception
office reception counter or front desk. cad file and obj file included.
3ddd
free

Axor WaterDream by Front
...r , waterdream , front
axor waterdream by front
3d_export
$5

front nut eye
...front nut eye
3dexport
front nut eye
3d_export
$5
front screw eye
...front screw eye
3dexport
front screw eye
3d_export
$5
front clamping device
...front clamping device
3dexport
front clamping device
archive3d
free
Front 3D Model
...rchive3d
facade front bluff
front 3d01a - 3d model (*.gsm+*.3ds) for interior 3d visualization.