Thingiverse
Neat Raspberry Pi Zero night vision camera - all ports covered by CptPicard
by Thingiverse
Last crawled date: 4 years ago
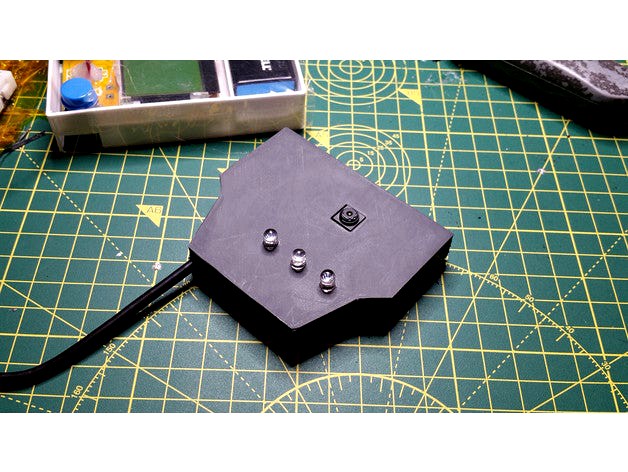
This covers all ports and the plug end of the cable, hiding the untidy bits whilst still remaining slim and as small as possible.
It uses a Raspberry Pi Zero and Infra Red LEDs to illuminate in the dark.
Features
Camera built into case
Infra Red LEDs for total night viewing
PCB retention clips (optional - break off if not used)
Tripod/Camera screw mount hole
Hides sdcard/camera cable/ports from view
optional screw hole for rear panel
Printing
Flip the lid before printing.
You don't need supports or a brim.
Parts:
Infra red camera "Frank-S01-V1.0"
Raspberry pi zero w
3 850nm LEDs
Resistor - find out the voltage drop for your LEDs and calculate accordingly, mine was about 20 ohms.
Assembly:
Make sure your pi is set up outside of the enclose with whatever software you want as the ports are not accessible while in the enclosure. I recommend MotionEyeOS personally.
Solder wires for the LEDs to the 5v supply on the Pi (this draws current from the USB plug so you can easily supply the LEDS from this).
Fit the camera in the square hole and secure with a dab of hot glue. You can use the adhesive strips if you prefer.
Clip the top of the board under the single clip at the top and locate the holes in the PCB on the top pegs.
If your print is flexible enough (and you are lucky enough) you can bend the bottom clips CAREFULLY with a small screwdriver enough to allow the bottom of the PCB to be held. These clips are very brittle so expect them to break off depending on filament type and print quality, they are a "nice to have" - for permanent fixing I recommend a couple of dabs of hot glue. The back of the enclosure also has legs designed to hold the PCB in place.
Insert USB power cable (or do this step earlier if your cable is too bulky).
Attach rear of case - this has friction fit tabs, use glue or tape to secure. You can also make a small hole near the bottom of the case rear for a self tapping screw - there is a cylinder in the front of the case designed to receive this optional screw.