Thingiverse

Nano Pi2 Webcam & solar charger LCD case. by Pole_ergo
by Thingiverse
Last crawled date: 3 years ago
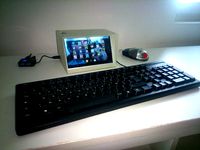
In order to improve the autonomy of the Nano Pi2 and its functionalities, an integration work was done on the case containing the LCD screen. Thus, by adding a solar panel directly connected to the charging boost 1000 of Adafruit, the Nano Pi2 can recharge its battery when exposed to the sun.
By leveraging Mike's (http://mikesmods.com/mm-wp/?p=584) tremendous work on the Macbook pro webcam, it was possible to integrate a miniature webcam that can be easily and cheaply found on auction sites.
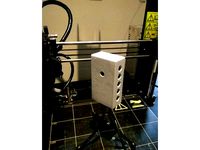
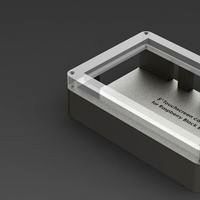
To add these options to the Nano Pi2, just print the 3 pieces proposed here which are intended to replace the parts of the complete kit found here: https://www.thingiverse.com/thing:2514014
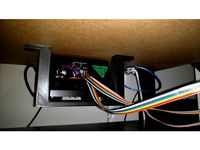
When mounting, first install the LCD screen and then the control electronics. Wire the whole as shown in the pictures. On the cover, install the solar panel and then the webcam. For the latter it is enough to follow the instructions given by Mike on his website. Since it is a USB webcam, the connection is simple on the Raspberry. On the Internet you will find all the tutorials needed to install the drivers.
Please note that the screen housing is particularly suitable for mounting as there is only room for 3 screws. For this reason, a printed clip is required to close the LCD case.
Finally, do not forget to install a non-return diode to prevent the flow of battery power into the solar panel. I was inspired by this site : http://www.instructables.com/id/SOLAR-POWERED-ARDUINO-WEATHER-STATION/
French :
Afin d'améliorer l'autonomie du Nano Pi2 et ses fonctionnalités, un travail d'intégration à été fait sur le boitier contenant l'écran LCD. Ainsi, en ajoutant un panneau solaire directement branché sur le charger boost 1000 de Adafruit, le Nano Pi2 peut recharger sa batterie losqu'il est exposé au soleil.
En exploitant le formidable travail de Mike sur la webcam du Macbook pro, il a été possible d'intégrer une webcam miniature que l'on trouve facilement et à moindre coût sur des sites de vente aux enchères.
Pour ajouter ces options au Nano Pi2, il suffit d'imprimer les 3 pièces proposées ici qui sont destinées à remplacer les pièces du kit complet que l'on trouve ici :.
Lors du montage, installer d'abord l'écran LCD, puis l'electronique de contrôle. Cabler l'ensemble comme illustré par les photos. Sur le couvercle, installer le panneau solaire puis la webcam. Pour cette dernière il suffit de suivre les instructions données par Mike sur son site. Puisqu'il s'agit d'une webcam USB, le branchement est simple sur le Raspberry. Sur Internet vous trouverez tous les tutoriaux nécessaires pour installer les drivers.
A noter que la fixation du boitier d'écran est particulière car il n'y a de la place que pour 3 vis. C'est la raison pour laquelle un clip à imprimé est nécessaire pour fermer le boitier de l'écran.
Enfin, n'oubliez pas d'installer une diode antiretour afin d'éviter le passage du courant de la batterie dans le panneau solaire.
By leveraging Mike's (http://mikesmods.com/mm-wp/?p=584) tremendous work on the Macbook pro webcam, it was possible to integrate a miniature webcam that can be easily and cheaply found on auction sites.
To add these options to the Nano Pi2, just print the 3 pieces proposed here which are intended to replace the parts of the complete kit found here: https://www.thingiverse.com/thing:2514014
When mounting, first install the LCD screen and then the control electronics. Wire the whole as shown in the pictures. On the cover, install the solar panel and then the webcam. For the latter it is enough to follow the instructions given by Mike on his website. Since it is a USB webcam, the connection is simple on the Raspberry. On the Internet you will find all the tutorials needed to install the drivers.
Please note that the screen housing is particularly suitable for mounting as there is only room for 3 screws. For this reason, a printed clip is required to close the LCD case.
Finally, do not forget to install a non-return diode to prevent the flow of battery power into the solar panel. I was inspired by this site : http://www.instructables.com/id/SOLAR-POWERED-ARDUINO-WEATHER-STATION/
French :
Afin d'améliorer l'autonomie du Nano Pi2 et ses fonctionnalités, un travail d'intégration à été fait sur le boitier contenant l'écran LCD. Ainsi, en ajoutant un panneau solaire directement branché sur le charger boost 1000 de Adafruit, le Nano Pi2 peut recharger sa batterie losqu'il est exposé au soleil.
En exploitant le formidable travail de Mike sur la webcam du Macbook pro, il a été possible d'intégrer une webcam miniature que l'on trouve facilement et à moindre coût sur des sites de vente aux enchères.
Pour ajouter ces options au Nano Pi2, il suffit d'imprimer les 3 pièces proposées ici qui sont destinées à remplacer les pièces du kit complet que l'on trouve ici :.
Lors du montage, installer d'abord l'écran LCD, puis l'electronique de contrôle. Cabler l'ensemble comme illustré par les photos. Sur le couvercle, installer le panneau solaire puis la webcam. Pour cette dernière il suffit de suivre les instructions données par Mike sur son site. Puisqu'il s'agit d'une webcam USB, le branchement est simple sur le Raspberry. Sur Internet vous trouverez tous les tutoriaux nécessaires pour installer les drivers.
A noter que la fixation du boitier d'écran est particulière car il n'y a de la place que pour 3 vis. C'est la raison pour laquelle un clip à imprimé est nécessaire pour fermer le boitier de l'écran.
Enfin, n'oubliez pas d'installer une diode antiretour afin d'éviter le passage du courant de la batterie dans le panneau solaire.
Similar models
thingiverse
free

Nano Pi2 docking station/Dev. kit by Pole_ergo
...de le coller.
ici encore, cette extension pour développement électronique est largement disponible sur les sites d'enchères.
thingiverse
free
Support boitier de contrôle Tevo Tornado et déplacement de l'écran + MKS TFT 32 by MrCyrille
... écran mks tft 32 tactile.
il vous suffira juste de rallonger les 2 connecteurs de l'écran d'origine à la bonne longueur.
thingiverse
free

Pack for lcd on DE200 by Azrod29150
...ennent directement du site dagoma
le cache a été mis en ligne par serial59
j'ai juste fait un pack pour regroupé tout les stl
grabcad
free

Support panneau solaire (25 panneaux)
...5 panneaux)
grabcad
le système présenté ici est adapté pour l'installation de panneaux solaires au sol sur une surface plane
thingiverse
free
Boitier Raspberry Pi Zero W avec Pi Camera V2 by NCNETFR
...y a suffisament de place pour des broches sur le gpio.
quatre vis m3x10 tête cylindrique seront nécessaire pour l'assemblage.
thingiverse
free

Fermeture automatique de poulailler by Littlejuce
...té, à l'intérieur du boitier.
la photo-résistance est à coller sur la face dans son emplacement à l'intérieur du boitier.
thingiverse
free
Android Nano Computer by Aganyte
...ine et la remplacer par un chargeur 5v - 2a.
le bouton de mise en route (format 12mm) est soudé en parallèle sur celui d’origine.
cults
$2
CADIC Philippe
...cadic philippe
cults
boitier pour raspberry pi2 équipé d'un écran hdmi 5 pouces. pour protéger la machine.
thingiverse
free

CR10-MKS GEN 1.4 support d'adaptation boitier by nicosky
...à l'extrémité du support) afin d'éviter que la carte ne bouge étant donné qu'elle est à l'envers dans le boitier.
thingiverse
free

Boitier pour le LCD d'une Ramps 1.4 / Case for RAMPS LCD Controller by Kavool
...;une ramps 1.4 / case for ramps lcd controller by kavool
thingiverse
boitier + support pouvant etre fixé sur le haut du profilé
Pi2
thingiverse
free

Pi2-hanger by Noerdz
...pi2-hanger by noerdz
thingiverse
no case for the pi then hang it.
thingiverse
free

Pi2 top without gpio by dalefukami
...pi2 top without gpio by dalefukami
thingiverse
removed the gpio access
thingiverse
free

Raspberry pi2 case box custom external modules by cinidavide
...raspberry pi2 case box custom external modules by cinidavide
thingiverse
pi2 case.
used to install custom electronics board.
thingiverse
free

Kinect and Raspberry Pi2 with display mount by l_k3
...a proof of concept for a raspberry pi2 and ms kinect 1 based standalone 3d scanner.
https://www.youtube.com/watch?v=dmxkp98by-w
thingiverse
free

Raspberry Pi2 Kossel Mount by Simonwlchan
...o the kossel's rail. i remade the ethernet/ usb side because it broke from previous use.
parts snap on, no screws required.
thingiverse
free

Zumo Robot Base for Raspberry Pi B+, Pi2, Pi3 by shamrage
...zumo robot base for raspberry pi b+, pi2, pi3 by shamrage
thingiverse
zumo robot base for raspberry pi b+, pi2, pi3
thingiverse
free

Raspberry Pi2 Mount by PeterG79
...for my magic mirror project since i wanted to screw the mount to the frame.
it holds the pi, the mirror and the tft in the frame.
thingiverse
free

HiFiBerry DAC + Raspberry Pi2 case (RPi2, RPi B+) by Smuk3D
...hingiverse
case designed for a raspberry pi2 + hifiberry dac shield.
i run volumio.org on it
thanks ultiarjan your base work
thingiverse
free

Nano Raspicade V2 for B+ and Pi2 by ian57
...screen from banggood : http://www.banggood.com/3_2-inch-tft-lcd-display-module-touch-screen-for-raspberry-pi-b-b-a-p-1011516.html
thingiverse
free

CTC Dual Fix for Raspberry Pi2 by robomodell
...spberry pi2 by robomodell
thingiverse
to fix the box on ctc dual on original bolt
the boxhttp://www.thingiverse.com/thing:922740
Ergo
turbosquid
$30

ergo
... available on turbo squid, the world's leading provider of digital 3d models for visualization, films, television, and games.
3ddd
free

HOESCH - ergo
...hoesch - ergo
3ddd
hoesch , ванна
акриловая ванна hoesch-ergo размерами 2075х1075мм.
3ddd
$1
MP3 Ergo Zen Clip
...o , mp3 , плеер
модель mp3 плеера ergo zen clip
3ddd
$1
Ergo E32C20 LCD Tv
...ergo e32c20 lcd tv
3ddd
ergo , телевизор
материалы и текстуры присутствуют
turbosquid
$9

ERGO black coin
...id
royalty free 3d model ergo black coin for download as max on turbosquid: 3d models for games, architecture, videos. (1496182)
turbosquid
$9

ERGO gold coin
...uid
royalty free 3d model ergo gold coin for download as max on turbosquid: 3d models for games, architecture, videos. (1496179)
turbosquid
$20

Rattan furniture ERGO
... available on turbo squid, the world's leading provider of digital 3d models for visualization, films, television, and games.
turbosquid
$10

Ergo Suspended Light
... available on turbo squid, the world's leading provider of digital 3d models for visualization, films, television, and games.
turbosquid
free

Ergo Road Handlerbars
... available on turbo squid, the world's leading provider of digital 3d models for visualization, films, television, and games.
archive3d
free

Ergo Libs 3D Model
...ergo libs 3d model
archive3d
сabinet case
Webcam
3d_export
$10

webcam
...webcam
3dexport
this is a webcam
archibase_planet
free
Webcam
...planet
webcam web camera camera
webcam camera a4tech pks-730g web n200613 - 3d model (*.gsm+*.3ds) for interior 3d visualization.
3d_ocean
$6
Webcam
...orted to 3ds, dae, obj and fbx there is the c4d file include with materials file this is a webcam microsoft lifecam vx-3000 model
turbosquid
$35

Webcam
... available on turbo squid, the world's leading provider of digital 3d models for visualization, films, television, and games.
turbosquid
$35

webcam
... available on turbo squid, the world's leading provider of digital 3d models for visualization, films, television, and games.
turbosquid
$20

webcam
... available on turbo squid, the world's leading provider of digital 3d models for visualization, films, television, and games.
turbosquid
$5

Webcam
... available on turbo squid, the world's leading provider of digital 3d models for visualization, films, television, and games.
turbosquid
$2

Webcam
... available on turbo squid, the world's leading provider of digital 3d models for visualization, films, television, and games.
turbosquid
free

Webcam
... available on turbo squid, the world's leading provider of digital 3d models for visualization, films, television, and games.
turbosquid
free

Webcam
... available on turbo squid, the world's leading provider of digital 3d models for visualization, films, television, and games.
Nano
3d_export
$20

nano astronaut
...nano astronaut
3dexport
turbosquid
$29

robot nano
...bosquid
royalty free 3d model robot nano for download as 3ds on turbosquid: 3d models for games, architecture, videos. (1658714)
3ddd
free
iPod nano 4G
... nano 4g
3ddd
ipod , apple , плеер
ipod nano 4g
3d_export
$6

Nano Katana
...nano katana
3dexport
3ddd
free
iPod Nano
...ipod nano
3ddd
apple , плеер
d
turbosquid
$80

NANO CAR
... available on turbo squid, the world's leading provider of digital 3d models for visualization, films, television, and games.
turbosquid
$20
nano house
... available on turbo squid, the world's leading provider of digital 3d models for visualization, films, television, and games.
turbosquid
$18

nano house
... available on turbo squid, the world's leading provider of digital 3d models for visualization, films, television, and games.
turbosquid
$5
Ipod nano
... available on turbo squid, the world's leading provider of digital 3d models for visualization, films, television, and games.
3ddd
$1
iPod nano 6
...ipod nano 6
3ddd
apple , плеер
модель ipod nano 6, моделировался по чертежу.
Charger
3d_export
$5
charger
...ers in battle. this is the 18th century meaning of charger, and it’s based on the verb charge and its meaning “rush into battle.”
3d_export
free
Charger
...charger
3dexport
turbosquid
$15

Charger
... available on turbo squid, the world's leading provider of digital 3d models for visualization, films, television, and games.
turbosquid
$3

Charger
...d model charger for download as skp, max, blend, stl, and obj on turbosquid: 3d models for games, architecture, videos. (1654816)
turbosquid
$1
charger
... available on turbo squid, the world's leading provider of digital 3d models for visualization, films, television, and games.
3d_export
$20

dodge charger 1972
...dodge charger 1972
3dexport
dodge charger 1972
3d_export
$20
dodge charger 1969
...dodge charger 1969
3dexport
dodge charger 1969
3d_export
free

dodge charger 1969
...dodge charger 1969
3dexport
dodge charger 1969
3d_export
$18

dodge charger
...dodge charger
3dexport
3d_export
$89
Charger 3D Model
...charger 3d model
3dexport
charger sea transopt industry 3d models
charger 3d model vitaly amurskiy 2286 3dexport
Lcd
turbosquid
$20

lcd
... available on turbo squid, the world's leading provider of digital 3d models for visualization, films, television, and games.
turbosquid
$15
LCD
... available on turbo squid, the world's leading provider of digital 3d models for visualization, films, television, and games.
turbosquid
$10

LCD
... available on turbo squid, the world's leading provider of digital 3d models for visualization, films, television, and games.
turbosquid
$10

LCD
... available on turbo squid, the world's leading provider of digital 3d models for visualization, films, television, and games.
turbosquid
$2

lcd
... available on turbo squid, the world's leading provider of digital 3d models for visualization, films, television, and games.
turbosquid
$1

lcd
... available on turbo squid, the world's leading provider of digital 3d models for visualization, films, television, and games.
turbosquid
free
lcd
... available on turbo squid, the world's leading provider of digital 3d models for visualization, films, television, and games.
turbosquid
free
LCD
... available on turbo squid, the world's leading provider of digital 3d models for visualization, films, television, and games.
3ddd
$1
Noti Lcd Sofa
...noti lcd sofa
3ddd
noti , lcd
3d model of noti lcd sofa
3d_ocean
$7

Lcd tube wall
...hrome electronic electronic lcd tv videowall
lcd tube wall you can put in the lcd your own texture or movie in it and animate it.
Pole
turbosquid
$3

Pole Vault - Pole Stand
... available on turbo squid, the world's leading provider of digital 3d models for visualization, films, television, and games.
turbosquid
$1

A Pole
...
turbosquid
royalty free 3d model a pole for download as fbx on turbosquid: 3d models for games, architecture, videos. (1687003)
3ddd
free

Poles salotti
... , капитоне , угловой
диван
poles salotti sofa
turbosquid
$10

pole A
...quid
royalty free 3d model pole a for download as ma and max on turbosquid: 3d models for games, architecture, videos. (1409150)
turbosquid
$1

pole
...
royalty free 3d model pole for download as max, obj, and fbx on turbosquid: 3d models for games, architecture, videos. (1437328)
turbosquid
$14
pole
... available on turbo squid, the world's leading provider of digital 3d models for visualization, films, television, and games.
turbosquid
$4

Pole
... available on turbo squid, the world's leading provider of digital 3d models for visualization, films, television, and games.
turbosquid
free

Pole
... available on turbo squid, the world's leading provider of digital 3d models for visualization, films, television, and games.
3d_ocean
$14
Telephone Pole
...s electricity pole road telephone telephone pole wire
model of a telephone pole made in cinema 4d. files included: .c4d .3ds .obj
3d_export
$5
Electric pole
...electric pole
3dexport
electric pole for street, electricity line
Solar
3d_ocean
$4

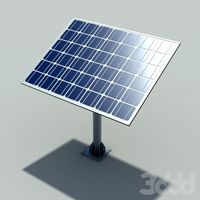
Solar Panel
...solar panel
3docean
cell panel solar
fully textured solar panel with scaleable solar cells.
3ddd
$1
solar cell
...solar cell
3ddd
солнечная батарея
solar cell
3d_export
$7

Solar Panel
...solar panel
3dexport
perfect solar panel for roof, modular, extensible.
3d_export
$5

solar system
...solar system
3dexport
solar system in c4d, with 8k nasa textures
3d_export
$15

solar system
...nd the other the sun, the earth and the moon, the latter has an animation with camera movement included, the files are in spanish
3ddd
$1
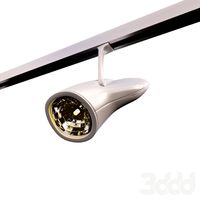
Zumtobel Solar II
...obel solar ii
3ddd
zumtobel , solar
модель направленного светильника solar 2 от zumtobel
3d_ocean
$14
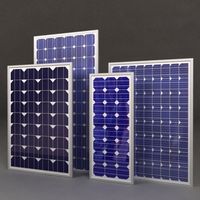
Solar Panels
... materials, hdri map, vray gi setup. four solar panels: type1: 1849 – poly, 2035 – vert. type2: 954 – poly, 1051 – vert. type3...
turbosquid
$29

Solar System
...squid
royalty free 3d model solar system for download as fbx on turbosquid: 3d models for games, architecture, videos. (1236050)
turbosquid
$25
Solar Panel
...osquid
royalty free 3d model solar panel for download as max on turbosquid: 3d models for games, architecture, videos. (1516562)
turbosquid
$25

Solar System
...uid
royalty free 3d model solar system for download as blend on turbosquid: 3d models for games, architecture, videos. (1314058)
Case
3d_export
$1

case
...case
3dexport
case
archibase_planet
free

Case
...case
archibase planet
showcase show-case glass case
glass-case + cakes - 3d model for interior 3d visualization.
archibase_planet
free

Case
...case
archibase planet
showcase show-case glass case
glass-case for chips - 3d model for interior 3d visualization.
archibase_planet
free

Case
...case
archibase planet
case shelving drawer
case - 3d model for interior 3d visualization.
archibase_planet
free

Case
...case
archibase planet
case rack locker
case - 3d model for interior 3d visualization.
archibase_planet
free

Case
...case
archibase planet
case drawer kitchen furniture
case - 3d model for interior 3d visualization.
archibase_planet
free

Case
...case
archibase planet
case cupboard shelving
glass case - 3d model for interior 3d visualization.
archibase_planet
free

Case
...case
archibase planet
case handbag suitcase
case - 3d model (*.gsm+*.3ds) for interior 3d visualization.
archibase_planet
free

Case
...case
archibase planet
case suitcase
case 5 - 3d model (*.gsm+*.3ds) for interior 3d visualization.
archibase_planet
free

Case
...case
archibase planet
locker case dresser
case - 3d model (*.gsm+*.3ds) for interior 3d visualization.