Thingiverse
MyRCCar Dogbone Making Tool by dlb5
by Thingiverse
Last crawled date: 3 years, 1 month ago
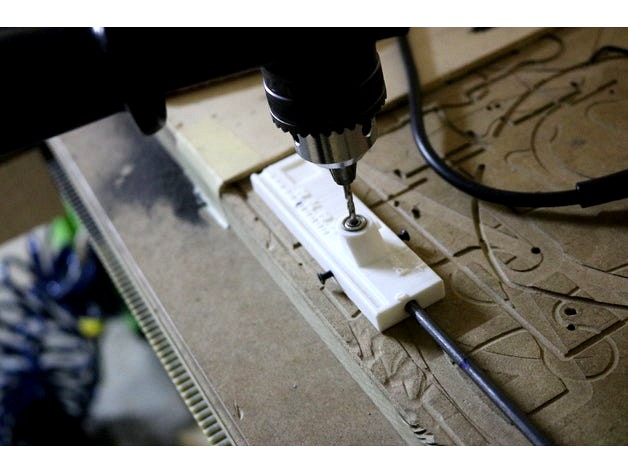
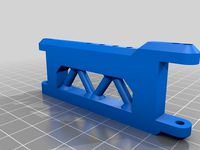
MARK, CUT, DRILL, SAND and RUN with your 3d printed rc car!!!
Emmm... what?¿? with a piece of plastic?¿?
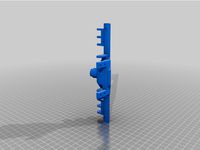
Ok, this is a tool to help you measure and mark, drill and hold your dogbones and pins while sanding them.
To use it, you should go as follows:
First of all would be to mark a 5mm piano wire to be cutted at the desired length. For this, use the convex surface to place the piano wire starting in the "0", then use the "ruler" to position your pen tip at the desired length or nearest one. You can do this always by hand with a ruler and a pen, but you should be able to rotate the piano wire over the convex surface while holding the pen in position to draw a circle around the wire. After that you can introduce it in the 5 mm hole to hold it with the 2 M3 screws in place to help you cut it. The selector button must be near the side to allow the 5mm wire to go through the tool.
Second, after cutting the 5mm piano wire to the desired length (must be dogbone extreme to extreme distance) you must drill both sides to be able to introduce the pins. For this, you must put the selector button in the "drill position", introduce the cutted 5mm wire from the left side till touching the selector button and then fix its position with the 2 M3 screws.
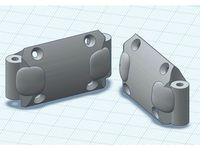
Drilling with the 3mm bit over a 5mm piano wire wont be easy, and if you try it just holding a big drilling machine it will be really hard, also previously marking the place for the pin. So i think i have quite a nice solution: The tool and its two 3x10x4 bearings shoud help you perfectly align perpendicular and centered where the hole must be. The bearings can rotate with the drilling tool and maybe they shoud allow a little of perpendicular force deviation while drilling.
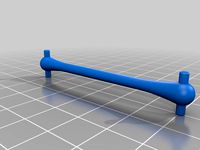
One time you have your dogbone with its holes, you must take the 3mm piano wire and mark and cut it twice for each dogbone with the provided 10mm and 12mm depth holes. Introduce the wire in the hole and mark arround it to cut it after that.
It's a good idea to sand the "heads" of th main piece trying to give it a half-spherical shape. For doing this you can put the select button in the sanding position and use the thumb button to avoid the dogbone to turn while you push it against a sanding cylinder. You can also introduce your cutted pins in the 3mm or 2mm holes to sand their "heads".
If you can't access 3x10x4 bearings maybe you can use 5x10x4 ones and the provided adaptor. The idea is that the walls of the adaptor or the bearing turns all together, so you shouldn't damage them much.
Needed Material:
2x 3x10x4 bearings or 2x 5x10x4 + adaptor
2x M3 Hex Socket Head 16mm or longer screws
Dremel like machine with cutting disk, sanding cylinder and if possible 3mm drill bit.
Protection Glasses
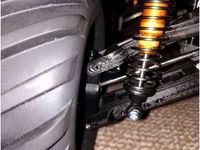
If you plan to use this in a MyRCCar config with printed FR diff vases, they should be compatible. A 1/8 center diff also uses 3mm pins but if you don't glue the pins and pray they could get shooted from the car. I made some covers for this 1/8 center diff vases so the pins shouldn't get shooted. If you are interested in this addons please tell me and i'll publish them.
As always, i encourage you to join the MyRCCar Group if you are really interested in the project.
Also, if you are using 02024+converter as center diff. You will need 2mm pins and holes for this side of the dogbone, so maybe you would use the 2mm adaptor for 5x10x4 bearings to use a 2mm drill bit. There is a special 2mm hole to hold the pin while sanding the extremes.
Do the drills over a "martir" table, so, one time you have drill the backpart of the thing you don't drill the floor or something undesired.
Emmm... what?¿? with a piece of plastic?¿?
Ok, this is a tool to help you measure and mark, drill and hold your dogbones and pins while sanding them.
To use it, you should go as follows:
First of all would be to mark a 5mm piano wire to be cutted at the desired length. For this, use the convex surface to place the piano wire starting in the "0", then use the "ruler" to position your pen tip at the desired length or nearest one. You can do this always by hand with a ruler and a pen, but you should be able to rotate the piano wire over the convex surface while holding the pen in position to draw a circle around the wire. After that you can introduce it in the 5 mm hole to hold it with the 2 M3 screws in place to help you cut it. The selector button must be near the side to allow the 5mm wire to go through the tool.
Second, after cutting the 5mm piano wire to the desired length (must be dogbone extreme to extreme distance) you must drill both sides to be able to introduce the pins. For this, you must put the selector button in the "drill position", introduce the cutted 5mm wire from the left side till touching the selector button and then fix its position with the 2 M3 screws.
Drilling with the 3mm bit over a 5mm piano wire wont be easy, and if you try it just holding a big drilling machine it will be really hard, also previously marking the place for the pin. So i think i have quite a nice solution: The tool and its two 3x10x4 bearings shoud help you perfectly align perpendicular and centered where the hole must be. The bearings can rotate with the drilling tool and maybe they shoud allow a little of perpendicular force deviation while drilling.
One time you have your dogbone with its holes, you must take the 3mm piano wire and mark and cut it twice for each dogbone with the provided 10mm and 12mm depth holes. Introduce the wire in the hole and mark arround it to cut it after that.
It's a good idea to sand the "heads" of th main piece trying to give it a half-spherical shape. For doing this you can put the select button in the sanding position and use the thumb button to avoid the dogbone to turn while you push it against a sanding cylinder. You can also introduce your cutted pins in the 3mm or 2mm holes to sand their "heads".
If you can't access 3x10x4 bearings maybe you can use 5x10x4 ones and the provided adaptor. The idea is that the walls of the adaptor or the bearing turns all together, so you shouldn't damage them much.
Needed Material:
2x 3x10x4 bearings or 2x 5x10x4 + adaptor
2x M3 Hex Socket Head 16mm or longer screws
Dremel like machine with cutting disk, sanding cylinder and if possible 3mm drill bit.
Protection Glasses
If you plan to use this in a MyRCCar config with printed FR diff vases, they should be compatible. A 1/8 center diff also uses 3mm pins but if you don't glue the pins and pray they could get shooted from the car. I made some covers for this 1/8 center diff vases so the pins shouldn't get shooted. If you are interested in this addons please tell me and i'll publish them.
As always, i encourage you to join the MyRCCar Group if you are really interested in the project.
Also, if you are using 02024+converter as center diff. You will need 2mm pins and holes for this side of the dogbone, so maybe you would use the 2mm adaptor for 5x10x4 bearings to use a 2mm drill bit. There is a special 2mm hole to hold the pin while sanding the extremes.
Do the drills over a "martir" table, so, one time you have drill the backpart of the thing you don't drill the floor or something undesired.
Similar models
thingiverse
free

Gameboy Zero XY Button Wells by Rittai3D
...the button wells to crack.
updated: rev 1: reduce height of wells 5mm->4mm and pin from 8mm->5.5mm.
pin interferes with pcb
thingiverse
free
EMAX 250 Nighthawk - Fatshark 600TVL plate - adjustable angle by Telnoi
...b the hole using a metal screw.
afterwards, use a nylon m3 screw to save weight and cut off or sand down the heads on both sides.
thingiverse
free

TPA3116 Bluetooth amplifier enclosure by isakh1
...de diameter to clean the upright pins of the bottom plate.
note 3: clean all the button pins for any irregularity on the outside
thingiverse
free

Self Centering Drill and Marking Guide by Bob68
... items up to 100mm or larger with two sets of spacers. the drill guide needs a washer of each size stuck in the hole for drilling
thingiverse
free

MyRCCar Central Differential Housing for HSP02024 Diff conversion, SST09304 and other 1/8 diffs. by dlb5
... it will fit in myrccar universal chassis. also please join the myrccar group to help improving myrccar, yourrccar i hope soon ;)
thingiverse
free

Laser Cut BB Bearing by stupidrob
...77 cal) for balls
red 'r's are just assembly markings
.100 holes can be used to pin pieces together with coat hanger wire
thingiverse
free
MyRCCar F/R Differential Housing for HSP 02024 Diff. with adjustable caster (OLD) by dlb5
...this housing for the hsp 02024 fr diff or similar becouse i think is one of the easiest to...
grabcad
free

Extruder Mk8 Nozzel
...e here.
you must print hollow with 1.5mm wall and drill the starting holes with a 2mm drill bit, the end holes are drilled at 3mm
thingiverse
free

Pizzaschieber | Laser Cut by grumpy_scrambler
...er
thingiverse
3mm plywood. front edge must be sanded. mesh holes are used to remove excess flour before placing it in the oven.
thingiverse
free

Glasses Case with Magnetic Closure by eclarkmeyer
... i used a #60 drill bit to ream the hinge pin bores. i customized mine by adding my initials to the lid at a depth of .001".
Dlb5
thingiverse
free
Adapter to fit NiKO2On's printed HSP 02024 gear into dlb5's MTC Diff by Saccco
...'s myrccar central differential housing for hsp02024 diff conversion, sst09304 and other 1/8 diffs. check remix links for it.
thingiverse
free

MyRCBike NSR500, First 1/5 3D Printed Hobby Level RC Bike: number 5 by dlb5
...st test ride of the v1 bike here:https://youtu.be/0ou5d9lsckc
if you want to find the full publication please come to see it here
thingiverse
free

MyRCCar 1/10 Buggy / Truggy LED Lights Holders (OLD) by dlb5
...ore space for shocks or due to caster.
i hope "you see the light" with this thing and start making your myrccar soon!!!
thingiverse
free
MyRCCar MTC Styled Lower Suspension Arm 769 (even easier to print) by Saccco
...769 (even easier to print) by saccco thingiverse thanks dlb5 made my own version of the lower arms. intended...
thingiverse
free

MyRCCar Steering System for three different bearings: 5x8x4, 5x10x4 and 6x12x4 by dlb5
... would be related more to the whole proyect please join the myrccar group. i hope i see you there soon building your own rc car:)
thingiverse
free

MyRCCar Center Diff. Remote Locking System by dlb5
... myrccar group and don't forget to introduce yourself! :)
note: the shared main body part is for a fixed blocked center diff.
thingiverse
free

Airbrush CNC Support and control with Marlin (OLD) by dlb5
...ease take a look at this video:video you can now also take a look to 5my first attemps airbrushing cmyk
will you give it a try?¿?
thingiverse
free

MyRCCar OBTS Chassis Building Instructions by dlb5
... shell, bumper, wing and lights
myrccar 1/10 buggy / truggy led lights holders. rc car light show!
myrccar 1/10 4th build testing
thingiverse
free
MyRCCar 1/10 Truggy rc car. With TITAN Shell, Bumper, Wing and Lights (OLD) by dlb5
...he car to put the shell lower or maybe accomodate some foam.
hope you like it and start soon making your own 3d printed rc car :)
Myrccar
thingiverse
free
Tarmo3 with myrccar truck body
...tarmo3 with myrccar truck body
thingiverse
i made a new front mount for the myrccar to connect to the tarm o3
thingiverse
free

Shock Spacer for MyRCCar by BotYoyo
...shock spacer for myrccar by botyoyo
thingiverse
you may need this shock spacer for some of the 1/10 shocks.
thingiverse
free

MyRCCar 1/10 12mm Wheel HEX (for HSP 188015 CVD) by BotYoyo
...12mm wheel hex (for hsp 188015 cvd) by botyoyo
thingiverse
this is a wheel hex remix for myrccar if you are using hsp 188015 cvd
thingiverse
free
MyRCCAR MTC Servo On Front RigAixs
...ing servo on the front bridge will keep the chasiss more stable when turning, so i give a try. and it works better as expected :)
thingiverse
free

MyRCCar LAS 0C and 6C for Ø3.0 x 56mm suspension rod by BotYoyo
...ension rod for myrccar. you may noticed the whole is not deep enough for the rod. this remix has deeper holes could fit 56mm rod.
thingiverse
free
MyRCCar MTC Improved Lower Suspension Arm 769 (easier to printer) by BotYoyo
...good. by not increase the weight, i just remix it to make it stronger and much easier to print. (maybe looks a little better? xd)
thingiverse
free

MyRCCar MTC Parts (Updated) by Saccco
...m.
for the complete chassis head on to dlb5's: myrccar 1/10 monster /crawler chassis with configurable 270 to 330mm wheelbase
thingiverse
free
MyRCCar OBTS Chassis Building Instructions by dlb5
... shell, bumper, wing and lights
myrccar 1/10 buggy / truggy led lights holders. rc car light show!
myrccar 1/10 4th build testing
thingiverse
free
Stronger Lower Arm Holder for MyRCCar MTC by BotYoyo
...ot which i broke it by a 0.3m height landing.
i just added some extra plastic to the weak spot. now the lower arm is rock solid!
thingiverse
free
MyRCCar MTC Styled Lower Suspension Arm 769 (even easier to print) by Saccco
...by saccco
thingiverse
thanks dlb5!
made my own version of the lower arms. intended to print without support.
hexa and m support.
Dogbone
thingiverse
free
Dogbone by Alvarocorgar
...dogbone by alvarocorgar
thingiverse
just a dogbone of 60mm and 40 centre to centre
thingiverse
free

USA1 Dogbone by pickled52
...usa1 dogbone by pickled52
thingiverse
usa1 dogbone
thingiverse
free

Type V Dogbone by Smatonis
...type v dogbone by smatonis
thingiverse
astm type v dogbone
thingiverse
free

Dogbone insulator
...dogbone insulator
thingiverse
have not tried it yet outside, suggest using a waterproof substrate
thingiverse
free

Instron dogbone mold by Mediated_Matter
... dogbone mold by mediated_matter
thingiverse
mold to make dogbone material samples for mechanical testing on the instron machine
thingiverse
free

Big dogbone and more parts by Alvarocorgar
...big dogbone and more parts by alvarocorgar
thingiverse
big dogbone 8mm diameter for 3mm axle
thingiverse
free
Earphone Dogbone by Vijay Menon by CopabX
...earphone dogbone by vijay menon by copabx
thingiverse
a dogbone to wrap extra earphone wire around.
thingiverse
free

ASTM D638-14 Type I Dogbone
...astm d638-14 type i dogbone
thingiverse
atsm d638-14 type i dogbone
thingiverse
free

Dogbone Cookie Cutter by pryan215
...dogbone cookie cutter by pryan215
thingiverse
for making homemade dog treats
thingiverse
free

Connector for wooden Traintracks / Dogbone by Orngrimm
...e
for a collegue, i quickly modeled and printed a bunch of "dogbone"-connectors for his childs playset from trainlabs.
Tool
turbosquid
$21
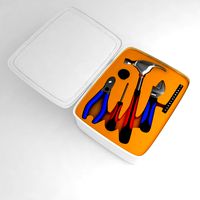
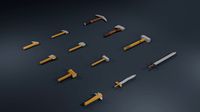
Tool box with tools
... available on turbo squid, the world's leading provider of digital 3d models for visualization, films, television, and games.
archibase_planet
free
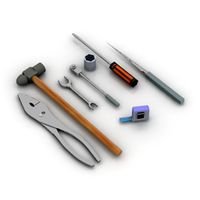
Tools
...tools
archibase planet
tools instruments implements
tools n070114 - 3d model (*.gsm+*.3ds+*.max) for interior 3d visualization.
3d_ocean
$12
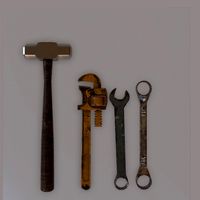
Tools
...tools
3docean
hammer metal old screw tools wrench
maya
turbosquid
$6

Tool Cart / Tool Box
...
royalty free 3d model tool cart / tool box for download as on turbosquid: 3d models for games, architecture, videos. (1241859)
3d_ocean
$15
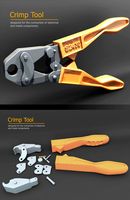
crimp tool
... tool copper cutter crimp crimp tool electrical electrical tools press tools pressing tool tools wire cutter
created in maya 2013
3d_ocean
$5

Tools
...tools
3docean
3d models paint tools work
3d,models,works,paint,art,create,working,
3d_export
free
tools
...tools
3dexport
coldsteel
turbosquid
$15

Tools
...turbosquid
royalty free 3d model tools for download as blend on turbosquid: 3d models for games, architecture, videos. (1331352)
3ddd
$1
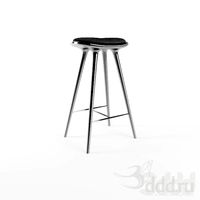
bar tool
...bar tool
3ddd
барный
bar tool
turbosquid
$35

tools
... available on turbo squid, the world's leading provider of digital 3d models for visualization, films, television, and games.
Making
3d_export
$5

make make planet
...make make planet
3dexport
turbosquid
$1

Make
...ke
turbosquid
royalty free 3d model make for download as obj on turbosquid: 3d models for games, architecture, videos. (1403181)
3ddd
free

make up
...make up
3ddd
косметика
makeup
turbosquid
$65

Make an interior
... available on turbo squid, the world's leading provider of digital 3d models for visualization, films, television, and games.
turbosquid
$5

Make Up Stand
...bosquid
royalty free 3d model make up stand for download as on turbosquid: 3d models for games, architecture, videos. (1542368)
turbosquid
$12

make up table
...quid
royalty free 3d model make up table for download as max on turbosquid: 3d models for games, architecture, videos. (1280789)
turbosquid
$1

Make up desk
...oyalty free 3d model make up desk for download as max and obj on turbosquid: 3d models for games, architecture, videos. (1222023)
turbosquid
$1
Make up desk
...oyalty free 3d model make up desk for download as max and obj on turbosquid: 3d models for games, architecture, videos. (1222007)
turbosquid
$29
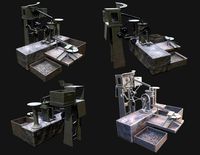
Ammo making machine
...aking machine for download as max, unitypackage, fbx, and obj on turbosquid: 3d models for games, architecture, videos. (1572915)
turbosquid
$29
Making light Collection
... available on turbo squid, the world's leading provider of digital 3d models for visualization, films, television, and games.