Thingiverse
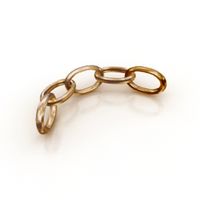
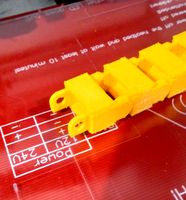
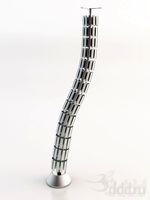
MPCNC Cable Chain Snap Fit Supports for Aluminum "L" angle bar (U.S. version) by 3dEz
by Thingiverse
Last crawled date: 3 years ago
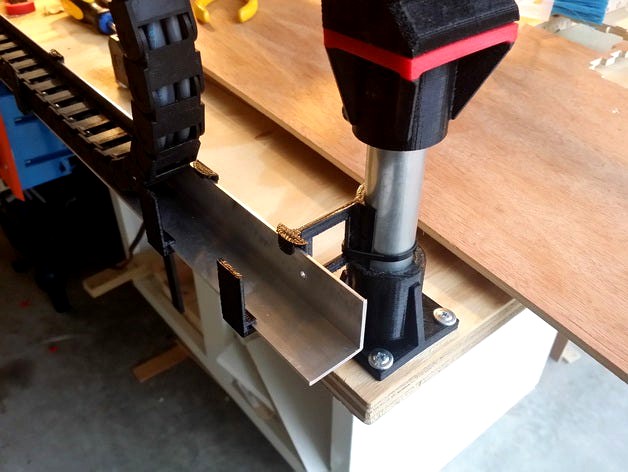
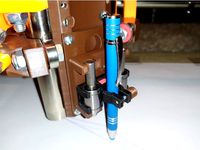
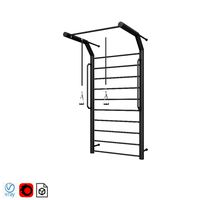
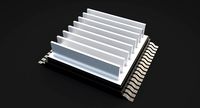
This set allows installation of an "L" Aluminum Angle Bar for the X and Y Axis cable chain.
I have made it snap-fit on the U.S. EMT tube (US Version), but I recommend wrapping with one zip tie after you position everything.
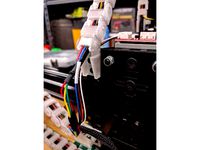
I was able to route the wires through the cable chain with connectors installed by wrapping the bundles with PFTE tape (plumbing teflon tape) and pulling them gently with a tweezer when there was a bit of snag.
Parts you will need:
1) Cable chain, such as this one: ($6 each)http://www.amazon.com/gp/product/B00880AVL2?psc=1&redirect=true&ref_=oh_aui_search_detailpage
2) Aluminum angle bar such as this one:http://www.homedepot.com/p/Everbilt-1-in-x-96-in-Aluminum-Angle-Bar-with-1-20-in-Thick-802587/204273981?MERCH=REC-_-PIPHorizontal1_rr-_-204273951-_-204273981-_-N
3) 2 X 5/16", 3" long screws for each axis, total of 4 screws if you are doing for X and Y. These will replace the 2.5" screw on the motor block to allow mounting the chain support bracket.
The STL's are as follows:
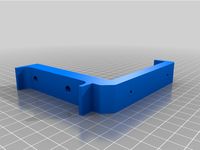
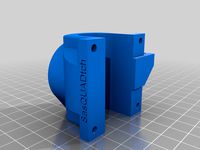
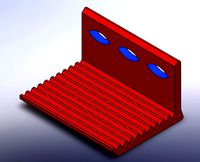
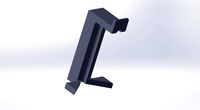
1) The biggest part is the mount to the motor block. Print one unit for each axis
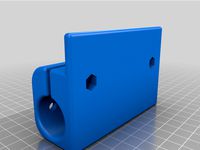
2) The end clip attaches to the EMT tube leg of the corner block - If you will need to print two of those, regardless of installing for 1 axis or 2 axis.
3) The XY clip combines 2 clips into one assembly if you are installing both X and Y cable chains.
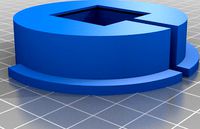
4) The small sliding clips holds and directs the cable chain into the rail when the axis is moving. I have printed 3 clips for each axis. Slide the clips in the aluminum bar.
Some general print advice: I initially planned to have these brackets designed to be printed laying down 90 degrees to avoid supports but after a few tests I realized the need for a curved "bump" to avoid snagging with the chain. So print the parts with supports keeping the orientation in the attached STL. Since the walls are thin, ensure your extrusion width is not creating hollow walls (check the sliced view). Finally, Reserve some time to gently remove all support material from the tiny slots (have a glass of wine while you do that :).
I have made it snap-fit on the U.S. EMT tube (US Version), but I recommend wrapping with one zip tie after you position everything.
I was able to route the wires through the cable chain with connectors installed by wrapping the bundles with PFTE tape (plumbing teflon tape) and pulling them gently with a tweezer when there was a bit of snag.
Parts you will need:
1) Cable chain, such as this one: ($6 each)http://www.amazon.com/gp/product/B00880AVL2?psc=1&redirect=true&ref_=oh_aui_search_detailpage
2) Aluminum angle bar such as this one:http://www.homedepot.com/p/Everbilt-1-in-x-96-in-Aluminum-Angle-Bar-with-1-20-in-Thick-802587/204273981?MERCH=REC-_-PIPHorizontal1_rr-_-204273951-_-204273981-_-N
3) 2 X 5/16", 3" long screws for each axis, total of 4 screws if you are doing for X and Y. These will replace the 2.5" screw on the motor block to allow mounting the chain support bracket.
The STL's are as follows:
1) The biggest part is the mount to the motor block. Print one unit for each axis
2) The end clip attaches to the EMT tube leg of the corner block - If you will need to print two of those, regardless of installing for 1 axis or 2 axis.
3) The XY clip combines 2 clips into one assembly if you are installing both X and Y cable chains.
4) The small sliding clips holds and directs the cable chain into the rail when the axis is moving. I have printed 3 clips for each axis. Slide the clips in the aluminum bar.
Some general print advice: I initially planned to have these brackets designed to be printed laying down 90 degrees to avoid supports but after a few tests I realized the need for a curved "bump" to avoid snagging with the chain. So print the parts with supports keeping the orientation in the attached STL. Since the walls are thin, ensure your extrusion width is not creating hollow walls (check the sliced view). Finally, Reserve some time to gently remove all support material from the tiny slots (have a glass of wine while you do that :).
Similar models
thingiverse
free
PrintNC - Cable Chain supports by evil_k
...5 machine screws.
printed everything in petg, 60% infill, 0.6mm nozzle.
solidworks files included if you need to change anything.
thingiverse
free

MPCNC Cable Chain Snap Fit Supports for Aluminum "L" angle bar (Beefy U.S. version) by anthonyalburton
...so i made them thicker and used an arc. recently changed to allow the cables to slide under bottom before installing the l-rail.
thingiverse
free

MPCNC Z Axis Cable Raceway
...r y axis
8 m3 x 10mm bolts (these replace the stock stepper motor bolts which are too short to clear the brackets and stock parts
thingiverse
free
ACRO Laser Cable Chains by 3boysdad
... the y-axis as well as the x-axis. then print another set using the mirror tool in your slicer for the right side of the y-axis.
thingiverse
free

MPCNC Primo Z Cable Chain Mount by truglodite
...z cable chain along the x or y axis. similar mpcnc primo z-cable mounts were too low to where...
thingiverse
free

Ender 3 Cable Chain Direct Drive Bullseye by Klingman
...axis and about 20 for the y axis.
you should experiment with the full range of movement of all the axis before starting printing.
thingiverse
free

Formbot T-Rex 2+ Y-Axis Cable Chain by afeathers1
... aluminum extrusion underneath the cable chain, so you can move around your printer without catching or damaging the cable chain.
thingiverse
free

Y axis cable chain for GEEETech I3 ProB(easy to assemble) by ybjack
...lock.stl
same part of source.
8/9 sorry, "y_cable_chain_print at_once.stl" has no cable lock. if you need, add above 5)
thingiverse
free

Ender 3 V2 LED Bar and V-Slot Clips for 2020 Extrusion by imaginepsn
...t the x-axis, you can print the led clips 45 version which can snap into the back of the x-axis.
remarks: no support is required.
thingiverse
free

Drag Chain Cable Raceway for Onefinity CNC by muddyfeet
...) m4 x 10mm flat head screws to secure drag chains
(1) m4 tap for threading holes
assemble per video:https://youtu.be/x7eg7uzhg84
3Dez
thingiverse
free
3DEZ Line Follower Snap by 3_DEZ
...system for the use with 3dez robotics systems. compatible with the vex edr robotics systems. works with most of the 3dez chassis.
thingiverse
free

3DEZ VEX Robot Chassis by 3_DEZ
...3dez vex robot chassis by 3_dez
thingiverse
a 3dez chasssis for use with the vex edr robotics systems.
thingiverse
free

3DEZ VEX cortex mount. by 3_DEZ
...r systems and they are made for the 3dez chassis. work with all vex edr products as holes lone up with the cortex mounting holes.
thingiverse
free

Solidoodle Dual Y Motor Drive by 3dEz
...tor drive by 3dez
thingiverse
this is described here:
http://www.soliforum.com/post/128328/#p128328
https://youtu.be/ja8bjmly2qw
thingiverse
free

3DEZ VEX Line Follower Chassis Robot by 3_DEZ
...se don't hesitate to contact us.https://www.youtube.com/channel/uc2a-uf0fhhlh5b7gtdulxbahttps://www.facebook.com/3dezchassis/
thingiverse
free

C-Wallet Remix by 3dEz
...need for the bearing, but here it is for now.
remix 2 - non-glued
= to remix 1 + screws (untested)
printed with bronze color pla
thingiverse
free

Mirroed extruder with adapted auto bed leveling mount by 3dEz
...create a small chamfer close to the left servo mount mounting screw. this is really the only difference from the original design.
thingiverse
free

MPCNC with Makerbase MKS TFT28 by 3dEz
...p you posted on that. you can easily adjust the display height thanks to the threaded rod
m5 nuts, and washers
m3 screws and nuts
unity_asset_store
$8

viking weapons
...elevate your workflow with the viking weapons asset from 3dez find this & other guns options on the unity...
unity_asset_store
free

Simple Cafe
...elevate your workflow with the simple cafe asset from 3dez find this & other urban options on the unity...
Mpcnc
thingiverse
free

MPCNC Laser Mount
...mpcnc laser mount
thingiverse
custom laser mount for mpcnc.
thingiverse
free

MPCNC Remix
...mpcnc remix
thingiverse
test
thingiverse
free
MPCNC Belt Mod
...mpcnc belt mod
thingiverse
belt mod for mpcnc. alternative to zip tie.
thingiverse
free

MPCNC Y PLATE
...mpcnc y plate
thingiverse
ender 3 printable y plate for mpcnc lowrider 2
thingiverse
free
MPCNC adapter for pen holder
...mpcnc adapter for pen holder
thingiverse
adapter to mpcnc
thingiverse
free

MPCNC Higher Feet
...mpcnc higher feet
thingiverse
extra height and width feet to minimize wobbling on higher mpcnc 2.5mm configurations.
thingiverse
free
MPCNC 30x30 Laser by DariusO
...mpcnc 30x30 laser by dariuso
thingiverse
mpcnc lasermodul in 30x30
thingiverse
free

mpcnc penholder
...mpcnc penholder
thingiverse
a quick remix of two different ideas
thingiverse
free
MPCNC Drillign Guide by isiks_tech
...mpcnc drillign guide by isiks_tech
thingiverse
mpcnc drilling guide for gantry rails.
thingiverse
free

MPCNC Proxxon Mount by CNC_Fan
...mpcnc proxxon mount by cnc_fan
thingiverse
this is my proxxon mount for use mpcnc
Snap
turbosquid
$10

SNAP ACTION SWITCH
... available on turbo squid, the world's leading provider of digital 3d models for visualization, films, television, and games.
3d_export
$10
Trigger Snap Hook 3D Model
...ty climbing snap-hook snap-link link shackle holder latch swivel ring equipment
trigger snap hook 3d model firdz3d 88191 3dexport
3d_export
$15
Battery Snap 3D Model
...ial tool part electricity wire
battery snap 3d model download .c4d .max .obj .fbx .ma .lwo .3ds .3dm .stl firdz3d 106985 3dexport
turbosquid
$8
Pro Snap Weight Clip
... available on turbo squid, the world's leading provider of digital 3d models for visualization, films, television, and games.
3ddd
$1

Стул Snap chair by Karim Rashid
... snap chair
дизайнер карим рашид. пластик, металл. моделилось по фото с сайта дизайнера, материалы vray
turbosquid
$10

Stainless Steel Snap E Ring
... available on turbo squid, the world's leading provider of digital 3d models for visualization, films, television, and games.
3ddd
$1

Пуфы Porada Contract, пуф Porada Snap
...уф фабрика porada артикул snap
коллекция newwork the greatness
материал - кожа, отделка - капитоне.
высота -46, диаметр -52 .
3d_export
$25
press fit of automobile hub bearing and snap ring
...splacement curve is monitored during the pressing process. welcome to download and learn if you like. there are step files in it.
3d_export
free
Download free Clock Diamantini Domeniconi Snap 3D Model
...ccessory design home style modern living room decor free
clock diamantini domeniconi snap 3d model modelplusmodel 29252 3dexport
3d_export
$16
womennp2maxfbxobjmb
...womennp2maxfbxobjmb 3dexport polygonal model of a girl.<br>you can easily snap a skeleton for...
Aluminum
3d_export
$5

aluminum crutch
...aluminum crutch
3dexport
aluminum crutch
3d_export
free

aluminum cane
...aluminum cane
3dexport
aluminum cane
3d_export
$5

the aluminum canister
...
3dexport
the aluminum canister is designed for storing and transporting liquids( water), fuels and lubricants (gasoline, oils).
turbosquid
$2
Aluminum Wheel
...uid
royalty free 3d model aluminum wheel for download as fbx on turbosquid: 3d models for games, architecture, videos. (1371918)
turbosquid
$2
aluminum pulley
...
royalty free 3d model aluminum pulley for download as sldpr on turbosquid: 3d models for games, architecture, videos. (1671716)
turbosquid
$40

Aluminum Can
... free 3d model aluminum can for download as 3ds, max, and obj on turbosquid: 3d models for games, architecture, videos. (1301606)
turbosquid
$15

Curved aluminum
...ee 3d model curved aluminum for download as max, obj, and fbx on turbosquid: 3d models for games, architecture, videos. (1260293)
turbosquid
$12

Aluminum pot
... free 3d model aluminum pot for download as max, fbx, and obj on turbosquid: 3d models for games, architecture, videos. (1653492)
3d_export
$5

Aluminum Bottle
... for shampoo, conditioner or any liquids (500ml 17floz) separated all parts, able to customize any color, material and finishing.
turbosquid
$19

Aluminum windows
...model aluminum windows for download as max, max, fbx, and obj on turbosquid: 3d models for games, architecture, videos. (1646740)
U
3ddd
$1

wii u
...wii u
3ddd
wii , игровая приставка
wii u
turbosquid
$10

U Couch
...turbosquid
royalty free 3d model u couch for download as c4d on turbosquid: 3d models for games, architecture, videos. (1388804)
turbosquid
$7

U for Umbrella
...uid
royalty free 3d model u for umbrella for download as max on turbosquid: 3d models for games, architecture, videos. (1695419)
turbosquid
$5

Letter U
...urbosquid
royalty free 3d model letter u for download as max on turbosquid: 3d models for games, architecture, videos. (1408533)
turbosquid
$5

Letter u
...urbosquid
royalty free 3d model letter u for download as max on turbosquid: 3d models for games, architecture, videos. (1408532)
3d_ocean
$4
U-shape stairs
...u-shape stairs
3docean
concrete stairs u-shape
concrete u-shape stairs. ceiling height 300cm. stairs width 100cm.
turbosquid
$15
BonePile U
...oyalty free 3d model bonepile u for download as blend and obj on turbosquid: 3d models for games, architecture, videos. (1546306)
turbosquid
$4

FONT U
...quid
royalty free 3d model font u for download as ma and obj on turbosquid: 3d models for games, architecture, videos. (1549191)
3ddd
$1
U-Light by Henge
...u-light by henge
3ddd
u-light , henge
designer: massimo castagna
3d_export
$25
gy t hy iy u j u k c b hy u 3D Model
...gy t hy iy u j u k c b hy u 3d model
3dexport
matani
gy t hy iy u j u k c b hy u 3d model tigo 37441 3dexport
Chain
archibase_planet
free
Chain
...chain
archibase planet
chain chain link chain loop
chain n020708 - 3d model (*.gsm+*.3ds) for interior 3d visualization.
3d_export
$5
chain
...chain
3dexport
3d model chain
3d_export
$5
chain
...chain
3dexport
chain. obj,fbx,blend
archibase_planet
free

Chain
...se planet
chain circuit catena
chain - archicad parametrical gdl 3d model (*.gsm). regulation of the length, curvature and angle.
archibase_planet
free
Chain
...n
archibase planet
chain circuit catena
chain - archicad parametrical gdl 3d model(*.gsm). regulation of the length and angle xyz
3d_ocean
$5

Chain
...chain
3docean
3d models chain design elements
3d models, design elements
3d_ocean
$5

Chain
...chain
3docean
3d models chain design elements
3d models, design elements
turbosquid
$10
Chain
...hain
turbosquid
royalty free 3d model chain for download as on turbosquid: 3d models for games, architecture, videos. (1329200)
turbosquid
$9

chain
...hain
turbosquid
royalty free 3d model chain for download as on turbosquid: 3d models for games, architecture, videos. (1549461)
turbosquid
$2
Chain
...hain
turbosquid
royalty free 3d model chain for download as on turbosquid: 3d models for games, architecture, videos. (1148668)
Angle
design_connected
$25
Angle
...angle
designconnected
flou angle sleep furniture computer generated 3d model. designed by rodolfo dordoni.
3ddd
$1
FLOU / Angle
...flou / angle
3ddd
flou
кровать flou angle. все карты процедурные.
3ddd
free
Кровать ANGLE flou
...le , flou , постельное белье
кровать angle flou
design_connected
$16

Calin Angle
...calin angle
designconnected
ligne roset calin angle computer generated 3d model. designed by mourgue, pascal.
3d_export
$5
angle grease nipple
...angle grease nipple
3dexport
angle grease nipple
3ddd
$1

Двуспальная кровать Angle
...ngle. двуспальную кровать с подъемным механизмом angle оценят и те, кто любит практичность: кровать имеет объемый ящик для белья.
turbosquid
$10

Angle Wardrobe
...e 3d model angle wardrobe for download as obj, fbx, and blend on turbosquid: 3d models for games, architecture, videos. (1301544)
turbosquid
$9

Angle Stool
...y free 3d model angle stool for download as max, skp, and skp on turbosquid: 3d models for games, architecture, videos. (1694318)
3d_export
free

angle bracket
...t 3d model part. it is the combination of a bra and ket (bra+ket = bracket) which represents the inner product of two functions.
turbosquid
$6

Angles Pouf
...e 3d model angles pouf for download as max, max, fbx, and obj on turbosquid: 3d models for games, architecture, videos. (1577097)
Cable
3d_export
free

Cables
...cables
3dexport
cables for your purposes
3d_export
free
cable belt for cable organization
...ze your cables in 3d printers. it will bend only to one direction. the area to put the cables per piece is aprox. 1,6cmx2,6cmx1cm
3d_ocean
$16
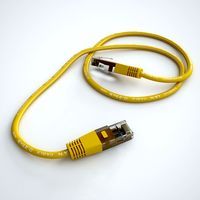
Ethernet Cable
...ethernet cable
3docean
cable computer electronics ethernet internet network connected
ethernet cable 3d model
3d_export
$65

cable
...cable
3dexport
simple rendering of the scene file
turbosquid
$14

Cable
...l cable for download as ma, max, fbx, 3ds, gltf, obj, and stl on turbosquid: 3d models for games, architecture, videos. (1631358)
3ddd
$1
Cable Cover
...cable cover
3ddd
кабель
vertebra passacavo - cable cover
max + vray 2.20.03
3d_export
$15
Cable reel
...without cable. textures 4k 4096x4096 targa, png, jpeg.<br>number of polygons without cable: 2896<br>with cable: 35328
3d_export
$7

short cable
...short cable
3dexport
rubber cord. very detailed. cable thickness: 2.55 mm total length: 55mm
3d_export
$5

USB CABLE
...usb cable
3dexport
turbosquid
$30
Cable Reels
...osquid
royalty free 3d model cable reels for download as fbx on turbosquid: 3d models for games, architecture, videos. (1439507)
Bar
archibase_planet
free
Bar
...bar
archibase planet
bar bar rack
bar 2 - 3d model for interior 3d visualization.
archibase_planet
free
Bars
...bars
archibase planet
horizontal bar parallel bars
parallel bars - 3d model for interior 3d visualization.
3d_export
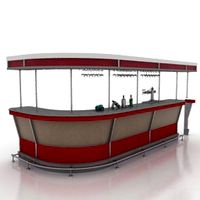
$10

bar
...bar
3dexport
modern bar
3d_export
$10

bar
...bar
3dexport
modern bar
3d_export
$10

bar
...bar
3dexport
modern bar
3d_export
$10
bar
...bar
3dexport
modern bar
3d_export
$10

bar
...bar
3dexport
modern bar
3d_export
$10

bar
...bar
3dexport
modern bar
3d_export
$10

bar
...bar
3dexport
modern bar
3d_export
$10

bar
...bar
3dexport
modern bar
Supports
turbosquid
$5

Support
... available on turbo squid, the world's leading provider of digital 3d models for visualization, films, television, and games.
3d_export
$8
Support 3D Model
...support 3d model
3dexport
support cantilever console
support 3d model tasal 73900 3dexport
3d_export
$5
phone support
...phone support
3dexport
phone
turbosquid
$12
Support bars
...squid
royalty free 3d model support bars for download as max on turbosquid: 3d models for games, architecture, videos. (1411542)
turbosquid
$8

support weights
...id
royalty free 3d model support weights for download as max on turbosquid: 3d models for games, architecture, videos. (1411538)
turbosquid
$2
headphone support
...royalty free 3d model headphone support for download as sldpr on turbosquid: 3d models for games, architecture, videos. (1357583)
turbosquid
$2

Support for flowers
...royalty free 3d model support for flowers for download as max on turbosquid: 3d models for games, architecture, videos. (1463543)
turbosquid
$14

Flower Support
...alty free 3d model flower support for download as max and obj on turbosquid: 3d models for games, architecture, videos. (1497066)
turbosquid
$5
serum support
...yalty free 3d model serum support for download as c4d and obj on turbosquid: 3d models for games, architecture, videos. (1551267)
3d_export
$10
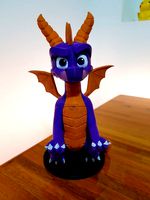
spyro joystick support
...spyro joystick support
3dexport
joystick support of spyro dragon
Fit
turbosquid
$21

Fitting
... available on turbo squid, the world's leading provider of digital 3d models for visualization, films, television, and games.
turbosquid
$20

fitness
... available on turbo squid, the world's leading provider of digital 3d models for visualization, films, television, and games.
turbosquid
$5

Fitness
... available on turbo squid, the world's leading provider of digital 3d models for visualization, films, television, and games.
turbosquid
$1
fitness
... available on turbo squid, the world's leading provider of digital 3d models for visualization, films, television, and games.
3d_export
$5

fittings
...fittings
3dexport
low poly 3d model for games
3d_export
$5

fittings
...fittings
3dexport
low poly 3d model for game
3d_export
$30

pipe fit
...pipe fit
3dexport
this models basically used for pipe fitting
3d_ocean
$19
Fitting room
...m fitting fitting room furniture interior materials photorealistic restaurant table textured wardrobe
fitting room with textures.
turbosquid
free
Fitness equipment, technogym tools, fitness ball
... available on turbo squid, the world's leading provider of digital 3d models for visualization, films, television, and games.
3ddd
$1
ITRE FIT
...itre fit
3ddd
itre
itre fit, моделировалась по фото. высота 800 мм, диаметр одного - 130 мм.
Version
3ddd
$1
Diamond version
...nd , version , ванна
visionnaire - diamond bath
turbosquid
$50
LibraryMini Version
...free 3d model librarymini version for download as max and jpg on turbosquid: 3d models for games, architecture, videos. (1617724)
design_connected
$34
Barocco Version 01
...barocco version 01
designconnected
zanotta barocco version 01 computer generated 3d model. designed by progetti, emaf.
design_connected
$27

Barocco Version 02
...barocco version 02
designconnected
zanotta barocco version 02 computer generated 3d model. designed by progetti, emaf.
turbosquid
free
![Door [2 versions]](/t/13243146.jpg)
Door [2 versions]
...rbosquid
free 3d model door [2 versions] for download as fbx on turbosquid: 3d models for games, architecture, videos. (1223985)
turbosquid
$2
seat version 0.1
...
royalty free 3d model seat version 0.1 for download as blend on turbosquid: 3d models for games, architecture, videos. (1432653)
turbosquid
$12
Chip Version 03
...lty free 3d model chip version 03 for download as c4d and fbx on turbosquid: 3d models for games, architecture, videos. (1241145)
3d_export
$10

magnolia grandiflora mature version
...magnolia grandiflora mature version
3dexport
magnolia grandiflora mature version
3d_export
$8
room assets and voxel version
...room assets and voxel version
3dexport
room assets and voxel version
turbosquid
$35

Zil Civilian version
... model zil civilian version for download as cgf, fbx, and obj on turbosquid: 3d models for games, architecture, videos. (1639420)