Thingiverse
![MP Select Mini Rodus Maximus Bed Extension for MK2 MK3 heatbeds [V 1.5] by simkhovich](/previews/8286122.jpg)
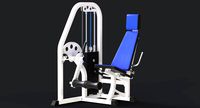
MP Select Mini Rodus Maximus Bed Extension for MK2 MK3 heatbeds [V 1.5] by simkhovich
by Thingiverse
Last crawled date: 3 years, 1 month ago
This is not a fully developed unit, only endeavor if you want to remix/build upon, there is a reason why rods are not popular
Hardware Prerequisites:
1x 10Pcs 250 x 3mm DIY Toy Model Drive Stainless Steel Connecting Rods $8.75- prime
Or any other 10 count 250mm+ 3mm rods
any 2 8mm 300mm rods
A longer G2 Belt of your Choice.
Essentially a must https://www.amazon.com/gp/product/B01MRCZKIX/ref=oh_aui_detailpage_o05_s00?ie=UTF8&psc=1
8x M3 square nuts
8x M3x14mm Socket Head Cap Screw (need right angle allen wrench)
2x M3 x 30 mm
2x M3 Nuts (ideally locking nuts)
Total: around $29.99
NOTE: Whatever heatbed you use it has to have holes that are spaced 209 mm apart, so any heatbed that claims to be 214mm should work
NOTE2: Make sure your power supply can support the new heatbed, i'm not sure if the new 7 Amp power adapter can
[Highly recommend]
Vice
Small Hammer
[Optional]
Metal idlers and teeth upgrade.
Taping oil.
3D printable Prerequisites:
[Highly recommend]
Variable z stop mod
MPSM Y Limit Switch Bracket
[based on need]
glass clamps for bed
Instrictions:
1) insert the M3 square nuts in to the clamps
2) make sure the tensioner and the belt clip fit in to one another as the tolerance is tight
3b) Now the holes as expected don't fit the tolerance and are too small, this is a good thing here as it's all held by friction, unfortunately 2.85mm drill bits are not that common so take the file that looks like an ice pic and heat it up with a lighter or stove and using a pair of pliers separate it from the fandle once hot, don't burn yourself, let cool and now you can toss this bad boy in a drill chuk and work all the holes where the rods go in a vice with the prices mounted in the position that will resist compression. DO NOT DRILL THE M3 screw holes. WARNING IT WILL GET HOT ENOUGH TO BURN YOU AND THE PLASTIC, use taping oil or wd40 or something like a glass of water to keep the file cool or it will help warp the parts in the vice.
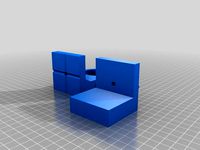
4) start hammering the rods one at a time in to the pieces like a kebab (small hammer might be needed) starting with the X axis (the sides that have a 2 on top and 3 on bottom hole pattern) refer to image for how it should look and estimate the position of the 8mm rods for the clamps go slow and fix position constantly if you need to move something or remove a rod toss it in the drill Chuck and spin it out. There will be bending flexing and misalignment, hammer it all.
5) you should now have a set of 2 contraptions each held with 5 rods. space them so they fit the heatbed and measure the belt length needed with clips make sure to leave a bit of slack and cut the belt to length.
6) mount the other 10 rods to make the platform square (more or less refer to picture for overhang and orientation)
7) time to take out the old plate, unscrew carefully one by one the screws that hold down the heatbed careful not to lose the little spring tensioners, you will reuse them for the new bed,
8) wiring, i'm going to leave this up to you
Changelog
8/2/2018 - Major change to clamp and heatbed hole location, increase print area and screws are more accessible
8/1/2018 - Slight change rotated model to use less supports
Hardware Prerequisites:
1x 10Pcs 250 x 3mm DIY Toy Model Drive Stainless Steel Connecting Rods $8.75- prime
Or any other 10 count 250mm+ 3mm rods
any 2 8mm 300mm rods
A longer G2 Belt of your Choice.
Essentially a must https://www.amazon.com/gp/product/B01MRCZKIX/ref=oh_aui_detailpage_o05_s00?ie=UTF8&psc=1
8x M3 square nuts
8x M3x14mm Socket Head Cap Screw (need right angle allen wrench)
2x M3 x 30 mm
2x M3 Nuts (ideally locking nuts)
Total: around $29.99
NOTE: Whatever heatbed you use it has to have holes that are spaced 209 mm apart, so any heatbed that claims to be 214mm should work
NOTE2: Make sure your power supply can support the new heatbed, i'm not sure if the new 7 Amp power adapter can
[Highly recommend]
Vice
Small Hammer
[Optional]
Metal idlers and teeth upgrade.
Taping oil.
3D printable Prerequisites:
[Highly recommend]
Variable z stop mod
MPSM Y Limit Switch Bracket
[based on need]
glass clamps for bed
Instrictions:
1) insert the M3 square nuts in to the clamps
2) make sure the tensioner and the belt clip fit in to one another as the tolerance is tight
3b) Now the holes as expected don't fit the tolerance and are too small, this is a good thing here as it's all held by friction, unfortunately 2.85mm drill bits are not that common so take the file that looks like an ice pic and heat it up with a lighter or stove and using a pair of pliers separate it from the fandle once hot, don't burn yourself, let cool and now you can toss this bad boy in a drill chuk and work all the holes where the rods go in a vice with the prices mounted in the position that will resist compression. DO NOT DRILL THE M3 screw holes. WARNING IT WILL GET HOT ENOUGH TO BURN YOU AND THE PLASTIC, use taping oil or wd40 or something like a glass of water to keep the file cool or it will help warp the parts in the vice.
4) start hammering the rods one at a time in to the pieces like a kebab (small hammer might be needed) starting with the X axis (the sides that have a 2 on top and 3 on bottom hole pattern) refer to image for how it should look and estimate the position of the 8mm rods for the clamps go slow and fix position constantly if you need to move something or remove a rod toss it in the drill Chuck and spin it out. There will be bending flexing and misalignment, hammer it all.
5) you should now have a set of 2 contraptions each held with 5 rods. space them so they fit the heatbed and measure the belt length needed with clips make sure to leave a bit of slack and cut the belt to length.
6) mount the other 10 rods to make the platform square (more or less refer to picture for overhang and orientation)
7) time to take out the old plate, unscrew carefully one by one the screws that hold down the heatbed careful not to lose the little spring tensioners, you will reuse them for the new bed,
8) wiring, i'm going to leave this up to you
Changelog
8/2/2018 - Major change to clamp and heatbed hole location, increase print area and screws are more accessible
8/1/2018 - Slight change rotated model to use less supports
Similar models
thingiverse
free

Towel Hanger by FunFunBoy
...20 mm m3 screw and an m3 nut to assemble it and you may need to drill the hole with 3mm drill bit to make hole fit your m3 screw.
thingiverse
free

Creality Ender-2 X Belt Cover and adjustable Endstop by PedaBot
...gh. for endstop mount need: 2 m3 nut 2 m3 spezial-nut (i used nut from my adjustable anet heatbed) you can use also other m3 nuts
thingiverse
free
Drill Machine Jig by PCatt
... a drill machine.
f.e. to clamp it into a vice and mount a polishing wheel.
the hole is 43mm,
you just need 2 nuts and bolds....
thingiverse
free

Parametric drill stop by ksuszka
... it till the nut is in the position
gently unscrew the long screw leaving the nut in the place
put the washer and the final screw
thingiverse
free

Drill attachment for the Vice mechanical v2.0 by Shlagork
...ink the hole for the screw is not centered, but it works.
you need a screw, like m3 with hexagonal head, not sure about the size.
thingiverse
free
FormBot T-Rex 2 / Heatbed holder by Felix22
...rom formbot
print glas 3mm
total 8 mm
you need:
1x screw m6 x 50mm
1x nut m6 (outside diameter 10mm)
8x screw m3 x 12mm
8x nut m3
thingiverse
free

Universal SmartPhone Clamp for Tripod by Scorpion722
...for the tripod screw is empty (use a 5 mm drill bit if needed)
screw the clamp to the tripod
insert your phone and you are done !
thingiverse
free

Anet A8 3-point heatbed leveling addon by Kotvic
...and watch first layer to be just right. if it is too close or too far, adjust origin position in your firmware or adjust endstop.
thingiverse
free
VIKI 2 LCD Prusa i3 mount by jkoljo
...ackets to printer frame have captive nuts.
the design requires printed files + 8x 20mm m3 bolts and 4x m3 nuts. washers optional.
thingiverse
free

Headphone Stand On Lamp
...es for bolts.
for lamp holes you need drill 4 holes to 4mm and for 2 small holes for m3 drill holes to 3mm.
sorry for my english.
Rodus
3dwarehouse
free

rodu
...rodu
3dwarehouse
ilma laudadeta
3dwarehouse
free

Novogotická hrobka rodu Staňků
.... #gotická #gotické #gotický #hrob #hrobka #hřbitov #novogotická #novogotické #novogotický #novogotika #rod #rodu #staňků #staňěk
3dwarehouse
free

Novorenesanční hrobka rodu Fornerů
...u starého kostela, karviná-doly #doly #forner #fornerové #fornerů #hrobka #karviná #novorenesanční #renesanční #u_starého_kostela
3dwarehouse
free

Historický statek č.p. 13 v Hejné
...tatek č.p. 13 v hejné
3dwarehouse
historický statek rodu kohoutů v hejné #hejná #klatovy #lidová_architektura #památky #plzeňsko
3dwarehouse
free

Helina chalupa - cottage
...ttage
3dwarehouse
helina chalupa z rodu čapov na slávikovom laze. helin's cottage form čapo line on settlement slávikov laz.
3dwarehouse
free

Moszna
...w będącego wlaścicielemm.in.zamku w mosznej w latach 1866-az do śmierci 1893 pomnik został zniszczony w 1950roku #moszna #pomniki
3dwarehouse
free

Stremehl Schloss in Polen
... nazywana była 'wilczym gniazdem' #castle #donżon #labes #poland #radowo_małe #schloss #strzmiele #szczecin #zamek #łobez
3dwarehouse
free

Chapel StJ.Nepomucky
...835. v kapli je umístěno lapidárium soch s expozicí o historii kaple. #chapel #kapelle #kaple #neoghotic #neugotisch #novogotický
3dwarehouse
free

Kościół fil. pw. Trójcy Św. w Proboszoczowie
...owa kaplica rodu von redernów z około 1750r. #architektura_sakralna #barok #dolny_śląsk #kościół #kościół_ucieczkowy #proboszczów
Maximus
turbosquid
$16

Maximus
...y free 3d model maximus for download as ma, max, fbx, and obj on turbosquid: 3d models for games, architecture, videos. (1674857)
3d_ocean
$5

Maximus Gladiator Helmet
...s helmet from the gladiator movie poly count: 5308, with turbo smooth 22721 file formats: 3ds max 2013 default, 3ds, fbx and obj
3d_ocean
$15

Maximus GT
...an sports transport vehicle
generic and low polygon sports car. for the latest model, visit my website: http://syndicate3d.at.ua/
cg_studio
$15

Maximus GT3d model
... gt3d model
cgstudio
.3ds .max .dxf .obj - maximus gt 3d model, royalty free license available, instant download after purchase.
3d_export
$15

Maximus GT 3D Model
...t
maximus gt generic sports car vehicle transport sedan coupe game ready classic
maximus gt 3d model clutchtrigger 44995 3dexport
3d_export
$80
Circus Maximus 3D Model
... rome race chariot horse ben hur benhur arena stadium racetrack ancient gladiator
circus maximus 3d model bustermk2 5588 3dexport
turbosquid
$44
Maximus sofa corner
...el maximus sofa corner for download as 3ds, max, obj, and fbx on turbosquid: 3d models for games, architecture, videos. (1451291)
turbosquid
$99

Antonov AN124 Maximus
... available on turbo squid, the world's leading provider of digital 3d models for visualization, films, television, and games.
3ddd
free

MAXIMUS RECTANGULAR CHANDELIER
...s masterfully crafted linear wrought iron frame, finished in a rich pyrite bronze, instills in this piece a cool industrial feel.
3d_export
$49

Asian Elephant Elephas Maximus 3D Model
...imals low poly lowpoly photoreal realistic textures nature fauna
asian elephant elephas maximus 3d model humster3d 57754 3dexport
Heatbeds
thingiverse
free

HeatBed by moreken
...heatbed by moreken
thingiverse
heatbed for my printer3d "moredelta"
thingiverse
free

heatbed (double heatbed) holder by Vo_Van_163
... bigger size than work desk. this holder - is good solution for me/ and also this is a good solution for double hotbed regulation
thingiverse
free
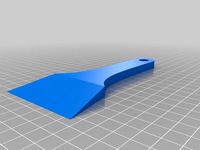
Heatbed Spatula by Brabus453
... spatula by brabus453
thingiverse
heatbed spatula
this is a simple spatula to scrape the heatbed from the first layer residues.
thingiverse
free
Heatbed Mount for round Heatbeds by OliverReinecke
...y bottom board to fix the heatbed-mount. but of coursse there are lots of alternatives to do this... its up to you. hope it helps
thingiverse
free
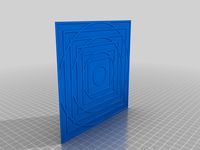
Heatbed plane test
...the accuracy of printings over the size of my heatbeds ... this simple object allows to see where the...
thingiverse
free
Heatbed Knob by Sp0nge
...heatbed knob by sp0nge
thingiverse
craftbot plus heatbed knob
print it in abs and put a nut inside.
thingiverse
free

Heatbed cable cover
... the heatbed when i placing the pei sheet.
so i designed this small cover, it clips right down over the +/- screws on the heatbed
thingiverse
free

Heatbed Mosfet controller by oscar_diciomma
...heatbed mosfet controller by oscar_diciomma
thingiverse
heatbed mosfet controller
thingiverse
free

Parametric Heatbed Clamp by verglor
...y verglor
thingiverse
minimalistic heatbed clamps that do not get in way of nozzle.
can be customized for any heatbed thickness.
thingiverse
free

Heatbed support
...ail
heatbed size 328mm
use m5x10 with washers or m5x8 for the 20x20 profile
m4 for heatbed
can be use with wells of 45mm of diam.
Mp
turbosquid
$19
MP-5
...-5
turbosquid
royalty free 3d model mp-5 for download as fbx on turbosquid: 3d models for games, architecture, videos. (1537795)
turbosquid
$3

MP-18
...turbosquid
royalty free 3d model mp-18 for download as blend on turbosquid: 3d models for games, architecture, videos. (1506436)
turbosquid
$5

Mp-28
...quid
royalty free 3d model mp-28 for download as fbx and obj on turbosquid: 3d models for games, architecture, videos. (1613220)
turbosquid
$5

Nightstand MP
...yalty free 3d model nightstand mp for download as max and fbx on turbosquid: 3d models for games, architecture, videos. (1655571)
turbosquid
$25

MP 3008
... available on turbo squid, the world's leading provider of digital 3d models for visualization, films, television, and games.
turbosquid
$25

MP 28
... available on turbo squid, the world's leading provider of digital 3d models for visualization, films, television, and games.
turbosquid
$20
MP-44
... available on turbo squid, the world's leading provider of digital 3d models for visualization, films, television, and games.
turbosquid
$20
MP-153
... available on turbo squid, the world's leading provider of digital 3d models for visualization, films, television, and games.
turbosquid
$2

Mp 41
... available on turbo squid, the world's leading provider of digital 3d models for visualization, films, television, and games.
turbosquid
free
MP-44.3ds
... available on turbo squid, the world's leading provider of digital 3d models for visualization, films, television, and games.
Mk2
turbosquid
$4

Mk2
...
royalty free 3d model mk2 for download as max, obj, and fbx on turbosquid: 3d models for games, architecture, videos. (1305687)
turbosquid
$9
Mk2 Grenade
...osquid
royalty free 3d model mk2 grenade for download as fbx on turbosquid: 3d models for games, architecture, videos. (1175401)
turbosquid
$4

Mk2 Grenade
...quid
royalty free 3d model mk2 grenade for download as blend on turbosquid: 3d models for games, architecture, videos. (1228888)
turbosquid
$2

mk2 Grenade
...osquid
royalty free 3d model mk2 grenade for download as fbx on turbosquid: 3d models for games, architecture, videos. (1329079)
turbosquid
$2

Grenade Mk2
...osquid
royalty free 3d model grenade mk2 for download as max on turbosquid: 3d models for games, architecture, videos. (1658201)
turbosquid
$2

GRENADE MK2
...osquid
royalty free 3d model grenade mk2 for download as fbx on turbosquid: 3d models for games, architecture, videos. (1202615)
turbosquid
$75

Lanchester Mk2
...alty free 3d model lanchester mk2 for download as 3ds and max on turbosquid: 3d models for games, architecture, videos. (1497085)
turbosquid
$10

MK2 helmet
...
royalty free 3d model mk2 helmet for download as max and obj on turbosquid: 3d models for games, architecture, videos. (1371428)
turbosquid
$10

Grenade MK2
...royalty free 3d model grenade mk2 for download as max and fbx on turbosquid: 3d models for games, architecture, videos. (1146970)
turbosquid
free

MK2 Grenade
...
free 3d model mk2 grenade for download as png, obj, and fbx on turbosquid: 3d models for games, architecture, videos. (1225336)
Mk3
turbosquid
$50

cention mk3
...ty free 3d model cention mk3 for download as ma, obj, and fbx on turbosquid: 3d models for games, architecture, videos. (1454148)
turbosquid
$129

MK3 Tank
... available on turbo squid, the world's leading provider of digital 3d models for visualization, films, television, and games.
turbosquid
$100

Toyota Supra MK3
... available on turbo squid, the world's leading provider of digital 3d models for visualization, films, television, and games.
turbosquid
$44

cention mk3 low poly
...d model cention mk3 low poly for download as ma, obj, and fbx on turbosquid: 3d models for games, architecture, videos. (1454666)
turbosquid
$30

Challenger I Mk3 Falcon
... available on turbo squid, the world's leading provider of digital 3d models for visualization, films, television, and games.
turbosquid
$10

American Frag hand grenade MK3
...free 3d model american frag hand grenade mk3 for download as on turbosquid: 3d models for games, architecture, videos. (1393624)
turbosquid
$20

Mk3 US Navy Combat Knife
...ty free 3d model mk3 us navy combat knife for download as fbx on turbosquid: 3d models for games, architecture, videos. (1172791)
3d_export
$29

Ford Fiesta MK3 Modified 3D Model
...7 tumerfx mtumer mehmet t?mer 1993 1995 1996 wrc special modifed modifiye
ford fiesta mk3 modified 3d model mtumer 30698 3dexport
3d_export
$99

Toyota Supra Mk3 19861993 3D Model
...ort fast coupe japan 1986 1987 1988 1989 1990 1991 1992 1993 tuning turbo
toyota supra mk3 19861993 3d model squir 62530 3dexport
turbosquid
$5

Timothy Oulton Mars Chair MK3
...on mars chair mk3 for download as 3ds, max, obj, fbx, and dae on turbosquid: 3d models for games, architecture, videos. (1209782)
Extension
3d_export
$5
extension plug - extension socket
...model. low poly and game ready. with blender files and texture (.png).<br>verts: 424<br>faces: 364<br>tris: 808
3ddd
$1

Moooi, Extension Chair
... стул , вешалка
стулья фирмы moooi, коллекция extension
turbosquid
$300

Bedroom Extension
...
royalty free 3d model bedroom extension for download as skp on turbosquid: 3d models for games, architecture, videos. (1682078)
3d_export
$5
palo extensible
...palo extensible
3dexport
turbosquid
$39
Leg Extension
...ee 3d model leg extension for download as obj, fbx, and blend on turbosquid: 3d models for games, architecture, videos. (1276776)
3d_export
$5

lampe extensible architecte
...lampe extensible architecte
3dexport
lampe extensible architecte maisons du monde
turbosquid
$20

Leg Extension
... available on turbo squid, the world's leading provider of digital 3d models for visualization, films, television, and games.
turbosquid
$2

Garage Extension
... available on turbo squid, the world's leading provider of digital 3d models for visualization, films, television, and games.
turbosquid
free

Extension cable
... available on turbo squid, the world's leading provider of digital 3d models for visualization, films, television, and games.
3ddd
$1

Moooi Extension Chair
...moooi extension chair
3ddd
moooi
http://www.moooi.com/products/extension-chair
Select
3ddd
$1

TUBADZIN SELECT
...max 2014, 2011.
fbx 2014, 2013, 2011,
obj
_____________________________________http://www.tubadzin.pl/en/collection/324
3ddd
$1
Плитка Selection
... supergres , плитка
плитка selection - supergres ceramiche
turbosquid
$15
Christmas Selection
...royalty free 3d model christmas selection for download as fbx on turbosquid: 3d models for games, architecture, videos. (1696333)
turbosquid
$39

Vases selection
... available on turbo squid, the world's leading provider of digital 3d models for visualization, films, television, and games.
turbosquid
free

SELECTIVE RACKING SYSTEM
...yalty free 3d model selective racking system for download as on turbosquid: 3d models for games, architecture, videos. (1282512)
turbosquid
$10

Hansgrohe ShowerTablet Select
...ee 3d model hansgrohe showertablet select for download as max on turbosquid: 3d models for games, architecture, videos. (1336955)
turbosquid
$29
Chill selectional sofa
...odel chill selectional sofa for download as max, obj, and fbx on turbosquid: 3d models for games, architecture, videos. (1465691)
3ddd
free

Lunaria - Nova, ASA Selection
... asa selection , dried flowers
ветка лунарии в вазе nova, asa selection
3ddd
$1
inno SELECT SLIM chair
...inno select slim chair
3ddd
inno
high detailed inno select slim chair
turbosquid
$29

Select Chaise Lounge
... available on turbo squid, the world's leading provider of digital 3d models for visualization, films, television, and games.
Mini
turbosquid
$10

Mini Mini Luceplan
...
royalty free 3d model mini mini luceplan for download as max on turbosquid: 3d models for games, architecture, videos. (1227359)
3d_ocean
$39

Mini Cooper
...mini cooper
3docean
cabrioler cooper mini
mini cooper cabrioler
3d_export
$30

Mini lathe
...mini lathe
3dexport
mini lathe
3d_export
$5

mini mouse
...mini mouse
3dexport
mini mouse
3d_export
$5

mini house
...mini house
3dexport
mini house
3d_export
free

Mini Mecha
...mini mecha
3dexport
concept of mini mecha
3d_ocean
$20

Mini Gun
...mini gun
3docean
gatling gun gun machine gun mini gun weapon
model of a mini gatling gun.
3ddd
free

Herve mini
... кофейный , herve
http://www.mobiliavenanti.it/ru/products/hervè-mini
3d_export
$5

mini wall
...mini wall
3dexport
mini wall for living room
3d_export
$5

mini bank
...mini bank
3dexport
mini bank 3d model
Bed
3ddd
$1

bed
...bed
3ddd
bed , постельное белье
bed
3ddd
$1

bed
...bed
3ddd
bed , постельное белье
bed
3ddd
$1

bed
...bed
3ddd
bed , постельное белье
bed
3ddd
$1

bed
...bed
3ddd
bed , постельное белье
bed
3ddd
$1

bed
...bed
3ddd
bed , постельное белье
bed
3ddd
$1

bed
...bed
3ddd
bed , постельное белье
bed
3ddd
free

bed
...bed
3ddd
bed , постельное белье
bed
3ddd
free

bed
...bed
3ddd
bed , постельное белье
bed
3ddd
$1

Bed
...bed
3ddd
bed , постельное белье , постель
bed
3d_export
$7

bed adairs bed
...rs bed
3dexport
bed adairs bed in modern style. if you want a smoother surface, please turn on turbosmooth in the modifier list.
V
design_connected
$16
V Chair
...v chair
designconnected
v chair computer generated 3d model.
design_connected
$11
V Hanglamp
...v hanglamp
designconnected
arturo alvarez v hanglamp computer generated 3d model. designed by alvarez, arturo .
turbosquid
$25

Borbet V
...v
turbosquid
royalty free 3d model borbet v for download as on turbosquid: 3d models for games, architecture, videos. (1381618)
turbosquid
free
Saturn V
...rn v
turbosquid
free 3d model saturn v for download as blend on turbosquid: 3d models for games, architecture, videos. (1651098)
turbosquid
$40

V motor
...turbosquid
royalty free 3d model v motor for download as max on turbosquid: 3d models for games, architecture, videos. (1379483)
turbosquid
$7

V for Van
...rbosquid
royalty free 3d model v for van for download as max on turbosquid: 3d models for games, architecture, videos. (1695889)
turbosquid
$5

Letter v
...urbosquid
royalty free 3d model letter v for download as max on turbosquid: 3d models for games, architecture, videos. (1408535)
turbosquid
$5

Letter v
...urbosquid
royalty free 3d model letter v for download as max on turbosquid: 3d models for games, architecture, videos. (1408534)
turbosquid
$15

BonePile V
...oyalty free 3d model bonepile v for download as blend and obj on turbosquid: 3d models for games, architecture, videos. (1546310)
turbosquid
$2

FONT V
...quid
royalty free 3d model font v for download as ma and obj on turbosquid: 3d models for games, architecture, videos. (1549450)
5
turbosquid
$6

Rock 5-5
...urbosquid
royalty free 3d model rock 5-5 for download as obj on turbosquid: 3d models for games, architecture, videos. (1639063)
3d_export
$5

hinge 5
...hinge 5
3dexport
hinge 5
turbosquid
$10

A-5
... available on turbo squid, the world's leading provider of digital 3d models for visualization, films, television, and games.
turbosquid
$2

A-5
... available on turbo squid, the world's leading provider of digital 3d models for visualization, films, television, and games.
turbosquid
$12

Calligraphic Digit 5 Number 5
...hic digit 5 number 5 for download as max, obj, fbx, and blend on turbosquid: 3d models for games, architecture, videos. (1389333)
3ddd
$1

5 роз
...5 роз
3ddd
5 роз в стеклянной вазе
design_connected
$11

iPhone 5
...iphone 5
designconnected
apple iphone 5 computer generated 3d model.
3ddd
$1

Lola 5
...lola 5
3ddd
miniforms
lola 5 miniforms 300*65*134
3ddd
$1

Nexus 5
...dd
nexus , phone , телефон
google nexus 5 phone
3d_ocean
$15

iPhone 5
...iphone 5
3docean
3d 4d apple cinema iphone model modeling phone screen texture
iphone 5 3d model and texture realistic iphone 5.
1
turbosquid
$69

armchairs(1)(1)
... available on turbo squid, the world's leading provider of digital 3d models for visualization, films, television, and games.
turbosquid
$15

ring 1+1
... available on turbo squid, the world's leading provider of digital 3d models for visualization, films, television, and games.
turbosquid
$10

chair(1)(1)
... available on turbo squid, the world's leading provider of digital 3d models for visualization, films, television, and games.
turbosquid
$8

Chair(1)(1)
... available on turbo squid, the world's leading provider of digital 3d models for visualization, films, television, and games.
turbosquid
$2

RING 1(1)
... available on turbo squid, the world's leading provider of digital 3d models for visualization, films, television, and games.
turbosquid
$1

house 1(1)
... available on turbo squid, the world's leading provider of digital 3d models for visualization, films, television, and games.
turbosquid
$1

Table 1(1)
... available on turbo squid, the world's leading provider of digital 3d models for visualization, films, television, and games.
turbosquid
$59

Formula 1(1)
...lty free 3d model formula 1 for download as max, fbx, and obj on turbosquid: 3d models for games, architecture, videos. (1567088)
design_connected
$11

No 1
...no 1
designconnected
sibast no 1 computer generated 3d model. designed by sibast, helge.
turbosquid
$2

desert house(1)(1)
...3d model desert house(1)(1) for download as 3ds, max, and obj on turbosquid: 3d models for games, architecture, videos. (1055095)