Thingiverse
Monoculight: Maker Faire Edition by artdavis
by Thingiverse
Last crawled date: 3 years ago
This is a very simplified but still functional Monoculight. I exhibited this "Maker Faire Edition" at the Troy Mini Maker Faire on Aug. 27, 2016. Attendees were encouraged to visit my table and build these models to take with them. This is a potentially valuable project for a STEM educational workshop.
The constituent parts are very cheap:
3D printed parts:
Lens/screen holders (Holder.stl)
Paper Card stock
Fresnel lens magnifier cards (Credit Card 3x Magnifier or equivalent)
Diffuser sheet (tracing paper, wax paper or other -- some experimentation may be required to find the best material for creating a clear image)
Tape
Also for the assembly process you'll need:
3D printed parts:
Tubular forming tool (Tube-Roller_OD*.stl)
Fresnel lens template card (Fresnel-lens-card.stl)
Ultra fine tip sharpie marker
1" diameter heavy duty hole punch (needs to be able to punch through the plastic Fresnel lens cards. For instance: Fiskars Thick Material Circle Punch
Paper trimmer and scissors.
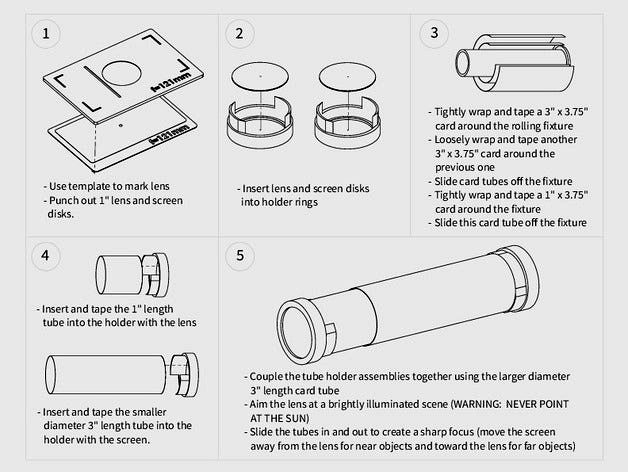
Graphically illustrated assembly directions may be printed from the file: Monoculight-Makerfaire-Instructions.pdf. Also an optional figure of an eye with inverted imaging is provided in Drawing-of-eye-with-Makey-imaged.png
Print out tube-cut-patterns-1.pdf and/or tube-cut-patterns-3.pdfonto paper cardstock. The -1 version is plain white and the -3 version includes the assembly directions (this way the instruction sheet becomes part of the project materials -- preferably make the model with the directions facing in so the outfacing side will be white).
There are two tubular forming tool STLs provided (Tube-Roller_OD*.stl). Choose the best one based on the thickness of the cardstock that you have. To determine which to use you can 3D print just a small section of each and wrap a sample card around it. Whichever tube yields a cylinder that snugly fits into the holder should be used.
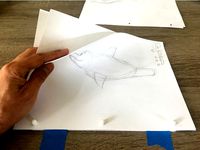
3D print Fresnel-lens-card.stl. A plastic Fresnel lens card should snap fit within. Place the lens card in with the ridged prisms side toward the 1" hole in the template. Trace the circular hole using the marker through the template onto the lens. Also trace the long line adjacent to the circle onto the lens. Take the lens out of the template and use the scissors to cut the lens in two pieces along the line you drew.
Place the lens in the hole punch so the circle is well aligned with the cutting edges and punch out the lens disk. Also use the hole punch to punch out a diffuser screen disk (retina screen).
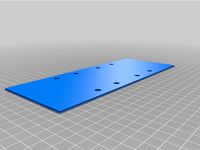
3D print two parts per model of Holder.stl.
You now have the materials necessary to follow the instructions provided in Monoculight-Makerfaire-Instructions.pdf. The lens side of the completed model can be pointed at objects of varying distance away and the tubes focussed to create a sharp inverted image on the retina screen. WARNING: the lens should never be pointed directly at the sun.
NOTE: Many people try to use the model like a telescope and put their eyes right up next to the screen. This doesn't work very well. It's much better if you view the screen by holding the model out at arm's length.
The constituent parts are very cheap:
3D printed parts:
Lens/screen holders (Holder.stl)
Paper Card stock
Fresnel lens magnifier cards (Credit Card 3x Magnifier or equivalent)
Diffuser sheet (tracing paper, wax paper or other -- some experimentation may be required to find the best material for creating a clear image)
Tape
Also for the assembly process you'll need:
3D printed parts:
Tubular forming tool (Tube-Roller_OD*.stl)
Fresnel lens template card (Fresnel-lens-card.stl)
Ultra fine tip sharpie marker
1" diameter heavy duty hole punch (needs to be able to punch through the plastic Fresnel lens cards. For instance: Fiskars Thick Material Circle Punch
Paper trimmer and scissors.
Graphically illustrated assembly directions may be printed from the file: Monoculight-Makerfaire-Instructions.pdf. Also an optional figure of an eye with inverted imaging is provided in Drawing-of-eye-with-Makey-imaged.png
Print out tube-cut-patterns-1.pdf and/or tube-cut-patterns-3.pdfonto paper cardstock. The -1 version is plain white and the -3 version includes the assembly directions (this way the instruction sheet becomes part of the project materials -- preferably make the model with the directions facing in so the outfacing side will be white).
There are two tubular forming tool STLs provided (Tube-Roller_OD*.stl). Choose the best one based on the thickness of the cardstock that you have. To determine which to use you can 3D print just a small section of each and wrap a sample card around it. Whichever tube yields a cylinder that snugly fits into the holder should be used.
3D print Fresnel-lens-card.stl. A plastic Fresnel lens card should snap fit within. Place the lens card in with the ridged prisms side toward the 1" hole in the template. Trace the circular hole using the marker through the template onto the lens. Also trace the long line adjacent to the circle onto the lens. Take the lens out of the template and use the scissors to cut the lens in two pieces along the line you drew.
Place the lens in the hole punch so the circle is well aligned with the cutting edges and punch out the lens disk. Also use the hole punch to punch out a diffuser screen disk (retina screen).
3D print two parts per model of Holder.stl.
You now have the materials necessary to follow the instructions provided in Monoculight-Makerfaire-Instructions.pdf. The lens side of the completed model can be pointed at objects of varying distance away and the tubes focussed to create a sharp inverted image on the retina screen. WARNING: the lens should never be pointed directly at the sun.
NOTE: Many people try to use the model like a telescope and put their eyes right up next to the screen. This doesn't work very well. It's much better if you view the screen by holding the model out at arm's length.
Similar models
thingiverse
free

Eleaf iStick TC100W Vinyl Wrap Template by BlackBeltPanda
...two pieces should be obvious; one is the front where your screen and buttons are, the other is the back where the vent holes are.
thingiverse
free

Hex Base for Card-stock Miniatures by wickedmonkey3d
...nd glue card stock to card stock, design b is thicker and yields a much more solid miniature.
added direction indicator add on.
thingiverse
free

Hollerith Punch Card (EBCDIC) by VeryWetPaint
...
lace card.stl is a binary-style card with all holes punched, purely a gimmick because the ibm 5081 couldn't have handled it.
grabcad
free

Hole Punch
... that can make multiple holes at once. they are often used in offices and schools to punch holes in papers for filing or binding.
thingiverse
free
Punched sander paper template by Idnas
...punched sander paper template by idnas
thingiverse
punched sander paper template
thingiverse
free
Animation Peg Bar (8.5" X 11" standard hole punch) by carv
...d paper. great for practice and student work.
if you don't have a printer, you can order a print here. http://shpws.me/ox0u
3dwarehouse
free

Paper Sphere Template
...wnload it, turn on hidden geometry, and print. then cut it out and tape it together. #model #paper #paper_model #sphere #template
thingiverse
free

"Light Play" Box
... tech, or both.
original tinkering studio guide:https://www.exploratorium.edu/sites/default/files/files/guide_lightplay_final.pdf
thingiverse
free

Face shield cutting template - prusa based head bands A4 template by CrikeyBlimey
...int no supports
printed on cr10s
use this to mark cutting points and punch holes for the face shield bands based on prusa design
thingiverse
free

Custom FPV Goggles by outcastrc
...result.
5"tft lcd screen rear view monitor for car reverse camera dvd vcd hd 800*480 2ch
8x10 assorted strength fresnel lens
Monoculight
thingiverse
free

Monoculight by artdavis
...rational
spark for myself and many others to work on developing technology around
3d printing and light. it's been great fun!
thingiverse
free

Ocarina and a filament Simple by shivinteger
...: creative commons - attribution [2] thing title : monoculight [2] thing url : http://www.thingiverse.com/thing:915796 [2] thing author :...
Artdavis
thingiverse
free

Egglantis by artdavis
...glantis by artdavis
thingiverse
egg shuttle "egglantis". snap together rocket model for holding an egg shaped payload.
thingiverse
free

Planet Eggspress by artdavis
...planet eggspress by artdavis
thingiverse
the "planet eggspress" egg carrying rocket model.
thingiverse
free

Customizable Embossing Stamp by artdavis
...ssing stamp. the image should be 150 x 150 pixels. the size of the stamp and it's features can be adjusted in the customizer.
thingiverse
free

Customizable Egg Model by artdavis
...is suitable as a reference or starting point for egg shape based projects. for instance: http://www.thingiverse.com/thing:2228825
thingiverse
free

Customizable Socket Wrench by artdavis
...d source) as necessary for your process.
inspired by hpaul's wrench set for 5.5mm nuts:http://www.thingiverse.com/thing:10905
thingiverse
free

Slingmobiles by artdavis
...hingiverse.com/thing:1174835
slingshot track inspired by "zheng3 penny ballista":http://www.thingiverse.com/thing:23464
thingiverse
free

Display mount for the RepRapDicount Full Graphic Smart Controller for the i3PRO by artdavis
...roller can be bolted on directly or using a case that has a matching hole pattern such as:http://www.thingiverse.com/thing:563515
thingiverse
free

Customizable Rocket Fin Alignment Jig by artdavis
...meters (ref: http://www.estesrockets.com/):
inner diameters:
bt-5: 13.2mm
bt-20: 18.0mm
bt-50: 24.1mm
bt-55: 32.6mm
bt-60: 40.5mm
thingiverse
free
Monoculight by artdavis
...rational
spark for myself and many others to work on developing technology around
3d printing and light. it's been great fun!
thingiverse
free

Customizable Rocket Tube Marking/Cutting Guide by artdavis
...ers for estes body tubes (ref: http://www.estesrockets.com):
bt-5: 13.8mm
bt-20: 18.7mm
bt-50: 24.8mm
bt-55: 34.0mm
bt-60: 42.0mm
Faire
3d_export
$5
fair pavilion
...fair pavilion
3dexport
italian fair pavilion in milan empty space, modeled in c4d and vray
3ddd
$1
BABY VANITY FAIR
... poltrona frau , fair
baby vanity fair от poltrona frau
3d_export
$10

Fair desing exhibition
...fair desing exhibition
3dexport
exhibition fair desing models fair carpet
turbosquid
$20

Stand for fair
...uid
royalty free 3d model stand for fair for download as max on turbosquid: 3d models for games, architecture, videos. (1259624)
turbosquid
$15

Bakery fair
...osquid
royalty free 3d model bakery fair for download as max on turbosquid: 3d models for games, architecture, videos. (1259428)
turbosquid
$5

fair stand
...bosquid
royalty free 3d model fair stand for download as max on turbosquid: 3d models for games, architecture, videos. (1360936)
3d_export
$100
fair place
...ir place realistic stereoscopic natural size applied to communicate sed77665544@gmail.com what's up 00962788214043 i am ahmed
3ddd
$1
VANITY FAIR
...vanity fair
3ddd
poltrona frau
1000x1000
turbosquid
$5

fair stand
...wnload as sldas, sldas, sldpr, sldas, sldpr, sldas, and sldpr on turbosquid: 3d models for games, architecture, videos. (1676970)
3d_export
$60

Fair stand 3D Model
... fair show presentation exhibit expo fairs business trade advertisement show-up display
fair stand 3d model tartino 1964 3dexport
Edition
turbosquid
$33
Natuzzi Editions
... available on turbo squid, the world's leading provider of digital 3d models for visualization, films, television, and games.
turbosquid
$29
Guitar_MJ-Edition
... available on turbo squid, the world's leading provider of digital 3d models for visualization, films, television, and games.
turbosquid
$20
Editable Fountain
... available on turbo squid, the world's leading provider of digital 3d models for visualization, films, television, and games.
3ddd
$1

Kueco Edition Palais
...kueco edition palais
3ddd
keuco
зеркальный шкаф kueco edition palais
design_connected
$16
369 Classic Edition
...369 classic edition
designconnected
walter knoll 369 classic edition computer generated 3d model.
3ddd
$1
Martz Edition
...martz edition
3ddd
martzedition
http://www.martzedition.com/a-500-3
3ddd
$1

Martz Edition
...martz edition
3ddd
martzedition
http://www.martzedition.com/b-400-3
design_connected
$25
Chester - Limited Edition
...nnected
established & sons chester - limited edition computer generated 3d model. designed by future systems, amanda levete.
3ddd
$1
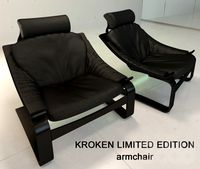
KROKEN LIMITED EDITION
...d
rochebobois
autumn/winter collections 2012 rochebobois paris
kroken limited edition armchairhttp://m.roche-bobois.com
3ddd
$1
stilwerk limited edition
...stilwerk limited edition
3ddd
3000х1200х750
Maker
3d_ocean
$17
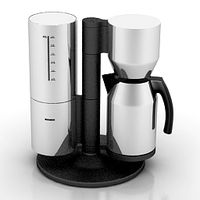
Coffee Maker
...coffee maker
3docean
breakfast coffee drip electric maker morning
detailed coffee maker and a plug.
3ddd
$1

coffee maker
...coffee maker
3ddd
кофемашина
coffee maker
3d_export
$10
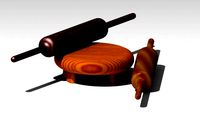
chapati maker
...chapati maker
3dexport
it is a indian traditional chapati maker
archibase_planet
free
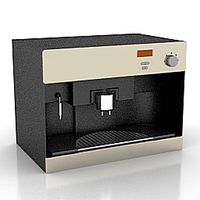
Coffee maker
...aker
archibase planet
percolator coffee-machine coffee maker
coffee maker - 3d model (*.gsm+*.3ds) for interior 3d visualization.
archibase_planet
free
Coffee maker
...aker
archibase planet
percolator coffee-machine coffee maker
coffee maker - 3d model (*.gsm+*.3ds) for interior 3d visualization.
archibase_planet
free
Coffee maker
...aker
archibase planet
percolator coffee-machine coffee maker
coffee maker - 3d model (*.gsm+*.3ds) for interior 3d visualization.
archibase_planet
free

Сoffee maker
...er
archibase planet
coffee maker percolator coffee-machine
сoffee maker n020112 - 3d model (*.3ds) for interior 3d visualization.
archibase_planet
free
Coffee maker
...aker
archibase planet
coffee maker percolator coffee-machine
coffee maker - 3d model (*.gsm+*.3ds) for interior 3d visualization.
3ddd
$1

Juice Maker
...juice maker
3ddd
соковыжималка
fully detailed kenwood juice maker
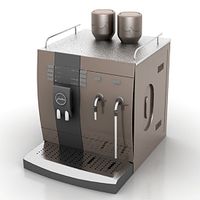
archibase_planet
free
Coffee maker
...hibase planet
coffee maker percolator coffee-machine
coffee maker n140611 - 3d model (*.gsm+*.3ds) for interior 3d visualization.