Thingiverse
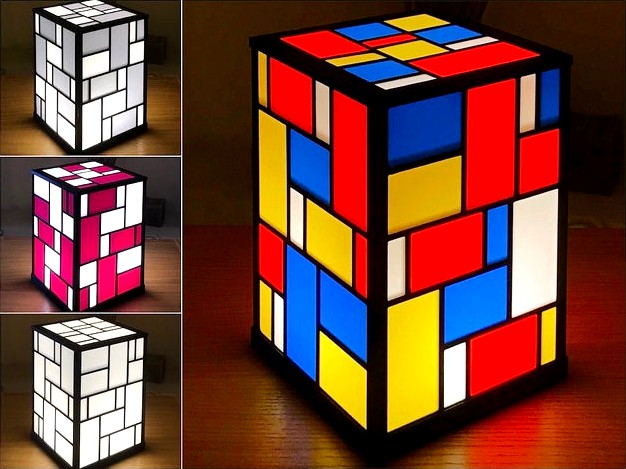
Mondrian Table Lamp by chrisguise
by Thingiverse
Last crawled date: 3 years, 3 months ago
To make the lamp you need to print the following:
Four-colour
4x Mondrian lamp frame
1x Mondrian lamp top
1x Mondrian lamp bottom
1x Mondrian lamp four-colour panes red
1x Mondrian lamp four-colour panes white
1x Mondrian lamp four-colour panes blue
1x Mondrian lamp four-colour panes yellow
Two-tone
4x Mondrian lamp frame
1x Mondrian lamp top
1x Mondrian lamp bottom
1x Mondrian lamp two-tone panes grey 1
1x Mondrian lamp two-tone panes grey 2
1x Mondrian lamp two-tone panes white 1
1x Mondrian lamp two-tone panes white 2
Monochrome
4x Mondrian lamp frame
1x Mondrian lamp top
1x Mondrian lamp bottom
1x Mondrian lamp monochrome panes 1
1x Mondrian lamp monochrome panes 2
1x Mondrian lamp monochrome panes 3
If you want to change the patterns and colours you can print the individual panes in the following quantities:
15x Mondrian lamp pane size 1
13x Mondrian lamp pane size 2
9x Mondrian lamp pane size 3
4x Mondrian lamp pane size 4
17x Mondrian lamp pane size 5
13x Mondrian lamp pane size 6
Printing
The frame components were printed in Prusament galaxy black PLA, but you could use any PLA. I printed on a textured PEI sheet using the default Prusament PLA profile in Prusaslicer modified to a bed temperature of 65° and no fan for better adhesion. For other printers use your default PLA profile with a 0.4mm nozzle, 0.2mm layer height. The finished height of the frames needs to be reasonably accurate so that they slot into the base and top correctly.
The coloured panes were printed in Basicfil PLA, but you could use any opaque PLA. I printed on a textured PEI sheet using the default Prusament PLA profile in Prusaslicer modified to a bed temperature of 65° and no fan for better adhesion. For other printers use your default PLA profile with a 0.4mm nozzle, 0.2mm layer height. I found Basicfil PLA good for the panes because it has just the right opacity for the required pane thickness and stiffness.
Lamp
You will need this USB lamp, widely available on the internet DZYDZR 3W USB LED LampThe lamp does generate a small amount of heat but I have tested it for many hours and there are no problems. Alternatively you can bundle a string of USB fairy lights inside but the effect is not so good due to the uneven distribution of light.
Assembly
Refer to the assembly pictures for the relevant colours and patterns for the sides (type 1 & 2) and the top frame.
Fit all the panes into the frames, they will need a firm press fit into the pockets on the inside faces of the frames. Make sure the corners are fully pressed in.
Fit the lamp into the pocket in the base and pass the cable through the slot at the back.
Fit the left and back frames into the slots in the base, and then fit the front and right, they should fit easily. Note the alignment of the coloured panes, this will ensure the stiffing bars on the inside corners overlap correctly.
fit the top frame over the front, back and side frames and gently press it down. It should fit easily.
Your Mondrian lamp is now finished, enjoy!
Sizing
The parts are dimensioned to fit together perfectly on my Stock Prusa Mini, but your filament brand may have different shrinkage properties so I would suggest printing a couple of individual coloured panes to test for fit before printing the full pane sets.
If you find the panes are too loose you can either increase the X & Y scaling or put a dab of superglue on the edges before fitting them. Take care to avoid getting glue on the visible faces.
If you find the panes are too tight you can reduce the X & Y scaling.
Similar models
thingiverse
free

Christmas Star Lamps! by chrisguise
...lt prusaslicer prusament pla preset.
each lamp will of course slice and print out fine in any slicer and on any brand of printer.
thingiverse
free

Print bed Frame for 2020 aluminium frame printer by Sjekkie
...cer m3x11
4x srew m3x40
4x m3 nuts
endstop parts
2x m3x25
1x m3x20
3x m3 nuts
all printed parts are printed with esum pla+ zilver
thingiverse
free
Arduino Pro Micro Media Control by moxl
...ines'
tips for fitting
see pictures for breadboard placement.
superglue the nuts in the center layer before final assembly.
thingiverse
free

Revell colourbox by NinjaQ
...for those who have many colours, with this you can organize them. you need:
1x top
1x left
1x right
1x bottom
3x layer
4x drawers
thingiverse
free
Knurled thumbscrew knob (M4) by skrrat
....05 mm layer height (default prusaslicer ultradetail profile) with 0.4 mm nozzle
pics show print with prusament galaxy black petg
thingiverse
free

Schockbesteck by t_schatz
...schockbesteck by t_schatz
thingiverse
schockbesteck
print:
13x schock.stl
1x huub.stl
1x besteck.stl
thingiverse
free

Fifth Element Spool Holder by MJS
...;ll need to print:
2x side frame
2x spool top
2x bottom rod
4x rivet
1x top spindle
(if req. 1x 30mm adapter and 1x 50mm adapter)
thingiverse
free

Kitchens aluminium-plastic profile cover by irodriguez1200
...rey coloured profile (30 years old). otherwise, it won´t fit in.
printed with default settings should be ok. no structure needed.
thingiverse
free

Prusa Mini Snap-Fit USB LED Lamp
...s://www.prusaprinters.org/prints/16033
also found at: https://www.prusaprinters.org/prints/18763-prusa-mini-snap-fit-usb-led-lamp
thingiverse
free
Flower_o_life
...n
printed on prusa i3 mk3
0,2 mm speed profile
printed with prusament pla azure blue (mainbody) and white filament pla (ornament)
Chrisguise
thingiverse
free
Christmas Star Lamps! by chrisguise
...lt prusaslicer prusament pla preset.
each lamp will of course slice and print out fine in any slicer and on any brand of printer.
thingiverse
free

Kontax 3D Printed Stirling Engine by chrisguise
...s can be found here: https://www.stirlingengines.co.uk/cd/assets/lt3d.pdf
a video can be found here: https://youtu.be/vormmsqfta4
Mondrian
3ddd
free

Mondrian armchair
...mondrian armchair
3ddd
mondrian
mondrian armchair
design_connected
$13

Mondrian Bookshelf
...mondrian bookshelf
designconnected
casamilano mondrian bookshelf computer generated 3d model. designed by raggi, massimiliano.
3ddd
free

Mondrian armchair
... marcopolo
timelessly elegant arm chair with clean lines in solid walnut with 100% velvet midnight upholstery.
3ddd
$1

Mondrian Sofa
...orts
timelessly elegant sofa with clean lines in solid walnut with 100% marine velvet.
dimensions: 80x34x30 inches (203x86x76cm)
3ddd
$1

Ulivi Salotti Mondrian
... ulivi salotti
кресло mondrian фирмы ulivi salotti, материал - кожа. размер 870х950х790h. в архиве max2014, max2010 и fbx.
turbosquid
$8

NATUZZI MONDRIAN
...model natuzzi mondrian for download as 3ds, max, obj, and fbx on turbosquid: 3d models for games, architecture, videos. (1443219)
turbosquid
$19

Mondrian Armchair
... available on turbo squid, the world's leading provider of digital 3d models for visualization, films, television, and games.
design_connected
free

Mondrian Pendant Lamp
...mondrian pendant lamp
designconnected
free 3d model of mondrian pendant lamp by venicem designed by tonetto, massimo.
design_connected
$11

Mondrian Large Tables
...ndrian large tables
designconnected
poliform mondrian large tables computer generated 3d model. designed by massaud, jean-marie.
design_connected
$11

Mondrian Small Tables
...ndrian small tables
designconnected
poliform mondrian small tables computer generated 3d model. designed by massaud, jean-marie.
Lamp
archibase_planet
free
Lamp
...lamp
archibase planet
lamp reading lamp table lamp
lamp - 3d model (*.gsm+*.3ds) for interior 3d visualization.
archibase_planet
free
Lamp
...lamp
archibase planet
lamp reading lamp table lamp
lamp - 3d model (*.gsm+*.3ds) for interior 3d visualization.
archibase_planet
free
Lamp
...lamp
archibase planet
lamp table lamp reading lamp
lamp - 3d model (*.gsm+*.3ds) for interior 3d visualization.
archibase_planet
free

Lamp
...lamp
archibase planet
lamp table lamp reading lamp
lamp - 3d model (*.gsm+*.3ds) for interior 3d visualization.
archibase_planet
free

Lamp
...lamp
archibase planet
lamp reading lamp table lamp
lamp - 3d model (*.gsm+*.3ds) for interior 3d visualization.
archibase_planet
free
Lamp
...lamp
archibase planet
lamp reading lamp table lamp
lamp - 3d model (*.gsm+*.3ds) for interior 3d visualization.
archibase_planet
free
Lamp
...lamp
archibase planet
lamp table lamp reading lamp
lamp - 3d model (*.gsm+*.3ds) for interior 3d visualization.
archibase_planet
free

Lamp
...lamp
archibase planet
lamp table lamp reading lamp
lamp - 3d model (*.gsm+*.3ds) for interior 3d visualization.
archibase_planet
free
Lamp
...lamp
archibase planet
lamp reading lamp table lamp lantern
lamp - 3d model (*.3ds) for interior 3d visualization.
3d_ocean
$6
Lamp
...lamp
3docean
lamp
a high quality lamp.
Table
3ddd
free
Table
...table
3ddd
table
table
archibase_planet
free
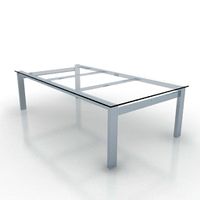
Table
...table
archibase planet
table glass-table round table glass table
table n240311 - 3d model (*.3ds) for interior 3d visualization.
archibase_planet
free
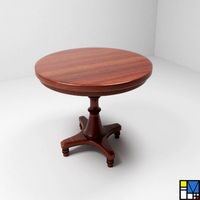
Table
...e
archibase planet
table dining-room table dinner table round table
table - 3d model (*.gsm+*.3ds) for interior 3d visualization.
3d_export
$5

table
...table
3dexport
table classic-table
archibase_planet
free
Table
...se planet
table glass table round table glass-table
table tonin habitat n280111 - 3d model (*.3ds) for interior 3d visualization.
archibase_planet
free

Table
...table
archibase planet
table dining-room table dinner table
table - 3d model (*.3ds) for interior 3d visualization.
archibase_planet
free
Table
...table
archibase planet
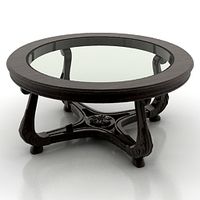
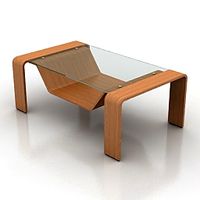
table coffee table glass table
table - 3d model (*.gsm+*.3ds) for interior 3d visualization.
archibase_planet
free
Table
...table
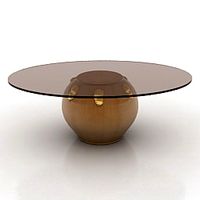
archibase planet
table glass-table coffee table
table - 3d model (*.gsm+*.3ds) for interior 3d visualization.
archibase_planet
free
Table
...table
archibase planet
table writing table office table
table - 3d model (*.gsm+*.3ds) for interior 3d visualization.
3d_ocean
$5
Table
...table
3docean
dining table furniture home kitchen table
simple wooden table.